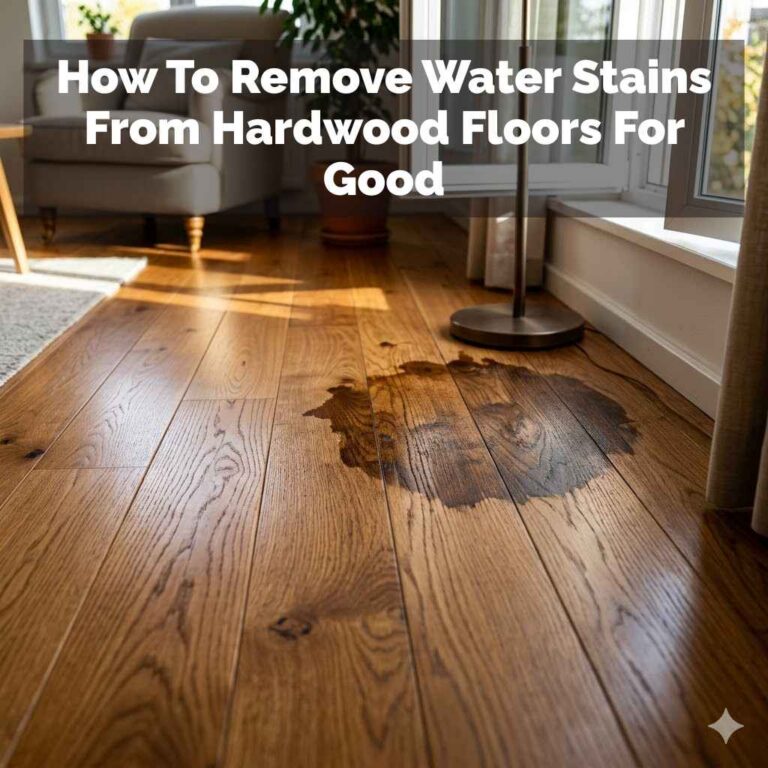
Can You Replace One Plank Of Hardwood Floors? Here’S How
It’s a common problem, isn’t it? You love your hardwood floors. They add so much warmth and style to your home.
But then, disaster strikes. A heavy object falls. A pet has an accident.
Maybe a leaky pipe wreaks havoc. Suddenly, you’re left with a damaged plank. Your first thought might be, “Oh no, I have to replace the whole floor!” It feels overwhelming.
But what if there’s a simpler way? What if you only need to fix that one bad spot? This is where the question often comes up: can you replace just one plank of hardwood floors?
The answer is yes, you absolutely can. It’s not always easy, but it’s often much more practical and affordable than a full replacement. Let’s explore how this works and what you need to know.
The Short Answer: Yes, You Can Replace a Single Hardwood Plank
Yes, you can replace a single plank of hardwood flooring. While it requires careful work, it’s a common repair method. This is ideal when damage is localized. It saves money and preserves the overall look of your floor. It’s a great way to fix scratches, dents, or water damage. This approach works for most types of hardwood. Solid wood is generally easier than engineered wood for this.
Understanding When One Plank Replacement Makes Sense
Sometimes, a single plank is all that’s wrong. You don’t need to rip up your whole living room. Think about a dropped pot. It might just dent or crack one piece. Or perhaps a leaky potted plant sat in one spot for too long. That section might get warped. In these cases, replacing just that one plank is smart. It’s like fixing a single loose tooth instead of getting a whole new smile.
You can often get away with replacing a single plank if the damage is:
Localized to one or a few adjacent planks.
Caused by impact, a spill, or a small leak.
Not widespread across the floor.
If the damage is severe and spreads. Or if many planks are affected. Then, a full floor replacement might be better. Also, consider the age of your floor. If it’s very old and worn. You might want to refresh it all at once. But for specific issues, one plank is often the way to go.
Why Replacing Just One Plank Is Often the Best Option
Let’s talk about saving money. Replacing an entire hardwood floor is a big expense. You’re buying a lot of new wood. You’re paying for a lot of labor. Fixing just one plank is much cheaper. It uses way less material. It takes less time for installation.
It also helps keep your home consistent. Hardwood floors get character over time. The color can change slightly with light. Old floors have a patina. If you
This is also much less disruptive to your home. You don’t have to move all your furniture out for weeks. The process is quicker. It’s a huge win for busy households.
Gathering Your Tools and Materials
Before you start, make sure you have everything. This makes the job go smoothly. You don’t want to stop halfway because you’re missing something.
Here’s a list of what you’ll likely need:
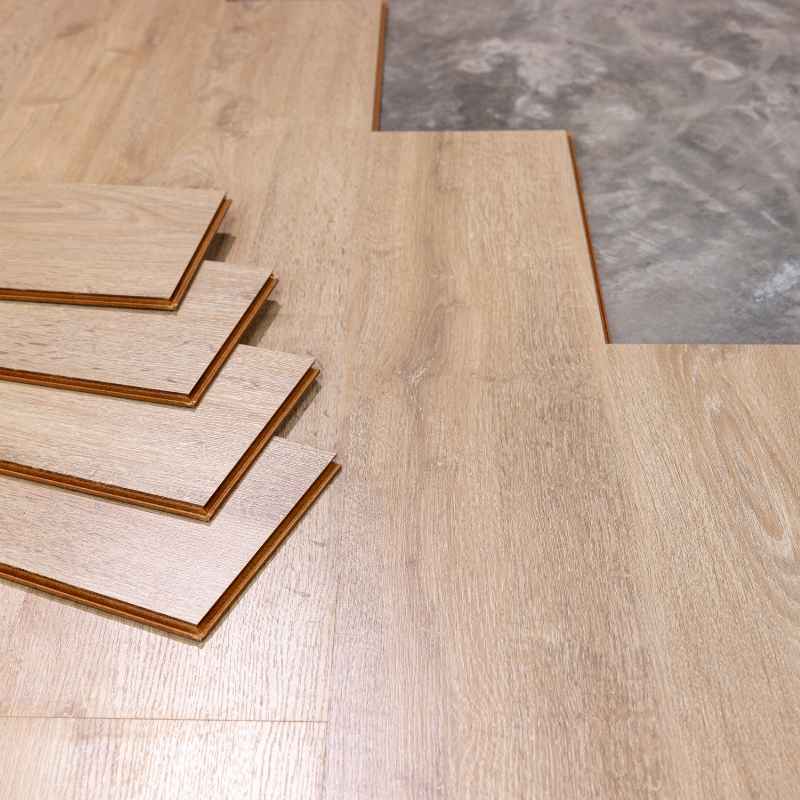
Replacement Plank: This is the most important. Try to find a plank that matches your existing floor. It should be the same species, width, thickness, and profile. This can be tricky. You might need to check your floor manufacturer. Or look for leftover pieces from the original installation.
Pry Bar: A good sturdy pry bar is essential. You’ll use it to lift out the damaged plank.
Hammer: For tapping in the new plank and for driving nails.
Nail Set: This tool helps you sink nails below the surface of the wood. This way, you can hide the holes later.
Utility Knife: For scoring and cutting.
Oscillating Multi-Tool or Saw: A small saw is needed to cut the damaged plank. An oscillating tool is often best. It can cut precisely without damaging nearby planks.
Wood Chisel: To help remove stubborn pieces of the old plank.
Safety Glasses: Always protect your eyes.
Dust Mask: Wood dust can be harmful.
Gloves: To protect your hands.
Wood Glue: For securing the new plank.
Wood Filler or Putty: To fill any nail holes or gaps. Make sure it matches your floor color.
Sandpaper: Fine-grit sandpaper for smoothing.
Finish (Matching): If your floor is finished, you’ll need a matching stain and top coat. This is crucial for blending.
Vacuum Cleaner: To clean up dust and debris.
Step-by-Step Guide: Replacing a Hardwood Plank
This is where the action happens. Take your time. Precision is key.
Step 1: Identify and Prepare the Damaged Plank
First, look closely at the damaged plank. Make sure it’s the only one that needs replacing. If there are multiple issues, you might need a different approach. Clear the area around the plank. Move any furniture.
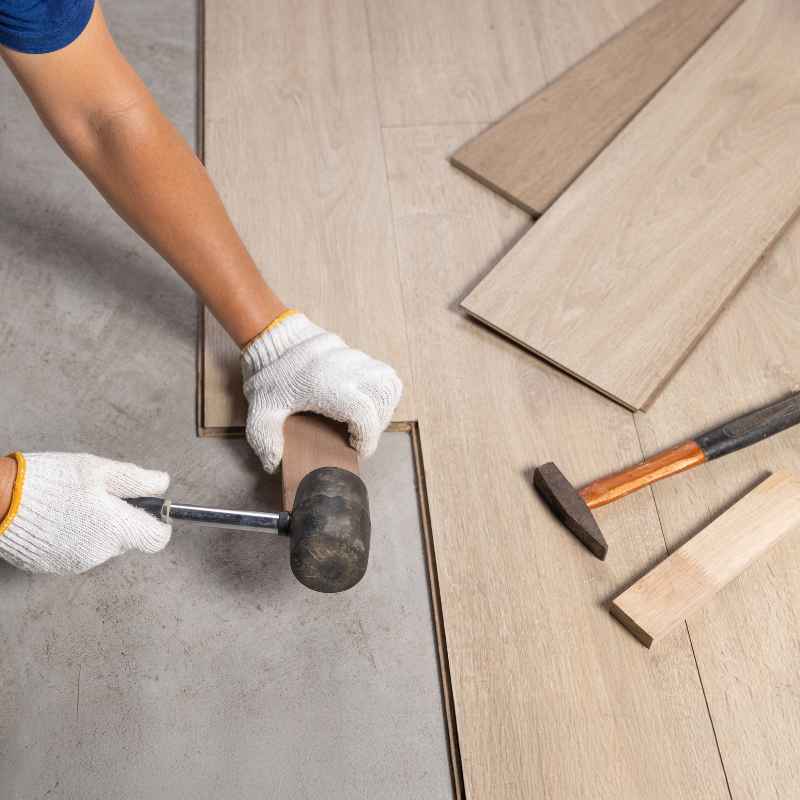
Step 2: Remove the Damaged Plank
This is the trickiest part. You need to cut the plank without harming the ones next to it.
Cut the Plank: Use your oscillating tool. Cut the plank lengthwise down the middle. Make two parallel cuts along the length of the plank. Leave about an inch from each edge. This creates a narrow strip you can remove.
Pry Out Sections: Use your pry bar and hammer. Gently pry out the cut sections. Work from the middle towards the ends. Try to lift without forcing. This saves the tongue and groove of the surrounding planks. If a piece is stuck, use your wood chisel carefully.
Remove All Pieces: Keep going until all pieces of the damaged plank are out. Be patient. It’s better to take a little longer than to damage good wood.
Step 3: Clean the Cavity
Once the old plank is out, you’ll have a gap. This is a good time to clean. Use your vacuum cleaner to suck up all dust and debris. Make sure the subfloor in the gap is clean. Any loose bits can prevent the new plank from sitting flat.
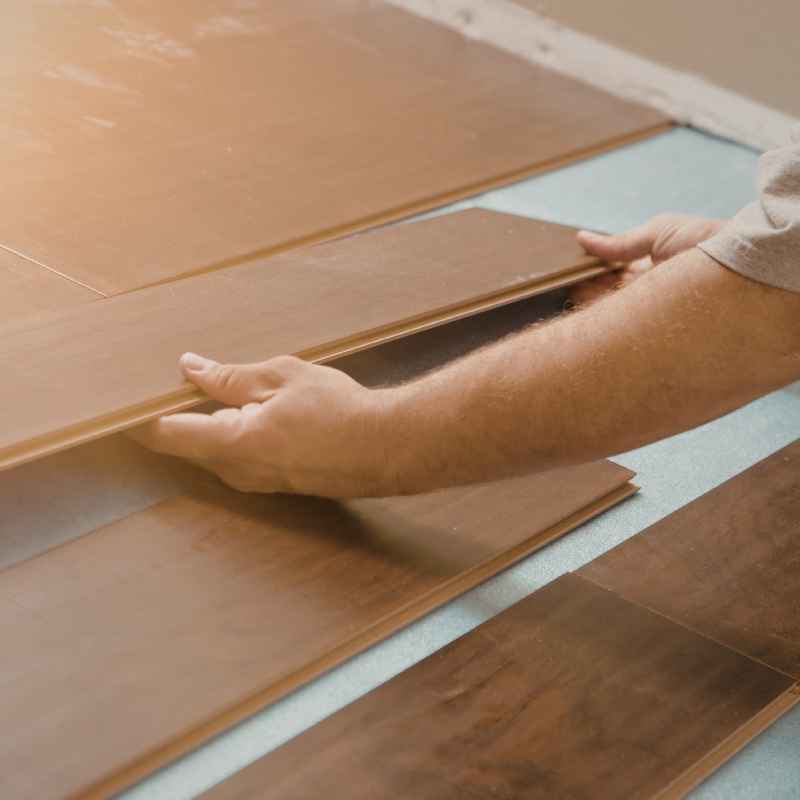
Step 4: Fit the New Plank
Now, it’s time for the new plank. It needs to slide into place.
Modify the New Plank: You might need to trim the edges of the new plank. The tongue or groove might be in the way. If the plank has a tongue. You may need to cut it off carefully. Do the same for the groove if it interferes with installation. This depends on how you’ll secure it.
Test Fit: Gently slide the new plank into the gap. It should fit snugly. If it’s too tight, you might need to shave a little off the edges. Don’t force it. A tight fit is good, but it shouldn’t be jammed in.
Step 5: Secure the New Plank
There are a few ways to secure the new plank. The best method depends on your floor type and how the original planks were installed.
Nailing: If you can still access the edge to nail. Use your flooring nailer or a hammer and finish nails. Angle the nails into the subfloor. You want them to hold the plank down firmly. Use your nail set to sink the nail heads below the surface.
Gluing: If nailing isn’t an option. You can glue the plank down. Apply wood glue to the subfloor. Also, put a little glue on the edges of the adjacent planks where the new one will meet them. Carefully slide the new plank into place.
Combination: Often, a combination of glue and a few strategically placed nails is best.
Step 6: Fill Nail Holes and Gaps
Once the plank is secured, you’ll likely have nail holes. You might also have tiny gaps along the edges.
Use Wood Filler: Apply wood filler or putty that matches your floor color. Press it into the nail holes. Fill any small gaps along the edges.
Smooth it Out: Use a putty knife or your finger to smooth the filler. Make it flush with the surface of the plank.
Step 7: Sanding and Finishing
This step is crucial for making the new plank blend in.
Sanding: Once the filler is dry. Lightly sand the new plank. Use fine-grit sandpaper. You want to make it smooth and level with the surrounding planks. Be careful not to sand down the edges of the old planks.
Matching the Finish: This is where expertise really shows. If your floor has a stain. You’ll need to match it perfectly. Test the stain on a scrap piece of wood first. Apply the stain to the new plank. Let it dry. You might need a second coat. Then, apply a matching protective finish (like polyurethane). You may need to lightly scuff sand the entire plank before applying the finish. This helps the new finish adhere and blend better. Applying finish to just one plank can be tricky. It might look different at first. You may need to apply a thin coat over the adjacent planks too, to help them blend.
Real-World Context: When This Method Works Best
I remember a client’s home. It was a beautiful old Victorian. They had a section of the living room floor damaged by a burst pipe. It was just a few planks near the wall. The rest of the floor was in perfect condition. The thought of replacing the whole room made them feel sick. We were able to carefully remove the damaged planks. We found matching reclaimed wood from an old barn. It took some work to get the patina right. But in the end, the repair was nearly invisible. The new planks looked like they had always been there. That’s the magic of careful single-plank replacement.
Think about homes with pre-finished flooring. These floors come with a factory finish. Matching this can be harder. You might have to live with a slight color difference. Or you might need to refinish a larger section to get a perfect match.
Key Considerations for Matching
Wood Species: Always try to match the wood type. Oak, maple, cherry – they all look and behave differently.
Plank Width: Ensure the replacement plank is the same width. Mismatched widths look jarring.
Finish Color: This is the hardest to match. Stains can vary. Sunlight can fade older floors.
You might need to experiment.
Sheen Level: Is your floor matte, satin, or glossy? The new finish needs to match. Otherwise, it will stand out.
Challenges and When to Call a Professional
While you can replace a single plank, it’s not always a DIY job for everyone.
Matching the Wood
This is the biggest hurdle. Finding an exact match for an older floor can be tough. Wood species, cut (plain-sawn, quarter-sawn), width, and thickness all need to align. Plus, colors fade and change with light exposure. A new plank will always look different initially.
Matching the Finish
Even tougher than matching the wood. Stains are tricky. Top coats have different sheens. Trying to blend a new finish with an old one requires skill. Often, you need to refinish a larger area, like the whole room, to make it seamless. This defeats the purpose of a simple plank replacement.
The Tools Required
You need specialized tools. An oscillating multi-tool is almost a must for clean cuts. If you don’t have these, the cost of buying them might be more than hiring someone.
Damage to Nearby Planks
If the damage is so bad that it impacts the surrounding planks. Or if they are brittle and break easily during removal. This makes the job much harder and riskier.
When to call a pro:
You can’t find a matching plank.
You’re not comfortable using power tools.
The surrounding planks are also damaged.
You want a perfect, invisible repair.
Your floor has a very specific or custom finish.
A professional floor installer has the experience and tools. They can often source matching wood. They know how to blend finishes for a seamless look. It’s an investment, but it guarantees a better result.
Pro Tip: Document Your Floor
Keep Records: When you install hardwood floors, always keep a few extra planks. Note the manufacturer, wood species, width, and finish type. This makes future repairs much simpler.
Take Photos: If you don’t have extra planks, take detailed photos of your floor. Include close-ups of the wood grain and finish.
What This Means for Your Home Repair Project
So, you’ve assessed the damage. You’ve looked at your tools. You’ve thought about calling a professional. What’s the next step?
If the damage is minor. You have a matching plank. And you’re handy with tools. Go for it! It’s a rewarding DIY project. You’ll save money and feel great about fixing it yourself.
If the damage is extensive. Or if you’re unsure about matching the wood and finish. It’s probably time to get quotes from flooring professionals. Think of it as an investment in your home’s value and appearance. A bad repair can look worse than the original damage.
Quick Fixes and Tips foar a Better Repair
Even if you’re doing it yourself, some quick tips can help.
Work in Good Light: Make sure you have plenty of light. You need to see what you’re doing.
Take Your Time: Rushing is the fastest way to make mistakes. Be patient with each step.
Protect Surrounding Areas: Use painter’s tape to protect nearby planks from scratches.
Test Stain Colors: Always test stain and finish on a scrap piece of wood first. Match it to your existing floor as best you can.
Consider the Direction of Grain: When you place the new plank, try to match the grain direction of the surrounding planks. This helps it blend better.
Infographic: Repair vs. Replace Decision Tree
Start Here: Notice a damaged hardwood plank.
Assess Damage: Is it just one plank? Is it minor (scratch, dent)? Or major (deep gouge, rot)?
If Minor & One Plank: Can you get a matching plank? Are you comfortable with tools? → DIY Repair Possible
If Major or Multiple Planks: Is the damage widespread? Is wood rotten? → Consider Full Replacement or Professional Repair
Matching Wood/Finish Difficulty: Is your floor unique or old? → Professional Help Likely Needed
DIY Skills: Confident with saws, chisels, finishing? → Proceed with DIY
Unsure: Better safe than sorry. → Call a Professional
Frequently Asked Questions
Can I really match the color of an old hardwood floor?
Yes, but it can be challenging. Wood ages and changes color over time due to light exposure and oxidation. You may need to experiment with different stains. Sometimes, it’s impossible to get a perfect match without refinishing a larger area. Keeping a few extra planks from the original installation is the best way to ensure a good match.
What if I don’t have any extra planks?
This is common with older floors. Your best bet is to try and find planks that are as close as possible. Check with the original installer or manufacturer if you know them. Architectural salvage yards can be a good source for older, matching wood. Take a sample of your existing wood to compare.
How do I remove a plank without damaging the ones next to it?
Patience and the right tools are key. Use an oscillating multi-tool to cut the damaged plank into sections. This allows you to remove small pieces carefully. Avoid using a pry bar directly on the edges of good planks. Work slowly, and if a piece is stuck, try to find where it’s binding.
Is it worth the effort to replace just one plank?
Yes, for localized damage, it’s often very worth it. Replacing one plank saves significant cost and disruption compared to a full floor replacement. It’s a practical solution for many common flooring issues.
What if the subfloor is damaged under the plank?
If the subfloor is damaged (e.g., rotten or warped), you need to address that first. After removing the damaged plank, repair or replace the section of subfloor before installing the new plank. This ensures a stable and long-lasting repair.
Can I replace a plank in engineered hardwood flooring?
It is possible, but often more difficult than with solid hardwood. Engineered wood has layers. Cutting and removing a plank can sometimes delaminate the layers of surrounding planks. Finding an exact match for the veneer layer can also be tricky. It’s often a job best left to professionals for engineered wood.
Conclusion: A Practical Repair for Your Home
Dealing with a damaged hardwood floor plank doesn’t have to be a disaster. While it requires careful work and the right tools, replacing a single plank is a very real and often smart solution. It’s a way to save money, reduce stress, and keep the beauty of your existing floors intact. Whether you decide to tackle it yourself or call in an expert, knowing that this repair is possible can bring a lot of relief. It means your beautiful floors can often be brought back to their former glory, one plank at a time.