How To Fill Nail Holes In White Painted Trim (Clean Finish)
This guide shows you how to easily fill nail holes in white painted trim. You’ll learn the best materials and steps to get a clean, smooth finish that blends right in. It’s a simple DIY fix for a polished look.
Understanding Nail Holes in Trim
Nail holes show up when nails are used. They are driven into wood. This wood is often your home’s trim.
Think baseboards or door frames. The nail pushes wood fibers apart. This creates a small void.
When you paint over them, these voids can still be seen. They might look like tiny dark spots. Or they can create a slight dip.
This happens even with white paint. The contrast between the hole and the paint is what you see. It breaks up the smooth line of the trim.
Why does this matter so much on white trim? White is a bright color. It shows imperfections clearly.
Any little dent or hole stands out more. Especially when the surrounding paint is fresh and clean. It’s like a tiny shadow in a bright room.
Our eyes naturally go to these little flaws. We want our homes to look neat. Smooth, unbroken lines of trim add to that feeling.
They make a room look finished and polished. So, making these holes vanish is key to that overall good look.
This guide will help you see those holes differently. We’ll break down the process. You’ll learn what tools you need.
You’ll know which fillers work best. We will guide you step-by-step. You will learn how to make them disappear.
We will also talk about how to get that perfect smooth finish. It’s about making your white trim look as good as new. This is a skill that makes a big difference.

My Trim Renovation Surprise
I remember the first time I really noticed nail holes. I had just finished painting my living room trim white. It was a crisp, bright white.
I was so proud of the clean lines. Then, a week later, I was hanging a new shelf. I used a few small nails to mark the spot first.
Just little taps. After I hung the shelf, I stepped back. And there they were.
Three tiny, dark dots on my beautiful white baseboard. My heart sank a little. I thought I had ruined the fresh paint job.
I had never really thought about fixing them before. It seemed like a small detail. But now, they looked so obvious.
They felt like little blemishes. I felt a bit annoyed with myself. Why didn’t I think of this before?
It felt like a silly mistake. But it was a mistake that stood out. I knew I had to fix it.
I wanted that perfect, seamless look back. It was a moment of learning. Small things can make a big impact.
Especially in home decor.
I learned that day that preparation is key. And sometimes, you need to fix small issues after the main job. It’s part of making things look truly professional.
This experience pushed me to figure out the best way to handle nail holes. I didn’t want that feeling of disappointment again. I wanted a simple, effective method.
And I found one that works wonders on white painted trim.
What You Need for a Flawless Finish
Getting those nail holes gone is not hard. You just need the right tools. And a little patience.
Think of it like being a detective. You need the right clues to solve the puzzle. Here’s what will help you solve the nail hole mystery.
Your Nail Hole Repair Toolkit
The Filler: You need something to fill the hole. For white painted trim, a lightweight spackling compound is great. It dries fast.
It’s easy to sand smooth. You can find it in small tubs. Look for one that says “paintable”.
The Tool: A putty knife or a small plastic scraper works best. A finger can even work in a pinch! You want something to press the filler into the hole.
For Smoothing: Fine-grit sandpaper is a must. Think 150-grit or 220-grit. This makes the filled area smooth as glass.
A sanding sponge is also nice. It can get into corners.
For Cleaning: A damp cloth or a tack cloth helps clean up dust. This is after sanding.
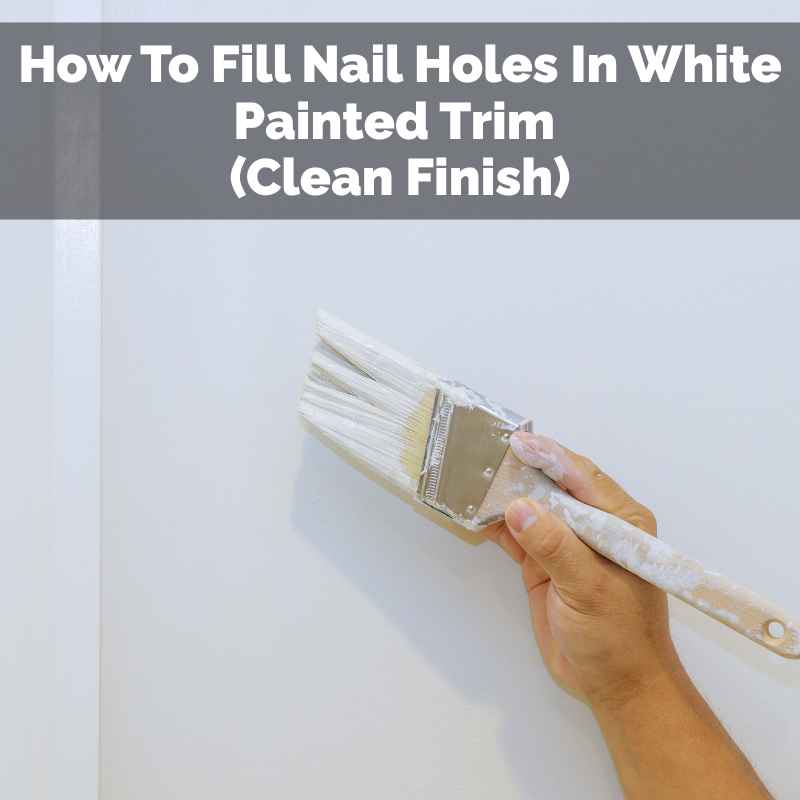
For Painting: A small paint brush. Match the white paint you already used. You’ll need a bit of touch-up paint.
Choosing the right filler is important. Some fillers shrink a lot. This means you might need to fill the hole more than once.
Lightweight spackle is usually good at not shrinking much. It stays put. This saves you time and effort.
You won’t have to do extra coats for the same hole.
The sandpaper should be fine. You don’t want to damage the surrounding paint. You’re just smoothing the filler.
Making it level with the wood. Imagine you’re polishing a gem. You want it to shine.
The right grit ensures you don’t scratch the paint. This is key for a clean look.
The Step-by-Step Process: Making Holes Vanish
Let’s get those nail holes fixed. Follow these simple steps. You’ll have smooth trim in no time.
Step 1: Clean the Hole. Look at the nail hole. Is there any loose paint? Or dust?
Gently remove it. A dry cloth works. Or the edge of a putty knife.
You want a clean surface for the filler to stick to. This helps the repair last longer.
Step 2: Apply the Filler. Take a little bit of spackling compound. Put it on your putty knife. Or your finger.
Gently press it into the nail hole. Fill it a bit more than you think you need. The filler might sink a little as it dries.
So, slightly overfilling helps. Ensure the filler is pushed into the hole. Don’t just leave it sitting on top.
Step 3: Smooth the Filler. Now, scrape off any extra filler. Do this with your putty knife. Hold the knife at a slight angle.
Glide it across the hole. You want to make the surface as flat as possible. It should be almost level with the trim.
Some people like to use their finger here. It can give a very smooth finish.
Step 4: Let it Dry. This is important. Wait for the spackle to dry completely. Check the product’s instructions.
Drying time can vary. It might be 30 minutes. It could be a few hours.
Don’t rush this step. If you sand too soon, it won’t work well.
Step 5: Sand Smooth. Once dry, take your fine-grit sandpaper. Gently sand the filled area. Sand in a circular motion.
Or back and forth. The goal is to make the filler smooth. It should feel flat.
It should be level with the trim surface. You shouldn’t feel a bump. Or a dip.
Wipe away the dust with a dry cloth or tack cloth.
Step 6: Prime (Optional but Recommended). If you want the best color match, a small dab of primer can help. Especially on darker woods or if the filler looks different. It seals the spackle.
It helps the paint stick better. Let the primer dry.
Step 7: Touch Up Paint. Now for the final step. Use your small paintbrush. Dip it in your white paint.
Gently paint over the filled area. Try to blend it with the surrounding paint. You might need two thin coats.
Let each coat dry. You want it to look like the hole was never there.
This process might seem long. But each step is quick. The drying times are what take the most patience.
But the result is worth it. You get a seamless, professional finish. It’s amazing what a few minutes of work can do.
Common Mistakes to Avoid
Even with simple tasks, mistakes can happen. Knowing what to look out for helps. It saves you time.
It ensures a better finish. Let’s look at some common pitfalls.
Avoid These Pitfalls
Using the Wrong Filler: Some wood fillers shrink a lot. Or they are hard to sand. This makes the job harder.
Lightweight spackle is usually the best bet for painted trim.
Overfilling: Trying to push too much filler in can make it messy. It’s better to fill twice if needed. Than to have a big blob to scrape off.
Not Letting it Dry: This is a big one. Sanding wet spackle makes a gummy mess. It can ruin your sandpaper too.
Always wait until it’s fully dry.
Sanding Too Hard: You don’t need to scrub. Gentle sanding is enough. Too much pressure can damage the paint around the hole.
Not Cleaning Dust: Dust left on the surface after sanding. It will get mixed with your paint. This makes the touch-up look dull or rough.
Using Too Much Paint: A thick coat of paint on a small spot can look different. It might be shiny. Or it might have brush strokes.
Thin, even coats are better.
One thing I learned is that a little goes a long way. You don’t need a huge amount of spackle. Just enough to fill the hole.
And then some for drying. Think about the size of the nail hole. It’s tiny.
So, you need only a tiny bit of filler.
Also, consider the paint. If your white paint is old, it might have faded. Or it might have a different sheen.
This can make the touch-up paint stand out. If this is the case, you might need to do a larger section. Or even repaint the whole piece of trim.
But for most new paint jobs, a simple touch-up works great.
Checking your work is also important. After you paint, look at the spot in different lights. Natural light is best.
If you still see something, a very light second touch-up might be needed. But usually, one good coat is enough.
Real-World Scenarios for Nail Hole Filling
Nail holes aren’t just for new construction. They appear in many situations. Understanding these helps you know when to fix them.
Where You Find Nail Holes
Hanging Decor: This is the most common. Picture frames, mirrors, wall art. Even heavy curtains need brackets.
Installing Shelving: Shelf brackets are usually nailed or screwed in. The screw holes might be filled, but sometimes small nail pops happen.
Replacing Trim: If you’re doing a renovation. You might add new trim. Or replace old sections.
Nails are often used to secure it.
DIY Projects: Any project where you add something to a wall. Or attach pieces of wood. Nails are often used for speed and ease.
Accidental Pops: Sometimes, wood expands and contracts. This can cause a nail to push out slightly. Leaving a small hole or crack.
Think about your baseboards. You might have kids’ toys that bump them. Or a vacuum cleaner that scrapes them.
These can sometimes dislodge a nail. Or cause a small crack. These small damages often start as nail holes.
Or can lead to them.
Even when you try to be careful, accidents happen. You might be trying to quickly hang something. Or you might be working in a tight space.
A small nail might slip. Or a hammer might miss its mark slightly. These small errors lead to nail holes.
Learning to fix them is part of home maintenance.
It’s also worth noting different types of trim. Some trim is very soft wood. It can dent easily.
Other trim is harder. But nails can still cause damage. The key is that no matter the wood type, a good filler and paint job will hide it.
White paint is forgiving. But it also highlights.
When is a Nail Hole “Normal” or “Concerning”?
Most nail holes are totally normal. They are a sign of building and decorating. But sometimes, what looks like a nail hole can be something else.
Or a nail hole might indicate a bigger problem.
Assessing Nail Holes
Normal:
- Small, clean holes in trim or walls.
- They are from nails used during installation or decoration.
- They are easy to fill with spackle and paint over.
Concerning (Rarely):
- Large, ragged holes that look like something blew out.
- Multiple holes in a line or cluster that don’t make sense.
- Holes that seem to be growing or weeping a dark substance.
- Holes near electrical outlets or fixtures that seem unusual.
If you see a hole that looks unusual, take a closer look. Does it seem deeper than it should be? Is there any sign of moisture around it?
Most of the time, a nail hole is just a nail hole. But if something feels off, it’s better to be safe. You might want to consult a handyman or a contractor.
For instance, if you see a hole near a window or door frame. And you also notice water stains. The nail hole might be a symptom of a leak.
In such cases, the nail hole needs to be addressed. But the water issue needs fixing first. This is where a little common sense and observation come in handy.
In the vast majority of cases, especially on white painted trim, the nail holes you find are just simple cosmetic issues. They are easy fixes. They don’t point to any structural problems.
So, don’t let them stress you out too much. They are a part of home living.
Quick Fixes for Minor Dents and Scratches
Sometimes, the damage isn’t a perfect nail hole. It might be a small dent or a scratch. These also happen on painted trim.
Luckily, the fix is often very similar. And just as easy.
Tackling Dents and Scratches
For Small Dents: If the wood is slightly dented but not broken through. You can sometimes use a damp cloth. Press it over the dent.
Then, gently warm the area with an iron on a low setting. The moisture and heat can make the wood fibers swell. This can push the dent out.
Be careful not to scorch the wood or paint.
For Light Scratches: If the scratch is only in the paint. A simple touch-up paint job will fix it. If the scratch is into the wood.
You might need to fill it slightly. Use a very fine wood filler. Or even toothpaste (non-gel).
Apply it. Let it dry. Then sand smooth and paint.
Using a Filler Stick: For deeper scratches or gouges. You can use a colored wood filler stick. Match the color to your trim as closely as possible.
Rub it into the scratch. Then buff off the excess. This is more for unpainted wood.
But can sometimes work on painted surfaces if the scratch is deep and the filler color is close.
The iron trick is amazing. I’ve used it on furniture and trim. It really works for shallow dents.
Just remember to use a cloth between the iron and the wood. And keep the iron moving. You don’t want to burn anything.
For scratches, the key is how deep they are. A shallow scratch in the paint is easy. A deep scratch into the wood needs more work.
If the scratch is significant, you might need a bit of wood filler. Or even a small amount of spackle. Then sand and paint.
Always test any method first on an inconspicuous area if possible. This way, you know how it will behave on your specific trim. White paint is great because it hides many small imperfections.
But it also means you can often achieve a perfect fix with simple materials.
Frequently Asked Questions About Filling Nail Holes
What is the best filler for nail holes in white painted trim?
Lightweight spackling compound is usually the best choice. It’s easy to use. It sands smooth.
And it doesn’t shrink much, which means fewer coats are needed.
Do I need to prime the nail hole before painting?
It’s optional but recommended. Primer helps the touch-up paint match the surrounding area better. It also seals the spackle, ensuring the paint adheres well.
How do I get a perfectly smooth finish without seeing the repair?
Key steps are using fine-grit sandpaper until the filled area is flush with the trim. And then applying thin, even coats of paint that match your existing white perfectly. Blend carefully.
Can I use wood filler instead of spackle?
Yes, but wood fillers can sometimes be harder to sand. And they might shrink more than lightweight spackle. If you use wood filler, choose one designed for interior use and easy sanding.
What if the nail hole is larger than normal?
For larger holes, you might need to apply spackle in two layers. Let the first layer dry. Then add a second layer to ensure it’s filled completely.
Sand after it’s fully dry.
How long does it take to fill nail holes?
The actual filling and sanding process takes only a few minutes per hole. The main time spent is waiting for the spackle and paint to dry between steps.
Can I feel the filled spot after painting?
If done correctly, you shouldn’t feel the filled spot at all. The sanding step is crucial for making it level with the trim. The paint layer should then make it invisible.
These questions come up a lot. Because people want that perfect finish. And it’s easy to worry about making it worse.
But with these simple steps, you can achieve great results. Don’t be afraid to try it yourself.
Remember, the goal is to blend. You want the repaired spot to look just like the rest of the trim. This means paying attention to texture.
And color. And making sure it’s perfectly smooth. With a little care, you can do just that.
Final Thoughts on Your Trim’s Appearance
Seeing those little nail holes doesn’t have to be a source of frustration. They are a normal part of home maintenance and decoration. You’ve learned that with a few simple materials and steps, you can make them disappear.
The key is patience. And attention to detail. Taking the time to fill, dry, sand, and paint will give you a beautiful, seamless finish.
Your white painted trim will look its best. Enjoy the satisfaction of a job well done!