How To Fix A Wood Table Top With Water Damage (Easy Steps)
Fixing a wood table top with water damage involves identifying the type of stain, cleaning the affected area gently, and then applying a suitable repair method based on the stain’s depth. Patience and the right techniques can restore its beauty.
Understanding Water Stains on Wood
Water spills are common. Accidents happen. A glass sweats.
A vase leaks a bit. Sometimes, you just forget to wipe up a wet cloth. The result is often a white or dark mark on your wood table.
These marks are signs of water damage. They look bad. They can also hurt the wood itself over time.
There are two main types of water stains. White marks are lighter. They usually sit on the wood’s finish.
Dark marks are deeper. They have gone into the wood itself. Knowing which one you have helps choose the right fix.
It’s like knowing if you have a small cut or a deeper wound. The treatment changes.
The wood finish is a protective layer. It stops water from getting in. White rings mean the water is trapped in this finish.
It has made the finish cloudy. Dark stains mean the water made it past the finish. It has reached the wood grain.
This is more serious. It needs careful work.
Sometimes, a small spill just dries. No mark appears. That’s great!
But if a mark does show up, don’t panic. Most of them can be fixed. The key is to act with care.
Use the right tools. Be gentle with your wood.
Signs of Wood Water Damage
You might see white rings or spots. They are the most common sign. These are often called “water rings” or “heat marks.” They look like a cloudiness on the wood.
They can be small circles from cups. They can be larger patches from a wet placemat.
Then there are dark spots. These are more worrying. They mean the water has soaked into the wood.
This can lead to mold or mildew. It can also warp the wood. Dark stains are often found where water sat for a long time.
Think under a potted plant that leaked. Or a damp cloth left overnight.
Look closely at your table. Does the finish feel rough or sticky? Water can damage the finish itself.
It might look dull in places. Or it might feel uneven. This is another clue.
The wood grain might also look raised. This happens when the wood swells from moisture.
Sometimes, the damage isn’t obvious. You might only see a slight change in color. Or a tiny bump on the surface.
It’s always best to check your wood furniture often. Especially if it’s in areas prone to moisture. Kitchen tables and dining tables see the most action.
If you see any of these signs, it’s time to take action. You don’t want the damage to get worse. Early detection saves a lot of trouble.
And it saves your table.
Quick Stain Identifier
White Marks: Usually in the finish. Often easy to remove with simple methods.
Dark Marks: Soaked into the wood. May need more involved repairs.
Dull Finish: The protective layer is compromised. Needs reconditioning or refinishing.
Raised Grain: Wood absorbed moisture and swelled. Requires careful sanding.
Methods for Fixing White Water Stains
White water stains are the easiest to tackle. They are usually just in the top coat of the finish. The goal is to draw the moisture out.
Or to buff the finish back to clarity. Many common household items can help.
1. The Toothpaste Method
Yes, toothpaste. But not the gel kind. Use a white, non-gel toothpaste.
It has mild abrasives. These can gently buff the finish. Mix toothpaste with a little baking soda.
This makes it a bit stronger. Gently rub the paste onto the stain. Use a soft cloth.
Work in the direction of the wood grain. Do not scrub hard. Just a gentle rub is needed.
Wipe it clean with a damp cloth. Then dry it well. You might need to do this a few times.
2. The Iron and Cloth Method
This works by using gentle heat. Place a clean, dry cotton cloth over the stain. Set your iron to a low setting.
No steam. Hover the iron over the cloth. Do not press down hard.
Just let the heat transfer. Check every few seconds. Lift the cloth to see if the stain is lifting.
The heat helps draw out the trapped moisture. Be very careful not to burn the wood. This method is best for lighter white marks.
3. The Petroleum Jelly Method
Petroleum jelly is good for lifting moisture. It can also help condition the wood. Apply a thick layer of petroleum jelly to the stain.
Let it sit for several hours. Or even overnight. The jelly will absorb the moisture.
Wipe it off with a clean, soft cloth. Then buff the area. This method is safe.
It’s gentle on most finishes.
4. The Baking Soda Paste Method
Baking soda is a natural cleaner and mild abrasive. Make a paste. Mix baking soda with a little water.
Or use it with the white toothpaste. Apply the paste to the stain. Rub gently with a soft cloth.
Follow the wood grain. Wipe it away with a damp cloth. Dry and buff.
This is a safe, everyday item that works wonders.
5. The Mayonnaise Method
Oil-based products can help. Mayonnaise has oil. It can penetrate the finish.
And lift the trapped water. Apply a dab of full-fat mayonnaise. Let it sit for a few hours.
Wipe it off. Buff the area. It might seem odd, but the oil helps.
It can often lift stubborn white rings.
6. Commercial Water Mark Removers
There are products made just for this. They are often called “water mark removers” or “cloudy finish removers.” Follow the product’s instructions carefully. They are designed to be safe.
But always test in an inconspicuous spot first. These can be very effective for tougher white stains.
Tip: Always Test First
Before trying any fix, test it. Find a hidden spot on your table. Underneath an edge works well.
Or the underside of a leaf if it’s a drop-leaf table. Apply the chosen method there. Wait and check.
If it causes no damage, then use it on the visible stain.
Tackling Dark Water Stains
Dark water stains are tougher. They have soaked into the wood. The wood itself is discolored.
These stains might need more aggressive methods. Sometimes, a deep clean or light sanding is required. The goal here is to remove the stained wood layer.
1. The Oxalic Acid Method
Oxalic acid is very effective for dark wood stains. It’s a wood bleach. You can buy it as crystals.
Mix the crystals with hot water. Follow the product directions precisely. Always wear gloves and eye protection.
Work in a well-ventilated area. Apply the oxalic acid solution to the stain. Let it sit.
It will bleach the dark color. Rinse the area thoroughly with clean water. Then let it dry completely.
You may need to repeat this. After drying, you will likely need to sand the area.
2. Gentle Sanding
If oxalic acid doesn’t fully work, or if the stain is not too deep, sanding might be needed. Use fine-grit sandpaper. Start with 150-grit.
Then move to 220-grit. Sand only the stained area. Work in the direction of the wood grain.
Be very careful not to sand too much. Or to create a noticeable dip. You want to remove just the discolored wood.
After sanding, you will need to reapply a finish to the area.
3. Replacing Wood Plugs (for deep damage)
In very rare cases, the wood is too damaged. You might see black spots. Or the wood feels soft and crumbly.
For severe damage, you might need to cut out the damaged piece. Then glue in a wood plug. This is a more advanced repair.
It requires woodworking skills. If your damage is this bad, consider a professional.
Remember, dark stains mean the wood fiber is affected. This isn’t just a surface issue. It takes more effort.
But many dark stains can still be fixed at home. Patience is key here. Don’t rush the process.
Steps for Repairing Damaged Wood Surfaces
Let’s put it all together. Here’s a step-by-step guide. This works for most common water damage.
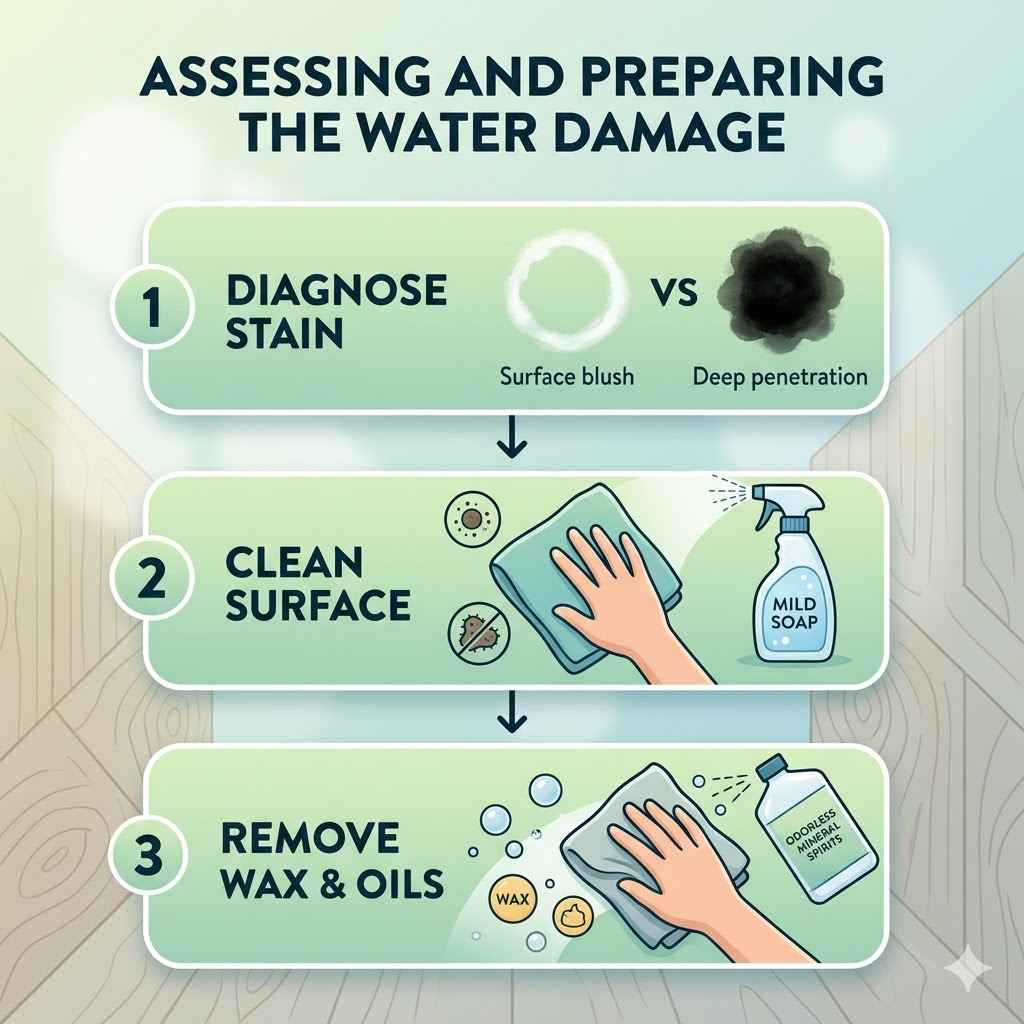
Step 1: Identify the Stain
Look closely. Is it white and cloudy? Or dark and deep?
This decides your approach.
Step 2: Clean the Area
Wipe the area with a soft, damp cloth. Make sure it’s clean. Remove any dirt or dust.
Let it air dry.
Step 3: Choose Your Method
For white stains: Try toothpaste, iron, petroleum jelly, baking soda, or mayonnaise.
For dark stains: Try oxalic acid or very careful sanding.
Step 4: Test Your Method
Always test on a hidden spot first. This is very important. You don’t want to make things worse.
Step 5: Apply the Fix
Follow the steps for your chosen method. Be gentle. Work slowly.
Especially if sanding or using chemicals.
Step 6: Clean Up
After the fix, clean the area. Wipe away any residue. Use a clean, damp cloth.
Then dry it well with a soft towel.
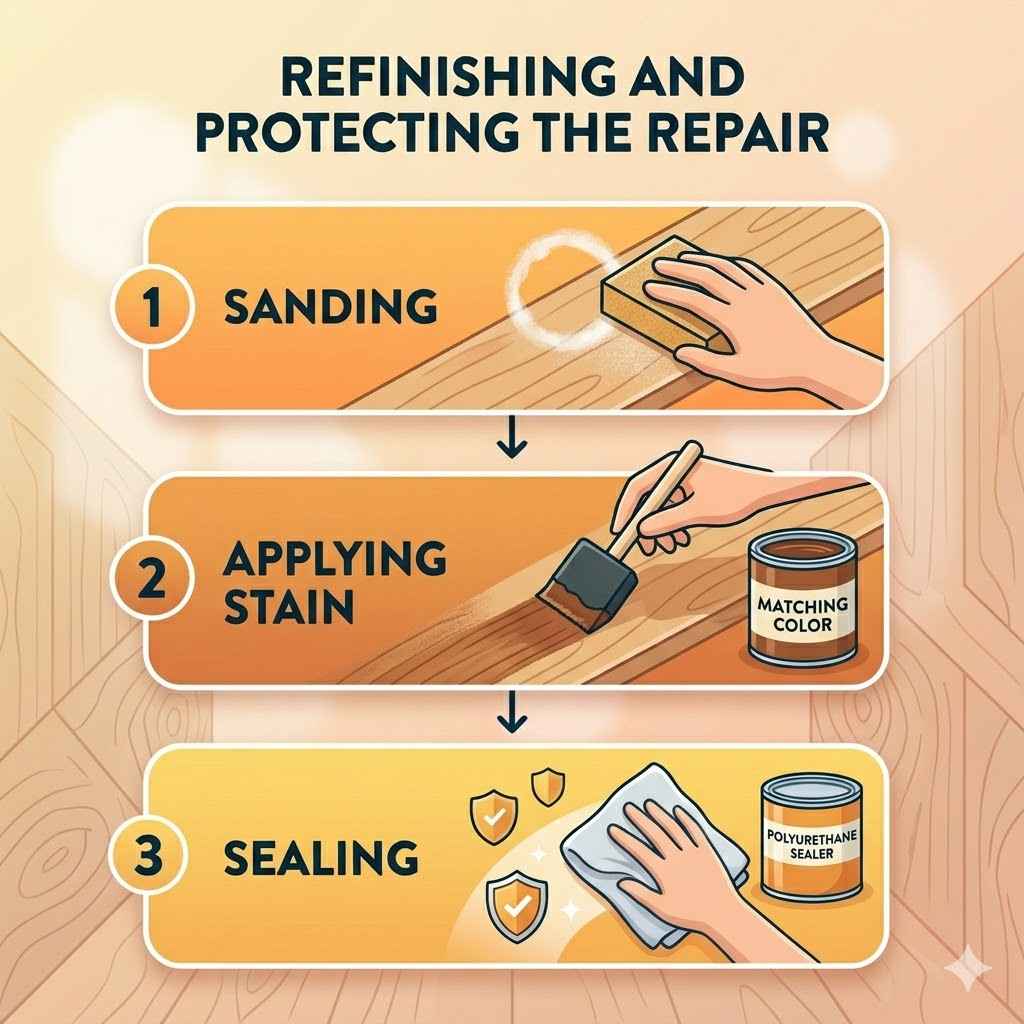
Step 7: Reapply Finish (if needed)
If you sanded the wood, or used oxalic acid, the original finish is gone. You need to reapply a protective coat. Use a wood stain that matches your table.
Then apply a clear topcoat. Such as polyurethane or a wax finish. Let each coat dry fully.
This protects the repaired area.
The final finish should blend in. It should look like the rest of the table. It might take a few tries to get it just right.
But the effort is worth it.
Essential Tools
- Soft cloths (microfiber is great)
- White, non-gel toothpaste
- Baking soda
- Petroleum jelly
- Iron
- Fine-grit sandpaper (150, 220)
- Oxalic acid crystals (if needed)
- Gloves and eye protection (for chemicals)
- Wood stain and topcoat (for refinishing)
Personal Experience: That Dreaded Ring
I remember one particularly stressful evening. I was hosting a dinner party. Everything was going great.
The food was perfect. The company was lively. As we were clearing the plates, someone placed a cold pitcher of water directly on my prized antique dining table.
I didn’t even notice at first. We were all laughing and talking. It wasn’t until later that night, after everyone left, that I saw it.
A perfect white ring. Right in the middle of the table. My heart sank.
It was a beautiful mahogany table. My grandmother’s. I had spent hours restoring it myself.
Seeing that mark felt like a personal failure. I felt a knot of panic in my stomach. What could I do?
I knew I had to fix it fast. Before it set in. I spent a good hour online.
Reading forums. Watching videos. I was so afraid of making it worse.
I finally decided to try the iron and cloth method. I took a deep breath. Laid down an old t-shirt.
Set the iron to its lowest setting. No steam. My hands were a little shaky.
I hovered it over the cloth. Then I lifted it. Checked.
Hovered again. Slowly, almost miraculously, the white cloudiness started to fade. It wasn’t instant.
But with each pass, the ring became less visible. By the end, it was gone. Completely gone.
I felt this wave of relief wash over me. It was such a simple fix. But it saved my table and my sanity that night.
Real-World Context and Scenarios
Water damage to wood tables isn’t just an abstract problem. It happens in everyday life. Let’s look at some common situations.
Understanding these helps you prevent them. Or fix them when they occur.
The Kitchen Table Chaos
Kitchen tables are high-traffic zones. They see spills from kids. Wet dishes are placed down.
Condensation from glasses. If your table has a simple lacquer finish, white rings can appear easily. Darker stains can happen if a wet sponge is left overnight.
The Living Room Coffee Table Dilemma
Coffee tables often have mugs and glasses. Sweating ice in drinks is a big culprit. Remote controls can get damp.
If you use coasters, you’re doing great! If not, those white rings are likely to show up.
The Dining Room Elegance Test
Dining tables are often more delicate. They might have a French polish or a more intricate finish. Water spills from wine glasses or serving dishes are common.
Dark stains can occur if a wet tablecloth isn’t removed promptly.
Outdoor Furniture & Moisture
While this guide focuses on indoor tables, even outdoor furniture can suffer. Rain can get under covers. Morning dew can sit on surfaces.
Proper sealing and protection are crucial for these pieces.
In American homes, the climate plays a role. Humid areas mean more condensation. Dry areas might mean wood expands and contracts more.
Which can open up the finish. Any surface that holds liquid is a potential risk. This includes desks, side tables, and even cutting boards if they get too wet.
Common Culprits
Sweating Glasses: The most frequent cause of white rings.
Hot Pans/Dishes: Can cause heat damage combined with moisture.
Damp Cloths/Sponges: Leaving them on the surface for too long.
Leaky Plants: Water pooling around potted plants.
Pet Bowls: Spills around pet food and water bowls.
What This Means for You
So, what does this all mean for your table? When is a water mark just a minor annoyance? And when is it a serious problem?
When It’s Probably Normal
A few faint white rings on a high-gloss finish. These usually happen in humid weather. Or from a drink left too long.
Most of these can be buffed out. Or fixed with a simple home remedy. If the wood itself still looks solid.
And the finish isn’t peeling. It’s likely manageable.
When to Worry
Dark spots are a red flag. They show the wood is stained. If the wood feels soft.
Or if you see mold. This means the damage is deep. Warping is another sign.
If the surface of the table is no longer flat. This indicates structural damage from moisture.
Peeling or bubbling finish is also concerning. This means the finish is compromised. And moisture is getting underneath.
It might need a full refinish. If you notice any buckling or lifting of veneers.
Simple Checks You Can Do
Run your hand over the surface. Does it feel smooth? Or is it bumpy?
Press gently on the stained area. Does it feel soft or give way? Look at the edges of the table.
Are they smooth and straight? Or do they look swollen?
Check the underside of the table too. Sometimes damage starts there. Especially if it sits on a damp floor.
Or if it’s stored in a humid basement.
If you’re unsure, take a picture. Send it to a furniture restorer. They can give you expert advice.
It’s better to ask than to try a risky fix. And cause more damage.
When to Call a Pro
Extensive Dark Stains: If oxalic acid doesn’t work or the stain is too deep.
Warping or Cracking: If the wood’s structure is affected.
Mold or Mildew: Indicates serious moisture issues.
Damaged Veneer: Lifting or peeling veneer requires specialized repair.
Valuable Antiques: If the table is a significant antique and you fear damage.
Quick Tips for Prevention
The best fix is always prevention. It saves you time and worry. Here are some simple tips.
- Use Coasters: This is the number one rule. Keep coasters handy. For all drinks. Hot or cold.
- Use Placemats: Especially under serving dishes. Or during meals.
- Wipe Up Spills Immediately: Don’t let liquids sit. A quick wipe can prevent damage.
- Avoid Placing Wet Items Directly: No wet towels. No damp plant saucers.
- Ventilate the Room: Good air circulation helps. Especially in humid areas.
- Check Your Finish: If your finish is old or worn, consider reapplying a protective coat.
- Avoid Direct Sunlight: While not water damage, sun can fade and dry out wood.
These habits seem small. But they make a big difference. They keep your wood furniture looking its best.
For years to come.
Frequently Asked Questions
What is the fastest way to fix a white water stain on wood?
The fastest way for a white stain is often the iron and cloth method. Place a dry cotton cloth over the stain. Gently hover a warm iron (low setting, no steam) over the cloth. Check every few seconds. This can lift the trapped moisture quickly. Always test first!
Can I use a magic eraser on wood water stains?
Magic Erasers are very abrasive. They can remove finishes easily. It’s best to avoid them on wood furniture. They might remove the stain, but they can also remove the protective coating. This can lead to more damage.
How do I know if a water stain is permanent?
White stains are usually not permanent. They are in the finish. Dark stains can be permanent if they’ve deeply penetrated the wood. If after trying several methods the stain remains visible, it might be permanent without a full refinish.
Should I sand down a dark water stain?
Yes, sanding is often necessary for dark stains. Use fine-grit sandpaper (150-220 grit). Sand only the stained area, working with the wood grain. Be careful not to create a divot. After sanding, you must reapply a matching stain and protective finish.
What kind of finish should I use after repair?
Use a finish that matches your table’s current coating. Common choices include polyurethane (water-based or oil-based), lacquer, or a hard wax oil. Ensure it provides good water resistance. Always apply multiple thin coats for best protection.
Can essential oils fix water stains on wood?
Some people claim essential oils can help with minor white rings. For example, tea tree oil or lemon oil. They might work by slightly dissolving or conditioning the finish. However, their effectiveness is debated, and they can sometimes leave their own oily marks. It’s safer to stick to proven methods first.
Conclusion
Seeing water damage on your wood table can be disheartening. But with these methods, you can often restore its beauty. Remember to identify the stain type.
Use gentle techniques first. And always test your approach. With a little care and effort, your table can look great again.