What Are The Maintenance Requirements For Infrared Heaters?
Dealing with a new heater can feel overwhelming. You want it to work well. You also want it to be safe.
Infrared heaters are great. They warm things directly. But like any tool, they need care.
This guide will help you understand what your infrared heater needs. We will cover everything simply. You’ll feel confident keeping your heater in top shape.
Infrared heater maintenance involves regular cleaning of the emitter surface, checking for physical damage, ensuring proper ventilation, and inspecting electrical connections. Consistent care prevents efficiency loss and safety hazards, prolonging the heater’s life and performance.
Understanding Infrared Heater Maintenance
Infrared heaters work by emitting heat waves. These waves warm objects directly. This is different from convection heaters.
Convection heaters warm the air first. Your infrared heater needs a few simple things. These ensure it works its best.
They also keep your home safe. Think of it like caring for a car. You need oil changes.
You need tire checks. Your heater needs similar, though simpler, attention. We will break down what you need to do.
You will learn why each step matters. This makes maintenance less of a chore. It becomes a helpful habit.
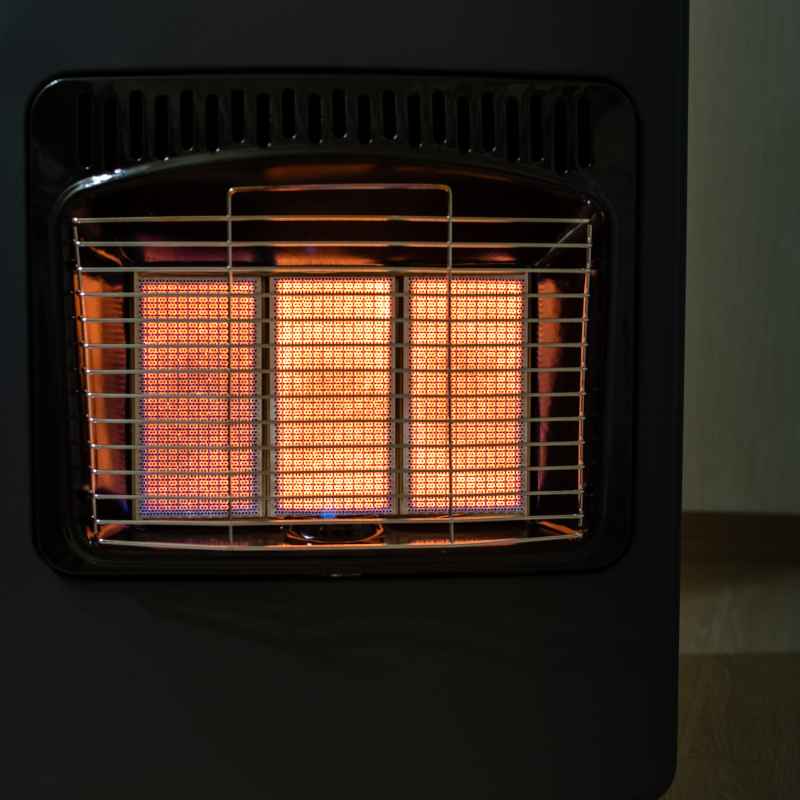
These heaters can be electric or gas-powered. The basics of care are similar. However, some things change based on type.
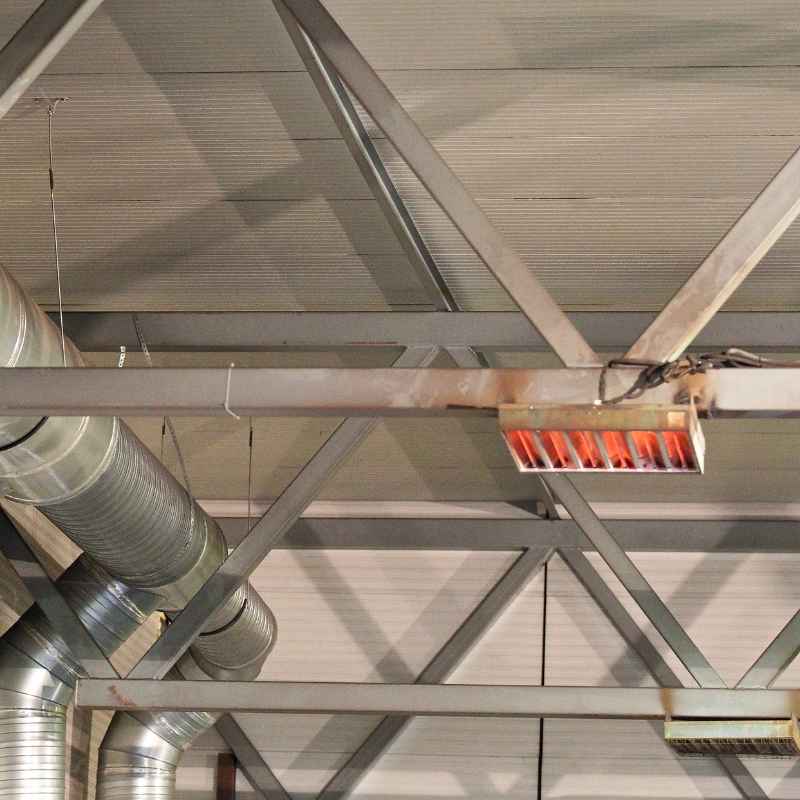
We will focus on common electric models. These are found in many homes. They are often used for patios or garages.
Or even in specific rooms for extra warmth. Gas models have extra steps. These involve fuel lines and gas flow.
For now, let’s stick to the electric kind. This covers most home uses.
The goal of maintenance is simple. It’s about two main things. First, keeping the heater working well.
This means it puts out the right amount of heat. It should do this without wasting energy. Second, and most important, is safety.
A well-maintained heater is a safe heater. This protects your home and your family. We will explore how to achieve both.
My First Infrared Heater Scare
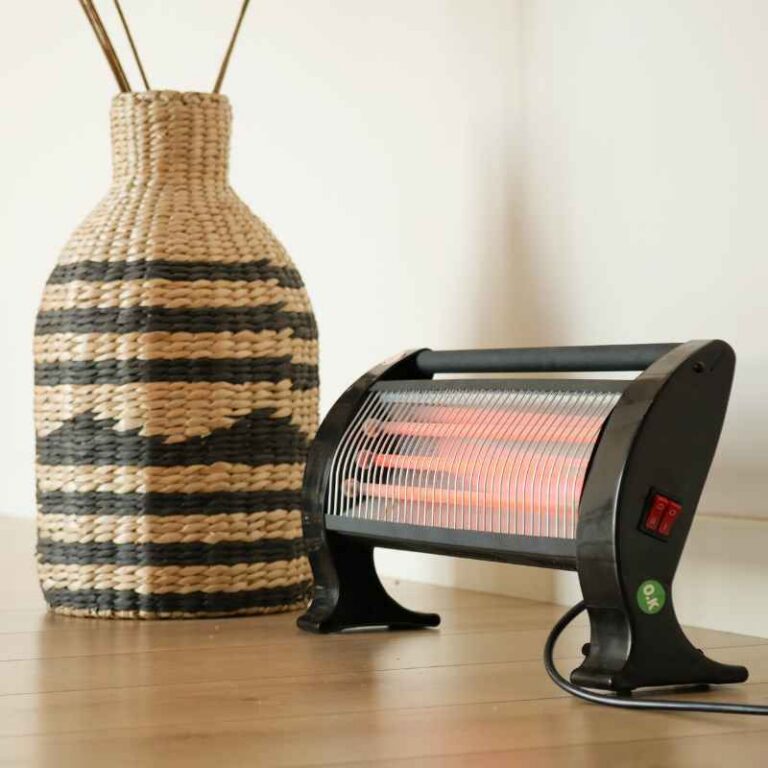
I remember getting my first patio infrared heater. It was a chilly autumn evening. I was so excited to use it.
I plugged it in, and it roared to life. Warmth spread out instantly. It felt magical.
I invited friends over the next night. We sat outside, enjoying the heat. I felt like a hosting pro.
A few weeks later, though, I noticed something odd. The heat didn’t feel as strong. It seemed to take longer to warm up.
I started to worry. Was it breaking already? I had only had it for a short time.
My first thought was, “It’s broken.” I almost called the store. But then I remembered my dad talking about cleaning dust. He said dust can block things.
I looked at the heater’s metal fins. I could see a fine layer of dust. It was especially noticeable on the emitter panels.
I felt a little silly. I had just assumed it would always work perfectly. I got a soft cloth and a vacuum with a brush attachment.
I gently wiped the panels. I carefully vacuumed the dust away from the vents. It took maybe ten minutes.
When I turned it back on, the difference was amazing. It was as warm and fast as before. That moment taught me a big lesson.
Simple cleaning makes a huge difference.
It’s easy to forget about things once they are installed. We expect them to just work. But even simple appliances need attention.
Especially things that get hot. Or things that are outside. Dust, dirt, and even spider webs can sneak in.
They can block airflow. They can coat heating elements. This makes them less efficient.
It can also be a fire risk. That scare made me a diligent cleaner of all my heaters. I learned that maintenance isn’t just for fixing problems.
It’s about preventing them.
Infrared Heater: What It Is
Type: Direct Heat Emitter
How it works: Uses radiant heat waves.
Warms: Objects and people directly.
Efficiency: High, as heat isn’t lost heating air.
Maintenance Need: Low but regular.
Cleaning Your Infrared Heater
Cleaning is the heart of infrared heater maintenance. It’s not hard. It just needs to be done right.
First, always disconnect the power. Safety first is the golden rule. Unplug the heater or turn off the breaker.
Wait for it to cool down completely. This is very important. You don’t want to burn yourself.
For the emitter surface, use a soft, dry cloth. Microfiber cloths work best. Gently wipe away any dust or debris.
Do not use harsh chemicals. They can damage the surface. They might even affect how it heats.
Some surfaces might have protective coatings. Chemicals can strip these away. For tougher spots, a slightly damp cloth can be used.
Make sure it is only slightly damp. Then, dry it thoroughly with a clean, dry cloth.
The outer casing and grill need attention too. Use a damp cloth to wipe these down. For the grill, a small brush or a vacuum cleaner with a brush attachment can help.
This gets into the small spaces. It removes dust and cobwebs. These can block airflow.
This makes the heater work harder. It can also be a fire hazard. Ensure all dust is removed.
When cleaning, look for any damage. Are there any cracks? Is the coating peeling?
Are the wires frayed? If you see anything concerning, stop. Do not use the heater.
Consult the manual or a professional. Regular cleaning helps you spot these issues early.
Cleaning Steps: Quick Guide
- Unplug: Always disconnect power.
- Cool Down: Let it become completely cool.
- Emitter: Wipe with a soft, dry cloth. Use slightly damp cloth for spots if needed, then dry.
- Casing/Grill: Wipe with a damp cloth. Use brush or vacuum for grills.
- Inspect: Look for any damage.
Checking for Damage and Wear
Beyond cleaning, a quick visual check is key. This happens when you are cleaning. Or anytime you use the heater.
Look at the main parts of the heater. The emitter panels are crucial. Check them for any signs of wear.
Are there any dark spots? Are they warped? Are they cracked?
These can show overheating or damage. Such issues mean the heater might not work right. It might also be unsafe.
The frame and casing are also important. Are there any dents? Are there any loose parts?
If the heater is mounted, ensure it’s still secure. Loose mounting can lead to problems. It could fall or cause damage.
Check the power cord too. Is it frayed? Are there any cuts?
Is the plug damaged? A damaged cord is a serious safety risk. It can cause electrical shorts or fires.
If your heater has a remote control, check its battery. Replace it if needed. Ensure the remote works.
This isn’t about efficiency, but usability. A working remote makes the heater easier to use. It’s a small thing, but it adds to the overall experience.
These checks should be part of your routine. They don’t take much time. Maybe five minutes each time you clean it.
Or every few months if you use it less. Catching damage early saves you trouble. It can prevent bigger repairs or replacements.
It also keeps you safe. Think of it as a quick health check for your heater.
Damage Checklist
Emitter Panels
Cracks, dark spots, warping?
Casing & Frame
Dents, loose parts, secure mounting?
Power Cord & Plug
Frayed, cut, or damaged plug?
Remote Control
Working correctly, battery ok?
Ensuring Proper Ventilation
Ventilation is a big deal for any heater. Especially for infrared ones. Even though they don’t heat air directly like others, they still produce heat.
This heat needs to go somewhere. The heater itself needs to stay cool. Its parts can overheat if air can’t move.
This shortens its life. It can also be a safety hazard.
Read your heater’s manual. It will tell you the recommended clearance. This is the space needed around the heater.
Keep this space clear of anything. This includes furniture, curtains, plants, and storage items. Make sure the air vents on the heater are not blocked.
These are usually on the sides or back. Dust and debris can block them. This is why cleaning is so important.
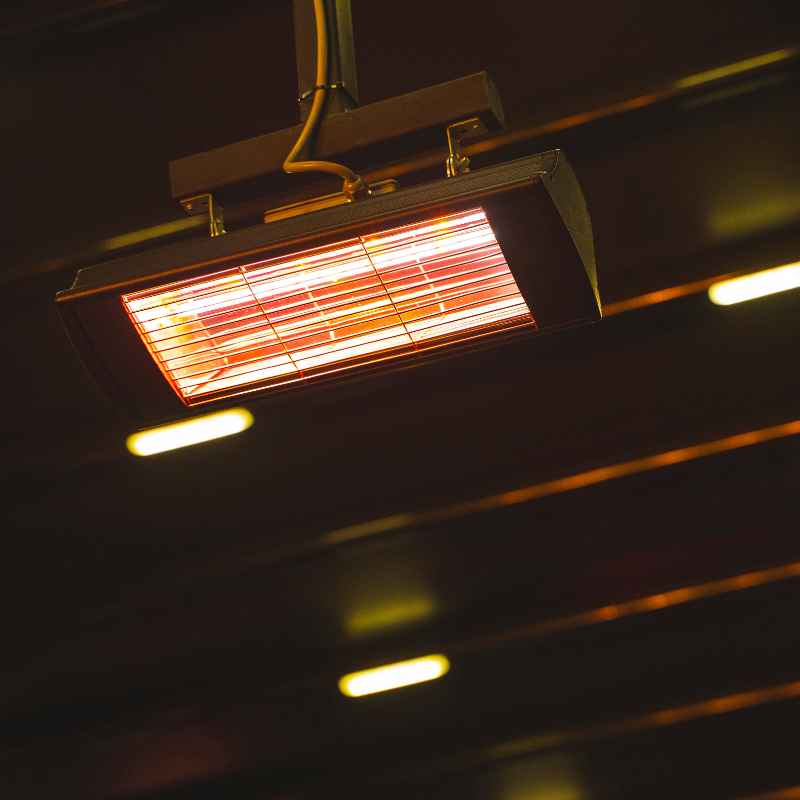
For mounted heaters, check that the wall or ceiling it’s attached to can handle the heat. Most are designed for this. But it’s good to be aware.
Ensure there’s enough space above and below it. This allows air to flow freely. For portable heaters, just be mindful of placement.
Don’t tuck them into tight corners. Give them room to breathe.
If you notice the heater getting excessively hot to the touch. Or if it starts making strange noises. It might be a ventilation issue.
Or it could be another problem. But ventilation is a common cause. Ensure the area around it is clear.
This is a simple step. It has a big impact on performance and safety.
Ventilation: Key Points
Clearance: Always maintain recommended space around the heater. Check your manual.
Obstructions: Keep furniture, curtains, and objects away.
Vents: Ensure air vents on the heater are clean and clear.
Placement: Give portable units room to breathe. Don’t hide them.
Signs of Trouble: Overheating or strange noises could mean poor ventilation.
Inspecting Electrical Connections
This is another safety-focused task. For any electric device, electrical connections are vital. For a infrared heater, this means the plug and the cord.
And if it’s hardwired, the connection point. Most home infrared heaters have a standard plug. Make sure this plug fits snugly into the outlet.
A loose plug can cause arcing. This is a spark. It can damage the plug and the outlet.
It can also be a fire risk.
Inspect the cord regularly. Look for any signs of wear and tear. This includes cuts, nicks, or exposed wires.
If you see any damage, do not use the heater. The cord needs to be
For hardwired units, this job is for a professional. If your heater is wired directly into your home’s electrical system, it’s important. You should have a qualified electrician check these connections.
They should do this periodically. Maybe once a year or every couple of years. They can ensure everything is tight and safe.
They can also check the circuit breaker. Make sure it’s the correct size.
If you are using an extension cord, check the rating. Make sure it’s heavy-duty enough for the heater. Small, light-duty cords can overheat.
This is a fire hazard. It’s always best to plug the heater directly into the wall outlet if possible. Extension cords should be a last resort.
And only if they are rated correctly.
Electrical Safety Checks
Plug & Outlet
Ensure the plug fits tightly into the outlet. No loose connections.
Power Cord
Check for cuts, nicks, or exposed wires. Replace if damaged.
Hardwired Units
Have a professional electrician inspect connections periodically.
Extension Cords
Use only heavy-duty cords rated for the heater’s wattage. Direct plug-in is preferred.
When to Call a Professional
Most maintenance for infrared heaters is DIY. Cleaning and visual checks are easy. But sometimes, you need expert help.
If you see any major damage to the emitter panels, call a pro. Cracks or deep pitting mean it might be time for a
If the heater is making unusual noises. Such as grinding, buzzing, or popping sounds. This often indicates an internal problem.
It could be a fan motor issue. Or something with the heating element itself. Do not keep using it.
Call a qualified repair person. These sounds are not normal. They mean something is wrong inside.
Any problems with the thermostat or controls. If it won’t turn on. Or if it won’t turn off.
Or if the temperature settings are way off. These can be complex issues. Sometimes they are simple fixes.
But often they involve internal wiring. Or faulty control boards. A professional can diagnose this.
They can tell you if it’s worth repairing.
If you smell burning. This is a serious warning sign. It could be dust burning off.
But it could also be an electrical issue. Or something internal overheating. Turn off the heater immediately.
Unplug it. Do not use it again until it’s checked. If you are unsure about any aspect of your heater’s operation or safety.
It’s always best to err on the side of caution. Call a professional. They have the tools and knowledge to fix it safely.
When to Seek Expert Help
Major Damage: Cracked emitter panels or significant casing damage.
Electrical Issues: Damaged power cords, sparking, or burning smells.
Unusual Noises: Grinding, buzzing, or popping sounds.
Control Problems: Heater not turning on/off, incorrect temperature readings.
Uncertainty: If you are ever unsure about safety or operation.
Real-World Context: Heater Placement and Environment
Where you put your infrared heater matters a lot. This affects its maintenance needs too. For outdoor heaters, like patio units, weather is a factor.
Rain, snow, and wind can bring dirt and debris. You might need to clean them more often. If it’s very dusty or sandy where you live, dust will build up faster.
Spider webs are also common in outdoor settings.
Indoor heaters might be in a living room, garage, or workshop. In a living room, you want to avoid placing them near curtains. Or furniture that could be scorched.
In a garage or workshop, dust and sawdust are big issues. These can coat the heating elements. They can reduce efficiency and pose a fire risk.
Regular cleaning is extra important in these environments.
Think about how you use the heater. If it’s on all day, every day, it will get more wear. Maintenance needs to be more frequent.
If it’s only used for a few hours a week, less frequent checks might be okay. But still, don’t forget it for months on end. Even when not in use, dust can settle.
The design of the heater also plays a role. Some have more robust casings. Others are more delicate.
Always follow the manufacturer’s recommendations. They know their product best. They will guide you on placement and care.
Understanding the environment helps you tailor your maintenance. It makes it more effective.
Environment & Placement Tips
Outdoor Use
Expect more dirt. Clean more often.
Indoor Use (Living Areas)
Keep away from curtains and furniture.
Indoor Use (Garages/Workshops)
Dust and sawdust are key concerns. Clean frequently.
Usage Frequency
Heavy use means more frequent checks.
What This Means for You: Normal vs. Concerning Signs
It’s good to know what to expect with your infrared heater. Some things are totally normal. Others are signs that something needs attention.
Normal signs include the heater getting warm when it’s on. You should feel radiant heat. The sound of the heating elements warming up is also normal.
A slight hum or click might be heard when it turns on or off. These are usually fine.
Concerning signs are different. If the heater is smoking. This is never normal.
If you smell burning plastic or electrical smells. That’s a big red flag. If the heater makes loud, strange noises.
Like grinding or popping. This isn’t normal. If the heater doesn’t seem to be heating anymore.
Or if the heat output is very low. Especially after cleaning. This suggests a problem.
If the casing feels much hotter than it should. Or if there are sparks or visible arcs from the plug or cord. These are all reasons to stop using it immediately.
Look for physical damage. Are the emitter panels visibly damaged? Is the cord frayed?
These are clear signs something is wrong. For any concerning sign, the best action is to turn it off. Unplug it.
Then consult your manual. If the manual doesn’t help, contact the manufacturer. Or a qualified repair technician.
Don’t try to fix serious electrical issues yourself. It’s not worth the risk.
Heater Health Check: Normal vs. Concerning
Normal Signs
- Warmth and radiant heat
- Slight operational sounds (clicks, hums)
- Heating elements glow (if applicable)
Concerning Signs
- Smoking
- Burning smells
- Loud, unusual noises
- No heat output
- Excessive casing heat
- Visible damage to cord/plug
Quick Tips for Longevity
Want your heater to last a long time? A few simple habits help a lot. First, always follow the manufacturer’s instructions.
They are in the user manual. Read it when you first get the heater. And keep it somewhere safe.
It has important details about use and care.
Avoid constant on/off cycling. If you are using it for a short period, that’s fine. But if you need heat for hours, let it run.
Constantly turning it on and off can put stress on the components. This can shorten its life. Use timers if you need to control run time.
Many modern heaters have these features.
Store it properly if you won’t be using it for a while. For example, over the summer. Make sure it’s clean and dry.
Store it in its original box if possible. Or in a protective cover. Keep it in a dry place.
Away from moisture. This prevents dust buildup and damage during storage.
Use the right settings. Don’t push the heater to its limits. If it seems to be struggling, it might be underpowered for the space.
Or it might need maintenance. Using it gently helps it last longer. And it’s safer.
Tips for a Longer Lasting Heater
- Read the Manual: Always follow manufacturer instructions.
- Mindful Cycling: Avoid constant on/off unless necessary. Use timers.
- Proper Storage: Clean, dry, and protected when not in use.
- Gentle Use: Don’t overwork the heater. Use appropriate settings.
Frequently Asked Questions About Heater Maintenance
How often should I clean my infrared heater?
You should clean your infrared heater at least once a year. If you use it frequently or in a dusty environment, clean it more often, perhaps every 3-6 months. Always check the manual for specific recommendations from the manufacturer.
Can I use household cleaners on my infrared heater?
It’s best to avoid household cleaners. They can damage the emitter surface. Use a soft, dry cloth for most cleaning.
A slightly damp cloth can be used for tough spots, but always dry it thoroughly afterward. Never use abrasive cleaners.
What if my infrared heater is making a strange noise?
Strange noises like grinding, buzzing, or popping are not normal. Turn off and unplug the heater immediately. This usually indicates an internal issue.
Contact a qualified technician for diagnosis and repair. Do not continue to use it.
Is it safe to leave an infrared heater on all night?
Whether it is safe depends on the heater model and its safety features. Most modern infrared heaters have safety shut-offs. However, it’s always wise to check your manual.
Avoid placing flammable materials near the heater. Ensure good ventilation. If unsure, it’s safer to turn it off.
Or use a timer.
My infrared heater’s cord is frayed. What should I do?
A frayed power cord is a serious safety hazard. Do not use the heater. You should have the cord
How do I know if my infrared heater is still efficient?
If your heater seems to take much longer to warm a space than it used to. Or if the heat output feels weaker. It might be less efficient.
This is often due to dust buildup. Or a damaged emitter. Regular cleaning and inspection can help maintain efficiency.
If issues persist, a professional check might be needed.
Conclusion: Keeping Your Heater Warm and Safe
Taking care of your infrared heater is simple. It mainly involves cleaning and regular checks. These tasks ensure it works well.
And most importantly, they keep it safe. Remember to unplug it first. Let it cool down.
Then wipe it clean. Look for any damage. Make sure its space is clear for airflow.
These steps make a big difference. Your heater will last longer. It will perform better.
Enjoy your cozy warmth!