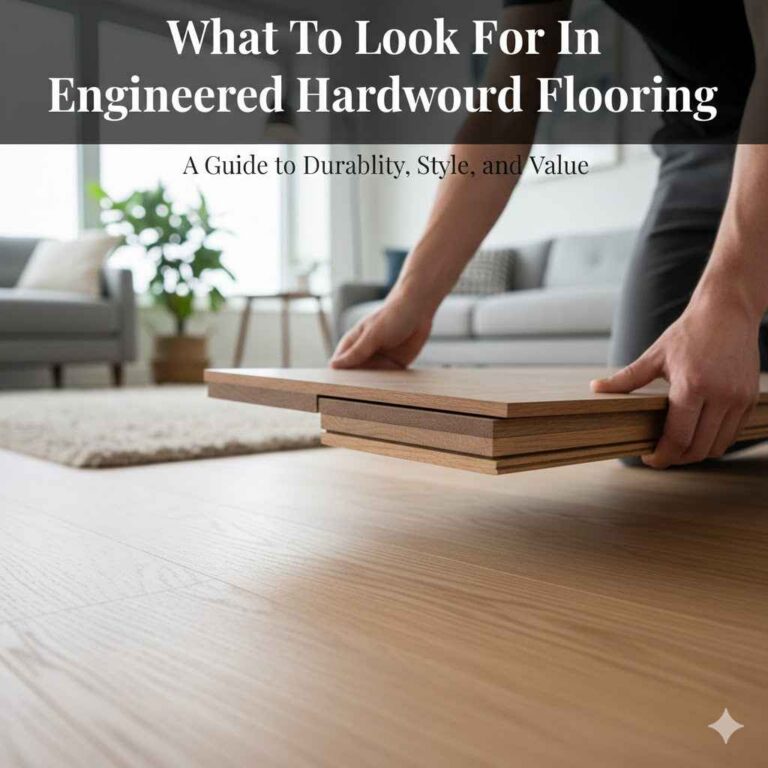
How To Fix Hardwood Floor Scratches From Dog Claws Fast
The main idea is to gently fill and blend minor surface scratches on hardwood floors caused by dog claws, often using wood repair crayons, touch-up pens, or specialized wood filler for light damage. Deeper scratches might need sanding and refinishing or professional help. Prevention through nail trims and protective mats is also key.
Understanding Hardwood Floor Scratches from Dogs
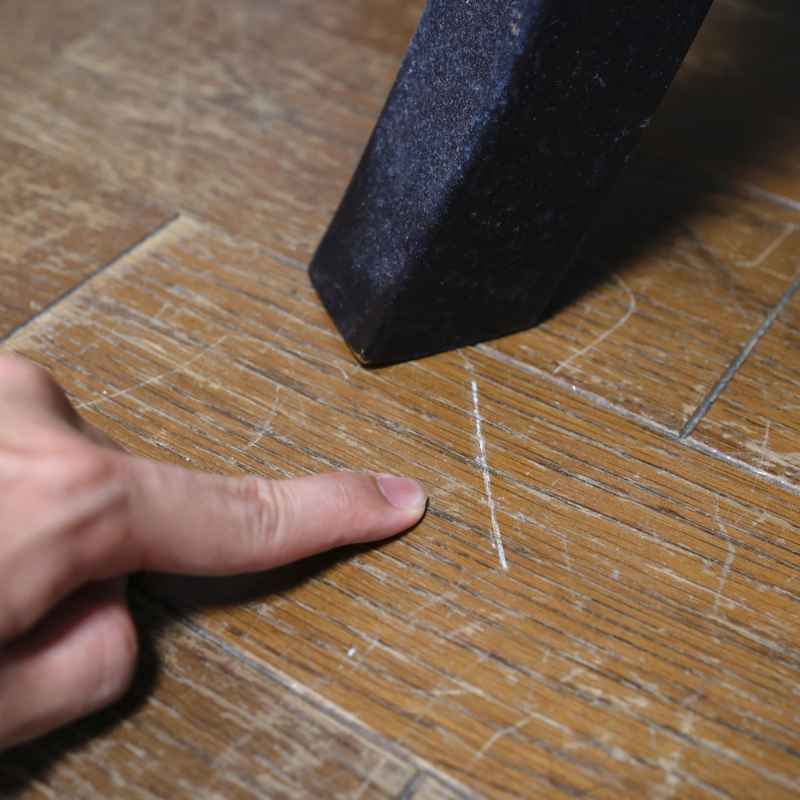
Hardwood floors are lovely. They add warmth and style to a home. But they can be delicate. Dog claws are surprisingly sharp. Even small dogs can leave their mark. These marks are often just in the top finish layer. Sometimes they go a bit deeper into the wood itself. Understanding the type of scratch helps fix it right.
The finish on your floor is the first line of defense. It’s a protective coating. When claws scratch it, they scrape away this layer. This creates a white or dull line. If the scratch is deeper, it can go into the wood. This shows the natural color of the wood underneath. It looks like a dark line. We need to identify which kind of scratch we’re dealing with.
My Own Dog Scratch Saga
I remember one rainy Saturday. My golden retriever, Gus, was bouncing around. He was so excited about a new squeaky toy. In his joy, he did a little spin near the entryway. When I looked down later, I saw them. A few faint, white lines crisscrossing one of the oak planks. My heart sank a little. These were fresh scratches. Gus, bless his furry heart, had no idea. I felt a mix of annoyance and sadness. Annoyance because my beautiful floors had a new flaw. Sadness because it was my fault for not keeping up with his nail trims as well as I should have.
I sat there, staring at the marks. I wondered how bad they were. Could I fix them? Would it cost a fortune? My mind raced with all the worst-case scenarios. I imagined having to replace the entire floor. That thought alone was enough to make me feel a bit panicked. But I took a deep breath. I knew there had to be a way to handle this. This was a common problem for pet owners. There had to be simple solutions. I started researching, and thankfully, I found ways to make those scratches disappear. It felt like a small victory.
Scratch Type Quick Check
Run your fingernail gently across the scratch.
- Surface Scratches: If your nail catches only slightly or not at all, it’s likely in the finish. These are easier to fix.
- Deeper Scratches: If your nail catches in the scratch, it has likely gone into the wood. These require more attention.
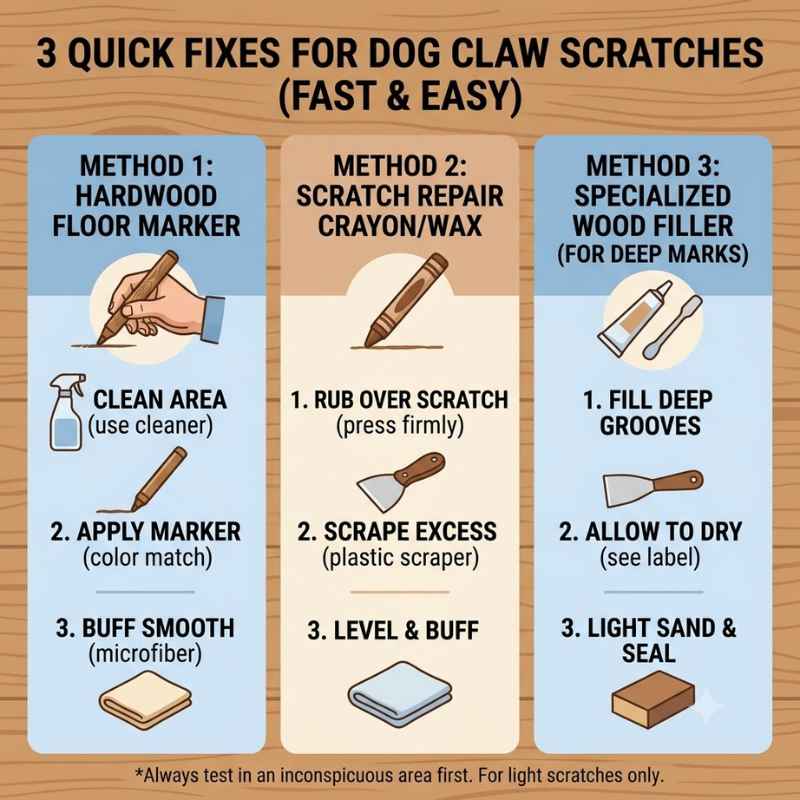
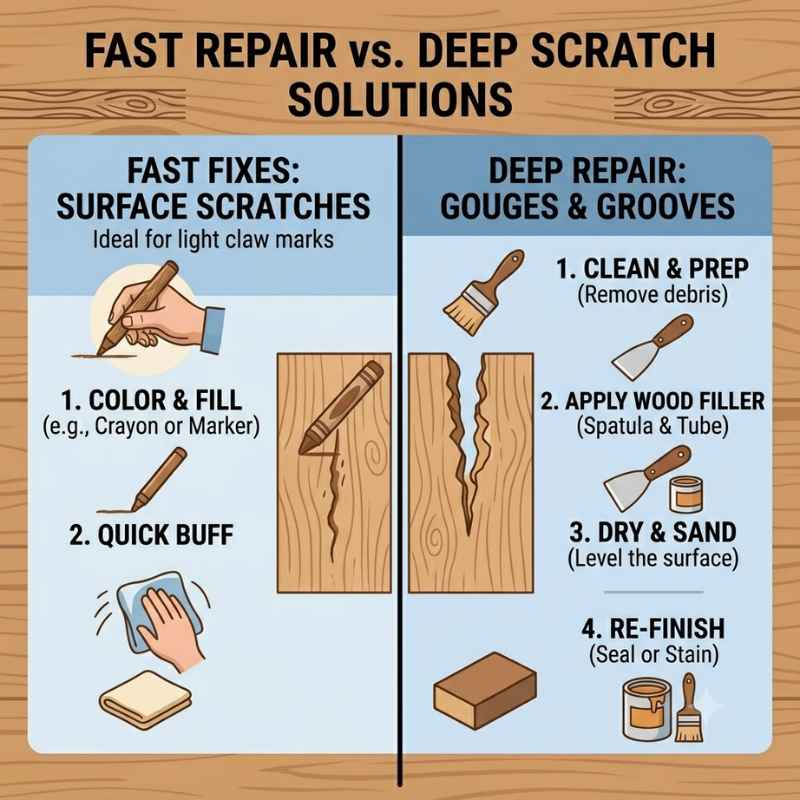
Fixing Light Surface Scratches
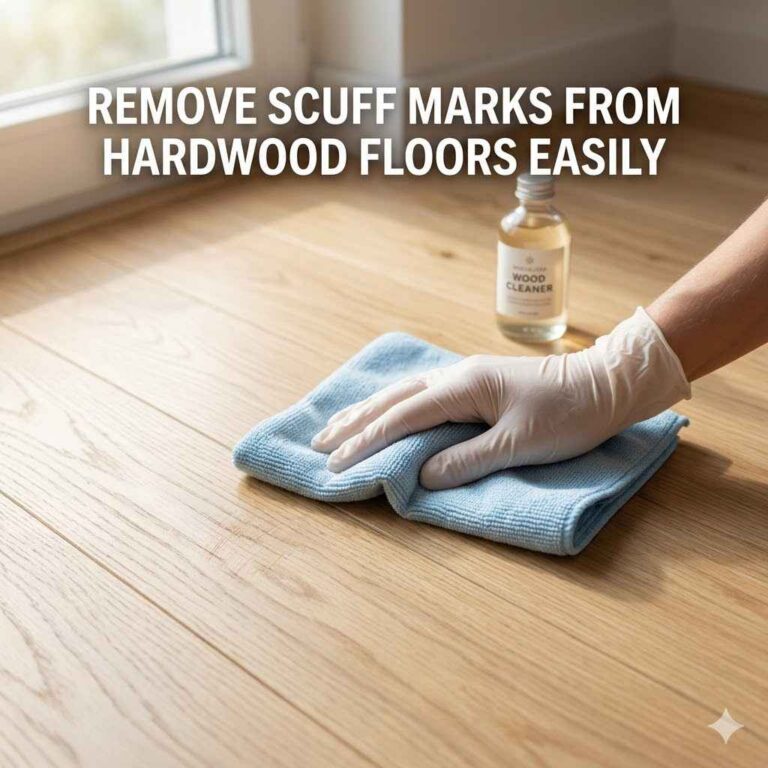
Most dog claw marks are surface level. They are in the clear coat of your floor. This is good news! You can often hide or fix these yourself. You don’t need to call a professional for every little mark. The goal is to blend the scratch so it’s not so visible.
You can use a few different products for this. Wood repair crayons are very popular. They come in many wood colors. You pick the shade that matches your floor best. Then you rub the crayon into the scratch. It fills the tiny gap. It helps hide the white line. Always test the color on an inconspicuous spot first. This ensures a good match before you work on the main area.
Easy Fixes for Surface Scratches
Wood Repair Crayons:
- Choose a color close to your floor.
- Rub the crayon firmly into the scratch.
- Buff off excess with a soft cloth.
Wood Touch-Up Pens:
- Similar to crayons, but a liquid.
- Apply directly into the scratch.
- Wipe away any drips.
Walnut Trick (for very minor marks):
- Rub a shelled walnut over the scratch.
- The natural oil can help mask light scratches.
Wood touch-up pens are also useful. They work much like crayons. You apply the color directly into the scratch. They often have a felt tip. This makes it easy to get the color just where you need it. Be sure to wipe away any excess color quickly. You don’t want to stain the wood around the scratch.
A surprising, simple trick for very minor scuffs is using a walnut. Yes, a plain walnut. Crack one open and gently rub the meat of the walnut over the scratch. The natural oils in the nut can help fill in and disguise very light marks in the finish. It’s a natural, chemical-free option for superficial damage. This works best on lighter wood tones. It’s a quick fix for those tiny, almost invisible marks.
Addressing Deeper Scratches
When scratches go beyond the finish, it’s a bit more involved. These have actually cut into the wood. They might look like thin grooves. If your fingernail catches on them, they are deeper. You can’t just rub a crayon into these. They need more substance to fill the void.
For these deeper marks, you might need wood filler. Wood filler comes in many colors. You can also find it in natural wood tones. Some fillers can be stained to match your floor perfectly. You’ll apply the filler using a putty knife. Gently press it into the scratch. Make sure it fills the entire groove. Then, you’ll let it dry completely.
Wood Filler Application Steps
- Clean the Scratch: Make sure the scratch area is free of dirt and dust.
- Choose Filler: Select a color or stainable filler matching your floor.
- Apply Filler: Use a putty knife to press filler into the scratch. Overfill slightly.
- Dry: Allow the filler to dry completely as per product instructions.
- Sand: Gently sand the dried filler flush with the floor. Use fine-grit sandpaper.
- Match Finish: Apply a matching wood stain or finish to the repaired area.
Once the filler is dry, you’ll need to sand it smooth. Use fine-grit sandpaper for this. You want the filled area to be perfectly level with the rest of the floor. Be gentle. You don’t want to sand away the surrounding finish. After sanding, you may need to touch up the finish. This means applying a clear coat or stain to match the area.
For very deep or widespread damage, sanding the entire plank or even a section of the floor might be necessary. This is a more advanced DIY task. It requires careful attention to detail. You’d sand down to the bare wood. Then you would re-stain and re-finish that section. This is where matching the color and sheen becomes critical. If you’re unsure, this is a good time to consider professional help.
When to Call the Professionals
Sometimes, the damage is just too much for DIY fixes. If your floors have many deep scratches, or if the scratches are very wide, it’s time to think about professionals. Trying to fix extensive damage yourself can sometimes make it worse. You might end up with a patch that looks noticeably different.
Professionals have specialized tools and knowledge. They can sand down entire sections of your floor. Then they can re-stain and re-finish it. This ensures a seamless look. They can match the color and sheen of your existing floor perfectly. This is especially important for older floors or those with unique finishes.
Signs You Need a Pro
- Widespread Damage: Many scratches across multiple boards.
- Deep Gouges: Scratches that are wide and deep, creating significant texture.
- Uncertainty: If you’re not confident in your DIY skills.
- Expensive Floors: If your hardwood floors are high-value or antique.
- Desired Perfection: If you want a flawless finish.
Another factor is the type of wood and finish you have. Exotic hardwoods or custom stains can be tricky to match. If you have a matte finish, for example, getting a perfect match with a DIY kit can be hard. A professional floor refinisher will know how to handle these situations. They can assess the damage and give you a clear plan.
Don’t feel like a failure if you need professional help. It’s a sign of good judgment. It means you value your home and want it done right. Get a few quotes from reputable flooring companies. Ask to see examples of their work. Check reviews from other homeowners. This ensures you get the best service for your situation.
Preventing Future Scratches
Fixing scratches is great, but stopping them before they happen is even better. Prevention is the key to keeping your hardwood floors looking pristine. This involves a few simple habits and tools.
The most impactful step is nail care for your dog. Regular nail trims are essential. When your dog’s nails are kept short, they are less sharp. This significantly reduces their ability to scratch the floor. I try to trim Gus’s nails every three to four weeks. It makes a huge difference. Some people prefer to have a groomer do this regularly. Find a schedule that works for you and your pet.
Daily Prevention Habits
Nail Trimming Schedule:
- Every 3-4 weeks for most dogs.
- Adjust based on breed and growth rate.
- Use sharp dog nail clippers.
Entryway Mats:
- Place durable mats inside and outside all doors.
- These trap dirt and grit that can scratch.
Paw Wiping Station:
- Keep a towel or pet wipes by the door.
- Wipe paws after walks, especially in wet or muddy conditions.
Mats at entryways are also a big help. Place them both inside and outside your doors. These mats catch dirt and grit from paws and shoes. This grit is abrasive. It can cause micro-scratches over time. A good mat reduces the amount of dirt tracked onto the floors.
Consider using rugs or runners in high-traffic areas. These can act as a buffer. They protect the hardwood underneath from constant wear and tear. If your dog has a favorite spot where they like to play or rest, a small rug there can also offer protection. It’s a simple step that can save your floors a lot of stress.
Protecting Your Floors During Playtime
It’s hard to stop a dog from being a dog. Especially when they’re full of energy and ready to play. But you can make smart choices about playtime. Think about where your dog plays the most.
If your dog tends to get zoomies inside, consider designating a play area. This could be a room with less sensitive flooring, like a kitchen or a tiled entryway. Or, you can place large play mats or area rugs in the main living spaces where they like to run. This creates a safe zone for energetic play.
Playtime Protection Strategies
Designated Play Zones:
- Use play mats or rugs in areas with heavy activity.
- Choose durable, washable materials.
Soft Toys:
- Avoid toys that might dig into the floor if dropped.
- Chew toys can be a great distraction.
Supervised Play:
- Keep an eye on your dog during energetic games.
- Gently redirect if they start scratching the floor.
Also, be mindful of the toys themselves. Some hard plastic or metal toys can also cause scratches when dropped or dragged. Opt for softer toys where possible. Supervised play is also beneficial. You can gently redirect your dog if they start to scratch at the floor during play. It’s about consistent training and gentle guidance.
Your dog’s personality plays a role too. Some dogs are naturally more careful. Others are a bit more boisterous. Adjust your approach based on your specific pet. The goal is to create a happy environment for both you and your dog. This includes protecting your beautiful home.
Wood Floor Finish Types and Scratches
The type of finish on your hardwood floors matters a lot. Different finishes react differently to scratches. Knowing your finish helps you choose the best repair method. It also helps understand how to protect it.
Most modern hardwood floors have a polyurethane finish. This is very durable. It’s applied in layers. The most common types are oil-based and water-based polyurethane. Oil-based finishes are generally harder and more resistant to wear. Water-based finishes dry faster and have less odor. Both are effective barriers against scratches.
Common Wood Floor Finishes
Polyurethane (Oil-Based):
- Durable and long-lasting.
- Slightly amber tint.
- Can be harder to repair evenly.
Polyurethane (Water-Based):
- Clearer finish.
- Dries faster, less odor.
- May require more frequent recoating than oil-based.
Hardwax Oils:
- Penetrates the wood for a natural look.
- Easy to spot-repair individual planks.
- Less resistant to water than polyurethane.
Older homes might have different finishes. These include shellac or wax. These are less durable than modern polyurethanes. They scratch more easily. Repairs on these finishes might require specific products. If you’re unsure about your floor’s finish, it’s best to test a small, hidden area.
For polyurethane finishes, minor scratches can often be buffed out or filled with the products we’ve discussed. Deeper scratches might require light sanding and a touch-up of the clear coat. For finishes like hardwax oils, spot repairs are quite easy. You can often reapply the oil to a small area to blend it in. Always follow the manufacturer’s recommendations for your specific floor finish.
Cleaning and Maintenance Tips
Proper cleaning and maintenance are crucial for the long-term health of your hardwood floors. It also helps prevent scratches from becoming more noticeable.
Regular sweeping or vacuuming is a must. Use a soft brush attachment on your vacuum. This will pick up dirt and debris without scratching the floor. Avoid brooms with stiff bristles. These can cause micro-scratches over time.
Smart Cleaning Routines
Daily:
- Sweep or vacuum with a soft brush attachment.
- Wipe up spills immediately.
Weekly:
- Damp mop your floors.
- Use a pH-neutral hardwood floor cleaner.
- Ensure mop is not soaking wet.
As Needed:
- Address specific scratches or scuffs.
- Deep clean only if absolutely necessary.
When it comes to mopping, use a damp mop, not a wet one. Excess water can damage hardwood floors. Use a cleaner specifically designed for hardwood. Many common household cleaners can strip the finish or leave residue. Always follow the cleaner’s instructions.
Avoid walking on your floors with heels or cleats. These can cause dents and scratches. If you have a dog that likes to dig or scratch at the floor when excited, gentle redirection is key. Consistently applying these simple cleaning and maintenance steps will help keep your floors looking great for years to come.
Comparing DIY vs. Professional Repair
Deciding between a DIY fix and hiring a professional is an important choice. It depends on several factors, including the severity of the scratches, your budget, and your comfort level with home repairs.
DIY repairs are generally more affordable. You can buy wood repair crayons, pens, or fillers for a fraction of the cost of hiring someone. They are also quick for minor surface damage. If you have a few light scratches, a DIY fix can be very effective and satisfying. It gives you a sense of accomplishment.
DIY vs. Professional: What’s Best?
DIY Repair:
- Pros: Cost-effective, quick for minor damage, satisfying.
- Cons: Can be difficult to match colors/sheens, risks making damage worse, limited to surface repairs.
- Best For: Light scratches, minor scuffs, budget-conscious homeowners.
Professional Repair:
- Pros: Expert results, handles deep damage, perfect color matching, saves time and effort.
- Cons: More expensive, requires scheduling and planning.
- Best For: Extensive damage, deep gouges, unique floor types, perfectionists.
Professional repair, while more expensive, offers a guarantee of quality. They have the tools and expertise to sand down and refinish damaged areas seamlessly. This is essential for significant damage or when you want your floors to look like new. Professionals can also advise on the best long-term care for your specific floor type.
Consider the value of your time and the potential risk of error. If you’re not confident, hiring a professional is often the wisest choice. It ensures the job is done right the first time, saving you potential headaches and further costs down the line. It’s an investment in your home’s appearance and value.
Frequently Asked Questions
Can I fix dog scratches on hardwood floors myself?
Yes, for light surface scratches, you can use wood repair crayons, touch-up pens, or even the walnut trick. For deeper scratches, wood filler followed by sanding and finishing might be needed. If you’re unsure or the damage is extensive, professional help is recommended.
How can I prevent my dog from scratching hardwood floors?
Regularly trim your dog’s nails to keep them short and less sharp. Place durable mats at all entryways to catch dirt. Wipe your dog’s paws after walks. Consider using area rugs or runners in high-traffic zones. Supervise playtime and gently redirect your dog if they scratch the floor.
What is the best way to match the color of the repair to my floor?
For wood repair crayons and pens, choose a color that closely matches your floor. Many products come in various wood tones. For wood filler, opt for a stainable filler and then use a matching wood stain. Always test the color in an inconspicuous area first. Professionals can perfectly match any shade or sheen.
Are there any natural ways to fix minor scratches?
Yes, rubbing a shelled walnut over very minor surface scratches can help. The natural oils can fill and disguise light marks. For slightly more noticeable but still surface-level scratches, a bit of olive oil applied to a soft cloth and buffed into the scratch might offer temporary relief by adding a slight sheen.
How often should I trim my dog’s nails for floor protection?
It’s generally recommended to trim your dog’s nails every 3 to 4 weeks. However, this can vary depending on your dog’s breed, activity level, and how quickly their nails grow. You’ll know it’s time when you can hear their nails clicking on hard surfaces. Keeping them trimmed short significantly reduces the risk of scratches.
Can a refinishing job fix deep scratches from dog claws?
Yes, a professional floor refinishing job is one of the most effective ways to fix deep scratches. This process involves sanding down the top layer of wood, removing the scratches entirely. The floor is then re-stained and sealed to match its original look. It’s a more involved process but can restore floors to a like-new condition.
Final Thoughts on a Scratch-Free Home
Living with pets and beautiful hardwood floors is totally possible. It just takes a little awareness and some proactive steps. You can fix those frustrating scratches and keep new ones from appearing. Remember to keep those nails trimmed and use protective mats.
Whether you choose a quick DIY fix for a minor scuff or call in the pros for deeper damage, there are solutions. Your floors can look lovely again. Enjoy your home and your furry companion. A little effort goes a long way in maintaining both!