Can You Refinish 1.5Mm Engineered Hardwood Floors?
Refinishing 1.5mm engineered hardwood floors is possible, but it requires careful consideration of the wear layer thickness. Not all engineered wood is suitable for sanding. The key is to know your floor’s specifications and to approach the refinishing process with precision to avoid damaging the real wood veneer.
Understanding Engineered Hardwood and Its Wear Layer
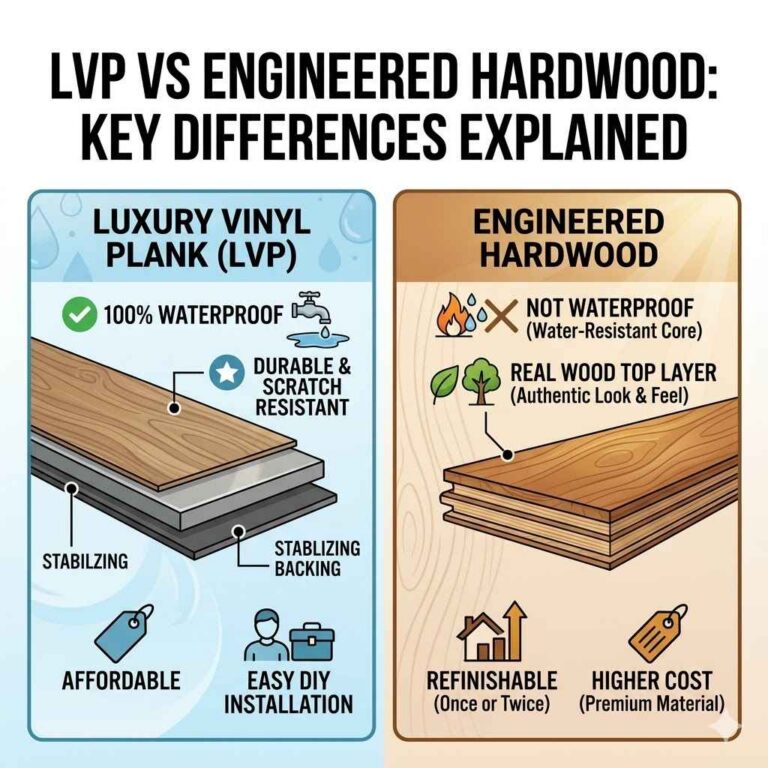
Engineered hardwood flooring is a smart choice for many homes. It’s made of layers. The top layer is real wood, like oak or maple. This is called the wear layer. Underneath are layers of plywood or HDF. This makes the floor very stable. It handles changes in humidity better than solid wood.
The wear layer is the part that gets sanded. It’s the visible wood you see and feel. The thickness of this wear layer is super important. It tells you how many times you can sand the floor. If the wear layer is too thin, you can sand through it. This would damage the floor.
A 1.5mm wear layer is on the thinner side for engineered wood. Many floors have wear layers from 2mm to 4mm or even more. A 1.5mm layer means you have about the thickness of two credit cards. This is a very delicate amount of real wood to work with. It means you have very limited sanding opportunities.
Why Wear Layer Thickness Matters
Imagine you’re trying to clean a wooden table. You might use a light scrub. If you scrub too hard, you might take off the finish and even some wood. The wear layer is like the finish and a little bit of wood combined. You can sand it to remove scratches and old finishes. But you can only do it a few times before you reach the plywood layers below.
This is why knowing your floor’s exact wear layer thickness is the first, most critical step. If you don’t know this number, you need to find out. Check your flooring manufacturer’s documentation. Look for the original packaging. If you can’t find it, contact the installer or the company you bought it from. Sometimes, you can find this info online by looking up the exact product name.
If you can’t find the specs, you might need to do a small test in an inconspicuous area. However, this is risky. It’s best to have the manufacturer’s data. Without knowing this, attempting to sand is like playing a guessing game. And the stakes are high – you could ruin your floor.
Can You Really Refinish 1.5mm Engineered Hardwood Floors?
The short answer is: sometimes. It depends heavily on the specific product. Here’s the breakdown:
Floors with a 1.5mm wear layer can often be screened and recoated. This is different from full sanding. It’s a lighter process. It removes the old finish but not much wood.
Full sanding might be possible, but with extreme caution. If your floor has a 1.5mm wear layer, you might get one, maybe two, light sandings. This depends on the skill of the refinisher.
Some engineered floors are NOT sandable. Certain types have a very thin veneer or are designed only for their original factory finish. These cannot be sanded at all.
You must confirm if your specific flooring product is designed for refinishing. Manufacturers usually state this clearly. If they say it’s sandable, it means there’s enough real wood to do so. If they don’t mention sanding, it’s a big red flag.
The Nuance: Screening vs. Full Sanding
This is where many homeowners get confused. There are two main ways to refresh the look of your floor.
Screening and Recoating: This is the gentler option. A machine with a buffing screen is used. It scuffs up the old finish. Then, a new coat of finish is applied. This process removes very little, if any, of the actual wood. It’s great for floors that have lost their sheen but aren’t deeply scratched. It works well even with thinner wear layers.
Full Sanding: This is a more aggressive process. A drum sander removes the old finish and a layer of wood. Then, the floor is usually buffed with finer sandpaper. After that, new stain (optional) and finish coats are applied. This can fix deeper scratches and remove significant wear. However, it removes more of the wood layer. For a 1.5mm wear layer, this is a high-risk procedure.
Most DIYers and even many professional refinishers might shy away from fully sanding a floor with only a 1.5mm wear layer. It requires a very light touch and precise control.
My Own Experience: A Close Call with Thin Veneer
I remember a job a few years back. A client in Seattle had beautiful, light-colored oak engineered floors. They looked tired. They wanted them to look new again. I went to check them out. The client mentioned they thought they had a thin wear layer but weren’t sure. I asked if they had the manufacturer’s details. They didn’t. Uh oh.
My gut told me to be super careful. I did a quick check in a closet. I used a very fine grit sandpaper by hand. I gently buffed a tiny spot. I could already see the different wood grain below. It was terrifyingly close to the plywood. My heart sank a little. I had to have a tough conversation with the client.
I explained that a full sanding would be too risky. We could easily go through the veneer. This would mean replacing the floor. They were disappointed, naturally. But they understood. We then talked about screening and recoating. It wouldn’t fix deep gouges, but it would restore the shine and protect the floor. They agreed.
We did the screening. It took a lot of care. We used the least aggressive screen we had. We applied a good quality water-based polyurethane. The result was a fresh, clean look. The floor gained a beautiful sheen. The client was happy. They learned that sometimes, the best fix isn’t the most dramatic one. It’s the one that preserves what you have. This experience cemented for me just how vital knowing your floor’s specs is.
When to Avoid Refinishing Engineered Floors
Too Thin a Wear Layer: If your wear layer is 1mm or less, or even 1.5mm and you’re not 100% sure of the wood quality, avoid full sanding.
No Manufacturer Specs: If you can’t confirm the wear layer thickness or if the flooring is rated as “non-sandable,” don’t risk it.
Deeper Damage: Very deep gouges or significant structural damage might require more than sanding can fix, especially on thin veneers.
Improper Installation: If the floor was installed over an unstable subfloor, issues might reoccur even after refinishing.
Assessing Your 1.5mm Engineered Hardwood Floor
Before you even think about bringing in sanders, you need to assess your floor. This means gathering information.
First, find out the exact brand and model of your flooring. Look for any paperwork from when you bought your home or the flooring. Check your email for purchase records if you installed it yourself. If you bought the house with the floors already in, this can be harder.
Sometimes, you can identify the brand by looking at the planks. There might be a logo or a specific pattern. Take pictures and do a reverse image search. This might lead you to the manufacturer. Once you have the brand, go to their website. Look for the product specifications. You’re searching for “wear layer thickness” or “veneer thickness.”
If you can’t find the specs online, call the manufacturer directly. They can often help identify your product if you provide them with details like the installation date or where you bought it.
This is the trickiest situation. If you absolutely cannot get a clear answer on the wear layer thickness, you have a few choices.
Consult a Professional: Find a reputable flooring contractor who specializes in engineered wood. Explain your situation. They might have experience identifying different types of engineered wood. They can often tell if it’s likely sandable by looking at it and performing very gentle tests.
Perform a Test Sanding (with Extreme Caution): In a very hidden spot (like inside a closet or under a large piece of furniture you rarely move), try sanding a tiny area. Use the finest grit sandpaper you can find. Do it by hand. Watch very closely. If you see the wood color change quickly or start to see a different grain pattern emerge almost immediately, stop. This indicates a very thin veneer.
Assume it’s Not Sandable: If you’re in doubt, err on the side of caution. It’s better to choose screening and recoating or explore other refinishing alternatives that don’t involve sanding.
The Refinishing Process: A Step-by-Step Guide (with Caveats)
If you’ve confirmed your 1.5mm engineered hardwood is indeed sandable, here’s a general idea of the process. However, this is where hiring a professional is highly recommended.
Step 1: Preparation is Key
Empty the Room: Remove all furniture, rugs, and decor.
Protect Your Home: Seal off the room from the rest of the house. Use plastic sheeting and painter’s tape. This prevents dust from spreading.
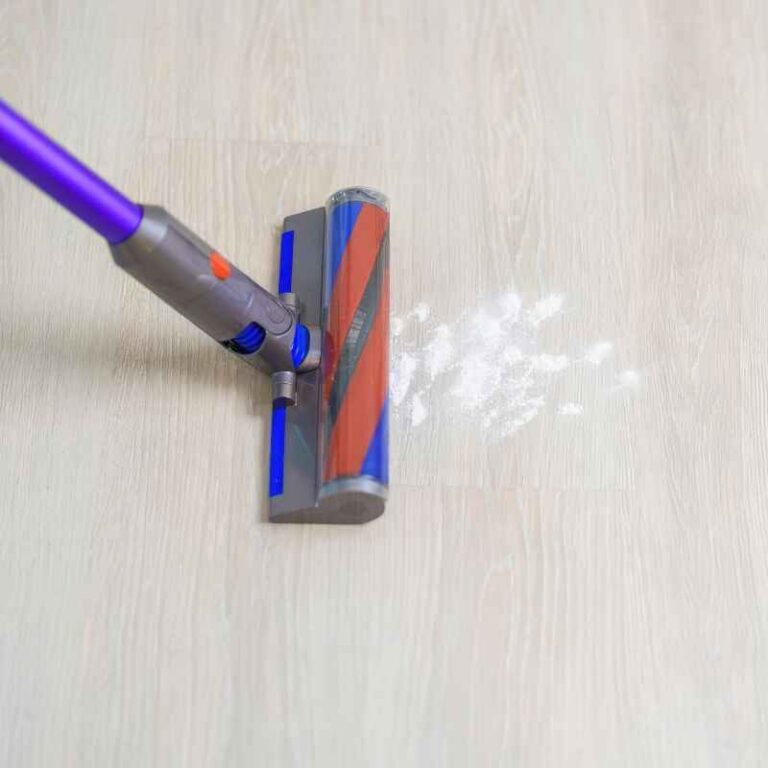
Clean Thoroughly: Vacuum and mop the floors to remove all dirt and debris.
Step 2: Screening (The Safer Option)
This is the preferred method for floors with thin wear layers.
Use a Buffer: A rotary buffer with a fine sanding screen (like 100-150 grit) is used. It lightly abrades the old finish. It does not dig deeply into the wood.
Clean Up Dust: Thoroughly vacuum and tack cloth the floor to remove all dust.
Apply New Finish: Apply two or three thin coats of a high-quality polyurethane finish. Allow adequate drying time between coats. This process refreshes the look without removing much wood.
Step 3: Full Sanding (High Risk for 1.5mm)
If you choose to sand, this requires expert skill.
Coarse Grit Sanding: This is where the main risk lies. A drum sander is used with a coarse grit (e.g., 36-grit). This removes the old finish and a layer of wood. For a 1.5mm wear layer, this step must be incredibly light. The operator must be highly skilled and experienced.
Medium Grit Sanding: The floor is then sanded with a medium grit (e.g., 60-80 grit) to remove drum marks.
Fine Grit Sanding: Finally, a fine grit (e.g., 100-120 grit) is used to smooth the surface.
Edging and Corners: Edge sanders and corner tools are used for areas the drum sander can’t reach.
Dust Removal: Meticulous vacuuming and tack cloth wiping are essential.
Staining (Optional): If you want to change the color, stain is applied.
Finishing: Multiple coats of polyurethane are applied.
Quick-Scan Table: Refinishing vs. Screening
| Feature | Screening & Recoating | Full Sanding |
|---|---|---|
| Wear Layer Removal | Minimal (just old finish) | Significant (wood removed) |
| Risk Level (1.5mm) | Low | High |
| Fixes Deep Scratches | No | Yes |
| Color Change Possible | No | Yes (with stain) |
| Best For | Dull finish, minor surface scratches | Deep scratches, significant wear, color change |
Hiring a Professional: Your Best Bet
For engineered hardwood with a 1.5mm wear layer, I strongly advocate for hiring a professional. Here’s why:
Expertise: They understand wood types, wear layers, and the different sanding techniques. They know how much pressure to apply and with which grit.
Equipment: They have high-quality, professional-grade sanding equipment. They also have specialized dust containment systems.
Experience: They’ve likely encountered floors like yours before. They can assess the risk accurately.
Warranties: Some professionals offer warranties on their work, giving you peace of mind.
When you get quotes, be upfront about your flooring type and the thin wear layer. Ask them specifically about their approach for such floors. Ask if they recommend screening or full sanding. Get their opinion on whether it’s even advisable.
Questions to Ask a Flooring Professional
- “What is the wear layer thickness of my engineered hardwood floors?” (They should know how to check or find this)
- “Is my floor suitable for screening and recoating?”
- “Is my floor suitable for full sanding?”
- “If sanding, what is your process for a 1.5mm wear layer? What grit levels do you use?”
- “What type of dust containment do you use?”
- “Can you provide references for similar jobs?”
- “What is your warranty on this type of work?”
Alternatives to Traditional Refinishing
If your 1.5mm engineered hardwood floors are deemed non-sandable, or if you want to play it extremely safe, you have other options to refresh their look.
1. Deep Cleaning and Polishing
Sometimes, floors just look dull because they are dirty. A thorough deep clean can make a surprising difference. Use a wood floor cleaner recommended by your manufacturer. Follow it up with a wood floor polish designed to restore shine. This won’t fix scratches, but it can bring back some of the luster.
2. Screening and Recoating
As mentioned earlier, this is a fantastic option for thin wear layers. It doesn’t remove wood, just the old, damaged finish. It adds a fresh protective layer. It’s much safer and less costly than full sanding. Many people are happy with the results of a screen and recoat.
3. Painting or Staining (with Proper Prep)
If the wear layer is too thin for sanding, but you want a new color, painting is an option. This involves thoroughly cleaning and scuffing the surface. Then, you apply a specialized floor primer and paint. You’ll need a very durable topcoat. Some people even opt for staining over a light scuff rather than sanding. This requires specialized products and careful application.
4. Layering Vinyl or Laminate Over It
This is a more drastic step. If your floors are damaged beyond repair or you simply want a change, you can install a new floor over your existing one. Floating vinyl plank or laminate flooring can often be installed directly over existing hardwood. Make sure the existing floor is level and clean.
5. Replacing the Floor
Of course, the most straightforward but expensive option is to replace the entire floor. If your 1.5mm veneer is worn through or significantly damaged, this might be the only way to get a brand-new look.
When to Consider Replacement
Sanding Through the Veneer: If you’ve already sanded through to the underlayment, replacement is necessary.
Widespread Damage: Deep, pervasive scratches, gouges, or water damage across most of the floor.
Warping or Cupping: Significant signs of moisture damage that cannot be corrected.
Desire for a New Look: If you simply want a different material or style and the cost of refinishing is close to new flooring.
Real-World Scenarios and What They Mean
Let’s look at some common situations and how they apply to your 1.5mm engineered floors.
Scenario 1: Kid and Pet Traffic
Kids and pets are tough on floors. You’ll get scuffs, light scratches, and wear patterns, especially in high-traffic areas like hallways and living rooms. With a 1.5mm wear layer, these minor issues might lead you to consider refinishing. However, if the scratches are only on the surface finish, screening and recoating is often the best first step. It can refresh the look and add a protective layer against future wear.
Scenario 2: Sunlight Fading
Sunlight can fade and damage the finish over time. If certain areas of your floor are exposed to direct sunlight, you might see a difference in color or sheen compared to protected areas. This is usually a surface issue. Screening and recoating can help restore uniformity. For extreme fading, staining might be considered if sanding is an option.
Scenario 3: Water Spills
Accidents happen. A spilled drink or a wet pet paw can cause damage if left for too long. Minor, quick spills that are wiped up immediately might only affect the finish. If left to soak, water can seep into the wood layers, causing swelling or discoloration. For a 1.5mm wear layer, water damage is a serious concern because it can affect the stability of the veneer. If you see any signs of cupping or warping, full sanding might not be enough, and replacement could be necessary.
Scenario 4: Old, Dull Finish
Your floor might just be tired. The original finish has lost its shine. It looks dull and maybe a bit scuffed. This is the ideal situation for screening and recoating. It’s a cost-effective way to revive the floor without the risks of sanding a thin wear layer.
What This Means for Your 1.5mm Floors
Understanding the nature of your 1.5mm engineered hardwood floors is crucial.
Limited Lifespan for Sanding: You have a finite number of times you can sand this floor. Each sanding removes a bit of the real wood.
Screening is Your Friend: For most wear and tear issues on a 1.5mm floor, screening and recoating is the safest and most effective solution.
Professional Assessment is Key: Don’t guess. Get an expert opinion before you attempt any sanding.
Maintenance Matters: Good maintenance, like using felt pads on furniture and cleaning up spills quickly, will extend the life of your floor, especially with a thin wear layer.
When is it Normal, and When Should You Worry?
Normal: A dull finish, minor surface scratches that don’t go through the wood’s color, and general wear from daily life are normal.
Worry: Deep gouges that go into the wood, discoloration, splintering, cupping, or warping are signs of serious problems. If you see the plywood layers beneath the wood veneer, you should definitely worry. This means you’ve sanded too deep or the floor is failing.
Simple Checks You Can Do
1. The Fingernail Test: Gently run your fingernail across a scratch. If you can feel a significant divot or if your nail catches on it, it’s likely too deep for screening alone.
2. The Water Drop Test: Place a small drop of water on the floor. If it beads up, the finish is still good. If it soaks in quickly or darkens the wood, the finish is compromised.
3. Visual Inspection: Look at the floor from different angles and under good light. Check for unevenness, lifting edges, or deep cracks.
Quick Tips for Maintaining Your Engineered Floors
Even if you can’t refinish, you can keep your floors looking great.
Use Doormats: Place mats at all entrances to trap dirt and grit.
Clean Spills Immediately: Don’t let liquids sit on the floor.
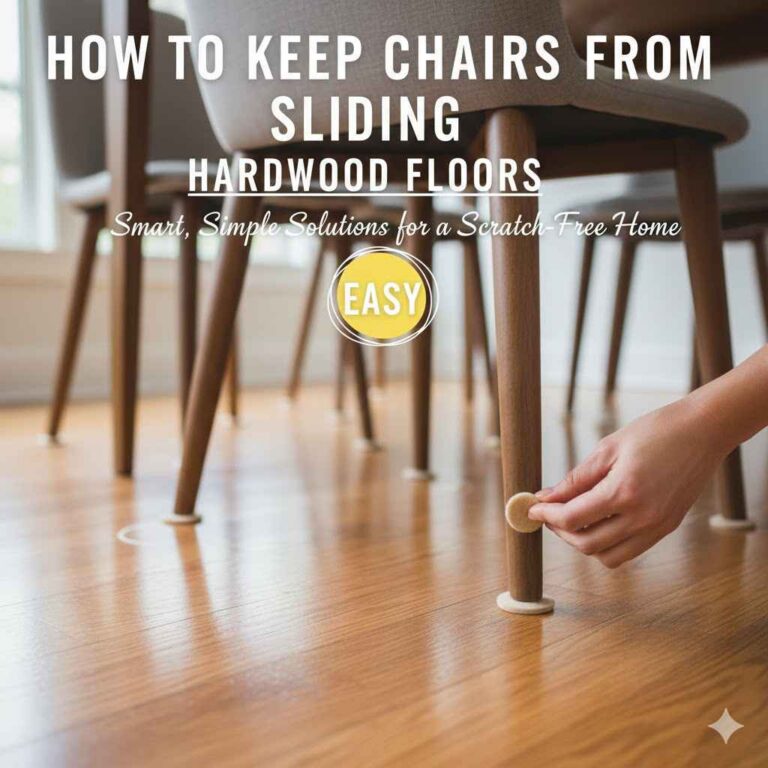
Use Furniture Pads: Put felt pads on the legs of all furniture.
Avoid Wet Mopping: Use a damp mop or a wood floor cleaner spray.
Sweep or Vacuum Regularly: This removes abrasive particles.
Control Humidity: Keep indoor humidity levels stable (ideally 35-55%).
Frequently Asked Questions
Can I refinish my engineered hardwood floors if I don’t know the wear layer thickness?
It is highly risky to refinish engineered hardwood floors without knowing the wear layer thickness. If you cannot confirm it, it’s best to consult a professional flooring expert who can assess the situation. In many cases, screening and recoating is a safer alternative to full sanding when the wear layer is unknown or thin.
What is the difference between screening and full sanding?
Screening is a lighter process that buffs the old finish, removing very little wood, and then applies a new coat. Full sanding uses abrasive paper to remove the old finish and a layer of wood, allowing for deeper repairs and color changes but removes more material.
How many times can you refinish engineered hardwood floors?
The number of times you can refinish engineered hardwood floors depends entirely on the thickness of the wear layer. Floors with thicker wear layers (3mm or more) can be sanded multiple times. Floors with thin wear layers (like 1.5mm) might only be sandable once or twice, or not at all, making screening a better option for longevity.
Are there special finishes for engineered hardwood floors?
Yes, there are many finishes suitable for engineered hardwood. Polyurethane (oil-based or water-based) is very common. Water-based finishes are generally more durable and dry faster, making them a good choice for thin wear layers as they require fewer coats.
Always check with your flooring manufacturer for their recommended finishes.
Can I DIY refinish my 1.5mm engineered hardwood floors?
DIY refinishing of 1.5mm engineered hardwood floors is generally not recommended due to the high risk of sanding through the thin wear layer. Professionals have the experience and equipment to perform this delicate task safely. If you are considering DIY, opt for screening and recoating, not full sanding.
What happens if I sand through the wear layer of my engineered hardwood floor?
If you sand through the wear layer of engineered hardwood floors, you will expose the plywood or HDF core layers beneath. This will ruin the aesthetic of the floor, compromise its durability, and usually means the floor needs to be replaced, as the real wood veneer is gone.
Conclusion
So, can you refinish 1.5mm engineered hardwood floors? Yes, but with a giant asterisk. It’s a delicate dance with a thin layer of real wood. For many with this flooring thickness, screening and recoating is the true path to refreshing your floors. It revitalizes the look and protects your investment without the extreme risk of sanding too deep. Always do your homework on your floor’s specifications, and don’t hesitate to call in the pros. They can help you make the right choice for a beautiful, long-lasting floor.