How To Level A Floor For Hardwood Installation Right
Leveling a floor for hardwood is essential for a stable, beautiful, and long-lasting installation. It prevents squeaks, gaps, and potential damage by ensuring a solid, even base for your new planks.
Understanding Floor Levelness
When we talk about a level floor, we mean a surface that is flat. It doesn’t tilt or slope in any direction. For hardwood floors, this is super important.
Even a small bump or dip can cause big problems.
Why does this matter so much? Hardwood planks need a solid, flat surface to sit on. If the floor is uneven, the planks won’t sit quite right.
This can lead to them flexing when you walk on them. That’s how you get those annoying squeaks. Over time, this can also cause gaps to appear between the planks.
In worse cases, it can even damage the wood itself.
Think of building a house. You wouldn’t build walls on a crooked foundation, right? It’s the same idea with floors.
The subfloor is the foundation for your hardwood. It needs to be ready for the new floor.
Why Uneven Floors Happen
Floors can become uneven for many reasons. It’s not always a sign of a big structural problem, but it’s good to know the common causes.
One common reason is simply age. Houses settle over time. Wood can warp or twist due to changes in moisture.
If you live in an area with a lot of humidity changes, this can affect your floor’s shape.
Water damage is another big culprit. Leaks from plumbing, roofs, or even spills can make wood swell. When it dries out, it might not go back to its original shape.
This can create humps or dips.
Sometimes, the original construction wasn’t perfect. Maybe the subfloor wasn’t laid completely flat to begin with. Or maybe, over the years, something has shifted or loosened.
The type of subfloor matters too. Plywood subfloors are common. If they are old or have been exposed to moisture, they can warp.
Concrete slabs can also settle or crack over time, causing unevenness.
It’s rare for a floor to be perfectly level everywhere. Most floors have some minor variations. The key is to identify when those variations are too big for a good hardwood installation.
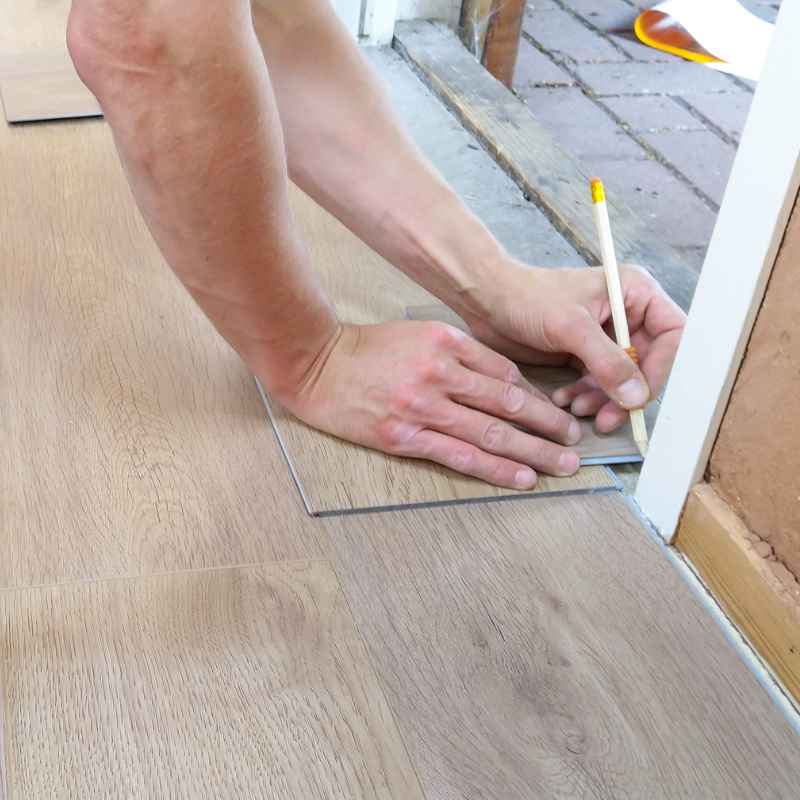
How to Check if Your Floor is Level
Checking your floor’s levelness is easier than you might think. You don’t need a lot of fancy tools. A simple level and a tape measure can tell you a lot.
Start by getting a long level. A 4-foot or 6-foot level is best. Place the level on the subfloor in different spots.
Check it in every direction: length, width, and diagonally. Look at the bubble in the middle. If the bubble is close to the center line, the floor is pretty level in that spot.
If the bubble is way off to one side, you have a slope. You can even use a tape measure to see how much of a slope. Place the level down.
Measure the gap between the longest end of the level and the floor. Do this in several places.
You can also use a string line for longer distances. Stretch a string tightly from one point to another. Then, use your level to see if the string is straight and if the floor is running parallel to it.
Another common tool is a laser level. These project a straight line of light around the room. You can easily see any high or low spots compared to the laser line.
It’s very helpful for large areas.
What are the magic numbers? Generally, for hardwood, you want the floor to be within 3/16 of an inch over a 10-foot span. If it’s more uneven than that, you’ll need to do some leveling work.
Level Check Tools
Long Level: Your best friend for checking flatness. A 4-ft or 6-ft level works well.
Tape Measure: To quantify how much off-level a spot is.
String Line: Great for checking longer spans.
Laser Level: For quick, large-area checks and precision.
Common Floor Unevenness Issues
Different types of unevenness require different fixes. Knowing what you’re dealing with helps you choose the right method.
High Spots: These are areas where the floor is too high. They might be caused by a warped subfloor board, a nail sticking up, or dried-up adhesive. You might feel these spots when walking.
They can feel like a bump under your foot.
Low Spots: These are dips or valleys in the floor. They can be from subfloor sagging, damage, or just wear and tear. These are often where water can pool if there’s a spill.
Warped Boards: A single subfloor board might be twisted or bowed upwards or downwards. This creates a localized high or low spot. It’s like a mini-mountain or valley.
General Slope: The entire floor might have a gradual tilt from one side of the room to another. This is often due to the house settling or the original construction.
Identifying the exact problem is the first step to fixing it correctly. Sometimes, a quick fix works. Other times, it needs a more involved repair.
Spotting the Problem
Feel it: Walk around in socks. Can you feel bumps or dips?
See it: Shine a light from a low angle. This can reveal subtle slopes.
Measure it: Use your level and tape measure for exact numbers.
Methods for Leveling a Subfloor
Once you know your floor is uneven, you’ll need to fix it. There are a few main ways to level a subfloor before installing hardwood.
1. Grinding or Sanding Down High Spots
If you have just a few high spots, especially on a concrete slab or where old flooring adhesive is sticking up, grinding can work. A concrete grinder can quickly shave down high areas.
For wood subfloors, a heavy-duty belt sander might help with very minor high spots. However, you can’t sand down a warped board too much without weakening it. This method is best for small, hard imperfections.
Experience Note: I once dealt with a job where old tile adhesive had been poorly scraped up. It left hardened ridges all over the concrete. A rented grinder made quick work of it.
It was dusty, but the result was a smooth surface ready for the new floor. Always wear a good mask and goggles when grinding!
2. Filling Low Spots and Cracks
For dips and low spots, you need to fill them. You can use a floor leveling compound or a patching material.
Self-Leveling Compound: This is a popular choice for concrete and sometimes plywood subfloors. You mix a powder with water to create a pourable liquid. It flows into the low areas and settles flat.
Some products are cement-based, others are gypsum-based. Always follow the manufacturer’s instructions carefully.
For concrete, it’s often as simple as mixing and pouring. For plywood, you might need to seal the seams first to prevent the compound from seeping through. These compounds can handle significant low areas.
They create a smooth, hard surface once dry.
Patching Compounds: For smaller cracks or very specific low spots, a trowel-on patching compound can work. You apply it with a trowel, filling the area and smoothing it flat. These are good for targeted repairs rather than large sections.
Wood Shims: For very localized dips in wood subfloors, especially under joists, you might use thin wood shims. These are tapered pieces of wood that you can slide into gaps. You might need to secure them with adhesive or screws.
This is more common when dealing with subfloor issues tied to the joist structure.
Choosing a Filler
- Self-Leveling Compound: Best for larger, shallow low spots. Works on concrete and some wood.
- Patching Compound: Good for small cracks and minor dips.
- Wood Shims: For specific issues related to subfloor support.
3. Replacing Damaged Subfloor
Sometimes, a section of the subfloor is too damaged to be saved. This might be due to rot, severe warping, or structural weakness.
In these cases, you need to cut out the bad section and
You’ll need to cut a neat square or rectangle. Then, lay the new piece in place. It should sit flush with the rest of the subfloor.
Secure it with screws around the edges, driving them into the floor joists below. This creates a strong, flat, and stable new section.
Expert Tip: When replacing a section, try to cut it so that the edges land on the center of a floor joist. This gives you a solid backing to screw the new piece into. If your new edges fall between joists, you might need to add extra blocking.
Subfloor Replacement Steps
- Identify and mark the damaged area.
- Cut out the bad section carefully.
- Measure and cut a new piece of subfloor.
- Place the new piece, ensuring it’s flush.
- Screw the new piece down securely into joists.
4. Adding Underlayment
Sometimes, minor imperfections can be handled by the underlayment you choose for your hardwood. Some underlayments offer a bit of cushion and can smooth out very slight variations.
However, underlayment is not a substitute for a properly leveled subfloor. If you have significant dips or high spots, you must address them before the underlayment. Think of underlayment as a finishing touch, not a primary leveling solution.
Different types of hardwood (like engineered vs. solid) and installation methods (glue-down, nail-down, floating) have different underlayment requirements. Always check the flooring manufacturer’s recommendations.
Leveling Concrete Subfloors
Concrete subfloors are very common in many homes, especially on the ground floor or in basements. They can be very stable but are also prone to cracking and settling.
Checking Concrete: Use your long level just like on wood. Look for cracks. Fill any cracks wider than 1/8 inch with a concrete patching compound.
For significant cracks or heaving, you might need a concrete repair specialist.
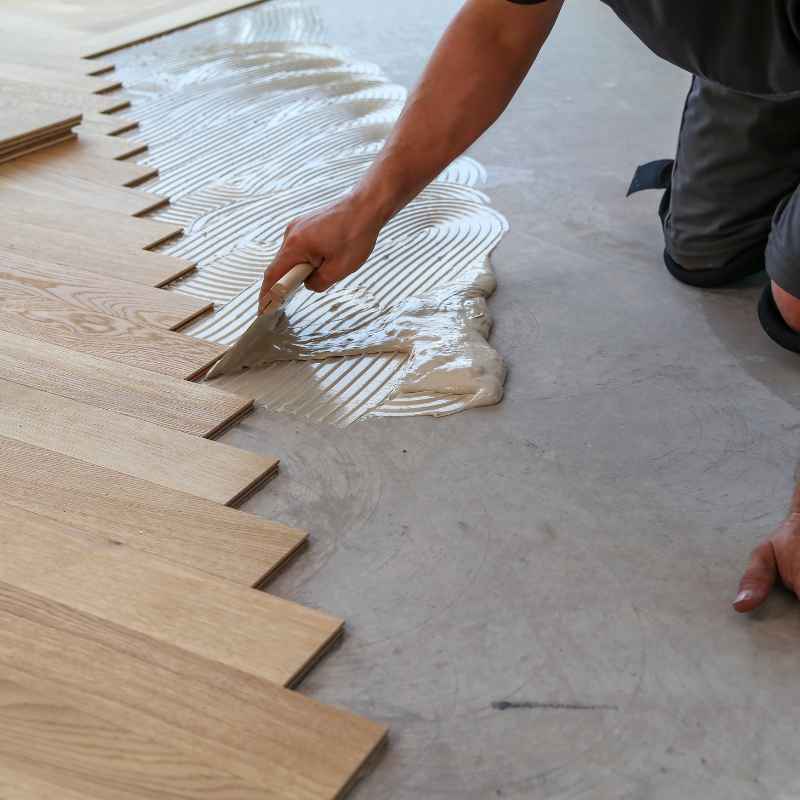
Using Self-Leveling Compound on Concrete: This is where self-leveling compounds really shine. For areas with significant low spots, they are ideal. The key is proper preparation.
First, sweep and vacuum the concrete thoroughly. You want no dust or debris. Many self-leveling compounds require a primer to help them bond to the concrete and prevent air bubbles.
Apply the primer as directed. Once the primer is dry, mix the self-leveling compound according to the package. You usually have a short working time.
Pour the mixture into the lowest areas first. Use a smoother or squeegee to help guide it into place and ensure it covers the whole area. It will flow and spread on its own.
Allow it to cure completely. This can take 24-72 hours depending on the product and thickness.
Expert Tip: If you have a very large area to level with self-leveling compound, consider hiring professionals. They have the tools and experience to mix and pour large batches quickly and evenly, which is crucial for a good finish.
Concrete Prep Checklist
- Clean thoroughly (sweep, vacuum).
- Inspect for cracks; patch as needed.
- Apply recommended primer.
- Mix and pour self-leveling compound.
- Allow full curing time.
Leveling Wood Subfloors
Wood subfloors, typically plywood or OSB, are common in most homes. They can warp, twist, or sag over time.
Checking Wood Subfloors: Use your level. Look for boards that are cupped (edges higher than the center) or crowned (center higher than the edges). Check for loose boards by walking on them.
Any board that moves or squeaks when you step on it needs attention.
Securing Loose Boards: If you find loose boards, you can often secure them. Drive screws through the loose board into the joists below. Be sure to sink the screw heads slightly below the surface so they don’t poke through the hardwood.
Dealing with Warped Boards: Minor warping might be addressed by sanding. However, if a board is significantly warped, it might be better to replace it. If it’s a slight warp and it’s a low spot, you might fill it.
If it’s a high spot, you might try to shave it down carefully, but be cautious not to weaken the board.
Using Plywood or OSB Patches: For dips in plywood or OSB, you can sometimes fill them with thin patches of the same material. Cut a piece of plywood or OSB to fit the low area. You can then glue and screw it down.
This adds thickness to the low spot, bringing it up closer to the surrounding level.
Can You Use Self-Leveling Compound on Wood? Some self-leveling compounds are designed for wood. However, you often need to take extra precautions. This might include sealing the seams between the subfloor panels to prevent the liquid from leaking through.
Always check the product specifications to ensure it’s suitable for your subfloor type and that you follow the specific instructions for wood.
Experience Note: I remember a fixer-upper where the kitchen subfloor had a noticeable dip. It was old plywood, and I suspect some water damage long ago. I cut out the worst section and replaced it.
But there was still a slight dip. I used a wood-specific leveling compound, carefully troweling it smooth. After it cured, it was rock solid and perfectly flat.
That floor felt so much better underfoot.
Wood Subfloor Fixes
- Secure loose boards with screws.
- Sand down very minor high spots.
- Replace severely warped or damaged boards.
- Use thin wood patches to build up low areas.
- Use wood-compatible leveling compounds if needed.
What Does This Mean for Your Hardwood Installation?
A level subfloor is the foundation of a successful hardwood installation. Ignoring it can lead to a cascade of problems.
Gaps: If the subfloor is uneven, planks might not sit flush against each other. This can lead to visible gaps. You might see them between planks or along the walls.
Squeaks: When planks aren’t fully supported, they can move against the subfloor or against each other. This movement causes squeaks. A level floor provides even support, preventing this.
Cupping and Warping: Hardwood can absorb moisture from the air. If one side of a plank has more exposure or is on a low spot where moisture collects, it can lead to cupping. A level floor helps ensure consistent moisture conditions for all planks.
Locking Systems: Many modern click-lock hardwood floors rely on the locking mechanisms fitting together perfectly. If the subfloor is uneven, these mechanisms can be stressed or broken, preventing a tight fit.
Glue-Down Installations: For glue-down floors, the adhesive needs full contact with the back of the plank and the subfloor. High spots mean less contact, and low spots mean the glue might not reach. This compromises the bond.
Aesthetics: Simply put, a floor that isn’t level doesn’t look as good. It can appear wavy or distorted, no matter how beautiful the wood itself is.
Longevity: A well-installed, level floor will last much longer and require fewer repairs over its lifetime. It’s an investment in the future of your home.
When Is a Floor “Level Enough”?
The term “level” can be a bit of a spectrum. For hardwood, there’s a standard to meet. Most manufacturers recommend that your subfloor should be flat within 3/16 of an inch over a 10-foot span.
This is a pretty strict requirement. It means that if you lay a 10-foot straight edge or level across your subfloor, the gap between the bottom of the straight edge and the subfloor should not be more than 3/16 of an inch anywhere along that 10 feet.
For smaller areas, like over a 6-foot span, the tolerance is tighter, usually around 1/8 of an inch. For shorter lengths, like 2 feet, it’s often just a slight variation that’s acceptable.
What if it’s slightly more uneven? Some people might get away with it if the difference is very small. But it’s a gamble. The risk of squeaks, gaps, or future issues increases significantly if you don’t meet the standard.
When to Worry: If you measure a difference of more than 1/4 inch over 10 feet, you definitely need to address it. If you see significant slopes, or if the subfloor feels soft, spongy, or unstable, that’s a sign of bigger problems that need professional assessment.
Always check the specific installation guidelines for the hardwood flooring you plan to use. They will detail their requirements for subfloor flatness.
Leveling Standards
- General Rule: Within 3/16 inch over 10 feet.
- Shorter Spans: Tighter tolerances (e.g., 1/8 inch over 6 feet).
- Worry Point: More than 1/4 inch over 10 feet needs attention.
Quick Tips for a Smooth Finish
Getting the subfloor level is key, but here are a few extra tips to make the process smoother.
- Work in Stages: If you have a large area, break it down. Level one section at a time. This makes the process more manageable.
- Read Instructions Carefully: Whether it’s for leveling compound or patch, always read and follow the manufacturer’s instructions to the letter.
- Ventilate: Many leveling compounds and primers can have strong odors. Ensure good ventilation in the work area.
- Wear Protective Gear: Use a dust mask when grinding or sanding. Wear safety glasses.
- Test a Small Area: If you’re unsure about a product or technique, try it in an inconspicuous corner first.
- Allow Full Cure Time: This is critical. Rushing the curing process can lead to the leveling compound cracking or failing.
- Vacuum Thoroughly: Before applying any leveling product, vacuum the subfloor multiple times. Dust is the enemy of good adhesion.
Frequently Asked Questions About Leveling Floors
Can I install hardwood over a slightly sloped floor?
Generally, no. Most hardwood manufacturers specify a maximum allowable deviation, usually around 3/16 inch over 10 feet. Installing over a significantly sloped floor can lead to squeaks, gaps, and warranty issues.
It’s best to level it first.
What’s the difference between a leveler and a patch?
A leveler, often called self-leveling compound, is a liquid that pours and spreads to create a flat surface over a large area or significant low spots. A patch is a thicker material applied with a trowel to fill smaller cracks or specific low spots.
How long does it take for floor leveler to dry?
Cure times vary greatly by product, thickness, and environmental conditions (temperature, humidity). Most self-leveling compounds take 24 to 72 hours to cure enough to walk on or install flooring. Always check the product’s specific instructions.
Do I need to prime concrete before using self-leveling compound?
In most cases, yes. The primer helps the self-leveling compound bond properly to the concrete and prevents air bubbles from forming within the compound as it cures. Always follow the primer and leveler manufacturer’s recommendations.
Can I just put down a thicker underlayment to fix unevenness?
No, underlayment is not designed to fix significant floor unevenness. While some underlayments offer minor cushioning, they cannot compensate for dips or high spots. The subfloor must be properly leveled before installing underlayment and hardwood.
What if my subfloor is made of particle board?
Particle board subfloors can be problematic, especially if they’ve been exposed to moisture. They can swell and degrade. If you have particle board, inspect it very carefully.
If it’s damaged or uneven,
Conclusion
Taking the time to level your subfloor before installing hardwood is one of the most important steps you can take. It ensures a beautiful, durable, and quiet floor. While it might seem like extra work, the payoff is a floor that looks great and lasts for years to come.
Don’t skip this vital part of the process for the best results.