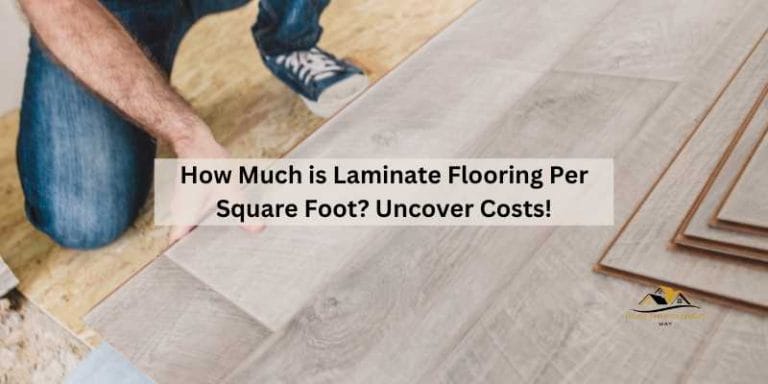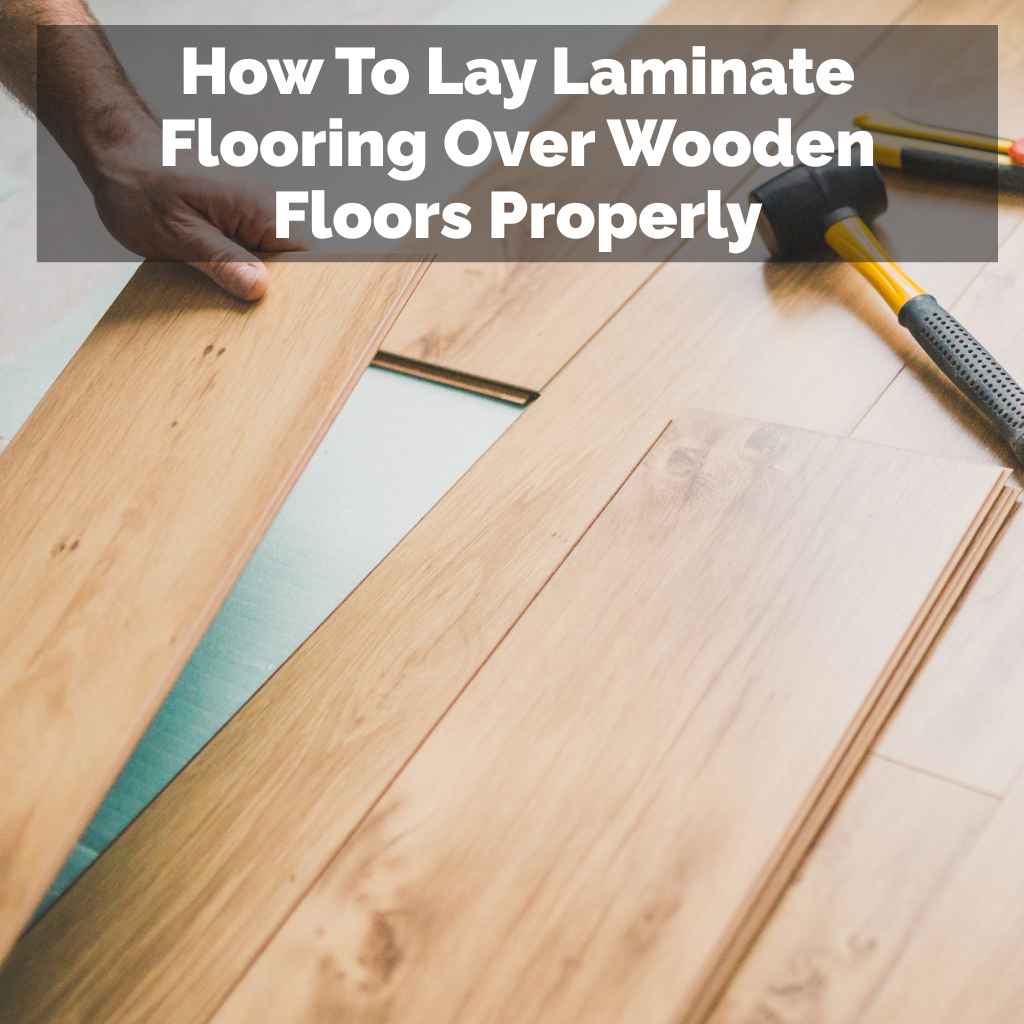
How To Lay Laminate Flooring Over Wooden Floors Properly
Yes, you can often lay laminate flooring directly over an existing wooden floor. Proper preparation of the subfloor is key. This includes ensuring the wood floor is level, clean, and dry.
You will also likely need an underlayment. This helps with moisture, sound, and cushioning.
What Is Laminate Flooring?
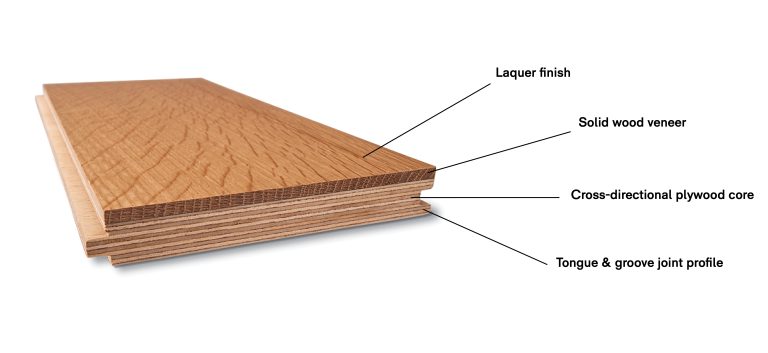
Laminate flooring is a popular choice for many homes. It’s made of layers. The top layer is a clear protective coat.
This stops scratches and stains. Below that is a decorative layer. This is what makes it look like wood, stone, or tile.
Underneath that is a core layer. This is usually made of high-density fiberboard (HDF). It gives the floor its strength.
The bottom layer is a backing. This helps with moisture and stability.
Laminate is known for being tough. It can handle a lot of foot traffic. It’s also easier to clean than many other flooring types.
For families with kids or pets, this is a big plus. It’s a great way to get a beautiful floor without a huge cost. It’s also simpler to install than real wood or tile.
When we talk about laying laminate over a wooden floor, we mean placing the laminate planks on top of the existing wood. This works because laminate often floats. This means it isn’t glued or nailed down directly to the subfloor.
Instead, the planks lock together. The floor then rests on the underlayment and the old floor. This is a big reason why it’s a good option for existing wood.
The Story of My First Over-Floor Project
I remember my first time trying to lay laminate over an old wood floor. It was in a small guest room at my parents’ house. The original oak floor was worn out.
It had scratches and a faded finish. I thought, “I’ll just throw some new laminate right on top!” It seemed so easy in the videos. I bought the cheapest laminate I could find.
I also grabbed some thin foam underlayment.
I started laying planks. They clicked together. It looked okay at first.
Then, I noticed it. The floor wasn’t perfectly flat. There were a few spots where the old wood was a bit uneven.
My new laminate planks started to feel soft when I walked on them. Some even creaked. It was an annoying sound.
I felt a knot of worry in my stomach. This wasn’t the solid, beautiful floor I had imagined. It felt cheap and unstable.
I had rushed the preparation step. That was my big mistake.
Understanding Your Existing Wood Floor
Before you buy anything new, take a good look at the wood floor underneath. Is it solid wood or engineered wood? Both can work.
But is it flat? Are there any loose boards? Does it feel sturdy when you walk on it?
These are important questions. A good base makes a good new floor. If the old floor has major issues, you might need to fix those first.
Or, you might need a different approach entirely. It’s all about starting with a solid plan.
Preparing Your Wooden Subfloor
This is the most critical step. It’s where many DIYers run into trouble. Your goal is a flat, clean, and stable surface.
Your wooden floor is your subfloor in this case. So, it needs to be in good shape.
First, clean the floor very well. Sweep and then vacuum. You want to get rid of all dust and dirt.
Any grit left behind can cause problems. It might shift under the new flooring. It could even scratch the underlayment or the laminate itself.
Next, check for flatness. Most laminate manufacturers say the subfloor should not have more than a 3/16-inch difference over a 10-foot span. This means it needs to be pretty level.
Use a long, straight board or a level tool. Lay it across the floor in many spots. If you find dips or high spots, you need to fix them.
For low spots, you can use a self-leveling compound. This is a special mix you pour. It spreads out to create a flat surface.
Let it dry completely according to the product’s instructions.
For high spots, you might need to sand them down. A floor sander can help with larger areas. For small bumps, a hand sander might work.
Be careful not to create new dips while leveling. If you have loose boards, you need to secure them. Use screws to fasten them down.
Make sure the screw heads are sunk slightly below the surface. This prevents them from catching on the new flooring.
Also, check for any old adhesive or paint. If it’s peeling up, scrape it off. You want a smooth surface.
Moisture is another enemy. Make sure the wood floor is dry. If you live in a humid area or have a basement below, consider a moisture barrier.
Some underlayments have this built-in. You might need a separate plastic sheeting layer. This is especially true if you’re on the ground floor or in a basement.
When is the Existing Wood Floor NOT Suitable?
There are times when you shouldn’t lay laminate over wood. If the wood floor is very warped or cupped, it’s a problem. Significant sagging or soft spots mean the wood is failing.
If there’s mold or mildew, you must address that first. Water damage is another big red flag. Also, if the wood floor is not installed directly over joists and has significant flex, it might not be strong enough.
In these cases, removing the old floor to get to the structural subfloor is usually the best plan.
Choosing the Right Underlayment
The underlayment is a layer that goes between your old floor and the new laminate. It’s super important. Don’t skip it!
It does a few jobs.
First, it acts as a cushion. This makes your new laminate floor feel softer underfoot. It also helps to absorb sound.
This means less noise when you walk. It’s also great for apartments or homes where noise is a concern. Think of it as adding comfort and quiet.
Second, it helps with minor imperfections. Even after you’ve leveled your wood floor, there might be tiny gaps. The underlayment can fill these.
This gives the laminate planks a smooth, even surface to rest on. This stops them from flexing and creating squeaks or cracks.
Third, and very important for wood subfloors, it can provide a moisture barrier. Wood can hold moisture. If moisture comes up from the ground or a basement, it can damage the laminate.
A good underlayment can stop this. Look for products that specifically mention moisture resistance or a vapor barrier. Some are just foam.
Others are made of rubber or felt.
There are different types of underlayment. Foam underlayment is common. It’s light and easy to work with.
It offers good cushioning and sound reduction. Felt underlayment is denser. It can offer better soundproofing.
Rubber underlayment is also very dense. It’s great for sound and moisture. Some products are combined.
They offer multiple benefits in one layer.
Always check the laminate flooring manufacturer’s recommendations. They will tell you what type of underlayment is best for their product. They might also have specific rules about moisture barriers.
Using the wrong underlayment could void your warranty.
Quick-Scan Underlayment Choices
- Foam: Light, good cushion, decent sound.
- Felt: Denser, better sound blocking.
- Rubber: Dense, excellent sound and moisture control.
- Combination: Often includes moisture barrier.
Always check your laminate’s warranty for approved types.
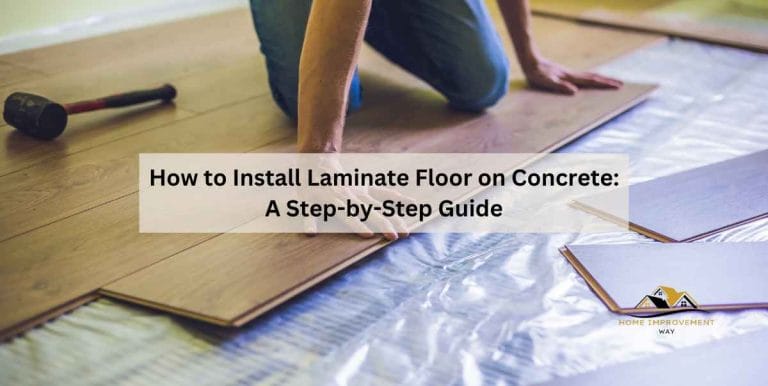
How to Install Laminate Flooring
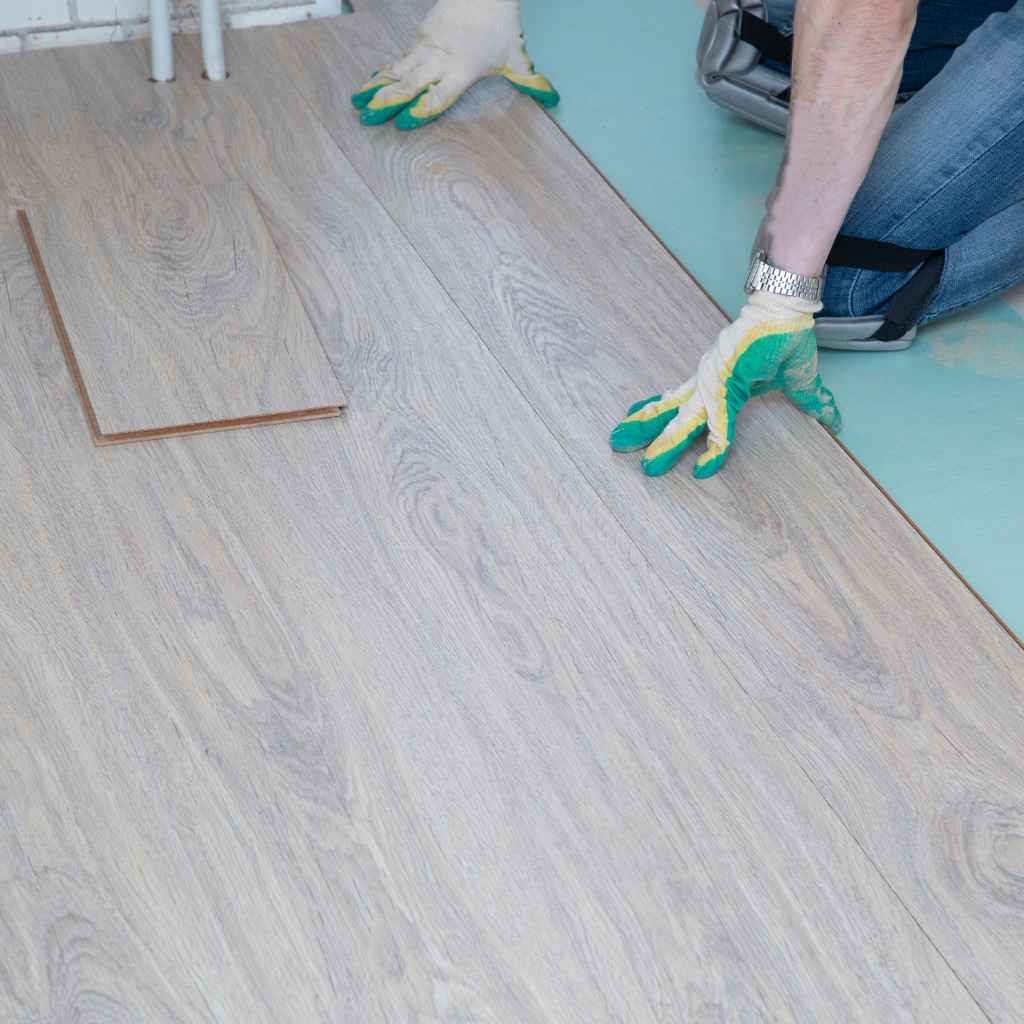
Once your old wood floor is prepped and you have your underlayment, you’re ready to install. Most modern laminate flooring uses a click-lock system. This makes it pretty straightforward.
Start in a corner of the room. You usually want to start along the longest wall. This is often the best look.
Make sure to leave an expansion gap around the edges. This gap is usually about 1/4 to 1/2 inch. It allows the floor to expand and contract with temperature changes.
You can use spacers to maintain this gap. Most laminate kits come with spacers or you can buy them.
Lay your first plank with the tongue side facing the wall. You may need to cut off the tongue on the first row of planks. This gives you a clean edge against the wall.
The tongue-and-groove system is designed so that you often only need the groove side facing the wall. Or, you might need to cut off both tongues for the first row. Check your specific flooring’s instructions.
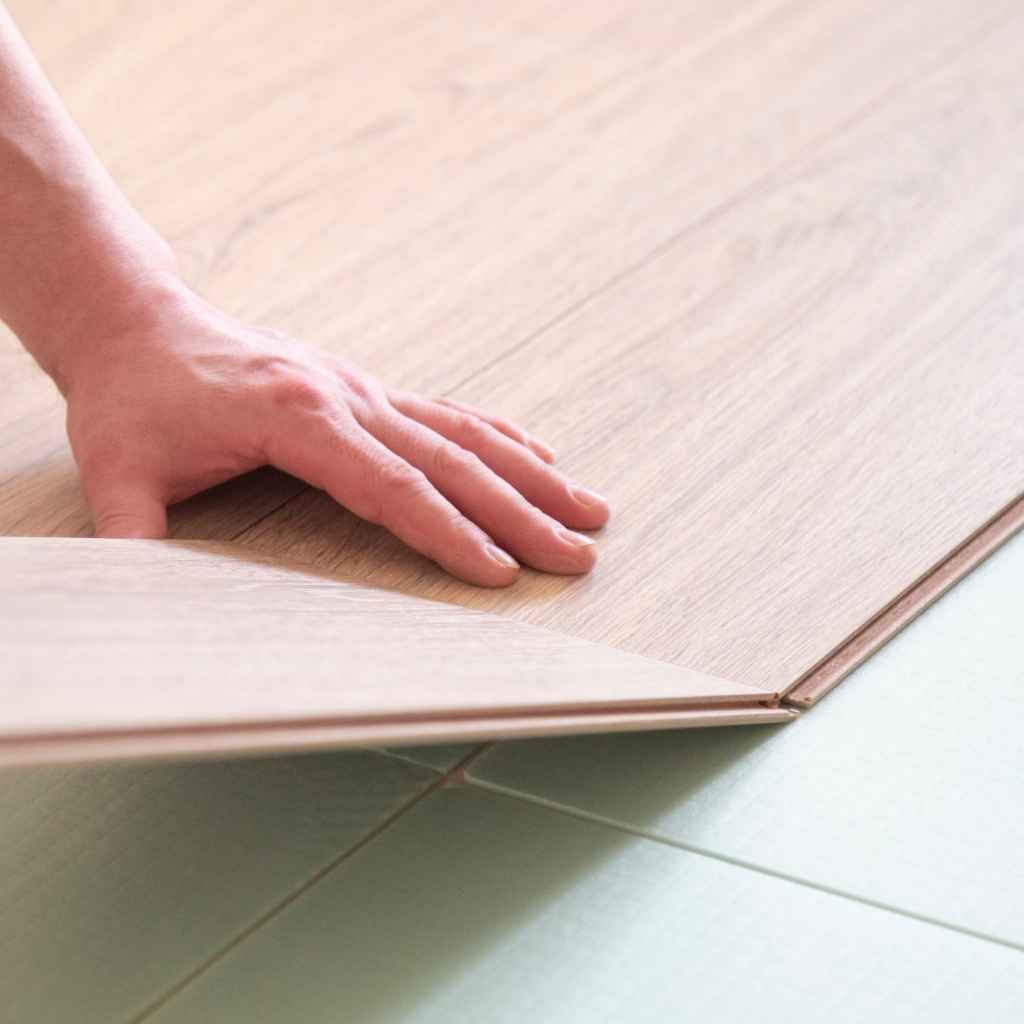
To connect the next plank, slide the long edge into the groove of the first plank. Then, gently tap it into place with a rubber mallet and a tapping block. The tapping block protects the edge of the plank.
You are aiming for a tight seam. No gaps should be visible between planks.
Continue along the first row. For the last plank in the row, you might need to measure and cut it. Leave your expansion gap.
To fit the last plank, you might need a pull bar. This tool helps you pry the plank into place. It’s especially useful when you’re close to the wall.
For the second row, start with the piece you cut off from the end of the first row. This helps to stagger the seams. This is called a brick pattern or offset.
Aim for seams that are at least 6 to 8 inches apart from the seams in the row next to it. This gives the floor strength and looks better.
Connect the long edge of the second row plank to the first row plank. Then, angle the short end of the second row plank into the groove of the previous plank in the same row. Gently lower it down.
Then, tap it closed. You might need to use the tapping block again. Or, some systems allow you to just push them together firmly.
Continue this process row by row. Always check your seams to ensure they are tight. Use your spacers against the walls.
When you reach the last row, you will likely need to cut the planks lengthwise. Make sure to leave your expansion gap. A pull bar is essential for locking these last planks in place.
Around doorways and other obstacles, you might need to do some tricky cuts. Use a jigsaw for curved cuts. For straight cuts, a miter saw or circular saw works well.
Always wear safety glasses when cutting. Measure twice, cut once!
Essential Tools for Laminate Installation
- Measuring tape
- Pencil
- Utility knife (for scoring some cuts)
- Jigsaw (for curved cuts around door frames)
- Miter saw or circular saw (for straight cuts)
- Rubber mallet
- Tapping block (to protect plank edges)
- Pull bar (for tight seams against walls)
- Spacers (to maintain expansion gaps)
- Safety glasses
- Work gloves
- Knee pads (highly recommended!)
Dealing with Transitions and Trim
Once the main floor is laid, you’ll need to finish the edges. This is where transitions and trim come in. Transitions are used where your new laminate floor meets another type of flooring.
This could be tile, carpet, or a different height of flooring. You might use a T-molding. This is a flat strip that bridges the gap.
Or you might use a reducer. This creates a smooth slope.
The trim around the walls is called baseboard or quarter round. If your existing baseboards are in good shape, you can usually leave them. You’ll need to remove them carefully before installing the laminate.
Then, reattach them after the floor is down. You’ll need to cut the bottom edge of the baseboard so it covers the expansion gap. Or, you can add a thin piece of quarter round molding along the bottom of the baseboard.
This fills the gap neatly.
Make sure your cuts are precise. A miter saw is best for getting clean angles on trim and transition pieces. Take your time here.
This is what gives your floor a finished, professional look.
Transition Types Explained
- T-Molding: Used when two floors of the same height meet.
- Reducer: Used when a laminate floor meets a lower floor. Creates a gradual slope.
- End Cap: Used at doorways where the laminate ends.
- Stair Nose: Used on the edge of stairs.
Real-World Considerations for Over-Wood Installation
Living in different parts of the U.S. can change how you approach this. For example, in humid Southern states, moisture is a bigger concern.
You might need a more robust moisture barrier. Using a plastic sheeting underlayment is a good idea. In dry desert climates, expansion and contraction might be more pronounced.
Ensure you maintain those expansion gaps correctly. Cold climates can also affect the wood. Wood expands and contracts with seasonal changes.
Habits also play a role. If you have a muddy entryway, you’ll want a durable mat right at the door. This keeps dirt and moisture off the new floor.
If you have pets that track water, be diligent about wiping up spills. Kids might drag toys across the floor. While laminate is tough, sharp objects can still scratch or dent it.
The type of wood floor you have matters too. Old, narrow hardwood planks might have more gaps between them than wider planks. These gaps will need to be filled or accounted for.
If the wood is unfinished or has a very rough texture, it might require more prep work. Some very old, soft woods might dent more easily, even with laminate on top. It’s always wise to test a small, hidden area if you’re unsure.
User behavior is key to longevity. Treating your floor with care makes it last. Don’t drag heavy furniture.
Use felt pads on furniture legs. Clean spills quickly. Use cleaning products recommended by the laminate manufacturer.
Avoid using too much water. A damp mop is usually best.
Observational Flow: Wood Floor Prep
Step 1: Inspect
Walk the floor. Check for loose boards, warps, or significant dips/humps.
Step 2: Clean Thoroughly
Sweep, vacuum, and maybe even damp mop to remove all dirt and debris.
Step 3: Leveling
Use a level and straight edge. Mark any areas needing adjustment.
Step 4: Fix Low Spots
Apply self-leveling compound. Let it cure fully.
Step 5: Fix High Spots
Sand down any raised areas. Ensure smoothness.
Step 6: Secure Loose Boards
Screw down any wobbly planks. Countersink screws.
Step 7: Check Moisture
Ensure the wood is dry. Consider a moisture barrier if needed.
What This Means for Your Home
When is laying laminate over wood just fine? It’s normal if your existing wood floor is relatively sound. It’s level enough.
It doesn’t have major damage like rot or deep water stains. It feels solid underfoot. This means the old floor can provide a good base for your new laminate.
When should you worry? If the wood floor is loose and creaks badly. If it’s warped or has significant dips or hills.
If you see signs of mold or severe water damage. These are signs the wood floor itself needs repair or
Here are some simple checks you can do. Stand in different parts of the room. Jump lightly.
Does the floor feel solid? Or does it flex and bounce? Press down firmly on boards near the walls.
Are they stiff? Or do they move a lot? Run a long level or straight edge across the floor.
Note any gaps wider than a nickel.
If you have access to a crawl space or basement, check the condition of the joists and subfloor from below. Are the joists straight? Is the wood subfloor solid?
This can give you clues about the overall stability.
Normal vs. Concerning Wood Floor Signs
Normal:
- Minor scratches or wear marks.
- Slight color fading.
- A few small gaps between boards (less than 1/8 inch).
- Solid feel when walking.
Concerning:
- Cupping or crowning of boards (edges up or down).
- Significant sagging or dips.
- Loose boards that creak loudly.
- Water stains, mold, or mildew.
- Visible damage or rot.
Quick Tips for Success
Always read the specific installation instructions for your chosen laminate flooring. They are the ultimate guide for that product. Don’t rely solely on general advice.
Work from left to right. This is often more comfortable for right-handed people. But adapt to what feels best for you.
When cutting planks, make sure your saw blade is sharp. A dull blade can chip the laminate. Always measure your cuts carefully.
It’s better to have a plank that’s slightly too long and trim it down. It’s harder to add length back.
Clean up dust as you go. Laminate dust can be fine and get everywhere. A shop vac is your best friend here.
For tight spaces, like closets, install the laminate last. This ensures you don’t have to cut tiny, awkward pieces for those areas. You can cut the main room’s laminate to fit snugly against the closet opening.
If you are laying laminate in a room that has significant humidity fluctuations (like a bathroom or laundry room), be extra vigilant about moisture. Even with a barrier, prolonged direct water contact can damage laminate. Many laminate products are not recommended for full bathrooms.
Consider the direction of the planks. Laying planks parallel to the longest wall can make the room appear larger. If you have a long, narrow room, laying them across the width can make it feel more square.
Laying Laminate: Key Takeaways
Prep is Paramount: A level, clean, and dry subfloor is non-negotiable.
Underlayment Matters: Choose the right type for cushioning, sound, and moisture control.
Expansion Gaps: Always leave space around the edges for movement.
Stagger Seams: Create a strong and visually appealing floor.
Manufacturer’s Instructions: Follow them closely for best results and warranty coverage.
Frequently Asked Questions
Can I lay laminate flooring over old, painted wooden floors?
Yes, you often can lay laminate over painted wood floors. The key is ensuring the paint is not peeling or flaking. If it is, you’ll need to scrape or sand it smooth.
Any loose paint can create an uneven surface or come up later. Make sure the paint itself is well adhered.
What happens if my wooden subfloor has gaps between the boards?
Small gaps (less than 1/8 inch) are usually fine, especially with a good underlayment. Larger gaps can cause problems. They might let the underlayment sink down.
This makes the laminate flex. You can fill wider gaps with a wood filler or even sawdust mixed with wood glue. Let it dry completely before installing the underlayment and laminate.
How long should my new laminate floor last when laid over wood?
With proper installation and care, laminate flooring can last 10 to 25 years. The lifespan depends on the quality of the laminate, the quality of the installation, and how well you maintain it. A well-prepared wood subfloor is crucial for reaching the higher end of this range.
Do I need a moisture barrier if my wood floor is upstairs?
Even on an upper floor, moisture can be a concern. Leaks from plumbing, spills, or high humidity can affect the wood. It’s generally a good idea to use an underlayment with a built-in moisture barrier or add a separate vapor barrier.
Check the laminate manufacturer’s warranty for their specific recommendations.
Can I lay laminate over engineered wood flooring?
Yes, you can often lay laminate over engineered wood. The key is that the engineered wood floor itself is stable, flat, and securely attached. Engineered wood is generally more stable than solid wood.
But it still needs to meet the same flatness and stability requirements for the laminate.
What’s the difference between laying laminate over wood and laying it on concrete?
Laying laminate over concrete usually requires a specific type of underlayment. It often needs a more robust moisture barrier because concrete is porous and can transmit moisture from the ground. Wood subfloors are typically warmer and drier, but their main concern is flatness and structural integrity.
Both require careful preparation.
Conclusion
Laying laminate flooring over an existing wooden floor is a smart way to update your home. It saves time and money. The most important part is preparation.
A solid, flat, and clean base will ensure your new floor looks amazing and lasts for years. Take your time, follow the steps, and enjoy your beautiful new floor!