Paint Removal Guide for Every Surface in the House
Match the remover to the surface, paint type, paint age, and finish condition; start with the least aggressive option, and avoid solvents or heat on plastic, laminate, veneer, or any older material until you know it is safe. Get this wrong and you can melt plastic, raise wood grain, etch stone, strip factory finishes, or spread lead dust. I use this framework on every paint-removal job because it tells you what to use, what to avoid, and when to step up or call a pro for each common household surface.
Start here: match the remover to the surface, not the stain

The four checks before you touch the paint
Most removal mistakes happen because people treat the paint as the whole problem. The substrate sets the limit. Check paint type first, then hardness, porosity, and finish condition.
Hard surfaces such as glass and steel can often take careful scraping. Soft surfaces such as vinyl, acrylic, carpet, upholstery, and softwood trim can mark quickly. Porous materials like concrete, brick, grout, and fabric can let paint sink below the top layer, so surface wiping may do very little.
Finish condition matters just as much. Polyurethane, factory clear coats, laminate faces, veneer glue lines, caulk, and rubber seals often soften or stain before the paint gives up.
The least-aggressive escalation path that prevents most damage
- Identify latex or oil-based paint.
- Try warm water with a little dish soap on fresh paint or paint that still dents with a fingernail.
- Lift residue with a plastic putty knife or fingernail through a cloth.
- Use rubbing alcohol for a latex spot test and limited latex removal.
- Use mineral spirits for oil-based paint and for some stripper cleanup.
- Use acetone only when you know the surface can tolerate it.
- Move to chemical stripper when scraping starts harming the surface faster than the paint releases.
- Use heat only on suitable substrates and never as a first move on suspected lead paint.
When the substrate matters more than the paint
Several materials fail before the paint does. Plastic can haze. Laminate edges can swell or lift. Veneer can bubble. Grout can discolor. Caulk and sealants can smear, soften, or detach. Those are stop points, not signs to scrub harder.
How do I tell if the paint is latex or oil-based?
Test a hidden spot first, like the back edge of trim, the underside of a sill, or a corner behind hardware. Water-based latex softens in rubbing alcohol, so a dampened cloth or cotton swab that picks up color usually points to latex. If alcohol does little and the paint resists water, treat it as oil-based and move toward mineral spirits rather than stronger solvents.
A quick rubbing alcohol spot test and how to read the result
Dampen a white cloth or swab with rubbing alcohol. Hold it on a small paint spot, then rub lightly. If color transfers and the paint gets gummy, it is likely latex. I use that same alcohol for some dried latex spots, but only after a hidden-area check.
If alcohol leaves the paint hard and unchanged, latex is less likely. At that point, do not jump straight to acetone. Oil-based paint needs mineral spirits or acetone, but acetone is much harsher on nearby finishes and plastics.
How latex and oil-based paints respond
Latex often responds first to water, soap, and alcohol. Oil-based paint often resists those steps. Mineral spirits is usually the next step for oil paint, and I also use it to wipe away some stripper residue. It needs ventilation, clean rags, and patience.
Why mixed layers and old repaints change the plan
Old trim, doors, and masonry often carry mixed coats. A top layer may soften in alcohol while older paint beneath it stays hard. When that happens, stop trying to solve the whole patch with one remover. Work in shallow passes and reset after each layer.
How do I remove paint without damaging the surface?
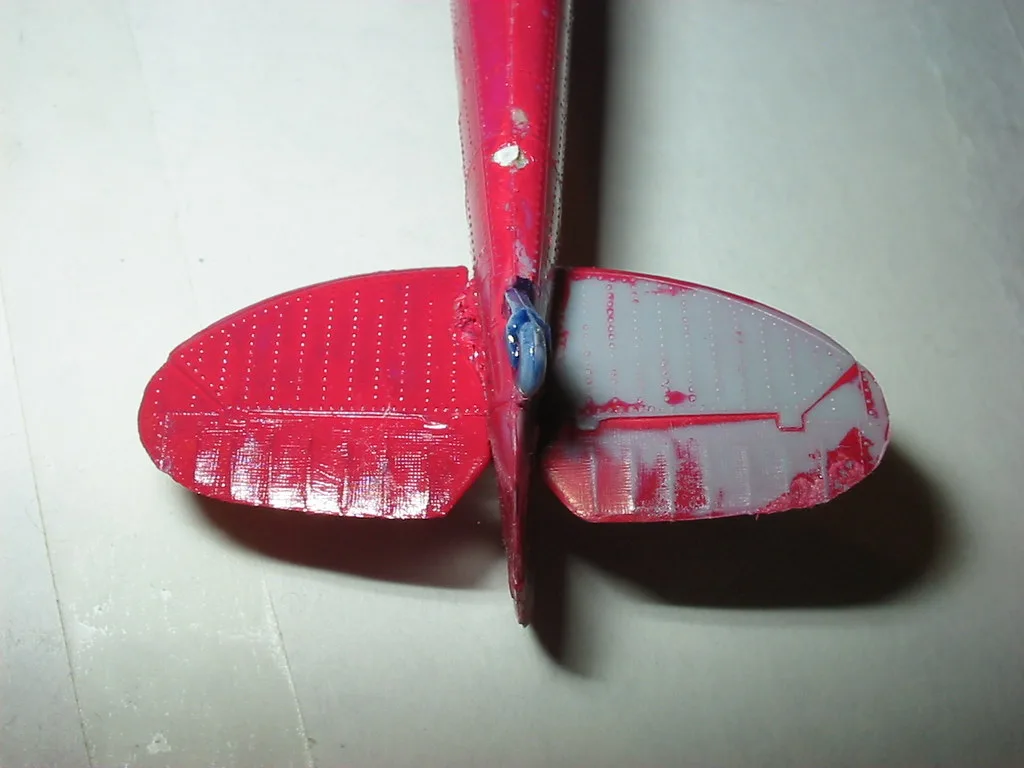
Choose the method by hardness, porosity, and finish sensitivity before choosing a solvent. Hard, non-porous surfaces can often handle gentle scraping. Soft, porous, or finished surfaces usually need blotting, softening, and controlled lifting. Stop as soon as haze, color loss, swelling, tackiness, or gouging appears.
Choose by hardness: hard surfaces versus soft surfaces
Hard surfaces include glass, ceramic tile, and many metals. These tolerate a shallow scraper angle and controlled pressure. Soft surfaces include plastic, acrylic, vinyl, carpet, upholstery, leather, and many clear-coated or painted finishes. They scratch, dent, or smear quickly.
A metal scraper on soft material often creates damage faster than progress. That is where a plastic putty knife earns its place. It is less likely to mar the surface and less likely to cut into clear coats, laminate faces, or plastic trim.
Choose by porosity: sealed surfaces versus absorbent ones
Sealed surfaces keep paint near the top. Glass, sealed tile, sealed countertops, and some painted metals often release with less effort. Absorbent materials behave differently. Concrete, brick, grout, carpet, and fabric pull paint downward, so scrubbing can drive it deeper.
On porous surfaces, rinse control matters. Too much liquid spreads dissolved pigment into nearby pores. That is why I work in small sections, blot often, and extract again instead of flooding the area.
Use the right scraper: when a plastic putty knife beats metal
Use plastic on plastic, vinyl, acrylic, laminate, sealed wood trim, painted trim, and soft metal finishes. Use metal only on hard surfaces that can take it, such as glass or some bare steel, and only with a low angle. The goal is lifting softened paint, not chiseling it off.
Stop signs that mean your current method is harming the substrate
- Plastic turns dull, cloudy, sticky, or soft.
- Wood finish gets tacky or the stain starts transferring to the rag.
- Laminate edge swells or the seam darkens.
- Veneer lifts at corners.
- Grout changes color as the remover sits.
- Caulk or rubber seals swell, smear, or pull loose.
- Scraping leaves bright scratches before paint starts moving.
What is the safest way to remove dried paint?
The safest route is usually mild cleaning, then mechanical lift, then a paint-matched solvent, with stripper or heat held back until clear stop points are met. Dried paint is harder than fresh paint, but forcing removal early often damages finishes, plastics, grout, or soft fibers first.
Fresh paint versus cured paint: what changes
Fresh paint sits on the surface longer. Cured paint bonds tighter, shrinks into texture, and often crosses into seams and pores. That means the same wipe that works on a fresh splatter may leave a cured one untouched.
First-line methods that work before solvents come out
Try warm water and dish soap on fresh or recent latex. On hard surfaces, let the moisture dwell briefly, then lift with a plastic putty knife. On fabric and carpet, carpet paint removal should blot, not rub. Rubbing drives pigment deeper and frays fibers.
On glass and ceramic tile, softened drips often release with a careful scraper pass. On wood, trim, laminate, and plastics, avoid hard scraping until a spot test shows the finish is stable.
When to step up to mineral spirits, acetone, stripper, or heat
Use mineral spirits when the paint behaves like oil-based or when stripper residue needs removal. Keep air moving. Change rags often so dissolved paint does not spread.
Use acetone only for stubborn paint on materials known to tolerate it. It can attack finishes, adhesives, acrylics, and many plastics. Plastic should avoid paint thinners because they can melt it, and a hidden-area spot test is recommended for acetone on plastic.
Move to chemical stripper when paint is thick, layered, or bonded into profile details, and scraping is starting to gouge. Heat comes last, and only where fumes, scorch marks, and old-paint risks are under control.
How to clean residue so the surface does not stay tacky or stained
Residue is where many DIY jobs go sideways. Wipe latex residue with clean damp cloths until the cloth stays clean. Wipe oily residue with mineral spirits, then follow with the surface-appropriate cleaner so dust does not stick later.
On porous surfaces, blot out residue instead of washing it across the field. On grout, stone, and unsealed masonry, keep the wet edge tight to avoid halos.
Surface-by-surface methods for hard, finished materials
Wood and trim: preserving stain, polyurethane, veneer, and paintable surfaces
Start by deciding whether the wood surface is meant to stay finished or be repainted. For stained wood or polyurethane, mild soap and water is the first move for fresh latex only. For dried latex, a careful alcohol spot test may work on the paint, but stop if the finish softens.
On painted trim that will stay painted, a plastic putty knife plus warm soapy water is the safest start. For stubborn oil-based drips, use mineral spirits on a cloth, not poured onto the trim. Veneer needs extra caution. Solvent at the edge can loosen glue lines, and heavy scraping can lift the face.
Failure cases: softened clear coat, color transfer from stain, raised grain, lifted veneer, and swollen miter joints.
Metal: bare steel, painted metal, aluminum, and hardware
Bare steel tolerates more scraping than most surfaces. Painted metal does not. Factory-coated aluminum scratches and dulls fast, so start with soap and water for latex, then alcohol or mineral spirits based on paint type.
For removable metal hardware, for metal hardware, simmering in water with baking soda can remove paint. I have freed up old hinges and knobs this way without grinding on the visible face. Keep clear-coated or plated hardware out of aggressive solvent baths unless a hidden test says the finish can take it.
Failure cases: scratched clear coat, bright scratch lines in aluminum, softened gasket material, and solvent trapped behind hardware plates.
Glass, tile, stone, and sealed countertops: safe scraping and residue cleanup
Glass is one place where scraping is often the first move. Wet the paint first, then use a low-angle scraper carefully. Tile behaves similarly on the glazed face, but grout joints do not. Avoid dragging dissolved paint into the grout.
Stone and solid-surface counters vary. Sealed stone may tolerate gentle lifting and mild cleaners. Unsealed or acid-sensitive stone can darken or etch. Acetone and stripper can leave a dull patch or break down nearby caulk. Mask the edge before working close to seams, backsplashes, or sink sealant.
Plastic, vinyl, laminate, and acrylic: where solvents go wrong fast
This group gets damaged faster than the paint releases. Start dry, with a fingernail through a cloth or a plastic putty knife. If the paint is latex, try a tiny rubbing alcohol test. Keep it local. Wipe immediately.
Do not start with paint thinner, acetone, or generic solvent blends. Plastic should avoid paint thinners because they can melt it. Acrylic and clear plastics can haze from a very short solvent contact. Laminate can survive the face but fail at the edge, where moisture and solvent wick into the core.
Failure cases: haze on plastic, softened vinyl, lifted laminate edge, sticky acrylic, and damaged printed finishes.
Surface-by-surface methods for porous and soft materials
Concrete and brick: lifting paint out of pores without spreading it deeper
Concrete and brick trap paint below the surface. Start by removing what sits proud with a plastic scraper. For latex, use controlled wetting and blotting rather than broad washing. For oil-based paint, use mineral spirits sparingly and extract the softened paint with absorbent cloths.
If the paint remains in the pores after several light passes, a chemical stripper made for masonry is usually the next step. Apply enough for full contact and wait until the paint bubbles. Then lift and collect the sludge before it re-sets in the pores.
Failure cases: bigger stain rings, deeper color spread, white haze from residue, and softened nearby caulk or sealant at control joints.
Grout and unsealed stone: stain risk, dwell time, and rinse control
Grout is porous and often softer than the tile around it. Solvent can carry pigment into the joint, and stripper can bleach or darken it. Work the tile face first. Then spot-treat the grout line with minimal liquid and quick pickup.
Unsealed stone deserves the same restraint. Long dwell times can leave a shadow even if the paint comes off. If the grout or stone changes tone before the paint loosens, stop and switch methods.
Carpet and upholstery: blotting, lifting, and when a stain becomes permanent
On carpet and upholstery, speed matters more than force. Carpet paint removal should blot, not rub. Blot fresh latex with water and a clean cloth. Lift with a spoon edge or plastic scraper if there is a surface skin. Repeat from the outside toward the center.
For dried latex, lightly moisten, wait, then blot again. For oil-based paint, use a very small amount of mineral spirits on a hidden spot first, and blot onto a clean cloth. Large spills, old set-in paint, or delicate upholstery often reach a cutoff point where more solvent only spreads the stain or damages backing and dye.
Failure cases: smeared paint deeper into pile, fuzzy texture, dye transfer, adhesive failure in carpet backing, and water rings in upholstery.
Clothing, leather, and other absorbent materials: salvage odds and cutoff points
Clothing can sometimes release fresh latex with repeated rinsing and blotting. Dried paint in woven fibers is much harder. Leather is a special case. Water can spot it, alcohol can strip finish, and solvent can stiffen it. Once color or finish starts moving, the goal shifts from full removal to limiting damage.
When should I stop scraping and use a chemical stripper or heat gun?
Stop scraping when the surface starts losing material, finish, or gloss faster than the paint is releasing. That is the tipping point for a chemical stripper on suitable materials. Heat is a later option for thick paint on stable substrates, but not for plastics, laminates, or suspected lead paint.
The tipping point where scraping causes more damage than progress
If each pass leaves scratches, bare spots in the finish, lifted veneer, fuzzed carpet, or whitened plastic, scraping has already gone too far. Change the chemistry before increasing pressure. More force rarely fixes a compatibility mistake.
Chemical stripper: dwell time, bubbling paint, residue removal, and caustic risk
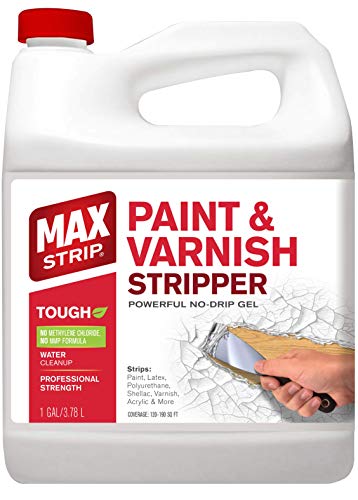
Chemical stripper works by softening the bond until the paint lifts. Apply it evenly and wait for visible bubbling before scraping. Chemical strippers can burn skin and require PPE. That warning matters more here than a generic glove reminder, because splashes often happen during scraping and cleanup.
Some DIY users prefer gentler gel products. Lily Ardor recommends Citri Strip as a safer option. Lily Ardor says to wrap stripper with Saran wrap while wet, and Lily Ardor recommends letting it sit up to an hour. That approach helps keep the stripper active on vertical or detailed surfaces.
Older cans need extra caution. Older cans can contain methylene chloride, and methylene chloride was prohibited in consumer removers after Nov. 22, 2019. If an old remover has unclear labeling or harsh fumes, do not assume it matches current consumer products.
After stripping, collect the softened paint fully. Then use mineral spirits where appropriate to remove oily residue so the surface does not stay tacky.
Heat gun: where it works, where it scorches, and fume concerns
Heat can soften thick paint on solid wood, some metal, and heavy trim profiles. It can also scorch wood, crack old glazing, soften adhesives, and release unpleasant fumes. Keep heat away from plastic, vinyl, laminate, acrylic, caulk, and insulated glass edge seals.
Lead rules matter here. EPA warns against heat guns hotter than 1,100°F on old paint. If the paint may be old enough for lead, heat is not the first answer.
Why heat and dry removal are the wrong move for suspected lead paint
Pre-1978 paint should be treated as lead paint. EPA warns against dry-scraping lead paint. That rules out the common instinct to attack old paint with aggressive scraping or power sanding. Use wet methods, tight cleanup, and know when the project has crossed into pro territory.
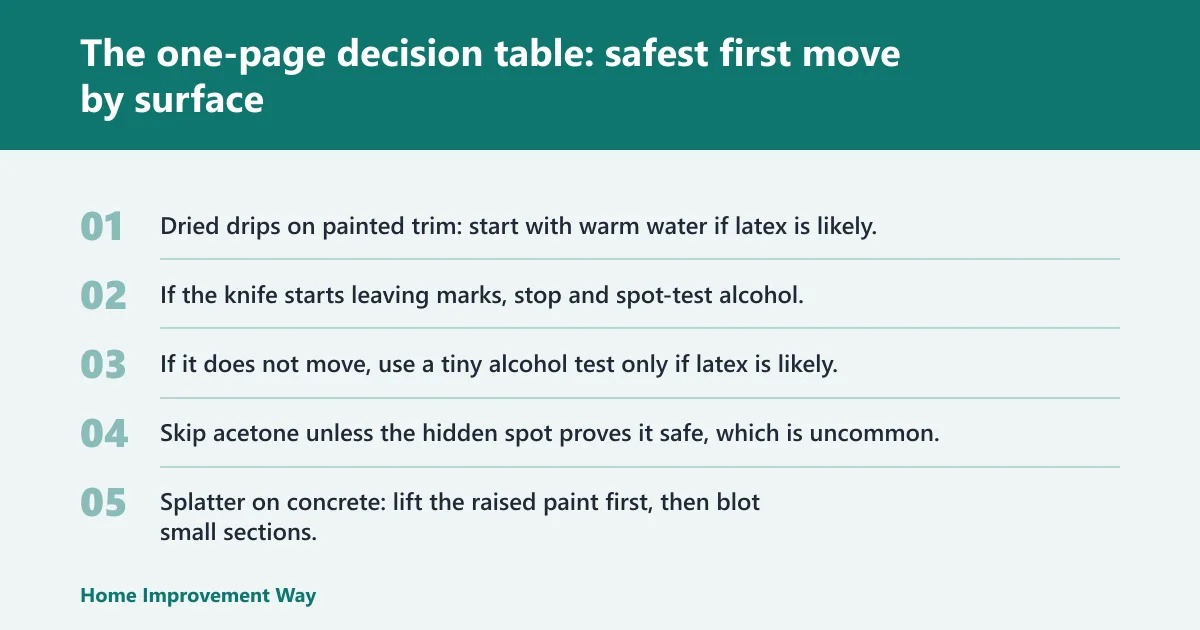
The one-page decision table: safest first move by surface
How to read the matrix: surface, paint type, first-line method, escalation, red flags, and difficulty
| Surface | Paint type | Safest first-line method | Escalation method | Red flags | Expected difficulty |
|---|---|---|---|---|---|
| Finished wood trim | Latex | Warm soapy water, plastic putty knife | Hidden alcohol test, then stripper on paintable areas only | Tacky finish, stain transfer, raised grain | Medium |
| Finished wood trim | Oil-based | Mineral spirits on cloth | Stripper if scraping marks the finish | Softened polyurethane, lifted veneer edge | High |
| Bare steel hardware | Mixed old paint | Lift loose paint, simmer with baking soda if removable | Stripper or controlled heat | Plating loss, trapped sludge in joints | Medium |
| Painted metal or aluminum | Latex or oil-based | Soap and water or mineral spirits based on test | Stripper safe for coated metal | Gloss loss, bright scratches, seal damage | Medium |
| Glass | Latex or oil-based | Wet surface, careful scraping | Small solvent wipe for residue | Scratched glass from grit under blade | Low |
| Tile face | Latex | Soapy water, plastic scraper | Alcohol or stripper on spot only | Paint driven into grout | Low |
| Grout | Latex or oil-based | Spot blotting, minimal liquid | Masonry-safe stripper | Discoloration, halo staining | High |
| Plastic or acrylic | Latex | Dry lift, plastic putty knife, tiny alcohol test | Stop early; replace part if finish clouds | Haze, softening, stickiness | High |
| Laminate | Latex or oil-based | Dry lift, damp cloth only on face | Very limited solvent after hidden test | Edge swell, lifted seam, dull face | High |
| Concrete or brick | Latex | Lift surface film, controlled wet blotting | Masonry stripper | Bigger stain ring, color spread | High |
| Carpet | Latex | Blot with water, lift skin gently | Repeat blotting; stop before pile fuzzes | Smearing, fiber distortion | Medium |
| Carpet | Oil-based | Hidden test, tiny mineral spirits blot | Professional cleaning or patching | Dye bleed, backing damage | High |
Fast picks for common DIY cases: dried drips on trim, overspray on plastic, splatter on concrete
Dried drips on painted trim: start with warm water if latex is likely, then a plastic putty knife. If the knife starts leaving marks, stop and spot-test alcohol.
Overspray on plastic: try dry lifting first. If it does not move, use a tiny alcohol test only if latex is likely. Skip acetone unless the hidden spot proves it safe, which is uncommon.
Splatter on concrete: lift the raised paint first, then blot small sections. If color remains in the pores after a few rounds, switch to masonry stripper rather than flooding the slab.
Cost, time, and mess tradeoffs readers should expect before they start
Soap, water, and plastic scraping are slow but low-mess. Mineral spirits adds odor and rag waste but stays manageable on small spots. Stripper saves scraping time on thick paint yet creates the most cleanup. Heat reduces chemical mess on suitable surfaces, but scorch risk and fume control make it a poor shortcut indoors.
How do I know if old paint might contain lead?
If the surface was painted before 1978, treat it as lead paint until testing proves otherwise. Use wet methods, contain debris, and avoid dry scraping, sanding, or hot heat-gun work. Once the job creates dust, multiple layers, or large disturbed areas, the safe choice may be to stop and call a lead-certified pro.
Treat pre-1978 paint as lead until proven otherwise
Pre-1978 paint should be treated as lead paint. That means no casual dry scraping, no power sanding, and no heat-first approach on old windows, trim, doors, railings, or built-ins. Keep the work small and damp.
Wet methods, containment, and cleanup rules for DIY-safe decision making
Use damp wipes, damp scraping where appropriate, and disposable collection materials. Keep debris contained to the immediate work zone. Bag waste promptly. Do not track dust into other rooms on shoes, tools, or drop cloths.
Jobs to stop and hand off to a lead-certified pro
Stop when the paint is failing over a broad area, when power tools seem like the only practical path, when the item has friction surfaces like old windows, or when children or pregnant occupants are in the space. At that point, surface preservation and dust control need a different level of setup.
Frequently asked questions
What removes paint from plastic without melting it?
The safest start is dry lifting with a fingernail through cloth or a plastic putty knife, then a tiny hidden test with rubbing alcohol if latex is likely. Avoid paint thinners on plastic because they can melt it, and treat acetone as a last resort after a hidden-area test.
What should I use to remove paint from metal or wood?
On metal, start with soap and water for fresh latex or mineral spirits for likely oil-based paint, then scrape only if the finish can take it. On wood, first protect the finish: use mild cleaning and a plastic putty knife, then limited solvent or stripper if the finish stays stable.
How do I remove paint from carpet before it sets?
Blot immediately with clean cloths and water if the paint is latex. Do not rub, because that drives paint deeper into the pile. Lift any surface skin gently, keep working from the outside toward the center, and stop if the fibers start fuzzing or the backing shows damage.
When should I stop scraping and use a chemical stripper?
Stop scraping when the scraper leaves scratches, gloss loss, lifted veneer, whitened plastic, or fuzzed fibers before the paint releases. That means the substrate is failing first. Switch to a suitable stripper on stable materials, or stop entirely on plastic, laminate, and other solvent-sensitive surfaces.
How do I know if old paint might contain lead?
If the paint dates from before 1978, treat it as lead paint until testing proves otherwise. Use wet methods, keep debris contained, and avoid dry scraping or power sanding. If the work area is large, dusty, or tied to old windows and trim, hand it off to a lead-certified pro.
Sponsored / affiliate links. As an Amazon Associate I earn from qualifying purchases. I may earn additional commission from eligible campaigns.