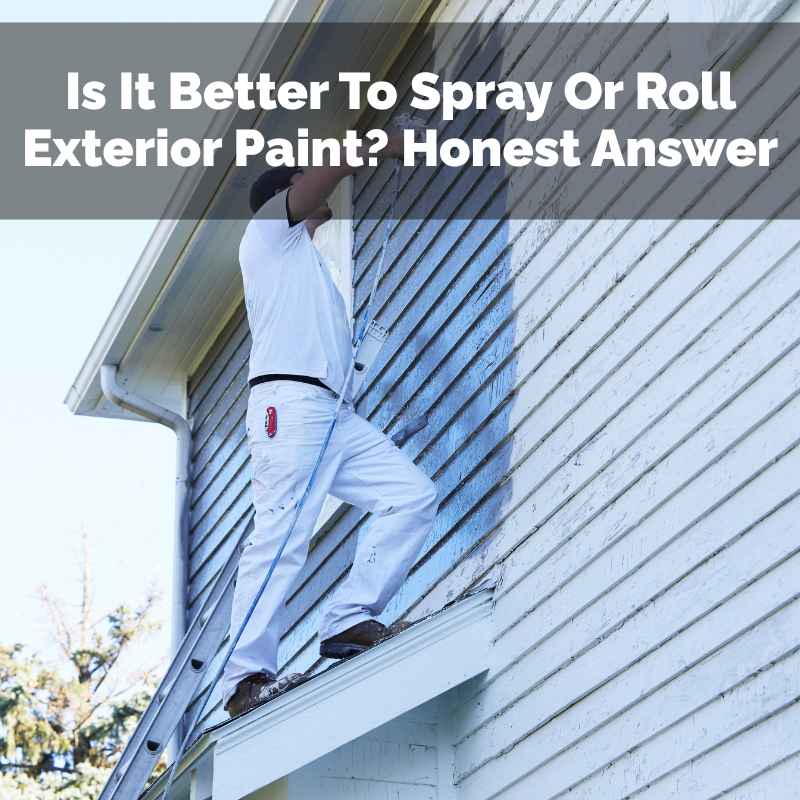
Is It Better To Spray Or Roll Exterior Paint? Honest Answer
Choosing how to apply paint to the outside of your home can feel like a big decision. You want a finish that looks great and lasts a long time. It’s easy to get lost in all the advice out there.
Many people wonder if spraying paint is truly better than rolling it. Let’s break down what makes each method work and when to use them.
Spraying exterior paint offers speed and a smooth finish but requires more prep and skill. Rolling is slower but provides more control, is forgiving, and is often best for textured surfaces or smaller areas, making the choice depend on your project goals, skill level, and desired outcome.
Spraying vs. Rolling Exterior Paint: A Clear Look
When you paint the outside of your house, you have two main choices for how to get that paint onto the walls. You can use a paint sprayer. Or you can use a roller and brush.
Both methods have their own set of benefits and drawbacks. Understanding these differences is key to picking the right one for your project. It’s not always a simple “one is better” answer.
The best choice really depends on what you need to do.
A paint sprayer can cover large areas very quickly. It lays down a thin, even coat of paint. This can create a very smooth look.
However, it needs a lot of careful setup. You must protect everything you don’t want painted. Overspray can be a big problem.
It also takes practice to use one well.
On the other hand, a roller and brush are more familiar tools for many people. They offer great control. You can really work the paint into surfaces.
This is good for rough or textured walls. It takes more time, though. You’ll likely do more physical work.
For DIYers, rollers and brushes are often easier to start with.
So, the question of which is better isn’t a simple yes or no. We need to look at the whole picture. Think about your home’s surfaces.
Consider the look you want. Think about how much time you have. Your own comfort level with tools matters too.
My Experience: The Siding Surprise
I remember helping a friend paint his house a few years back. It was a two-story colonial with a lot of siding. He was convinced that spraying was the only way to go.
“It’ll be done in a weekend!” he declared. We spent the first whole day masking. We covered every window, every door, every plant, the whole driveway.
It felt like we were building a giant plastic fort around his house.
When we finally started spraying, it did go fast. The paint flew on. But then, the wind picked up a little.
Suddenly, paint was drifting onto the neighbor’s pristine white fence. Panic set in. We had to scramble to cover it.
We also found that the spray wasn’t getting into all the nooks and crannies of the old wood siding. We ended up going back over some spots with a brush anyway. By the end of that weekend, my friend looked exhausted.
We were both covered in a fine mist of paint. It taught me a valuable lesson: speed isn’t always the only thing that matters. Sometimes, good old-fashioned control wins out.
Spraying Quick Facts
Pros: Very fast for large, flat areas. Creates a smooth, even finish. Good for tight spaces a roller can’t reach.
Uses less paint if applied correctly.
Cons: Requires extensive masking. High risk of overspray. Needs practice to use well.
Equipment can be expensive. Difficult to control on windy days.
What is Spraying and Why Use It?
Painting by spraying means using a machine to mist paint onto surfaces. This machine pushes paint through a nozzle. It turns the paint into a fine spray.
You hold the sprayer and move it back and forth. This covers the surface with a thin layer of paint.
People choose to spray for a few main reasons. The biggest one is often speed. Spraying can cover a lot of ground very quickly.
This is a huge plus for big houses or buildings. Imagine painting hundreds of square feet in just a few hours. That’s the promise of spraying.
Another reason is the finish. When done right, a spray finish can be incredibly smooth. It looks very professional.
There are no roller marks. There are no brush strokes. This makes it great for smooth surfaces like metal or new wood.
It gives a very sleek look.
Spraying also gets paint into places that are hard to reach. Think about areas with lots of trim or decorative details. A sprayer can get paint into those small gaps and corners.
A roller or brush might miss them or take a long time to cover them.
Finally, some believe spraying can use paint more efficiently. The thin, even coat means less paint is wasted. It doesn’t soak into the surface as much.
This can save money on paint in the long run, if done correctly.
When Spraying Shines Brightest
- Large, Open Surfaces: Think broad siding sections or fences.
- Smooth Finishes: For a factory-like, sleek look on trim or doors.
- Complex Details: Reaching into intricate areas of trim or railings.
- Time Constraints: When you need to paint a lot of area quickly.
The Reality of Spraying: What the Pros Know
Experienced painters know spraying isn’t just about pointing and shooting. There’s a lot more to it. They understand that the preparation is huge.
For a house, this means taping off every single window, door frame, light fixture, and anything else that doesn’t need paint. This can take as long, if not longer, than the actual spraying.
They also know about overspray. This is when paint lands on surfaces you didn’t intend to paint. It can travel quite far, especially if there’s a breeze.
Protecting nearby cars, plants, and even your own roof shingles is vital. If overspray happens, it can be very hard to remove. It might even damage surfaces.
Skilled painters know how to control their spray gun. They move it at a consistent speed. They overlap their passes.
This ensures an even coat. They know how much paint to thin for their specific sprayer. Different paints need different thinning amounts.
This affects how well they spray.
They also understand the best type of sprayer to use. There are different models. Some are for thin paints, others for thicker ones.
Choosing the right one is important for a good outcome.
Finally, they know when spraying is not the best option. For very rough surfaces, like old, pitted stucco, spraying might not fill all the texture. You might end up with a patchy look.
Or on a very windy day, it might be impossible to spray safely or effectively.
Spraying: Key Skills and Considerations
- Masking Mastery: Protecting everything that won’t be painted.
- Overspray Awareness: Planning for and preventing paint drift.
- Consistent Technique: Smooth, overlapping passes for even coverage.
- Paint Thinning: Adjusting paint viscosity for the sprayer.
- Sprayer Choice: Selecting the right tool for the job.
What is Rolling and Why Use It?
Painting with a roller involves dipping a roller cover into paint. Then you spread it onto the surface. You do this in a back-and-forth motion.
A brush is used for edges and smaller areas. This is a method most homeowners are very familiar with.
The main advantage of rolling is control. You can see exactly where the paint is going. You can feel the paint going onto the surface.
This makes it easier to apply the paint evenly. It also lets you work the paint into the texture of the surface. This is great for wood siding with deep grooves or textured walls.
For many people, rolling is also easier to learn. It doesn’t require special training. You don’t need to worry about overspray or complex thinning.
Most people can pick up a roller and start painting. It’s a more forgiving method for beginners.
Cost is another factor. Rollers and brushes are less expensive upfront than most paint sprayers. You can often rent a sprayer, but buying one can be a big investment.
For smaller jobs, or if you only paint occasionally, rolling is usually more budget-friendly.
When you roll, you can also see problems as you go. If you miss a spot, or if the coverage isn’t right, you can easily fix it. You can add more paint or work it in better.
This makes touch-ups simple.
Rolling Quick Facts
Pros: Excellent control over application. Good for textured or uneven surfaces. Easier for beginners.
Less prep work needed than spraying. More forgiving for mistakes.
Cons: Much slower than spraying. Can leave roller marks if not done carefully. More physically demanding.
Can be harder to reach tight spots.
The Power of Control: Rolling in Action
I often see homeowners choose rolling because they want to feel confident about the job. They want to know they are putting the paint exactly where it needs to go. For houses with older siding, rolling is often superior.
The roller nap can get right into the dips and valleys of the wood. This ensures full coverage.
Think about painting a deck railing. You have spindles and small posts. A sprayer would be messy here.
A roller, even a small one, and a brush can get into all those areas cleanly. You can apply a good thick coat that protects the wood well.
When rolling, the goal is to apply paint evenly. You dip the roller about halfway into the paint tray. Then you roll it on the ramp to coat the roller evenly.
You apply the paint to the wall in overlapping “W” or “V” patterns. Then you smooth it out with parallel strokes. This helps prevent lap marks.
Lap marks happen when a painted section starts to dry before you overlap it with new paint.
For DIYers, it’s important to use the right roller cover. The nap length matters. A longer nap is good for rough surfaces.
A shorter nap is better for smooth surfaces. Using the wrong nap can lead to uneven coverage or a poor finish.
Also, patience is key with rolling. Don’t rush. Take your time to ensure each section is covered well before moving on.
This slow and steady approach often yields better, more professional-looking results for the average homeowner.
Rolling: Key Skills and Considerations
- Even Application: Using “W” or “V” patterns and smoothing strokes.
- Lap Mark Prevention: Maintaining a wet edge to blend sections.
- Right Roller Nap: Matching the nap length to the surface texture.
- Consistent Pressure: Applying even pressure for uniform coverage.
- Patience: Taking time to ensure full, even coats.
Real-World Context: What Surfaces Demand What Method?
The type of surface you’re painting has a huge impact on whether spraying or rolling is better. This is where the decision often gets made.
Smooth Surfaces: For areas like smooth metal garage doors, vinyl siding, or brand-new, untextured wood, spraying can give a beautiful, factory-like finish. There are no brush marks or roller textures to mar the sleek look. However, even on smooth surfaces, proper prep is crucial for spraying.
Textured Surfaces: Older homes often have wood siding with a natural grain or texture. Stucco, brick, and rough-sawn lumber are other examples. For these, rollers are usually the better choice.
The roller’s nap can get into the dips and valleys of the texture. This ensures the paint covers every bit of the surface. Spraying might leave some areas looking dry or patchy on very textured materials.
Trim and Details: While spraying can get into tight spots, detailed trim work, like window frames or intricate railings, often benefits from the control of a brush. A skilled hand can apply paint precisely where it needs to go. For large areas of trim, like an entire house’s worth of window frames, a sprayer might be used with a smaller nozzle and careful technique, but a brush offers more precision.
Fences and Decks: For a simple wooden fence, spraying can be very fast. However, for a deck, where the surface is flat but often textured with wood grain, rolling might be preferred for better coverage and a more durable finish. If you’re staining a deck, brushing is almost always the best way to work the stain into the wood grain.
Repainting vs. New Work: If you’re repainting an existing surface that was rolled, you might find rolling works best again. If the surface was previously sprayed and has a very smooth finish, you might consider spraying again to maintain that look.
New construction might offer a blank canvas where spraying is very efficient.
Surface Guide: Spray or Roll?
Smooth Metal/Vinyl: Spray (for best finish)
Textured Wood Siding: Roll (for best coverage)
Stucco/Brick: Roll (to fill texture)
Intricate Trim: Brush (for precision)
Large Flat Walls: Spray (for speed)
Rough Lumber: Roll (to get into grain)
The Role of the Paint Itself
The type of exterior paint you choose also plays a part in the application method. Most exterior paints are designed to be applied by roller or brush. They have a certain thickness, or viscosity.
When you spray paint, you often need to thin it. This means adding a solvent to make it less thick. This allows it to pass through the sprayer nozzle.
Not all paints can be thinned. Some paints are specifically designed for spraying and might already have the right consistency or require specific thinners.
Using the wrong type of paint or thinning it incorrectly can lead to problems. The paint might not stick well. It might run or sag.
It might not provide good coverage. Always check the paint can’s instructions. It will tell you if the paint is suitable for spraying and how to prepare it.
Some paints are thicker and designed to lay down a heavier coat. These might be great for rollers, especially on rough surfaces, as they can fill in gaps. Others are thinner and made for smooth, even application, which is often the goal with spraying.
Consider the finish you want too. High-gloss paints can show every imperfection, making a smooth spray finish desirable. Matte or satin finishes can hide minor flaws, making rolling a more forgiving option.
Paint Matters: How it Affects Application
Viscosity: How thick or thin the paint is. Sprayers need thinner paint.
Paint Type: Some paints are made for spraying. Others are best for rolling.
Thinning: May be required for spraying. Follow manufacturer directions.
Coverage: Thick paints may cover better with rollers on textured surfaces.
Finish: Glossy finishes show more flaws, favoring smooth spray application.
My Take: When I Reach for the Sprayer vs. the Roller
For me, the decision usually comes down to a few clear factors. If I have a large, fairly flat surface, like a new fence I’m building or a garage door, I’ll often grab the sprayer. The speed is undeniable.
I’ll spend extra time masking to avoid headaches later. The key is to have a calm, windless day.
But for most repainting jobs on a typical house, I lean towards the roller and brush. Why? Because most houses have some texture.
They have details. They have windows close to siding. The control of a roller means I can be sure the paint is getting into all those places.
I can see if I’ve missed a spot immediately.
I also think about the long-term. A perfectly applied roller coat, even if it takes longer, can be just as durable, if not more so, than a spray job that might have missed some areas or has a thin, uneven coat. My personal experience has shown me that the extra effort with a roller is often worth the peace of mind and the quality of the finish, especially for DIYers who aren’t painting professionals.
If I were painting a brand-new shed with smooth plywood, I’d spray. If I’m painting the existing siding on my house, which has some grain and texture, I’m rolling. It’s about matching the tool to the task and the desired outcome.
My Personal Decision Matrix
Scenario: Large, Flat, Smooth Area (New Fence)
Action: Spray. (Speed is key. Masking is vital.)
Scenario: Textured Siding or Older Home (Repaint)
Action: Roll & Brush. (Control and coverage are paramount.)
Scenario: Intricate Trim (Window Frames)
Action: Brush. (Precision is essential.)
Scenario: Windy Day or Limited Prep Time
Action: Roll & Brush. (Spraying is too risky/difficult.)
What This Means for You: Making the Right Choice
So, how do you decide? It boils down to what’s most important for your specific painting project. Ask yourself a few key questions.
How much time do you have? If you need to paint a large area very quickly, and you’re comfortable with the prep, spraying might be your answer. If you have more time and want to take it slow, rolling is perfectly fine.
What is the surface like? This is a big one. Smooth surfaces lend themselves well to spraying. Textured or rough surfaces usually need the control of a roller.
What is your skill level? Spraying requires practice. If you’ve never used a sprayer before, starting on a small, less visible area might be wise. Rolling is generally more forgiving for beginners.
What is your budget? Renting or buying a sprayer can be expensive. Rollers and brushes are much cheaper. Factor in the cost of masking supplies for spraying, too.
What kind of finish do you want? A super-smooth, almost flawless finish is often easier to achieve with spraying on the right surface. A more traditional, slightly textured finish is typical with rolling.
Consider the weather. If it’s a very windy day, spraying is a bad idea. You’ll end up with paint everywhere.
If it’s very humid, paint might dry too slowly, leading to runs or drips, no matter how you apply it.
For most homeowners tackling their own house painting, rolling is often the safer, more controllable, and equally effective option for achieving a durable, attractive finish. You get what you put in, and with rolling, you can directly see that effort.
Decision Checklist: Spray or Roll?
Time Available:
High: Spray possible
Moderate/Low: Roll is fine
Surface Texture:
Smooth: Spray or Roll
Textured: Roll is better
Your Experience:
New to tools: Roll is easier
Comfortable with equipment: Spray is an option
Budget:
Lower: Roll
Higher (can afford equipment/rental): Spray is an option
Quick Tips for Better Exterior Painting (No Matter the Method)
Regardless of whether you choose to spray or roll, some universal tips apply to getting the best results for your exterior paint job. These simple steps can make a big difference in how your paint looks and how long it lasts.
Clean the Surface: Before you even think about paint, make sure the surface is clean. Wash off dirt, mildew, and chalky residue. Power washing is great for this.
A clean surface helps paint stick better.
Scrape and Sand: If there’s any peeling or flaking paint, scrape it off. Then, sand the edges smooth. This creates a smooth transition for the new paint.
It prevents the old, peeling paint from showing through.
Prime Bare Spots: If you scrape down to bare wood or metal, you must prime it. Primer acts like a base coat. It helps the new paint adhere better and last longer.
It also helps hide stains.
Use Quality Paint: Don’t skimp on paint quality. High-quality exterior paint is more durable. It resists fading and chipping better.
It usually covers better, meaning you might need fewer coats.
Paint in Good Weather: Avoid painting in direct, hot sun. The paint can dry too fast. Avoid painting when it’s too cold.
Check the temperature range on your paint can. Avoid painting if rain is expected soon.
Work in Sections: Whether rolling or spraying, paint in manageable sections. This helps you maintain a “wet edge.” A wet edge is the line where new paint meets wet, unpainted paint. Blending into a wet edge prevents lap marks.
Don’t Rush: Painting is a job where patience pays off. Take your time with prep. Take your time with application.
This leads to a better-looking and longer-lasting finish.
General Exterior Painting Best Practices
- Prep is King: Clean, scrape, sand, and prime as needed.
- Quality Matters: Invest in good paint and tools.
- Weather Watch: Paint during ideal temperature and humidity.
- Section by Section: Maintain a wet edge for smooth transitions.
- Read the Can: Follow the paint manufacturer’s specific instructions.
Frequently Asked Questions About Exterior Painting Methods
Is spraying paint better for vinyl siding?
Yes, spraying can be very effective for vinyl siding, especially if you’re painting it a new color or refreshing its look. It allows for a smooth, even coat that can make the siding look almost new again. However, ensure the vinyl is clean and that you use the correct type of paint.
Proper masking of trim and windows is still crucial.
How much prep work is really needed for spraying?
A lot! You need to cover everything you don’t want painted: windows, doors, trim, light fixtures, your roof, walkways, plants, and any adjacent surfaces. Overspray can travel further than you think.
Think of prep as covering 5 to 10 times the area you’ll be painting.
Can I spray and then back-roll exterior paint?
Yes, this is a common technique, especially for siding. You spray a light coat, then immediately use a roller to “back-roll” it. This pushes the paint into the texture of the siding and ensures better adhesion and coverage.
It combines the speed of spraying with the control of rolling.
What kind of roller cover is best for exterior wood siding?
For most exterior wood siding, which has some texture and grain, a roller cover with a 1/2-inch to 3/4-inch nap is usually best. This longer nap can get into the grooves and texture of the wood, ensuring complete coverage. For smoother engineered wood or some newer sidings, a shorter nap might suffice.
Does rolling take much longer than spraying for a whole house?
Yes, significantly longer. Spraying can cut down application time dramatically for large, open areas. Rolling involves a more methodical process, section by section, which is inherently slower.
However, the time saved in prep for rolling often balances out the longer application time for DIYers.
When should I absolutely avoid spraying exterior paint?
You should avoid spraying on windy days, near sensitive surfaces that are hard to mask (like delicate plants or a neighbor’s pool), or if you don’t have the time or patience for extensive preparation. If you’re unsure about using a sprayer, rolling is a safer bet.
Conclusion: The Best Method is the One That Works for You
Deciding whether to spray or roll your exterior paint isn’t about finding the “best” method overall. It’s about finding the best method for your home, your skills, and your project goals. Spraying offers speed and a smooth finish for large, open areas.
Rolling provides control and better coverage on textured surfaces, often being more forgiving for DIYers. Understand the pros and cons of each, consider your surface types, and choose the path that leads to the most satisfying and durable result.