Why Is My Garage Door Light Blinking Continuously?
A garage door light blinking continuously almost always signals a safety-sensor or lock-button problem: LiftMaster and Chamberlain openers flash 10 times for a sensor issue and 2 times for Lock mode, though Genie uses a different pattern. Left unfixed, the door won’t close, sometimes stranding a car outside overnight. This guide covers reading your opener’s flash code, realigning sensors in under 10 minutes, and knowing when it’s a $100-$300 professional repair instead. As a homeowner who’s spent years tinkering with garage doors, I’ve chased down this exact blink more times than I can count.
Understanding the Blinking Garage Door Light
When your garage door light starts blinking, it’s like your door is trying to tell you something. I remember the first time it happened to me—I thought my opener was broken! But after digging into it, I learned that most garage door openers use blinking lights to signal specific issues. The number of blinks or the pattern can point to problems like misaligned sensors, a faulty remote, or even a mechanical glitch.
Different brands, like LiftMaster, Chamberlain, or Genie, have their own “blink codes.” For example, a LiftMaster might blink 10 times for a sensor issue, while a Genie might flash twice for a lock mode problem. I keep my opener’s manual handy for these codes, but you can usually find them online too. The blinking light is your first clue, so pay attention to how many times it flashes and check your manual to decode it. This simple step can save you a lot of guesswork.
Common Reasons Your Garage Door Light Is Blinking
Over the years, I’ve seen a handful of reasons why garage door lights blink. Let me walk you through the most common culprits I’ve come across.
One big issue is misaligned safety sensors. These are the small devices near the bottom of your garage door tracks. If they’re not lined up, the light blinks to let you know the door won’t close safely. Dirt or a bump from a soccer ball can knock them out of place. Another common problem is a wiring issue. Frayed or loose wires connecting the sensors or opener can trigger the blinking.
Sometimes, the door’s lock mode is engaged. I accidentally hit this once on my remote, and the light started flashing like crazy! Lock mode prevents the door from opening, often to keep it secure. Other times, it’s a remote control glitch. Dead batteries or a signal interference can confuse the opener, causing the light to blink. Lastly, mechanical issues, like a stuck roller or broken spring, can also set off the light, especially if the door struggles to move.
Here’s a quick table I put together to summarize these issues:
| Cause | Symptoms | Likely Fix |
|---|---|---|
| Misaligned Sensors | Replace batteries, reprogram the remote | Realign sensors, clean lenses |
| Wiring Issues | Intermittent blinking, door stops | Check and repair wires |
| Lock Mode Engaged | Disable lock mode on the remote or the panel | The door won’t open, rapid blinking |
| Remote Control Problems | Inconsistent operation, blinking | Replace batteries, reprogram remote |
| Mechanical Issues | Door jams, light blinks | Inspect rollers, springs, or tracks |
Best Sensor Kit Pick
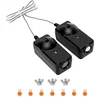
41A5034 Safety Sensor Kit (Chamberlain/LiftMaster/Craftsman) – $16.14
If misaligned sensors are behind your 10-flash code, this replaces both the amber and green sensor units this guide walks you through realigning.
- Best for: Openers made after 1997 with a cracked lens or a sensor that no longer holds alignment
- Why we picked it: Direct plug-and-play replacement for the 041A5034/820CB sensors most LiftMaster and Chamberlain units ship with
- Main drawback: Aftermarket, not OEM — brand names are listed only to confirm compatibility
Compare more sensor kit options
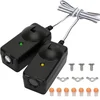 Option 1 10-Year Warranty Sensor Kit – $12.34
|
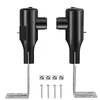 Option 2 Genie/Overhead Sensor Kit – $20.99
|
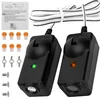 Option 3 Upgraded 41A5034 Sensor – $12.99
|
As an Amazon Associate we earn from qualifying purchases.
How to Troubleshoot a Blinking Garage Door Light
Troubleshooting a blinking light is like being a detective, and I’ve gotten pretty good at it over time. Here’s my step-by-step approach to figure out what’s wrong.
Start by checking the safety sensors. Look at the small lights on each sensor—one should be green, the other amber. If one’s off or blinking, they’re likely misaligned. Gently nudge them until both lights are steady. I use a level to make sure they’re perfectly aligned. While you’re there, wipe the sensor lenses with a soft cloth. Dust or spider webs can block the beam.
Next, inspect the wiring. Follow the wires from the sensors to the opener. Look for frayed spots, loose connections, or chew marks from critters. I once found a mouse had nibbled my wires—yuck! If you spot damage, tape minor frays or call a pro for bigger issues. If the sensors and wires look good, check if the lock mode is on. Press the “lock” button on your wall panel or remote to toggle it off. My owner’s manual showed me where to find this button.
Still blinking? Test the remote. Swap out the batteries and try reprogramming it. Hold the remote close to the opener to rule out signal interference from Wi-Fi routers or other devices. If none of this works, count the blinks and check your manual’s code chart. It might point to a circuit board or motor issue, which usually needs professional help.
Quick-Reference Troubleshooting Steps
- Count the flashes: Watch the opener’s light or motor unit and count how many times it blinks before repeating, then check the brand chart below.
- Inspect the sensors: Confirm both LEDs on the two sensors near the floor glow solid, not blinking, and wipe the lenses with a dry cloth.
- Check for a manual lock: Look for a metal slide-bar lock on the inside of the door track, separate from the remote’s electronic Lock button, and disengage it if it’s slid into the track.
- Power-cycle the opener: Unplug the opener from its ceiling outlet for 60 seconds so the internal capacitors fully discharge, then plug it back in and retest.
- Swap the remote batteries: Replace with a fresh CR2032 or AAA and reprogram using the opener’s “learn” button before ruling the remote out.
- Call a technician: If the flash code points to the circuit board or motor, or a spring looks broken, stop and call a licensed technician instead of continuing.
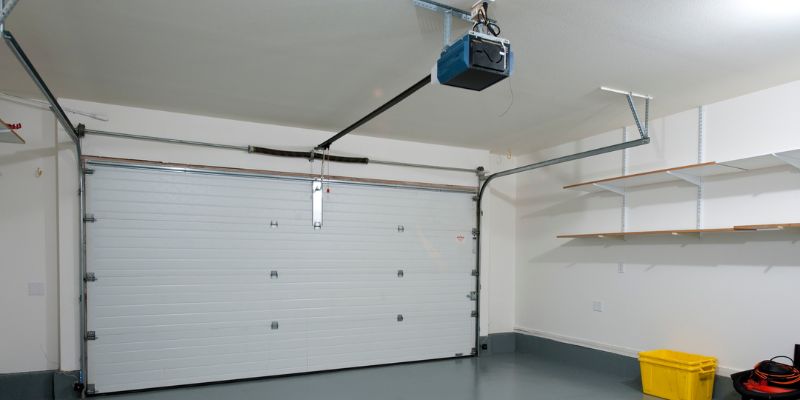
Garage Door Opener Flash Codes by Brand (Official Chart)
A garage door opener flash code is a number of light blinks the unit repeats to identify which internal circuit tripped a safety stop. It comes straight from the opener’s built-in diagnostic board, not a guess, so matching the exact count to your brand’s chart is faster than testing every part one by one.
📊 On LiftMaster and Chamberlain openers, 10 flashes means the safety sensors are misaligned or obstructed and 2 flashes means the LOCK button is engaged. — Source: Chamberlain Group Official Support, 2026
| Brand | Flash Count | What It Means |
|---|---|---|
| LiftMaster / Chamberlain | 10 flashes | Safety sensors misaligned, dirty, or obstructed |
| LiftMaster / Chamberlain | 2 flashes | LOCK button on the wall control is engaged |
| LiftMaster / Chamberlain | 1 up, 4 down (LED arrows) | Sensors momentarily blocked or knocked out of alignment |
| Genie | 2 flashes | Lock mode is active on the wall console |
| Craftsman | 10 flashes | Same sensor-alignment fault as LiftMaster (shared circuit board design) |
Two causes the flash code won’t show you directly: a manual slide lock and sunlight interference. Most garage doors also have a physical metal slide-bar lock on the inside of the track — separate from the remote’s electronic LOCK button — that a previous owner or a kid playing near the door can engage by hand. And on sensors facing a window or an open driveway at sunrise or sunset, direct sunlight hitting the receiving lens can overpower the infrared beam and trigger the same blinking as an obstruction, even with nothing in the way.
If cleaning and realigning the sensors doesn’t stop the blinking, a full power reset often will: unplug the opener from its ceiling outlet for a full 60 seconds so the internal capacitors discharge completely, then plug it back in. This clears a stuck logic-board state that a quick sensor check can’t fix, and it’s free to try before calling a technician.
“I once found a mouse had nibbled through a sensor wire in my own garage — the light blinked for two days before I traced it. A five-minute splice with wire nuts and electrical tape fixed what looked like a dead circuit board.”
Fixing Misaligned Safety Sensors
Since misaligned sensors are the most common issue, let’s dive deeper into fixing them. I’ve realigned my sensors more times than I can count, and it’s usually a quick fix.
The sensors sit about 6 inches off the ground on either side of the door. They send an invisible beam to each other, and if that beam breaks, the door won’t close, and the light blinks. First, check if something’s blocking the beam, like a broom or a toy. I once found my kid’s bike in the way!
If the path is clear, loosen the sensor brackets with a screwdriver. Gently tilt or shift them until the lights on both sensors turn solid. I like to wiggle them slowly while watching the lights—it’s like a little game. Once aligned, tighten the brackets. If they keep slipping, secure them with extra screws or mounting tape. After fixing mine, I marked the exact spot with a marker so I’d know if they moved again.
Dealing with Wiring Problems
Wiring issues can be a pain, but I’ve tackled them a few times. Start by turning off the power to the opener at the breaker—safety first! Trace the wires from the sensors to the opener. Look for loose staples, cuts, or exposed copper. I found a staple had pierced my wire once, causing a short.
For small frays, wrap the damaged spot with electrical tape. If the wire’s badly damaged, you might need to replace that section. I bought a spool of low-voltage wire at the hardware store and spliced it in with wire nuts. If you’re not comfortable with this, call an electrician. After fixing the wires, turn the power back on and test the door. My light stopped blinking after I taped up a frayed spot, and it felt like a big win!
Unlocking a Locked Garage Door Opener
If your door’s in lock mode, the fix is super simple. I’ve accidentally locked my opener a few times, usually by pressing the wrong button on the remote. Check your wall control panel for a “lock” or “vacation” button. Press and hold it for a few seconds until the light stops blinking.
If your remote has a lock feature, try pressing it to toggle it off. My Chamberlain remote has a tiny lock icon, and I had to dig out the manual to find it. If the light still blinks, the lock mode might not be the issue, so move on to checking sensors or wiring. This fix is quick, so it’s worth trying early on.
Resolving Remote Control Issues
Remote problems are another common headache. I’ve had my remote act up because of dead batteries or interference. First, replace the batteries—most remotes use CR2032 or AAA. Test it by standing close to the opener. If it works, great! If not, reprogram it following your manual’s instructions. For my LiftMaster, I pressed a “learn” button on the opener, then hit the remote button until it clicked.
Interference can also cause blinking. Wi-Fi routers, cordless phones, or even LED lights can mess with the signal. I moved my router farther from the garage, and it helped. If the remote’s old, consider replacing it. I upgraded to a universal remote, and it’s been smooth sailing since.
Addressing Mechanical Problems
If sensors, wiring, and the remote check out, the blinking might point to a mechanical issue. I’ve seen doors jam because of worn rollers, bent tracks, or broken springs. Inspect the door’s movement. Does it jerk or stop halfway? Listen for grinding noises.
Lubricate the rollers and tracks with a silicone-based spray—I do this every six months to keep things smooth. Check the springs above the door. If they’re broken or loose, don’t touch them—they’re under high tension and dangerous. I called a pro when my spring snapped, and it was the best decision. Bent tracks or stuck rollers might need professional straightening or replacement, too. For more on diagnosing hardware beyond the opener itself, see our full door hardware and lock repair guides.
When to Call a Professional
Sometimes, the blinking light signals a problem that’s beyond a DIY fix. I’m all for tackling things myself, but I know my limits. If you’ve tried troubleshooting and the light still blinks, or if the manual’s code points to a circuit board or motor issue, call a garage door technician. Same goes for broken springs or major wiring problems—they’re risky to handle alone.
I called a pro when my opener’s circuit board fried, and they had it replaced in an hour. Look for a licensed, insured technician with good reviews. It might cost $100-$300, but it’s worth it for safety and peace of mind. Keep their number handy for future emergencies.
Preventing Future Blinking Light Issues
Once you’ve fixed the blinking light, you’ll want to keep it from happening again. I’ve learned a few tricks to keep my garage door happy. Clean the sensor lenses every few months—dust builds up fast. Check the wiring during seasonal maintenance to catch frays early. Lubricate moving parts like rollers, hinges, and tracks twice a year. If the light stays on solid instead of blinking and won’t shut off between cycles, that’s a separate issue — see our guide on why a garage door opener light won’t turn off.
Test the door’s balance by disconnecting the opener and lifting it manually. It should stay halfway open. If it slams shut, the springs need adjusting—call a pro. I also keep my remote batteries fresh and store spares in the garage. These small habits have saved me from more blinking lights and costly repairs.
Choosing the Right Replacement Parts
If you need to replace sensors, wires, or a remote, quality matters. I stick with parts made by my opener’s brand for compatibility. For example, LiftMaster sensors work best with LiftMaster openers. Generic parts are cheaper but can cause issues down the line.
Buy from reputable retailers like Home Depot, Amazon, or directly from the manufacturer. Check reviews to ensure the part’s reliable. I replaced my sensors with OEM ones for $40, and they’ve been rock-solid. If you’re unsure about compatibility, call the manufacturer’s customer service—they’re usually happy to help.
Upgrading Your Garage Door Opener
If your opener’s old and keeps giving you blinking light headaches, it might be time for an upgrade. I swapped my 15-year-old opener for a smart model, and it’s been a game-changer. Modern openers have better sensors, quieter motors, and Wi-Fi connectivity. You can control them from your phone and get alerts if something’s wrong.
Look for brands like Chamberlain, LiftMaster, or Genie with good warranties. My new opener has a 10-year motor warranty, which gives me peace of mind. Installation costs $200-$500, but it’s worth it for reliability. Plus, newer models have clearer blink codes, making troubleshooting easier.
Safety Tips for Working on Your Garage Door
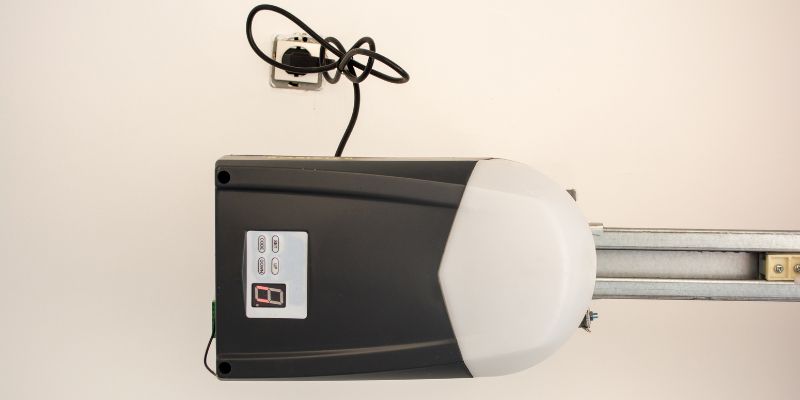
Working on a garage door can be risky, so I always put safety first. Unplug the opener or turn off the breaker before touching wires or sensors. Never mess with the springs—they can cause serious injury. I wear gloves and safety glasses when inspecting tracks or rollers to avoid cuts.
Keep kids and pets away while you’re working. I make sure my dog’s inside when I’m tinkering in the garage. If you’re using a ladder, ensure it’s stable—I learned this after a wobbly scare! If something feels unsafe, stop and call a pro. Your safety’s worth more than a quick fix.
Wrapping It All Up
A blinking garage door light can feel like a mystery, but with a little patience, you can crack the code. I’ve been through this enough times to know that most issues—misaligned sensors, wiring glitches, or a locked opener—are fixable with some basic troubleshooting. Start with the simple stuff, like checking sensors and batteries, before diving into bigger repairs. If you’re ever in doubt, don’t hesitate to call a professional. Keeping your garage door in good shape with regular maintenance can prevent those blinking lights from coming back. Now that you know the ins and outs, you’re ready to tackle that flashing light and keep your garage door running like a dream. Here’s to smooth openings and no more blinking!
Frequently Asked Questions
Why does my garage door light blink 10 times?
Ten blinks usually mean a sensor issue, like misalignment or a wiring problem. Check if the sensors’ lights are solid and clean the lenses. If that doesn’t work, inspect the wires for damage.
Can a dead remote battery cause the light to blink?
Yes, a weak or dead battery can confuse the opener, triggering the blinking light. Replace the batteries and test the remote close to the opener to see if it helps.
How do I know if my garage door sensors are bad?
If one sensor’s light is off or blinking even after realigning and cleaning, the sensor might be faulty. Test with a multimeter or replace them to confirm.
What does it mean if my garage door is locked?
Lock mode prevents the door from opening, often causing the light to blink rapidly. Press the “lock” button on your wall panel or remote to turn it off.
How much does it cost to fix a blinking garage door light?
DIY fixes like realigning sensors or replacing batteries cost little to nothing. Professional repairs for wiring or circuit boards can run $100-$300, depending on the issue.
Can I use any brand of sensors for my opener?
It’s best to use sensors from your opener’s brand for compatibility. Generic ones might work, but can cause issues. Check your manual or call the manufacturer to be sure.
Why does my garage door light blink even after I fixed the sensors?
If the sensors are aligned and clean, check for wiring issues, lock mode, or mechanical problems like stuck rollers. Count the blinks and check your manual’s code chart for clues.
Sponsored / affiliate links. As an Amazon Associate I earn from qualifying purchases. I may earn additional commission from eligible campaigns.