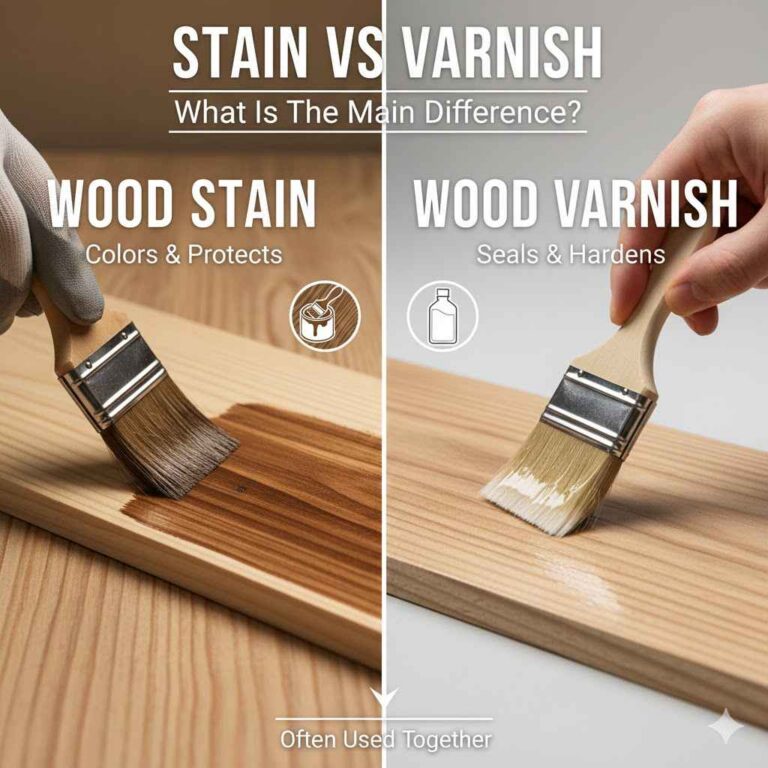
How To Paint Over Wood Stain Without Sanding (Simple Method)
It’s frustrating when you want to update the look of your wood furniture or trim, but the thought of all that sanding feels overwhelming. You have this beautiful stain color, but it just doesn’t match your room anymore. Or maybe you’ve inherited a piece that’s just not your style.
You want to paint it, but the idea of endless hours with sandpaper and dust is a big hurdle. What if there was a way to get a fresh, painted look without all that hard work?
This guide shows you a simple way to paint over wood stain without needing to sand first. It’s a method that respects your time and effort, aiming for a smooth, durable finish so you can refresh your home without the usual messy prep.
Painting Over Stained Wood: The Magic of Preparation
Painting over wood stain without sanding might sound a little too good to be true. For years, sanding has been the go-to step. It makes the surface rough.
This roughness helps new paint stick. But what if you could achieve that same grip with different tools? The secret isn’t skipping prep.
It’s using prep steps that work differently.
Wood stain soaks into the wood grain. It’s not just a surface layer. Paint sits on top of the stain.
If you don’t prepare the surface right, the paint might peel or scratch off. This is because there’s nothing for the new paint to grab onto. So, you need to give the paint something to stick to.
You want to create a surface that’s clean and ready for a new coat.
The goal is adhesion. That means how well the new paint sticks. With stained wood, you need to clean off any oils or residues.
You also need to dull the surface. This creates tiny pores. The paint can then settle into these pores.
This makes a much stronger bond. Think of it like preparing a wall for wallpaper. You wouldn’t put it on a dirty, greasy wall, would you?
Modern paints and primers are pretty amazing. They are designed to work on many surfaces. Some can even stick to slick finishes.
But even the best paint needs a little help. You can’t just slap paint on any old surface and expect it to last. So, while you’re skipping the sandpaper, you’re not skipping the important prep work.
You’re just choosing smarter steps.
Let’s talk about what “sanding” really does. It scuffs up the surface. It removes any glossy finish.
It creates microscopic grooves. This is what new paint needs to grip. The methods we’ll discuss aim to achieve this same effect.
They just use chemical cleaners or special primers instead of abrasion. It’s about creating that tooth for the paint. This makes your painted finish last much longer.
My Own Frustrating Experience
I remember staring at this old oak dresser. It was a beautiful, deep reddish-brown stain. But my bedroom was going through a makeover.
It was all soft blues and grays now. The dresser felt so out of place. My first thought was, “I need to paint this.” Then, reality hit.
Sanding that whole thing? It felt like a week-long chore.
I pictured myself with a sander, covered in dust. I saw the fine particles getting into everything. My dog would track it all over the house.
I felt a wave of annoyance. I just wanted a pretty dresser, not a construction zone. I almost gave up.
I considered selling it. But I loved the shape of the dresser too much.
Then, I started digging online. I searched for “paint over stain no sand.” I found a few articles. Some said it was impossible.
Others mentioned special primers. I was skeptical. Could a primer really do the job of hours of sanding?
It felt like a shortcut that would lead to peeling paint. But I was desperate to avoid the dust.
I decided to test it on a small, hidden part of the dresser first. I found a little corner at the back. I cleaned it well.
Then I applied a special bonding primer. I let it dry. Then I put on my chosen paint color.
I waited a few days. Then, I tried to scratch it with my fingernail. It held!
I couldn’t believe it. This was a game-changer.
That experience taught me a valuable lesson. Sometimes, you don’t need to do things the old, hard way. With the right products and a bit of smart prep, you can achieve great results faster.
It’s about understanding the materials and finding the best tools for the job. It saved me so much time and frustration. And my dresser looks amazing.
Key Steps to Painting Over Stain Without Sanding
1. Clean Thoroughly: Remove all dirt, grease, and grime. Use a degreaser.
2. Use a Bonding Primer: This is the most crucial step. Choose a primer made for slick surfaces.
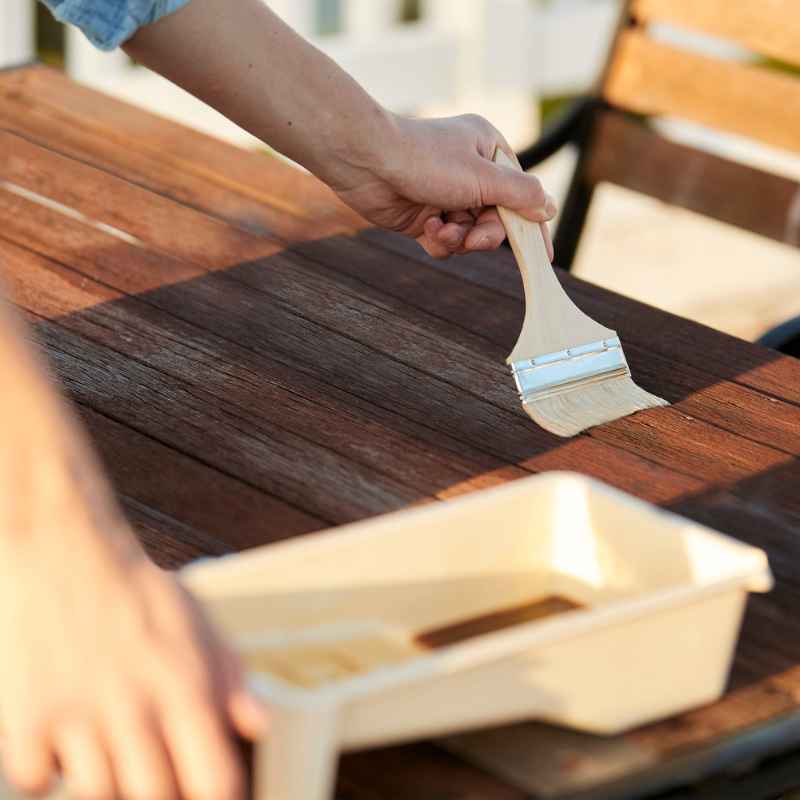
3. Apply Paint: Use a good quality paint. Several thin coats are better than one thick one.
4. Allow Proper Drying Time: Don’t rush the process. Let each coat cure fully.
Understanding the “No-Sand” Approach
The main idea behind not sanding is using products that can grip surfaces that are normally too smooth. Wood stain, even when dry, can leave a smooth or sometimes even slightly oily finish. This is what paint struggles to stick to.
Think about glass. You can’t just paint glass and expect it to stay. It’s too smooth.
You need special products. These are often called bonding primers. They are formulated to create a chemical bond.
This bond works on surfaces that are non-porous or very slick. Stained wood can sometimes fall into this category, especially if it has a sealant on top.
The key players here are degreasers and bonding primers. A degreaser cuts through any oils or residues. These could be from the wood itself, furniture polish, or handling.
Even a clean-looking surface can have invisible oils. These oils prevent paint from adhering. So, a good scrub is non-negotiable.
A bonding primer is like a super-sticky intermediate layer. It has special ingredients. These ingredients allow it to stick to tough surfaces.
Then, it provides a surface that regular paint can easily adhere to. It essentially creates a bridge between the stained wood and your topcoat of paint.
Some people might worry about durability. They might think, “If it’s not sanded, it won’t last.” This is a valid concern. However, with the right products, this isn’t always true.
A high-quality bonding primer, applied correctly, can offer excellent adhesion. It can be just as durable as a sanded surface. It really depends on the specific products you choose and how you use them.
The alternative to sanding isn’t doing nothing. It’s doing a different kind of prep. It’s about cleaning and creating a receptive surface through chemical means, not physical ones.
This is often faster and much less messy. It opens up painting projects to more people who might be put off by the dust and effort of traditional sanding.
Why Bonding Primers Work
Chemical Adhesion: These primers contain solvents. They slightly etch or soften the surface. This allows them to bond chemically.
Microscopic Grip: They create a molecular grip. This is different from the physical grip sanding gives.
Surface Preparation: They act as a universal base coat. They prepare even very smooth surfaces for paint.
Step-by-Step Guide to Painting Over Stained Wood
Ready to give it a try? Here’s how you can paint over wood stain without sanding. Remember to take your time with each step.
Good prep leads to a great finish.
Step 1: Gather Your Supplies
Before you start, make sure you have everything. This saves you from stopping mid-project. You’ll need:
- A good degreaser or TSP (trisodium phosphate) substitute.
- Clean cloths or sponges.
- A high-quality bonding primer. Look for labels that say “adheres to glossy surfaces” or “for difficult substrates.”
- Your chosen paint (latex or oil-based, depending on the primer).
- Paint brushes, rollers, or a sprayer.
- A drop cloth to protect your floor.
- Gloves and safety glasses.
Step 2: Clean the Surface
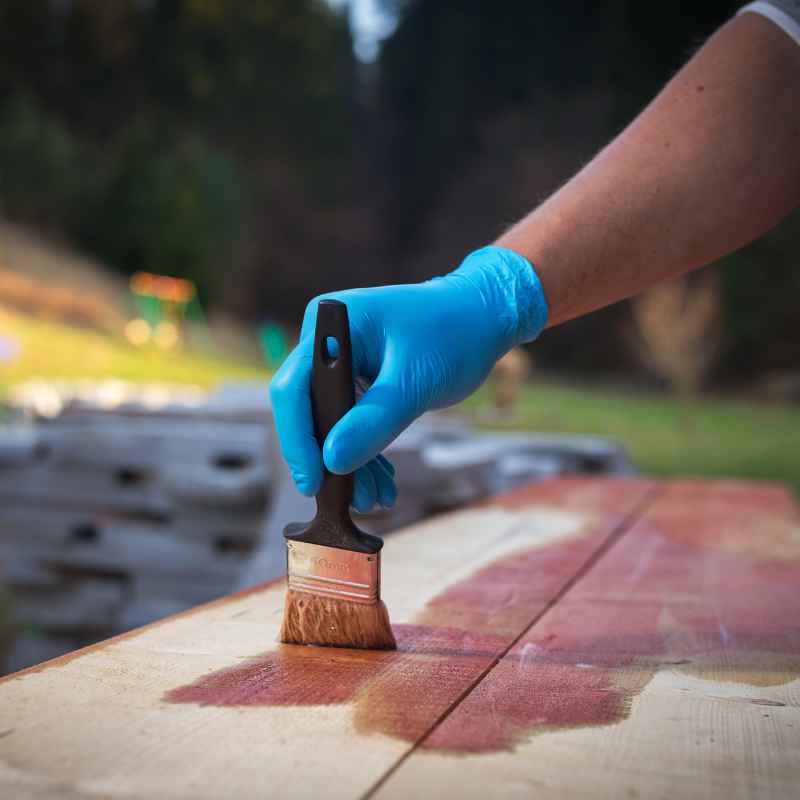
This step is super important. You need to remove all dirt, grime, grease, and any old wax or polish. Mix your degreaser or TSP substitute with water according to the product instructions.
Wear your gloves and safety glasses.
Wipe down the entire surface. Use a clean cloth or sponge. Rinse the surface thoroughly with clean water.
You don’t want any degreaser residue left behind. This can interfere with the primer. Let the surface dry completely.
This might take a few hours, or overnight if it’s humid.
Important Cleaning Note:
Use a clean cloth for rinsing. Change it often. You don’t want to spread dirt around. Make sure the wood is totally dry before the next step.
Moisture can trap and cause problems later.
Step 3: Apply the Bonding Primer
Now for the magic step. Open your bonding primer. Stir it well.
Do not shake it, as this can create bubbles. Apply a thin, even coat to the entire surface. Use a good quality brush or roller.
Work in smooth strokes. Try to avoid lap marks where one section overlaps another. If you’re using a roller, keep a wet edge.
This means overlapping your strokes slightly as you go. This helps create a smooth, uniform finish.
Check the primer can for drying times. Most bonding primers need at least a few hours to dry. Some may recommend longer, especially before painting.
Follow the manufacturer’s instructions exactly. This primer layer is key for the paint to stick.
Step 4: Lightly Scuff (Optional but Recommended)
While you are skipping heavy sanding, a very light scuff can sometimes help. After the primer is completely dry, you can use a fine-grit sanding sponge (like 220-grit or higher). Gently go over the surface.
The goal isn’t to remove the primer. It’s just to knock down any tiny bumps or imperfections.
This step also slightly roughs up the primer surface. This gives your paint an even better grip. After scuffing, wipe the surface clean with a tack cloth or a slightly damp cloth.
This removes any dust. Make sure it’s completely dry again.
Scuffing Sponge Tip:
Use a flexible sanding sponge. These get into corners and curves easily. Always wipe away dust after scuffing.
A tack cloth is great for this. It picks up fine dust particles.
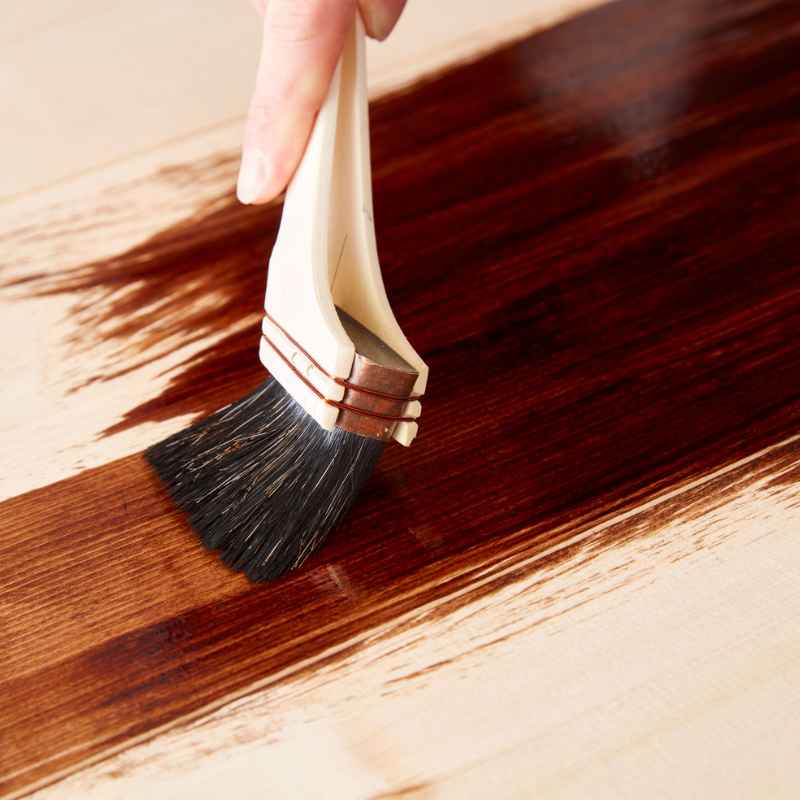
Step 5: Apply the Paint
You’re ready for your topcoat! Stir your paint well. Apply your first coat of paint.
Again, aim for thin, even coats. It’s much better to apply two or three thin coats than one thick coat. Thick coats tend to drip and peel more easily.
Allow each coat to dry completely. Check the paint can for recommended drying times between coats. This is crucial for durability.
Rushing this step will weaken the final finish. Don’t be tempted to speed it up!
Step 6: Apply Additional Coats (If Needed)
Most projects will need at least two coats of paint. Some colors might need a third, especially if you are painting a dark stain a very light color. Apply additional coats as needed.
Make sure each coat is dry before applying the next.
Once you’ve applied all your paint coats, let the piece cure. Curing is different from drying. Drying means it’s dry to the touch.
Curing means the paint fully hardens. This can take several days or even weeks. During the curing time, be gentle with the painted surface.
Avoid banging it or placing heavy objects on it.
Paint Application Tips:
Use the right tools: For flat surfaces, a good quality roller works well. For edges and details, use a brush. A paint sprayer offers a very smooth finish but requires practice.
Work in good light: This helps you see any missed spots or unevenness.
Choosing the Right Products Matters
When you’re painting over stained wood without sanding, the products you choose are everything. This isn’t the place to skimp on quality. You want paints and primers that are known for their excellent adhesion.
Primers: Look for primers specifically designed for “difficult surfaces.” Brands like Zinsser (B-I-N, Bulls Eye 1-2-3), Kilz (Adhesion), or General Finishes (Adhesion Primer) offer products that grip well on laminate, metal, and even previously finished wood. The label should clearly state that it adheres to glossy or slick surfaces. This is your insurance policy.
Some oil-based primers are also excellent for this. They can offer a very durable base. However, they often require special solvents for cleanup.
Water-based (latex or acrylic) bonding primers are usually easier to work with. They also dry faster.
Primer Spotlight:
Zinsser B-I-N Shellac-Based Primer: This is a professional favorite. It dries very fast and blocks stains. It adheres to almost anything.
It has a strong odor, so ventilation is key.
Zinsser Bulls Eye 1-2-3: A great water-based option. It adheres well to glossy surfaces and is easy to clean up.
Paints: Once you have a good primer, most quality interior paints will work. For furniture and trim, you might want to consider paints that are durable and have a slight sheen. Semi-gloss or satin finishes are popular.
They are easier to clean than flat finishes. For very high-traffic items like tabletops, you might even consider a furniture-specific paint or a topcoat of polycrylic.
Think about the finish you want. A satin finish offers a soft sheen. A semi-gloss is shinier and more durable.
A high-gloss finish is very reflective and can highlight imperfections. Choose a paint that matches your desired look and is known for its durability.
Always read the labels. They tell you what surfaces the product is designed for. They also give you instructions on how to use it.
Following these directions is critical for success. Using the wrong product is the fastest way to end up with peeling paint. It’s worth spending a little extra on good quality primer and paint.
Real-World Scenarios and What to Expect
This method works well on many different types of wood projects. It’s not just for furniture. You can use it on wooden cabinets, doors, trim, and even some outdoor items if the products are suitable.
Cabinets: Kitchen or bathroom cabinets are often finished with a durable stain or varnish. Cleaning them thoroughly is crucial. Then, a good bonding primer and a durable paint will give them a fresh, new look without the endless sanding.
This is a popular project for a reason!
Doors: Interior doors that are stained can easily be painted. This is a great way to update the look of your home. You can paint them the same color as your trim or a contrasting color.
Just be sure to tape off any hardware.
Trim and Moldings: Baseboards, crown molding, and door casings often have a stained finish. Painting these without sanding saves a lot of time. Focus on cleaning the trim well.
Then, use a good primer and paint for a clean, crisp look.
What if the stain is very dark? If you’re painting a very dark stained piece a light color, you might need more than two coats of paint. Also, consider using a primer that is tinted gray. This can help cover the dark color more effectively.
Some bonding primers come in gray or can be custom tinted.
Consider the Wood Type
Hardwoods: Woods like oak, maple, and cherry are generally good candidates for this method. Their dense grain holds stain well and doesn’t usually have excessive oil.
Softwoods: Woods like pine can be a bit trickier. Pine can be resinous. Make sure to clean it extremely well.
Some people recommend a shellac-based primer on pine to block any wood resins from bleeding through the paint.
What about glossy finishes? If the wood has a very glossy polyurethane or varnish finish over the stain, a bonding primer is essential. These finishes are designed to be non-porous and very smooth. The primer will create the necessary adhesion.
If the finish is peeling or flaking, you might need to lightly scrape those areas first, but you can still avoid full sanding.
Outdoor items: For items that will be exposed to the elements, you need to be more careful. Make sure the primer and paint you choose are rated for exterior use. Even then, a truly durable finish on outdoor wood might eventually require more robust prep.
However, for shaded areas or less demanding uses, this method can work.
When Is This Method NOT Recommended?
While this technique is fantastic for many situations, it’s not a magic bullet for every wood project. There are times when traditional sanding is still the best or only option.
Damaged Finishes: If the existing stain or finish is peeling, chipped, or severely damaged, you must address those areas. You might need to scrape away loose bits. You might even need to lightly sand those specific damaged spots to create a smooth transition.
Simply painting over peeling paint will result in the new paint peeling with it.
Very Old, Peeling Paint: If you are painting over old, cracked, or peeling paint (even if it’s on stained wood), sanding is usually required. This ensures you remove all loose paint. The new paint will adhere to a stable surface.
Certain Wood Types: As mentioned, some woods like red oak can have very open grain. If the stain is not completely sealed and the grain is very rough, sanding might give a smoother final look. Also, some extremely oily woods might benefit from a shellac-based primer to prevent the oil from bleeding through.
Desire for a Perfectly Smooth Finish: If you are aiming for a glass-like, furniture-grade smooth finish, especially on a piece with a deep wood grain like oak, you might find that sanding achieves a superior result. While a good primer and paint will look great, a truly perfect finish often benefits from a final light sanding between coats of paint.
When to Reconsider:
Heavy Damage: If the surface looks like it’s flaking off everywhere, painting over it without addressing it will lead to disappointment.
Extreme Gloss: Some industrial-level lacquers or epoxies are so slick that even bonding primers struggle. Test in an inconspicuous area first.
High-Wear Surfaces: For surfaces that get a lot of abuse, like a dining table that’s used daily for meals, homework, and crafts, the “no-sand” method might be sufficient, but it will likely require a very durable paint and possibly a protective topcoat. If you want maximum longevity and resilience, some light sanding might be beneficial.
It’s always a good idea to test your chosen products. Pick a small, hidden area of the wood piece. Clean it, prime it, and paint it.
Let it dry completely. Then, try to scratch it with your fingernail or a key. If it holds up well, you’re likely good to go.
If it scratches off easily, you might need to rethink your primer or consider some light sanding after all.
The Role of Cleaning in Detail
I can’t stress this enough: cleaning is the most critical step when you’re skipping sanding. If you don’t clean properly, the primer won’t stick, and the paint will peel. It’s that simple.
What does “cleaning” really mean in this context? It means removing everything that isn’t the wood itself. This includes:
- Dust and Dirt: Everyday stuff that settles on furniture.
- Grease and Grime: From hands touching the surface, cooking fumes, or general wear.
- Polish and Wax: Many furniture polishes contain waxes or silicones that create a barrier.
- Residue from Previous Finishes: Sometimes older finishes can leave a sticky or oily residue.
A good quality degreaser is your best friend here. Products like Krud Kutter, Simple Green (ensure it’s diluted correctly), or a TSP (trisodium phosphate) substitute are excellent. Avoid using just soap and water.
Soap can leave its own residue that needs to be rinsed off thoroughly.
When you clean, use a sponge or a soft cloth. Apply the degreaser and scrub gently. Don’t use steel wool or overly abrasive pads at this stage, as you don’t want to scratch the finish yet.
After you’ve scrubbed, you need to rinse. This is where many people make mistakes. You need to rinse away all the degreaser and the lifted grime.
Use a clean sponge and plenty of clean water. Rinse the surface multiple times. You might even want to wipe it down with a solution of just water and a tiny bit of vinegar to neutralize any remaining degreaser.
Make sure the wood dries completely before you move on.
The Rinsing Technique:
Use a new sponge for rinsing. Don’t use the one you used for cleaning. Rinse the surface several times with clean water. Make sure there are no suds or cloudy residue left behind.
Drying is also important. You can let the piece air dry. In humid conditions, you might use a fan to speed things up.
If you’re painting wood in a bathroom or kitchen, ensure it’s completely dry. Moisture trapped in the wood can cause paint to bubble or peel later on.
This thorough cleaning process is what prepares the surface. It ensures that the bonding primer can do its job effectively. It creates a clean canvas.
Without this step, even the best bonding primer will struggle. It’s like trying to stick a sticker on a greasy hand – it just won’t hold.
Quick Fixes and Tips for Success
Here are some extra tips to help you achieve a great painted finish over stained wood without all the sanding.
- Test, Test, Test: Before you commit to painting your entire piece, always test your chosen primer and paint on an inconspicuous area. Let it dry thoroughly and then try to scratch it. This is your best way to ensure it will hold.
- Ventilation is Key: When working with primers and paints, ensure you have good ventilation. Open windows and doors. Use fans to circulate air. Some primers have strong fumes.
- Thin Coats are Your Friends: It bears repeating: apply thin, even coats of both primer and paint. This leads to a much more durable and smoother finish than trying to get coverage in one thick application.
- Clean Your Tools: Always clean your brushes, rollers, and sprayers immediately after use. Dried paint and primer are much harder to remove.
- Patience Pays Off: Don’t rush the drying or curing times. This is the most common mistake people make. Let each layer do its job before adding the next.
- Consider a Topcoat: For high-traffic items like tabletops or chair seats, applying a clear topcoat (like a water-based polycrylic) over your dried paint can add extra durability and protection.
- Read the Labels: Seriously, read all product labels carefully. They provide specific instructions for application and drying times.
Quick Checklist:
Surface Prep Done? Yes/No
Bonding Primer Used? Yes/No
Thin Coats Applied? Yes/No
Drying Times Followed? Yes/No
Tested for Adhesion? Yes/No
Frequently Asked Questions
Can I really paint over any wood stain without sanding?
Generally, yes, you can paint over most wood stains without heavy sanding by using a high-quality bonding primer. The key is thorough cleaning and using the right primer designed for slick surfaces. However, if the existing finish is severely damaged or peeling, some prep will be needed.
What is the best type of primer for painting over stained wood?
The best type of primer is a “bonding primer” or “all-surface primer.” These are formulated to adhere to surfaces that are normally difficult to paint, like laminate, metal, and glossy finishes. Look for brands like Zinsser (Bulls Eye 1-2-3, B-I-N) or Kilz (Adhesion).
How long does the paint job last if I don’t sand?
With proper cleaning and a good bonding primer, a paint job over stained wood can last for many years. Durability depends on the quality of products used, application, and the amount of wear the surface receives. For high-wear areas, consider a protective topcoat.
Will the stain bleed through the new paint?
This can happen, especially with dark stains or certain wood types like pine or mahogany. A good quality bonding primer is designed to block stains. If you are concerned about bleed-through, a shellac-based primer like Zinsser B-I-N is excellent at blocking tannins and stains.
Do I need to use a special paint or just regular latex paint?
Once you have applied a quality bonding primer, most regular interior latex or acrylic paints will adhere well. For added durability on furniture, consider paints marketed for cabinets or furniture, or apply a clear polycrylic topcoat over your dried paint.
What if the wood is very oily or waxy?
If the wood feels oily or waxy, your cleaning step is even more critical. Use a strong degreaser and rinse thoroughly. If you suspect a heavy wax buildup, you might need to use mineral spirits to remove it before using your degreaser.
Then, a shellac-based primer is often recommended for oily woods.
Conclusion
Updating your home decor doesn’t have to involve endless hours of sanding. You can achieve a beautiful painted finish over stained wood by focusing on smart preparation. Thorough cleaning and a high-quality bonding primer are your keys to success.
This simple method saves time and energy. It allows you to refresh your furniture and trim with confidence. Enjoy your newly painted space!