How Many Coats Of Stain Do You Really Need?
When undertaking a staining project, understanding the optimal application of stain is crucial to achieving a durable and aesthetically pleasing finish. The question of **how many coats of stain** are necessary depends on several factors, including the type of wood, the stain formulation, and the desired color intensity. Various technical guidelines suggest that different wood species absorb stain differently, influencing the refinement of the finish. Additionally, considering the characteristics of penetrating versus film-forming stains can dictate the number of required applications.
Exploring these nuances will reveal the secret to perfecting your staining technique—read on to unlock the answers.
How Many Coats Of Stain: The Ultimate Guide To Application
Understanding how many coats of stain are necessary for your woodworking projects is crucial for achieving the desired finish and durability. The number of coats required can depend on various factors, including the type of wood, the stain used, and the look you wish to achieve. This summary provides essential insights into selecting the right number of stain applications, ensuring the longevity and vibrancy of your stained surfaces while maximizing the effectiveness of your efforts.
Factors Influencing the Number of Coats
Wood type and grain: How they affect stain absorption. Desired color intensity: Determining how deep the color should be. Condition of the wood: New vs. previously stained surfaces.
Several important factors affect how many coats of stain you should apply. First, wood type and grain impact how much stain the wood absorbs. Softwoods like pine soak up more stain than hardwoods like oak. Next, consider the desired color intensity.
Darker shades may need more coats for a rich look. Lastly, the condition of the wood matters. New wood may need fewer coats compared to surfaces that were previously stained.
- Wood Type: Softwoods absorb more.
- Color Intensity: Dark shades require more.
- Wood Condition: New wood needs fewer coats.
Preparation for Staining
Surface preparation: Sanding, cleaning, and repairing. Weather conditions: Ideal temperature and humidity for staining.
Proper preparation is key for a successful staining job. Sanding the surface smooths out imperfections, which helps the stain stick better. After sanding, cleaning is essential to remove dust and dirt.
Check for any damages and repair them before you start. Ideal weather conditions also play a big role. The best temperature for staining is between 50°F and 90°F, with humidity below 70%. This ensures a perfect finish!
- Sanding removes rough spots.
- Cleaning keeps the surface free of debris.
- Repairing ensures a smooth application.
- Ideal staining temp: 50°F – 90°F.
- Humidity should be under 70%.
Application Techniques for Stain
Brushing vs. rolling vs. spraying: Pros and cons of methods. Best practices for even application and avoiding lap marks.
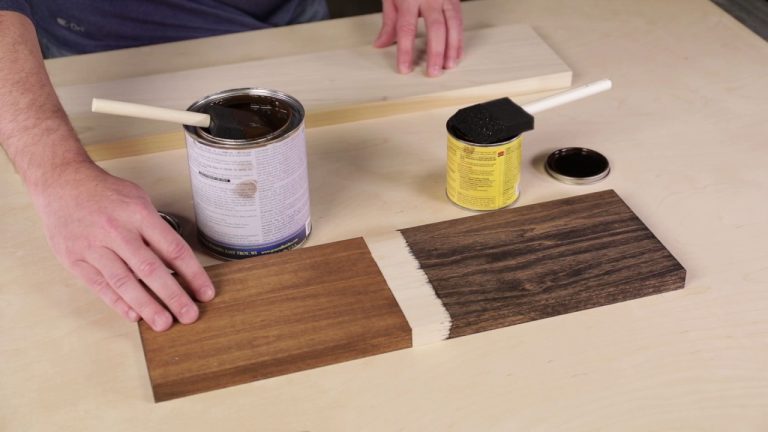
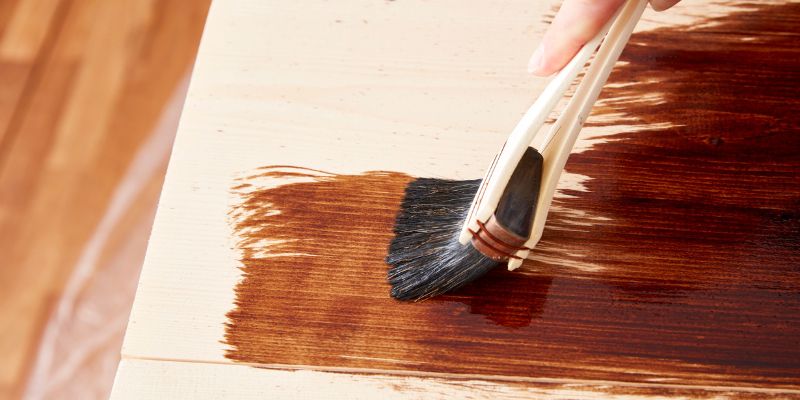
Let’s dive into the fun world of staining! First up is brushing. This method gives you control and helps to fill in those tricky spots.
However, it can take some time and may leave brush marks—oops! Rolling is faster but can sometimes miss those tight corners. Finally, spraying gets the job done quickly and evenly but requires some practice. Enjoy a fun mess-free zone, but watch for overspray!
| Method | Pros | Cons |
|---|---|---|
| Brushing | Great control, fills gaps | Time-consuming, brush marks |
| Rolling | Quick application | Might miss corners |
| Spraying | Even and fast | Needs practice, overspray mess |
Remember to apply your stain in small sections and work quickly to avoid lap marks. Always blend the edges for that smooth, professional finish. Keep it fun and happy staining!
Determining the Number of Coats
General guidelines based on wood type and stain choice. Visual indicators for when a second coat is necessary.
Choosing the right number of stain coats can make all the difference! Generally, softwoods like pine soak up stain well, needing about two coats. Hardwoods like oak may need only one or two, depending on the stain.
Look out for visual signs! If the wood appears patchy or dull, it’s a hint for a second coat. Remember, too much stain and your wood may feel like it’s wearing a heavy coat in summer!
| Wood Type | Coats Recommended |
|---|---|
| Softwoods (e.g. , Pine) | 2 Coats |
| Hardwoods (e. g. , Oak) | 1-2 Coats |
Testing Your Stain Application
Importance of testing on a small area first. How to evaluate the test area for color and coverage.
Before diving in, testing your stain on a small area is key. It’s like trying on shoes before buying them—nobody wants a surprise! Pick a spot that’s not too obvious, and apply the stain. Wait for it to dry.
This will help you see the true color and coverage.
| Criteria | What to Look For |
|---|---|
| Color | Does it match your vision? Is it too bright, too dark, or just right? |
| Coverage | Is it evenly spread? Any spots looking thirsty? |
By testing first, you save time, avoid headaches, and who knows, you might just discover your new favorite stain shade! No one wants a lovely project turned into a colorful disaster.
Maintaining Stained Surfaces
Tips for prolonging the life of stained wood. When and how to restain or refresh the finish.
Keeping stained wood looking fresh is easier than you think! Regular cleaning helps prevent dirt from building up. Use a soft cloth and mild soap—no scrubbing like you’re polishing your shoes!
If the shine starts to wear, it’s time to restain. Typically, every 3-5 years is a good rule, but check for wear and tear. Not sure when to do it? If your wood looks duller than a squirrel’s favorite acorn, it’s time to refresh!
| Tip | Description |
|---|---|
| Regular Cleaning | Wipe with a soft cloth and mild soap. |
| Inspect Regularly | Look for any signs of wear! Is it looking sad? |
| Restain Time | Usually every 3-5 years. Judging your wood is key! |
Common Mistakes to Avoid
Overapplying stain: Signs and effects. Skipping important preparation steps: Consequences on final appearance.
Applying too many coats of stain can cause problems. You may notice drips or a sticky surface. These signs mean it’s time to stop and let it dry.
Skipping important steps, like sanding or cleaning, leads to a poor final look. Stains may not absorb evenly. This can create a blotchy appearance. Follow these tips to get a smooth and beautiful finish:
- Apply in thin coats for best results.
- Always prepare your surface before staining.
- Check your work as you go for even coverage.
Conclusion
In conclusion, the number of coats of stain you should apply largely depends on the type of wood, desired finish, and specific product guidelines. Generally, one to three coats is ideal for optimal durability and appearance. Always remember to prepare the surface properly and allow adequate drying time between coats to achieve the best results for your staining project.
FAQs
Sure! Here Are Five Related Questions On The Topic Of How Many Coats Of Stain To Apply:
The number of coats of stain to apply typically depends on the wood type and desired finish. Generally, two to three coats are recommended for optimal color depth and protection. It’s essential to allow each coat to dry thoroughly before applying the next. Always consult the stain manufacturer’s instructions for specific guidance related to their product.
Sure! Please provide the question you’d like me to answer.
How Do I Determine The Number Of Coats Of Stain Needed For My Specific Type Of Wood?
To determine the number of coats of stain needed for your wood, first assess the wood type and its porosity; softer woods like pine may absorb more stain than hardwoods like oak. Conduct a test on a scrap piece or an inconspicuous area to see how the wood reacts to the stain and how deep the color saturates. Based on the test results, apply additional coats if a deeper hue or richer finish is desired. Generally, two coats are common for achieving an even and consistent look, but always refer to the manufacturer’s recommendations for specific products.
What Factors Can Influence The Number Of Stain Coats Required For Achieving The Desired Color And Finish?
The number of stain coats required for achieving the desired color and finish can be influenced by several factors, including the type of wood, its porosity, and the stain’s opacity and formulation. Lighter woods may absorb stain differently than darker woods, often requiring more coats to achieve the same intensity of color. Additionally, environmental conditions like humidity and temperature can affect drying times and application effectiveness. Finally, the application technique, such as the method used (brush, cloth, or spray), can also impact how evenly the stain is absorbed.
Is It Better To Apply Multiple Thin Coats Of Stain Or One Thick Coat, And Why?
It is generally better to apply multiple thin coats of stain rather than one thick coat. Thin coats allow for more even absorption and help to prevent streaks and blotches. Additionally, multiple layers can build up color and depth more effectively, resulting in a richer finish. This method also promotes better adhesion and durability of the stain.
How Can I Tell If My First Coat Of Stain Has Adequately Absorbed Into The Wood Before Applying A Second Coat?
To determine if your first coat of stain has adequately absorbed into the wood, check the surface for a uniform appearance and dryness. If the wood feels dry to the touch and there are no sticky or shiny areas, it’s likely ready for a second coat. Additionally, you can gently rub a small, inconspicuous area with a cloth; if it lifts color, the stain hasn’t fully absorbed. Generally, allowing sufficient drying time as per the manufacturer’s instructions is crucial before applying additional coats.
Are There Different Recommendations For Exterior Versus Interior Stain Applications Regarding The Number Of Coats?
Yes, there are typically different recommendations for exterior versus interior stain applications. Exterior stains often require more coats for enhanced durability and protection against weather elements, usually recommending two to three coats. In contrast, interior stains generally recommend one to two coats, as they do not face the same environmental challenges. Always follow the manufacturer’s instructions for the best results.