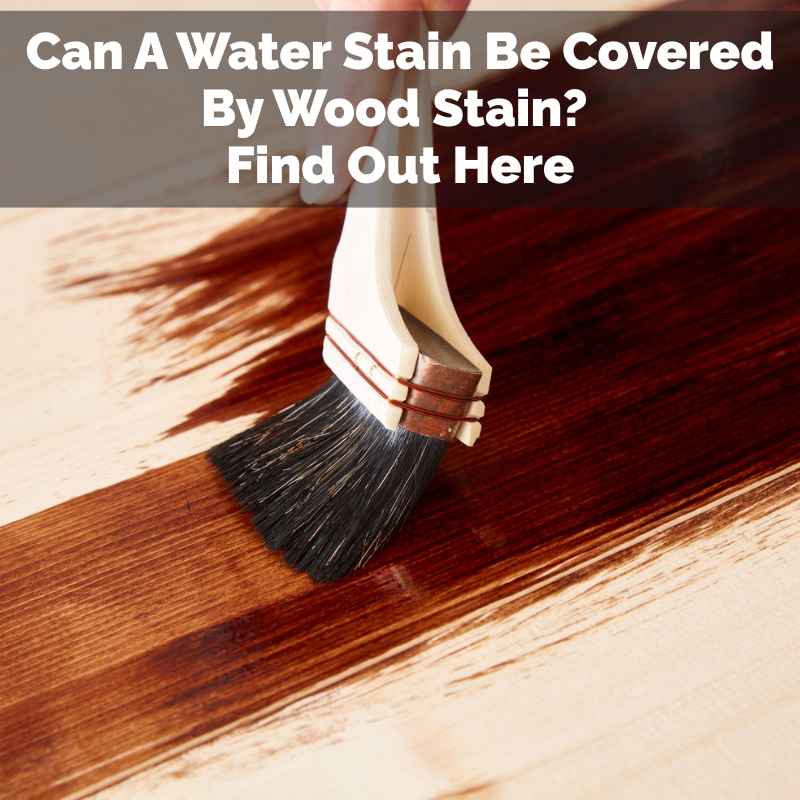
Can A Water Stain Be Covered By Wood Stain? Find Out Here
A water stain on wood generally cannot be fully covered by simply applying more wood stain. Wood stain primarily adds color and protection, but it doesn’t typically erase or reverse the physical damage, discoloration, or changes in wood texture caused by water saturation and mineral deposits. Effective removal or repair of the underlying issue is usually necessary before staining for a good result.
Understanding How Water Stains Affect Wood
Water is a tricky thing when it hits wood. It doesn’t just sit on the surface. Wood is like a sponge.
When water soaks in, it can cause all sorts of changes. The fibers in the wood swell up. This can push things around inside the wood itself.
Over time, this swelling and drying cycle can weaken the wood. It can also push mineral deposits from the water up to the surface.
These mineral deposits are often what we see as the stain. They can be light or dark. Sometimes, mold or mildew can grow.
This adds even more color. The water can also lift the natural oils or tannins in the wood. These then dry on the surface, creating dark rings or splotches.
Even after the water dries, these marks can stay behind. They are a sign that the wood has been changed.
The type of wood matters too. Some woods, like oak, have a lot of tannins. These can react with water and turn dark brown or black.
Softer woods might absorb water more easily. They can also show damage more readily. The longer the wood stays wet, the worse the damage can get.
This is why dealing with water spills quickly is so important.
My Own Water Stain Scare
I remember one weekend, I was working late in my garage. I had a big project going on. I’d set up a makeshift workbench near the wall.
A storm rolled in unexpectedly. The rain was really coming down hard. I thought the old garage window was sealed tight, but I was wrong.
A steady drip started. It landed right on a newly sanded pine board I had just prepped. It wasn’t a flood, just a slow, steady drip.
I didn’t notice it for a few hours. By the time I did, the board had a dark, ugly ring forming exactly where the drips hit. My heart sank.
I had spent hours sanding that board perfectly smooth.
My first thought was, “No problem, I’ll just sand it again and stain it. It will be fine.” I was annoyed at myself for not checking the window better. The little drip felt like a big disaster for my project.
I hoped a quick fix would save the day, but I had a nagging feeling it might not be that simple.
Can You Really Cover a Water Stain with Wood Stain?
The short answer is usually no, not really. Wood stain’s main job is to change the color of the wood. It also seals the wood a bit.
It can make light wood darker. It can give a different tone, like cherry or walnut. But it’s not a magic eraser.
It can’t undo the damage water has done.
Think of it like trying to cover a bruise with makeup. You can put on foundation, but the bruise is still there underneath. The makeup might make it less obvious for a little while.
But the underlying problem hasn’t gone away. Water stains often involve more than just a surface color change. The minerals and wood fibers have been altered.
A dark stain might cover a very light water mark. But if the water has caused the wood to swell, warp, or darken due to minerals, stain alone won’t fix that. It might even make the problem look worse.
A dark stain on warped wood will highlight the uneven surface. It can also make the original stain color look blotchy.
Sometimes, a gel stain might offer a bit more coverage. Gel stains sit more on top of the wood. They are thicker.
They can hide some surface imperfections better than a liquid stain. But they still won’t repair the wood itself. And they can look less natural if not applied perfectly.
Why Wood Stain Doesn’t Erase Water Marks
Wood stain works by soaking into the wood’s pores. It carries pigment with it. This pigment colors the wood fibers.
When water hits wood, it causes several issues:
- Mineral Deposits: Water often contains minerals. As the water evaporates, these minerals are left behind. They can be white, gray, or dark. These deposits are physically on or in the wood. Stain doesn’t remove them.
- Wood Swelling: Water makes wood fibers expand. When the wood dries, it shrinks. This can leave the grain raised or even cause small cracks. Stain won’t flatten swollen wood.
- Tannin Migration: Some woods release tannins when wet. These can bleed to the surface and create dark stains. Stain can sometimes cover light tannin stains, but dark ones are tough.
- Mold/Mildew: If wood stays wet long enough, mold and mildew can grow. This causes discoloration that stain might not fully hide.
Because wood stain is meant to enhance the natural look of wood, it doesn’t typically have heavy-duty hiding power. Its goal is transparency and absorption. It lets the wood grain show through.
This means it will also let the water stain show through, often amplified.
Different Types of Water Stains on Wood
Not all water stains are the same. Their cause and appearance can vary a lot. This affects how (or if) they can be treated.
Understanding Water Stain Types
Light Stains (White or Gray):
These are often caused by water trapped in the wood’s finish. The moisture gets under the top coat. It then collects there.
These are usually the easiest to fix. They haven’t deeply penetrated the wood itself.
Dark Stains (Brown or Black):
These are more serious. They happen when water penetrates the wood itself. Minerals in the water react with the wood.
Or, tannins in the wood have been drawn out. Mold or mildew can also cause dark spots.
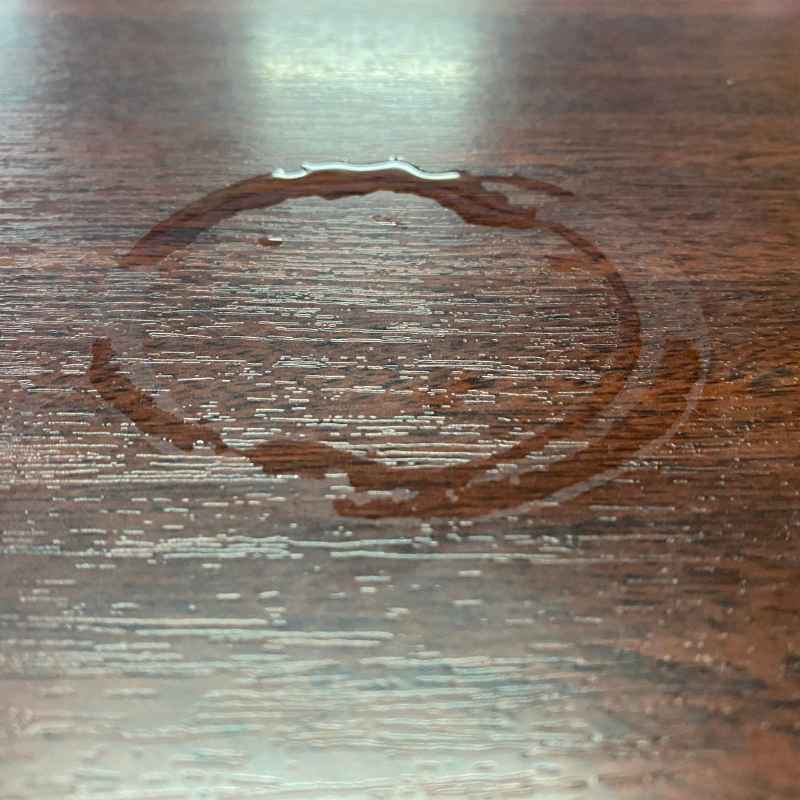
Rings from Glasses or Cups:
These are common. They are often caused by condensation. Heat from a mug can also play a role.
They are usually a type of light stain but can be stubborn.
The depth of the stain is key. A surface stain might be something you can lift. A deep stain is much harder.
It has changed the wood on a molecular level, in a way. Trying to stain over it can be like painting a dent instead of fixing it first.
Real-Life Scenarios Where Stain Won’t Cut It
I’ve seen this happen many times, both in my own home and when helping friends. Picture this:
Someone spills a glass of water on a beautiful, light-colored dining table. They wipe it up quickly. But a faint ring is left.
They think, “Okay, I’ll just re-stain the whole tabletop later.” When they do, the area where the spill was might look a bit different. It might be darker or have a strange sheen. The stain didn’t cover it; it just colored the damaged spot.
Or imagine a leaky roof. A water stain appears on the ceiling or a wooden beam. It’s a big, brown splotch.
Someone decides to paint over it. But the stain bleeds through the paint. Then, they try to stain the wood.
The stain highlights the uneven texture and color of the water-damaged wood. It looks worse than before.
Another common one is in bathrooms. Water splashes from the sink onto a wooden vanity. Over time, the wood under the sink can get damp.
It can start to look gray or even black. Trying to stain that wood without addressing the moisture first will just make the dark areas stand out more. It won’t look like a rich, uniform color.
When a Light Stain Might Seem to Work
There are rare cases where a very light water mark might become less noticeable after staining. This usually happens when:
- The water stain is extremely faint.
- The wood is naturally a bit uneven in color already.
- You are using a very dark or opaque stain.
- You are restaining the entire piece of furniture or wood surface.
In these situations, the stain is not covering the water mark. It’s just adding so much color that the original imperfection is harder to see. It’s like using a very thick, dark paint.
You can still see bumps and ridges underneath, but the color is uniform.
However, this is not a reliable fix. And it can backfire. If the water has caused the wood grain to lift, a dark stain can settle into those raised areas.
This makes the texture even more pronounced. It can look blotchy and unfinished. It’s better to deal with the problem directly.
The Right Way: Cleaning and Repairing Water Stains
So, if just staining won’t work, what will? The key is to clean and repair the wood first. The methods you use depend on the type of stain.
Fixing Light Water Stains (White/Gray)
For finished wood:
- Iron Method: Place a clean, dry cloth over the stain. Gently glide a warm (not hot) iron over the cloth. Move the iron constantly. The heat can help lift the trapped moisture. Check often.
- Toothpaste (Non-gel): Apply a small amount of white, non-gel toothpaste to a soft cloth. Gently rub the stain. Wipe clean with a damp cloth. Buff dry.
- Baking Soda Paste: Mix baking soda with a little water to make a paste. Apply to the stain. Gently rub with a soft cloth. Wipe clean and dry.
These methods work best for stains on the surface or within the finish. They help to draw out the moisture or gently lift the residue. They don’t usually damage the existing finish.
Fixing Dark Water Stains (Brown/Black)
These require more effort. You often need to remove the stain from the wood itself.
Sanding:
- Start with medium-grit sandpaper (e.g., 120-grit).
- Sand the stained area, going slightly beyond the stain’s edges.
- Work your way up to finer grits (e.g., 180-grit, then 220-grit) for a smooth finish.
- If the stain is deep, you might need to sand down to fresh wood.
Wood Bleach:
- For very stubborn dark stains, a two-part wood bleach (oxalic acid is common) can be effective.
- Follow product instructions carefully. It’s a chemical process.
- Always wear protective gear (gloves, eye protection).
- Neutralize the bleach afterward as directed.
After cleaning or sanding, the wood will look different. It might be lighter or show the bare wood. This is the point where you would then apply your wood stain.
You’ll want to re-stain the entire piece or section for a uniform look. This ensures the repaired area blends in.
My Experience with Sanding Out a Stain
Remember that pine board from earlier? The one with the drip ring? I decided I had to fix it properly.
I grabbed my orbital sander. I started with 120-grit sandpaper. The ring was surprisingly stubborn.
I had to sand down a bit deeper than I liked.
The wood dust flew everywhere. I wore my mask and safety glasses. Slowly, the dark ring started to fade.
It took a good twenty minutes of sanding, moving the sander in small circles. I could feel the wood getting smoother.
Once the ring was gone, I switched to 180-grit. Then, finally, 220-grit. The surface felt nice and smooth.
It looked like fresh wood again. It was lighter than the surrounding pine, but that was okay. I knew I would be staining the whole board anyway.
I wiped away all the dust. I felt a sense of relief. I had fixed the problem at its source.
It took more time and effort than I initially wanted. But I knew the final result would be so much better than just trying to cover it up. I could already picture the finished board, looking even and beautiful.
The Importance of Preparing Wood Before Staining
This experience taught me a valuable lesson. Proper wood preparation is everything when it comes to staining. Staining is the final step.
It enhances what’s already there. It doesn’t fix underlying issues.
If the wood is rough, stained, or damaged, the stain will only highlight those problems. This is why sanding is so crucial. It smooths the surface.
It opens up the wood pores evenly. This allows the stain to penetrate uniformly.
Even if you don’t have a water stain, you still need to prep. If you’re staining old furniture, you might need to remove the old finish first. You’ll likely need to sand it down.
If you’re working with new wood, you still need to sand it. Start with a coarser grit if needed and finish with a fine grit.
Always wipe the wood clean of dust after sanding. A tack cloth works wonders for this. Then, you can apply your stain.
If you skip these steps, your stain job might look uneven or blotchy. It can highlight every little flaw.
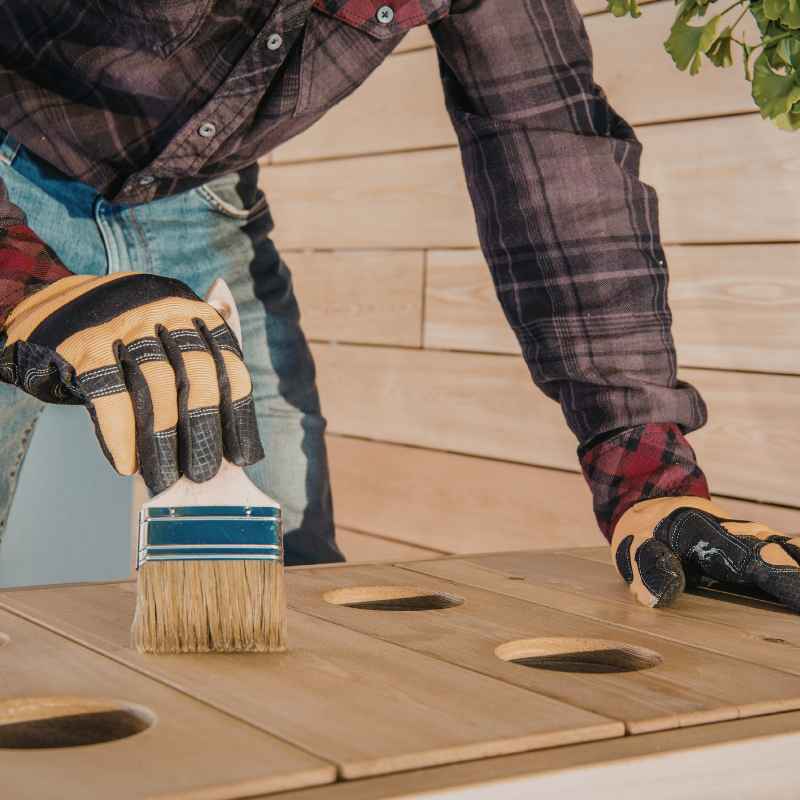
Applying Stain After Repair
Once you’ve successfully cleaned or sanded away the water stain, the next step is applying your wood stain. This is where you get to choose the color and finish you want.
Steps for Staining Repaired Wood
1. Final Sanding: Ensure the entire area you will stain is smooth. Use 220-grit sandpaper.
Wipe away all dust with a tack cloth.
2. Test in an Inconspicuous Area: Always test your stain on a scrap piece of wood or an hidden spot. This helps you see the true color.
It also shows how the stain absorbs into the wood.
3. Apply Stain: Use a good quality brush, cloth, or foam applicator. Apply the stain in long, even strokes.
Follow the direction of the wood grain. Work in small sections.
4. Wipe Off Excess: Let the stain sit for the time recommended on the product label (usually 5-15 minutes). Then, use a clean, lint-free cloth to wipe off the excess stain.
Wipe with the grain.
5. Allow Drying: Let the stain dry completely. This can take several hours or even overnight.
Check the product directions.
6. Apply Second Coat (Optional): If you want a darker color, you can apply a second coat. Repeat steps 3-5.
You can also apply a pre-stain wood conditioner before staining if you are working with a wood known for blotching (like pine or maple).
When you stain the entire surface after a repair, the repaired area will blend in naturally. The stain will give a consistent color. This is the goal.
You want the wood to look like one beautiful, finished piece.
When to Call a Professional
While many water stain issues can be fixed at home, there are times when you might need expert help. If the water damage is extensive, it can be overwhelming. Especially if the wood is warped or structurally weakened.
If you have antique furniture, you might want a professional restorer. They have specialized knowledge and tools. They can assess the damage without causing more harm.
They know how to bring old pieces back to life. Their skills can preserve the value of the item.
Also, if the water damage was due to a leak that isn’t fixed, you need to address the source of the water first. This might involve calling a plumber or a roofer. Fixing the leak is essential before you even think about repairing the wood.
Otherwise, the problem will just keep coming back.
What This Means for You
So, can a water stain be covered by wood stain? Usually, no. It’s not the best approach.
It’s like trying to put a band-aid on a deep cut. It might hide it for a bit, but it doesn’t heal anything.
Understanding the difference between light and dark water stains is important. Light stains are often on the surface. Dark stains have gone deeper into the wood.
Your approach to fixing them will change.
For light stains, simple home remedies like the iron or toothpaste can work wonders. They can lift the moisture and make the stain disappear. For dark stains, you’ll likely need to sand or even use wood bleach.
This removes the discolored wood.
After you’ve fixed the damage, you can then apply wood stain. Staining a clean, properly prepared surface will give you the best results. It will ensure an even, beautiful color.
It will make your wood look its best.
Don’t get discouraged if you see a water stain. Most of the time, it’s fixable. Just remember that the stain is the final step.
The real work comes before that. It’s about repairing the wood itself. Once that’s done, your staining project can truly shine.
Quick Fixes & Tips for Water Stains
Here are some quick takeaways to help you deal with water stains:
- Act Fast: If you spill something, wipe it up immediately. This prevents many stains from forming.
- Identify the Stain: Is it light or dark? This tells you how deep the damage is.
- Light Stains = Gentle Methods: Try the iron, toothpaste, or baking soda paste.
- Dark Stains = Deeper Work: Sanding or wood bleach might be needed.
- Stain is the Last Step: Always repair and prep the wood before staining.
- Test Your Stain: Always test on a scrap piece first.
- Work in Sections: Stain and wipe in manageable areas.
- Protect Your Wood: Use coasters and be careful with liquids around wood surfaces.
Frequent Questions About Water Stains and Wood Stain
Can a clear coat of polyurethane cover a water stain?
A clear coat of polyurethane is a finish. It sits on top of the wood. Like wood stain, it’s not designed to remove stains.
It will likely just seal the water stain in. If the stain is light and in the finish, sometimes a gentle buffing or polishing might help. But for stains that have penetrated the wood, the clear coat will just make them permanent.
What is the difference between a water stain and a heat stain on wood?
A water stain is caused by moisture. It can be light (moisture trapped in the finish) or dark (minerals or tannins reacting with water). A heat stain is usually caused by something hot, like a mug, being placed on the wood.
Heat stains can sometimes cause the wood finish to turn white or cloudy, similar to a light water stain. Both often require careful cleaning or refinishing.
Can I use a wood filler on a water-damaged area before staining?
Wood filler is best for cracks, dents, or holes. If the wood is just discolored but not damaged in shape, filler isn’t the right solution. If water has caused wood to rot or become very soft, you might need to remove the damaged wood and then use a wood filler or epoxy filler before sanding and staining.
But for simple discoloration, repair and sanding is better.
Will sanding a water stain remove the original wood finish?
Yes, sanding will almost always remove the existing finish over the stained area. This is usually necessary to get to the wood itself so you can treat the stain. After sanding, you’ll need to reapply a finish, like stain and then a topcoat (polyurethane, varnish, etc.), to protect the wood.
If it’s a light stain in the finish only, some methods might not require sanding.
Is it okay to stain wood that had mold on it from water damage?
No, it’s not okay to stain wood with mold on it. Mold can be a health hazard. You must clean the mold thoroughly first.
Use a solution of water and mild soap, or a specific mold remover. For stubborn mold, a diluted bleach solution might be needed. Ensure the wood is completely dry and the mold is gone before sanding or staining.
If the mold has deeply penetrated the wood, you may need to replace the affected section.
How can I prevent water stains on my wood furniture?
Prevention is key! Always use coasters for drinks. Wipe up spills immediately.
Be mindful of plants that might leak. For outdoor furniture, use protective covers. For indoor wood, keep it away from excessive humidity or direct water sources.
Regular dusting and occasional polishing with a good furniture polish can also help maintain the finish and provide a slight barrier.
Conclusion
Dealing with water stains on wood can be tricky. While the idea of simply staining over them is appealing, it’s rarely an effective solution. Wood stain is for color and protection, not for repairing physical damage or deep discoloration.
The key is to identify the stain type and use the right cleaning or repair methods first. Only after the wood is properly prepped and repaired should you move on to staining for a beautiful, lasting finish.