How to Restore Wood Furniture: A 5-Step Guide (DIY)
Restoring wood furniture means cleaning, repairing, sanding, and refinishing a piece to reverse damage like scratches, dents, or a failed varnish — but if the existing finish is still intact, a full strip-and-sand isn’t needed. Oversanding is the most common mistake, turning solid wood into a splintered mess. This guide covers assessing damage, repairing scratches and cracks, and choosing between an 80-120-220 grit sanding sequence or a no-sand clean-and-wax revival.
How To Restore Wood: Essential Tips And Techniques
Restoring wood can breathe new life into tired or damaged surfaces, transforming the aesthetic of furniture, fixtures, and flooring alike. Techniques vary based on the type of wood and the extent of deterioration, encompassing cleaning, sanding, refinishing, and staining. Restoring wood involves assessing the condition of the piece, choosing the right materials, and applying the appropriate methods to achieve a polished finish. With attention to detail and patience, even heavily worn wood can regain its original beauty.
Understanding Different Types of Wooden Surfaces
Wood comes in two main types: hardwood and softwood. Hardwood, from trees like oak and maple, is dense and durable, making it well-suited for furniture. Softwood, from trees like pine and cedar, is lighter and more often used for flooring and construction framing.
Knowing which type you’re working with affects everything downstream — sanding grit, stain absorption, and drying time all differ between the two. Below is a quick comparison:
| Type | Characteristics | Common Uses |
|---|---|---|
| Hardwood | Dense, durable, often expensive | Furniture, cabinetry |
| Softwood | Lighter, easier to work with, usually cheaper | Flooring, construction |
Assessing the Condition of Wood
Before restoring wood, examine it for signs of damage. Common issues include:
- Scratches: Small lines that affect the wood’s appearance without going deep into the surface.
- Dents: Indentations that happen from heavy or dropped objects.
- Rot: Soft, spongy areas usually caused by prolonged moisture exposure. If rot has spread into the core of the wood, surface repair products alone won’t hold — a dedicated wood rot repair product with an epoxy hardener is needed before refinishing.
Next, evaluate the finish already on the wood. Check if it has:
- Varnish: A glossy layer that protects the wood.
- Lacquer: A fast-drying finish that gives a smooth surface.
- Paint: Colorful coatings that can hide imperfections underneath.
If the finish is still intact and just dull, a full strip usually isn’t necessary — cleaning and waxing can revive it. If bare wood is showing through worn patches, plan on a full sand-and-refinish instead.
Essential Tools and Materials for Wood Restoration
Before starting, gather the right tools. Hand tools, such as chisels, rasps, and sandpaper, work best for detail and repair work. Power tools like orbital sanders and heat guns save time on larger, flatter surfaces.
You’ll also need quality cleaning and finishing products for a durable result — cutting corners on stain or sealant is the most common reason a restoration doesn’t last.
| Tool Type | Examples |
|---|---|
| Hand Tools | Chisels, Sandpaper, Paintbrush |
| Power Tools | Orbital Sander, Drill, Heat Gun |
| Cleaning Products | Wood Soap, Vinegar |
| Finishing Products | Stain, Varnish, Oil |
Best Wood Restoration Kit Pick
Weiman Wood Restore and Repair Kit – $22.99
Combines a cleaner/restorer with wax touch-up markers — a practical starting point for the cleaning and finish-assessment steps this guide covers, before deciding if a full strip is even necessary.
- Best for: reviving a dull-but-intact finish without full sanding
- Why we picked it: matches the “clean and wax first” decision point covered above
- Main drawback: markers only hide light scratches, not deep gouges or rot
Compare more wood restoration options
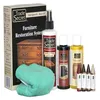 Option 1 Trade Secret Complete Restoration Kit – $49.99
|
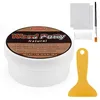 Option 2 SEISSO Wood Filler Putty – $9.99
|
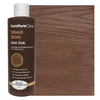 Option 3 Furniture Clinic Wood Stain, Dark Oak – $11.95
|
As an Amazon Associate we earn from qualifying purchases.
Steps to Clean and Prepare Wood for Restoration
Start with dust removal. A soft cloth or a damp rag wipes off surface dust; a vacuum with a brush attachment reaches carved corners and joints. Cleaning comes next.
You can choose between natural and chemical cleaning options. Natural cleaners like mild soap and water are gentler on old finishes. Chemical cleaners work faster but can strip more of the existing finish than intended, so test on a hidden spot first.
| Option | Pros | Cons |
|---|---|---|
| Natural | Safe, gentle on existing finish | May take longer to cut through grime |
| Chemical | Fast-acting on heavy buildup | Can strip more finish than intended |
Techniques for Repairing Damaged Wood
For scratches and dents, clean the area first, then apply wood filler with a putty knife and let it dry fully before sanding it flush with the surrounding surface. For chipped edges or missing corners, the same filler approach works — see this guide on fixing chipped wood for chip-specific technique.
For cracks and splits, wood glue is the standard fix: squeeze it into the crack, clamp it tight, and let it cure fully before sanding. Deeper or structural cracks need a different approach — see how to fix cracked wood for clamping times and when epoxy is the better call.
| Damage Type | Repair Method |
|---|---|
| Scratches and Dents | Use wood filler, sand flush |
| Cracks and Splits | Wood glue, clamp until cured |
Stripping Old Finishes and Preparing for New Coating
If bare wood shows through worn patches, strip the old paint or varnish first. Chemical strippers or a heat gun both work — wear gloves and work in a ventilated area with either method.
Sanding comes next. Professional finishers commonly work through an 80-120-220 grit progression: 80-grit strips residual finish, 120-grit blends in stain remnants, and 220-grit leaves the surface smooth enough for an even stain absorption. Skipping a grit step leaves visible scratches the next grit can’t fully remove.
| Method | Description |
|---|---|
| Chemical Stripping | Apply a chemical solution to dissolve old finishes. |
| Heat Gun | Use heat to soften the finish, then scrape it off. |
| Sanding | 80-120-220 grit progression for a smooth, stain-ready surface. |
“Spend more time up front with letting the stripper do all of the work to remove the layers of stain and top coat.”
Applying New Finishes: Stains, Oils, and Sealants
Choosing the right wood stain and finish matters because different woods absorb finish at different rates. Here are the main options:
- Stains: Enhance color and grain.
- Oils: Penetrate wood for a natural look.
- Sealants: Protect against moisture and daily wear.
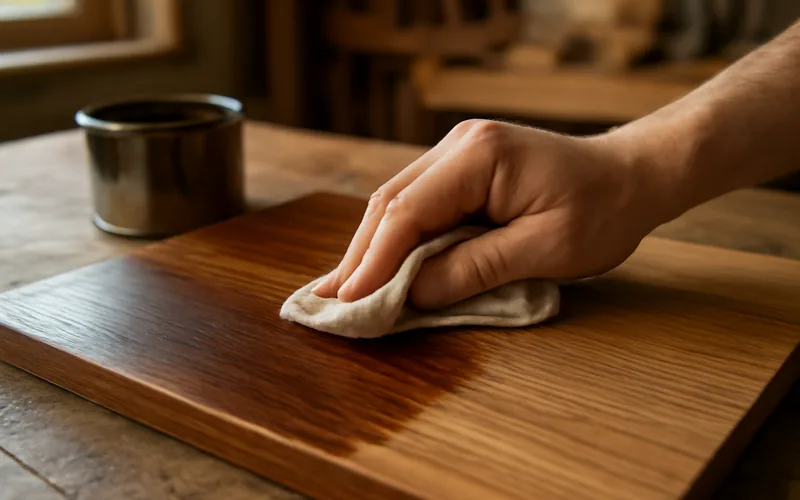
To apply a finish, follow these steps:
- Clean the surface: Wipe the sanded wood free of dust with a tack cloth so the finish bonds evenly.
- Apply the stain or oil: Use a brush or lint-free cloth, working with the wood grain.
- Wipe off excess: Remove surplus stain before it dries tacky, per the product label.
- Let it dry fully: Follow the product’s recommended drying window before the next coat.
- Sand lightly between coats: Use fine-grit paper (220+) and apply additional coats for extra protection.
📊 Minwax Fast-Drying Polyurethane needs 4 to 6 hours of drying time between coats — Source: Minwax, 2026
Following the manufacturer’s drying window between coats — rather than guessing — is what separates a durable finish from one that stays tacky or clouds over.
Maintenance Tips for Restored Wood
Keep restored wood looking its best with regular cleaning using a soft cloth and mild soap — harsh chemical cleaners can dull or strip a fresh finish over time. Use coasters and placemats to prevent new scratches and moisture rings.
Also watch humidity levels; wood expands and contracts with moisture, and prolonged dampness can undo a restoration.
| Tip | Description |
|---|---|
| Dust Regularly | Use a soft cloth to avoid scratches. |
| Use Mild Soaps | Clean without stripping the new finish. |
| Avoid Excess Moisture | Keep wood dry to prevent warping and damage. |
Common Mistakes to Avoid in Wood Restoration
Oversanding is the most common error — pushing past the recommended grit progression thins the wood and can expose splinters or veneer underneath. Stick to the 80-120-220 sequence and stop once the surface feels uniformly smooth.
Mixing incompatible products is the second most common mistake — for example, applying an oil-based stain over a water-based sealer, or vice versa, without testing compatibility first. This causes peeling and bubbling instead of a clean finish.
| Error | Effect |
|---|---|
| Oversanding | Splintered wood and uneven surfaces |
| Using incompatible products | Peeling and bubbling finishes |
Resources and Further Reading
For deeper reading on wood restoration, “The Complete Manual of Woodworking” and “Woodworking Basics” both cover restoration fundamentals for beginners. This Old House also publishes detailed furniture and woodworking restoration guides. For rot, structural damage, or antiques with real value, a professional restoration service is worth the cost over a DIY attempt.
| Resource Type | Title/Website |
|---|---|
| Book | The Complete Manual of Woodworking |
| Book | Woodworking Basics |
| Website | This Old House |
| Service | Professional Restoration Services |
Frequently Asked Questions
What Are The Essential Tools And Materials Needed For Restoring Wood Furniture?
Essential tools include sandpaper or an electric sander, wood glue for repairs, and a putty knife for applying wood filler. You’ll also need finishing supplies such as stain or paint, brushes, and rags, plus a sealant or varnish to protect the restored surface. Safety gear like a dust mask and gloves is recommended when sanding or using chemical strippers.
How Can I Identify The Type Of Finish On My Wood Surface Before Starting A Restoration Project?
Start by examining the sheen: glossy finishes are often lacquer or polyurethane, while matte finishes may indicate oil or wax. A small solvent test helps narrow it down — denatured alcohol softens shellac, while mineral spirits react to oil-based finishes. If the finish softens or lifts with the solvent, it’s likely shellac or lacquer; if it stays intact, it’s probably polyurethane or varnish.
What Are The Best Methods For Removing Old Paint Or Varnish From Wood Without Damaging It?
A heat gun softens the coating for easy scraping, and chemical strippers safe for wood surfaces dissolve old finishes without heavy abrasion. Fine-grit sandpaper removes remaining residue while preserving the wood’s integrity. Always test any method on a small, inconspicuous area first, then clean thoroughly before refinishing.
How Can I Repair Scratches And Dents In Wood Surfaces During The Restoration Process?
Clean the area first to remove dirt or debris. For small scratches, rub a matching wood stain marker or wood-colored wax crayon into the area to blend it in. For deeper dents, place a damp cloth over the dent and apply a hot iron briefly to steam the wood fibers back into shape, then finish with a clear coat of varnish or sealant.
What Steps Should I Follow To Properly Stain And Seal Restored Wood For Optimal Protection And Appearance?
Sand the surface smooth and clean first. Apply wood stain with a brush or cloth, following the grain, and let it penetrate before wiping off excess. Once the stain is fully dry, seal with a clear protective finish such as polyurethane or varnish. Allow the manufacturer’s recommended drying time between coats (typically 4 to 6 hours for fast-drying polyurethane) and lightly sand between layers for a smooth, durable result.
Conclusion
Restoring wood furniture comes down to matching the method to the damage: clean and wax an intact finish, or sand through 80-120-220 grit and refinish bare wood. Following the right sequence — assess, repair, sand, stain, seal — rejuvenates furniture, cabinetry, and flooring without the oversanding or product-mismatch mistakes that ruin a piece.
Sponsored / affiliate links. As an Amazon Associate I earn from qualifying purchases. I may earn additional commission from eligible campaigns.