How To Level A Plywood Subfloor For Laminate (Step-By-Step)
You’re getting ready to install new laminate flooring. That’s exciting! But wait.
Have you looked closely at your current floor? It’s likely made of plywood. This is your subfloor.
It’s the base for everything else.
Sometimes, this plywood base isn’t perfectly flat. It might have little bumps or dips. Or it could be a bit uneven over a larger space.
Laminate flooring needs a smooth, flat surface. If your subfloor isn’t level, your new laminate can have problems. It might squeak.
It could feel soft when you walk on it. Worst of all, the planks could separate over time. This guide will show you how to fix that.
Leveling a plywood subfloor for laminate flooring involves identifying uneven spots and filling them. This ensures the laminate planks connect properly, preventing squeaks, gaps, and damage. It’s a crucial step for a lasting, beautiful floor.
Understanding Plywood Subfloor Issues
Your plywood subfloor is usually made of several layers of wood pressed together. It’s strong and common in homes. But over time, things can happen to make it less than perfect.
One common issue is called “cupping.” This is when the edges of the plywood planks are higher than the center. This can happen if one side of the wood gets more moisture than the other. Think about spills or leaks.
It can also happen if the room humidity changes a lot. This makes the wood swell and shrink.
Another problem is warping. This is when the whole piece of plywood bends. It might curve up or down.
This can be from water damage. It can also happen if the plywood wasn’t laid perfectly flat to begin with. Or maybe the screws holding it down have loosened over time.
You might also find low spots or high spots. These are just areas that aren’t smooth. Sometimes, nails or screws can pop up a bit.
Or old flooring adhesive might have dried unevenly. Even small humps can cause big problems for laminate.
Why Even a Small Unevenness Matters for Laminate
Laminate flooring is designed to click together tightly. Each plank has a special edge that locks into the next. If the subfloor is uneven, these connections get stressed.
A dip in the floor means the planks in that area don’t get full support.
When you step on this unsupported area, the planks flex. This flexing can break the locking mechanism. It’s like bending a plastic ruler over and over.
Eventually, it snaps. This leads to gaps between your planks. It also makes those annoying squeaking noises when you walk.
Plus, water can seep into these gaps. This can damage the laminate and the subfloor underneath. A level surface ensures that the locking system works as intended.
It makes your floor look great and last much longer. It’s a small step with a big payoff.
Assessing Your Plywood Subfloor: The First Step
Before you grab any tools, you need to know exactly what you’re dealing with. Think of it like a doctor checking a patient before giving medicine. You need to find out where the problems are and how bad they are.
Start by walking all over the subfloor. Pay attention to any spots that feel soft or bouncy. Listen for squeaks.
Sometimes you can feel a slight give under your feet. This tells you there’s likely a loose board or an area that needs support.
Next, you’ll need a long, straight edge. A carpenter’s level is perfect. You can also use a long piece of straight wood, like a 2×4.
Lay the level on the subfloor. Start in one corner of the room and slowly move it across the floor. Do this in several different directions.
Go across the planks. Go along the planks. Go diagonally.
As you move the level, look for light. If you can see light shining through under the level, it means there’s a gap. This is an uneven spot.
Note down where these gaps are. You can use chalk or a pencil to mark them.
Also, look for high spots. If the level rocks on a hump, that’s a high spot. You need to know both the low spots and the high spots.
Measure the gaps if you can. Is it a tiny crack you can barely see? Or is it big enough to fit your finger into?
This helps you decide what fix you need.
Tools You’ll Need for Assessment
Gathering the right tools makes this job much easier. You don’t need a lot of fancy equipment. Just some basic items will do:
- A long carpenter’s level (4 feet or longer is best).
- A measuring tape.
- A pencil or chalk line for marking.
- A flashlight to help see low spots.
- A broom and dustpan or vacuum cleaner.
- Safety glasses and work gloves.
Once you’ve marked all the problem areas, you have a map of your subfloor’s condition. This map will guide you on how to fix it. It’s time to make a plan.
Quick Subfloor Check Guide
What to look for:
- Squeaks: Walk around to find noisy spots.
- Soft Spots: Areas that feel bouncy or give way.
- Gaps: Light shining under a long level.
- Humps: Where a level rocks back and forth.
- Water Stains: Dark or discolored areas.
How to check:
- Use a long level in many directions.
- Press down firmly on the floor.
- Feel for any movement.
Common Subfloor Problems and Their Solutions
Now that you know what’s wrong, let’s talk about how to fix it. The solution depends on the type of problem you found.
Fixing Low Spots (Dips)
Low spots are areas where the subfloor is lower than the surrounding area. These are often the trickiest to fix because you need to add material.
Self-Leveling Compound: This is often the best choice for larger dips. It’s a special cement-like powder. You mix it with water.
Then you pour it onto the low spot. It flows and spreads out. It finds its own level.
You might need to help it a little with a trowel. Make sure to follow the product instructions carefully. Some can be messy.
You need to protect the edges of the area so it doesn’t flow where you don’t want it.
Wood Filler or Patching Compound: For very small dips, like less than 1/8 inch, you might use a wood filler. This is like a thick paste. You spread it into the low spot with a putty knife.
Then you smooth it flat. Let it dry completely. You might need to sand it down if it dries a bit high.
Make sure the filler is compatible with your subfloor and the laminate adhesive, if any.
Fixing High Spots (Humps)
High spots are areas where the subfloor sticks up too much. These are usually easier to fix than dips.
Sanding: If the hump is caused by dried adhesive or a slightly raised edge of plywood, sanding might work. Use a floor sander or a belt sander for larger areas. For small humps, a sanding block can do.
Wear a dust mask! Sand the high spot down until it’s flush with the rest of the floor. Vacuum up all the dust.
Nail/Screw Heads: Sometimes, nails or screws have worked their way up. You can hammer them back down. Make sure they go below the surface of the wood.
If a nail head is rusty and won’t go down, you might need to remove it and put in a new screw. Countersink the screw head so it’s below the wood surface.
Trimming Edges: If a piece of plywood has a slightly raised edge, you might be able to carefully trim it. A router with a flush trim bit can do this. Or, a sharp chisel might work for very small adjustments.
Be very careful not to cut too deep.
Dealing with Cupping and Warping
These are bigger issues. They often mean the plywood itself has a problem.
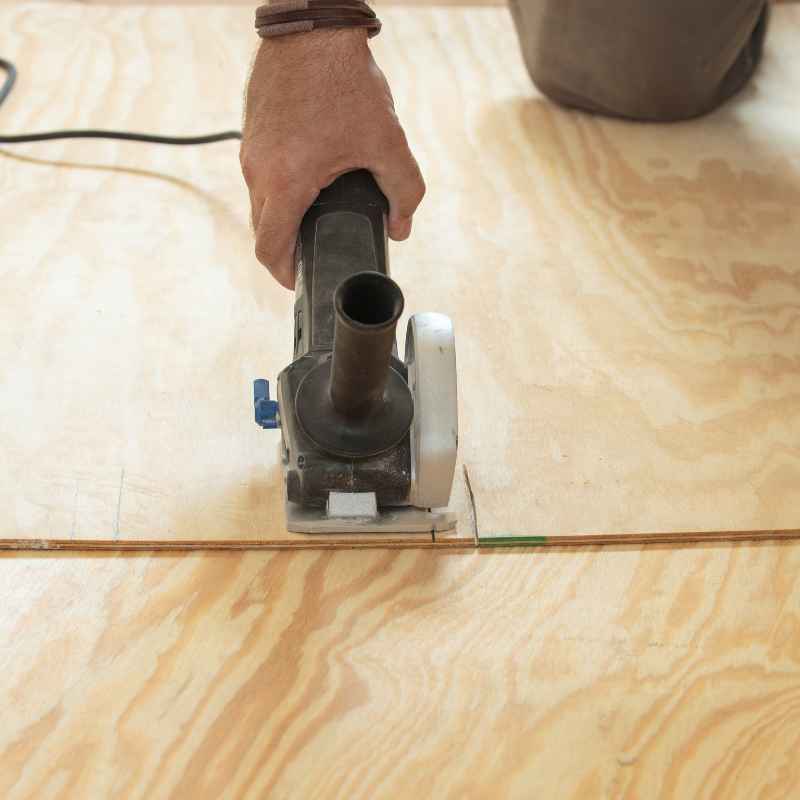
Replace Damaged Plywood: If a section of plywood is badly cupped or warped due to water damage, it’s best to replace it. You’ll need to cut out the bad section. Use a circular saw to make cuts.
Be careful not to cut into joists if you can avoid it. Then, remove the damaged piece. Install a new piece of plywood of the same thickness.
Screw it down securely.
Flattening (Limited Success): Sometimes, if the cupping isn’t too severe, you can try to flatten it. You can try screwing the edges down very firmly. Use screws spaced about every 6 inches.
You might need to use longer screws if the plywood is thick. This sometimes pulls the edges down. But it doesn’t always work.
If it’s still uneven after this, you might need to use a leveling compound over it. But that can get thick. Replacing the board is often better.
Securing Loose Plywood
Loose plywood is a common cause of squeaks and an uneven feel. The fix is simple: secure it better.
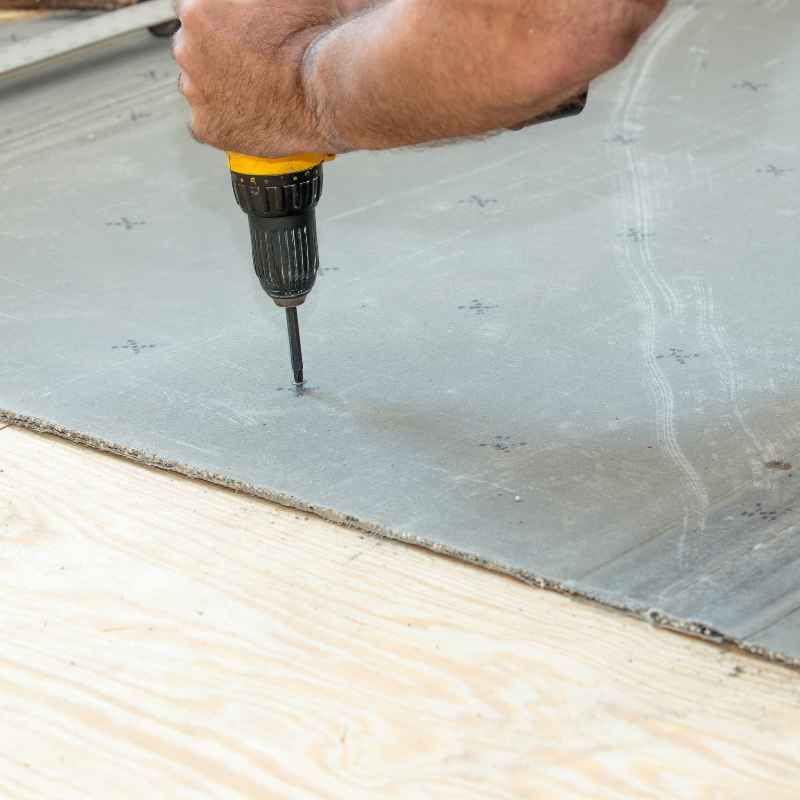
Screws: Find the loose spot. If you can tell which direction the wood is moving, place screws there. Use 1 1/4-inch or 1 1/2-inch wood screws.
Drive them down until they are just below the surface of the plywood. This will pull the plywood tight against the floor joists below. You can buy special subfloor screws that have a grip that helps prevent squeaks.
Adhesive: For extra security, you can add subfloor adhesive. You apply it to the joists before laying the plywood. If your subfloor is already down, you can sometimes inject adhesive under it.
But this is difficult. Screwing is usually the main fix for loose boards already in place.
Quick Fix Table
| Problem | Solution | When to Use |
|---|---|---|
| Small Dip (< 1/8 inch) | Wood Filler/Patching Compound | Minor imperfections |
| Larger Dip (> 1/8 inch) | Self-Leveling Compound | Significant low areas |
| High Spot (Adhesive/Edge) | Sanding | Minor high spots, rough patches |
| Raised Nail/Screw | Hammer/Countersink | Loose fasteners |
| Loose Plywood | Add Screws | Squeaks, bouncy spots |
| Severe Cupping/Warping | Replace Plywood | Water damage, bent boards |
Step-by-Step Guide: Leveling Your Plywood Subfloor
Let’s put it all together. Here’s a detailed plan for leveling your plywood subfloor before you lay that beautiful new laminate.
Step 1: Prepare the Area
First, clear out the room. Remove all furniture, rugs, and anything else on the floor. You need open space to work.
Sweep or vacuum the subfloor thoroughly. Any dirt, dust, or debris can get mixed into your leveling compound or cause issues later.
Inspect the subfloor again. Use your level and flashlight. Mark all the areas that need attention.
If you found loose boards, address those first. Drive in extra screws until the plywood feels solid and doesn’t squeak when you step on it. This makes sure you have a stable base to start with.
Step 2: Address High Spots
It’s usually easier to deal with high spots before filling low spots. Use a floor sander, belt sander, or even a sanding block to carefully grind down any high edges or dried glue. If you’re using a power sander, wear a good dust mask and safety glasses.
Sand until the area is flush with the surrounding floor.
For raised nail or screw heads, use a hammer to pound them flush or slightly below the surface. If they won’t budge, remove them and put in new screws. Make sure the screw heads are below the wood’s surface.
If a section of plywood is badly warped, you might need to cut it out and replace it. This is more work, but it’s the best long-term solution.
Step 3: Filling Low Spots with Self-Leveling Compound
This is where you build up the floor in the dips. Read the instructions on your self-leveling compound bag carefully. Every brand is a little different.
Mixing: You’ll need a clean bucket, a mixing paddle (often sold with the compound or use a drill with a mixing attachment), and clean water. Measure the water first. Then add the powder.
Mix it thoroughly until it’s lump-free and has a smooth, pourable consistency. Don’t add too much water, or it won’t be as strong. Don’t mix more than you can use in about 10-15 minutes, as it starts to set quickly.
Pouring: Pour the mixed compound directly into the low spots you marked. Start in the deepest areas. Use a squeegee or a trowel to gently spread the compound.
You want it to flow and level out on its own. The edges should blend smoothly into the surrounding dry floor. You might need to work fast.
If you have a very large area to level, you might need help from a friend.
Drying: Let the self-leveling compound cure completely. This can take anywhere from 24 hours to several days, depending on the product and how thick you laid it. Check the bag for drying times.
Do not walk on it until it’s fully dry and hard.
Infographic: Key Steps for Self-Leveling
1. Prep: Clean floor, mark dips. Seal edges if needed.
2. Mix: Water first, then powder. Mix till smooth.
3. Pour: Pour into low spots. Work quickly.
4. Spread: Use squeegee or trowel. Let it flow.
5. Cure: Wait for it to dry completely. Check bag.
Step 4: Filling Small Dips with Wood Filler
For very minor dips, less than 1/8 inch, wood filler or a patching compound is easier. Squeeze or scoop the filler onto a putty knife. Press it firmly into the low spot.
Scrape off any excess. You want it to be flush with the subfloor surface. Let it dry.
Some fillers might shrink a bit as they dry. If so, you might need a second thin coat.
Once dry, lightly sand the filled spot if needed to make it perfectly smooth. Make sure there are no rough edges. The goal is a seamless transition from the filled area to the surrounding wood.
Step 5: Final Inspection and Sanding
After all your filling and patching is dry, do one last check. Lay your level across all the areas you worked on. Does everything look flat?
Are there any new humps or dips? Gently sand down any small imperfections you find.
Your goal is a continuous, smooth surface. You shouldn’t be able to feel where the patches are. Sweep or vacuum up all dust again.
This is super important! Any remaining dust can affect the next layers or the final flooring.
Real-World Scenarios and Considerations
Let’s talk about some common situations you might run into. Life with floors isn’t always perfectly straightforward.
Basement Subfloors
If your plywood subfloor is in a basement, you might have different challenges. Basements can be prone to moisture. Make sure your subfloor is dry before you start.
If there’s a history of water problems, consider a moisture barrier. Some self-leveling compounds are designed to work over concrete slabs or as a moisture barrier.
Also, consider the temperature. Some leveling compounds need certain temperatures to cure properly. Check the product details.
If your basement is cold, you might need to warm it up a bit before you start.
Old Homes with Uneven Joists
Older homes often have more character, and sometimes that means less-than-perfectly straight joists. This can lead to a very wavy subfloor over a larger area. If the entire floor feels like a roller coaster, just filling dips might not be enough.
In severe cases, you might need to sister joists (add new support beams next to the old ones) or shim them to make them level. This is a more advanced structural fix. If your floor is this uneven, it might be worth consulting a professional.
But for moderate issues, careful use of self-leveling compound can still work wonders.
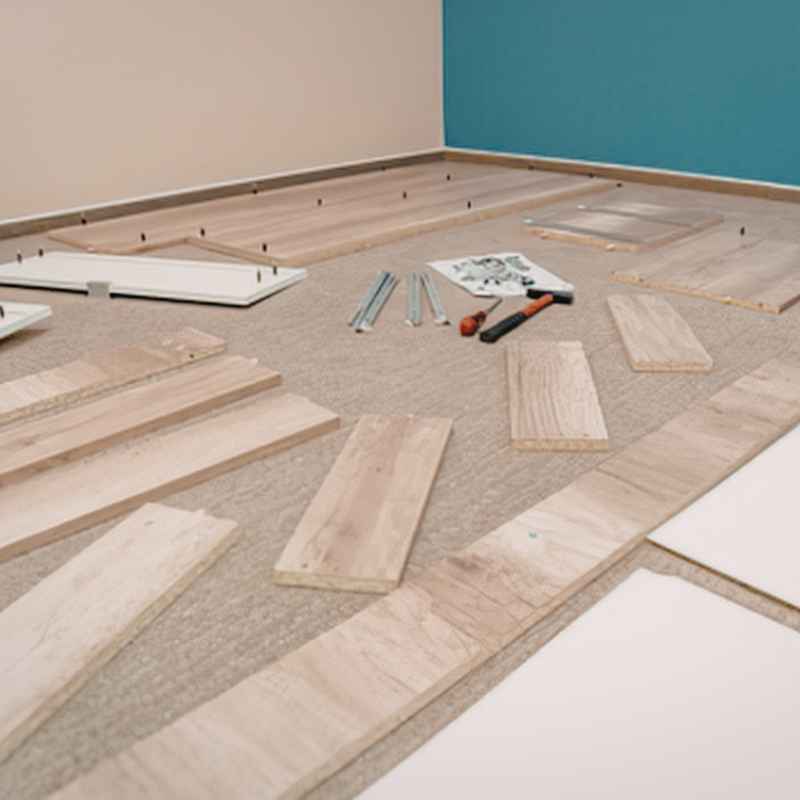
Dealing with Existing Underlayment
Sometimes, you might have an old underlayment (like felt paper or thin foam) on top of your plywood. You usually need to remove this before leveling. However, some modern leveling compounds are designed to go over certain types of existing underlayment.
Always check the product’s compatibility and instructions. Most laminate flooring will require a specific type of new underlayment anyway.
Moisture Testing: A Crucial Check
Before installing laminate, you almost always need to check for moisture. Even if you’ve leveled the floor, excessive moisture in the subfloor can ruin your new laminate. Plywood can hold moisture.
If you’re on a concrete slab or in a basement, this is even more important.
You can buy inexpensive moisture meters. You push the probes into the wood to get a reading. Your laminate flooring manufacturer will specify acceptable moisture levels.
If your subfloor is too wet, you need to let it dry out completely. Address any water leaks or excessive humidity first.
Scenario Spotlight: The Creaky Old House
The Problem: In Sarah’s old Victorian home, the living room subfloor had a noticeable dip near the fireplace. Walking across it felt like stepping on a soft cushion, and it made a terrible squeaking sound. Old nails had loosened over the years.
The Solution: Sarah first went around and added new screws. She drove them deep into the joists to secure the plywood. Then, she mixed a self-leveling compound.
She carefully poured it into the dip, spreading it out. After a few days of drying, the floor felt solid and quiet. She could finally install her new laminate without worry.
What This Means for Your Laminate Installation
Why is all this leveling so important for your new laminate? It directly impacts how your floor looks and performs.
A Smooth Surface Means a Perfect Finish
Laminate planks are designed to interlock precisely. When the subfloor is flat, each plank sits perfectly. The edges meet up without any gaps.
This creates a smooth, seamless look across your entire floor. If the floor isn’t level, the planks can’t align correctly. You might see slight height differences between planks.
This can make the floor look unprofessional and unfinished.
Preventing Squeaks and Movement
Squeaks are a common complaint with laminate floors. Often, they are caused by movement. This movement happens when planks rub against each other or against loose subfloor.
When the subfloor is perfectly level and securely fastened, the laminate has a stable base. The locking mechanism can do its job without being stressed. This means fewer squeaks and a much quieter floor.
Extending the Life of Your Flooring
Laminate flooring has a locking system. This system is strong, but it has limits. If the floor flexes too much due to unevenness, the locks can break.
This leads to gaps, loose planks, and eventually, flooring failure. A level subfloor ensures that the stress is distributed evenly. This helps your laminate last for its intended lifespan, saving you money and hassle in the long run.
Warranty Considerations
Many laminate flooring manufacturers require a flat subfloor for their warranty to be valid. They often specify a maximum allowable deviation (like 1/8 inch over 6 feet). If your floor isn’t level and something goes wrong, the manufacturer might deny your warranty claim.
Taking the time to level your subfloor protects your investment.
Key Benefits of a Level Subfloor
Perfect Seams: Laminate planks lock together tightly and evenly.
No Squeaks: A solid base prevents planks from rubbing.
Durability: Protects the locking system from stress.
Aesthetics: Creates a smooth, professional look.
Warranty Protection: Meets manufacturer requirements.
Quick Tips for a Better Subfloor
Here are a few extra bits of advice to make this job go smoothly.
- Read Product Labels: Always read the instructions for any leveling compound or filler you use. They have specific mixing ratios, drying times, and application tips.
- Work in Sections: If you have a large room, consider working in sections. This is especially true for self-leveling compounds, which set quickly.
- Use a Primer: Some self-leveling compounds require a primer applied to the subfloor first. This helps the compound adhere better. Check the product instructions.
- Ventilate: Make sure the room is well-ventilated, especially when using self-leveling compounds or sanding. Open windows and doors if possible.
- Protect Nearby Areas: Cover baseboards and walls with painter’s tape and plastic sheeting to protect them from dust and spills.
- Proper Disposal: Dispose of leftover materials and waste according to local regulations.
Frequently Asked Questions About Leveling Plywood Subfloors
How flat does my plywood subfloor need to be for laminate?
Most laminate manufacturers recommend that your subfloor be no more than 1/8 inch out of level over a 6-foot span. Some may have slightly different requirements, so always check the specific product instructions.
Can I just put a thicker underlayment over an uneven subfloor?
No, a thicker underlayment is not a substitute for a level subfloor. While underlayment provides cushioning and sound dampening, it cannot correct significant dips or humps. Trying to cover an uneven subfloor can lead to premature wear and damage to your laminate flooring.
How long does self-leveling compound take to dry?
Drying times vary by product and thickness. Most self-leveling compounds are ready for foot traffic in 24 hours, but it might take several days to fully cure and be ready for flooring installation. Always refer to the manufacturer’s instructions for specific drying times.
What if I find mold or mildew on my plywood subfloor?
If you find mold or mildew, it indicates a moisture problem. You must address the moisture source and treat the mold before proceeding. Clean the affected area thoroughly with a mold cleaner or a bleach solution, ensuring good ventilation.
Allow the area to dry completely. If the mold is extensive, you may need to replace the affected plywood.
Can I use wood filler for large dips in the subfloor?
Wood filler is best for very small imperfections, like tiny cracks or shallow divots. For dips larger than 1/8 inch, wood filler is not suitable. It may shrink, crack, or not hold up under the weight of the flooring.
For larger low spots, use a self-leveling compound.
Do I need to prime my subfloor before using self-leveling compound?
Many self-leveling compounds require a primer to ensure proper adhesion to the subfloor. Always check the product packaging or manufacturer’s website for specific instructions regarding primer use. Applying the correct primer is crucial for the longevity of the leveled surface.
Conclusion: A Solid Foundation for Your New Floor
Leveling your plywood subfloor might seem like a tedious extra step. But it’s truly one of the most important. It’s the foundation for your beautiful new laminate floor.
A flat, smooth surface means your planks will click together perfectly. This helps prevent annoying squeaks. It keeps your floor looking great for years.
And it protects your investment.
Taking the time to assess and correct any issues ensures your laminate floor will perform as it should. You’ll enjoy a quiet, durable, and beautiful floor for a long time. Happy flooring!