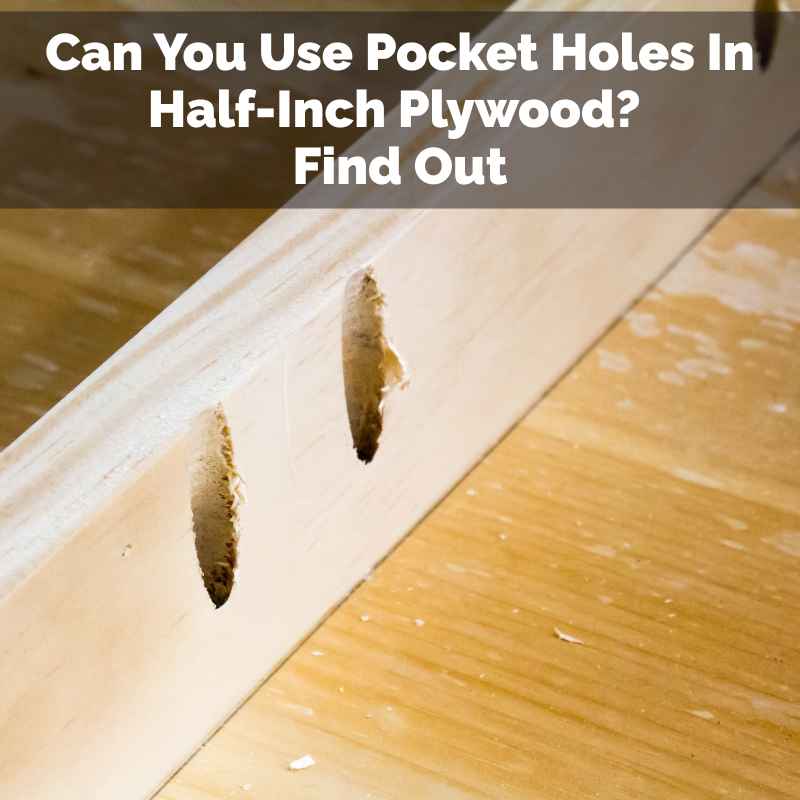
Can You Use Pocket Holes In Half-Inch Plywood? Find Out
Yes, you can use pocket holes in half-inch plywood. It requires using the correct jig settings and shorter screws. This method works best for less critical joints where extreme strength isn’t the main goal. It offers a quick and hidden way to join thinner materials.
What Are Pocket Holes and Why Use Them?
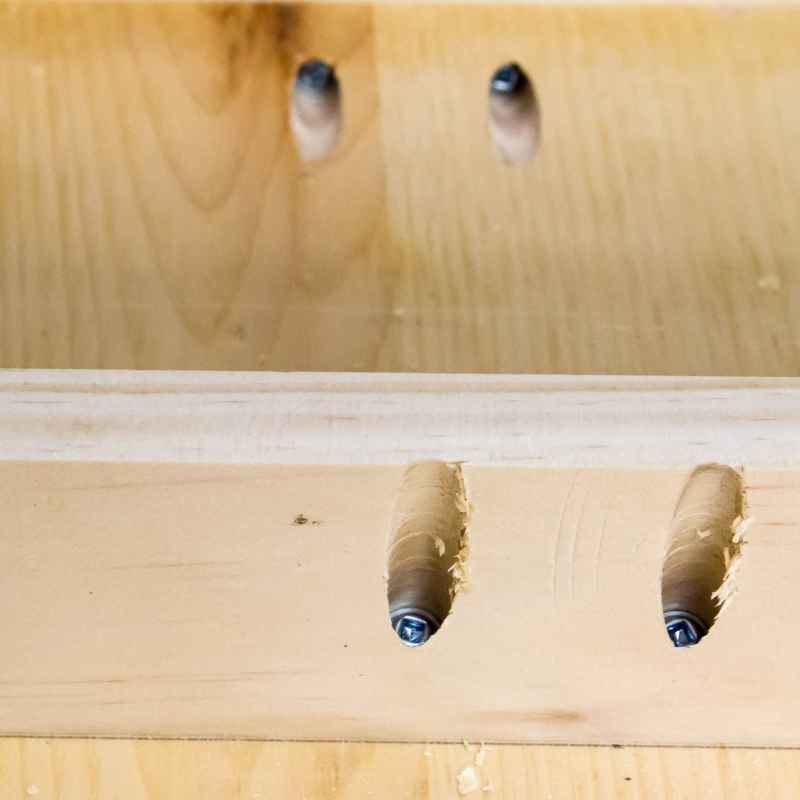
Pocket holes are like little angled tunnels. You drill them into the edge of one piece of wood. Then, you use a special screw.
This screw goes through the pocket hole and into another piece of wood. It pulls the two pieces together. This creates a strong connection.
It also hides the screw head. This makes your project look cleaner.
People like pocket holes for a few reasons. They are fast to make. They don’t need fancy clamps sometimes.
The screws are hidden. This is great for furniture or decorative items. You don’t see the screw heads on the outside.
This saves you from filling holes. It makes sanding and finishing easier.
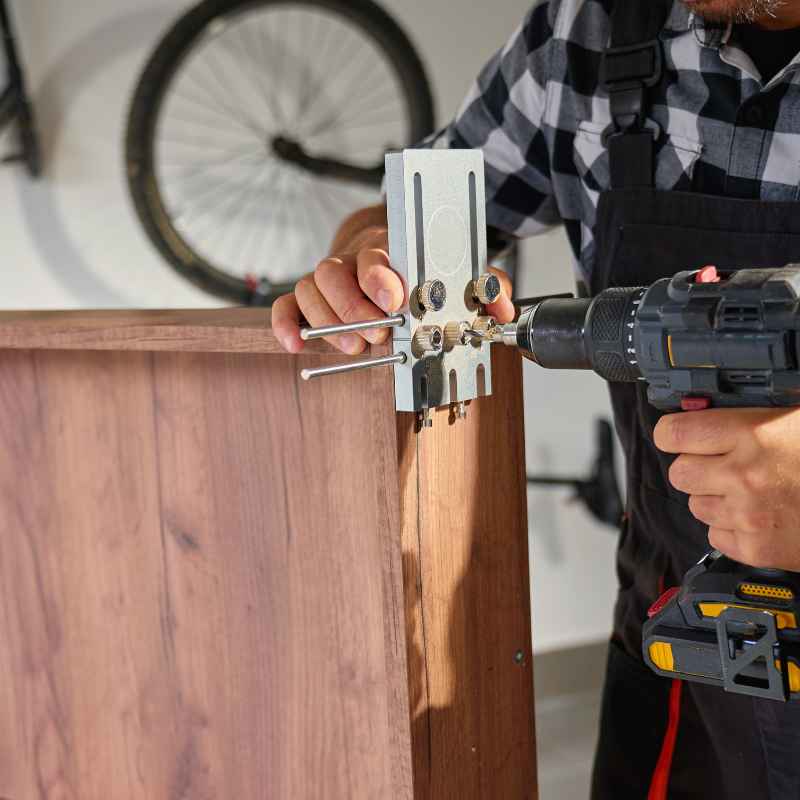
Pocket hole jigs are the tools that make these holes. There are many types. Some are simple, some are more advanced.
They guide your drill bit at a specific angle. This angle is key to the strength of the joint. They ensure the screw drives in just right.
The Challenge with Thin Plywood
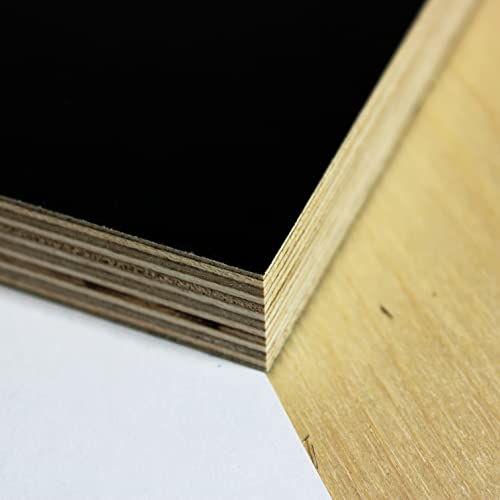
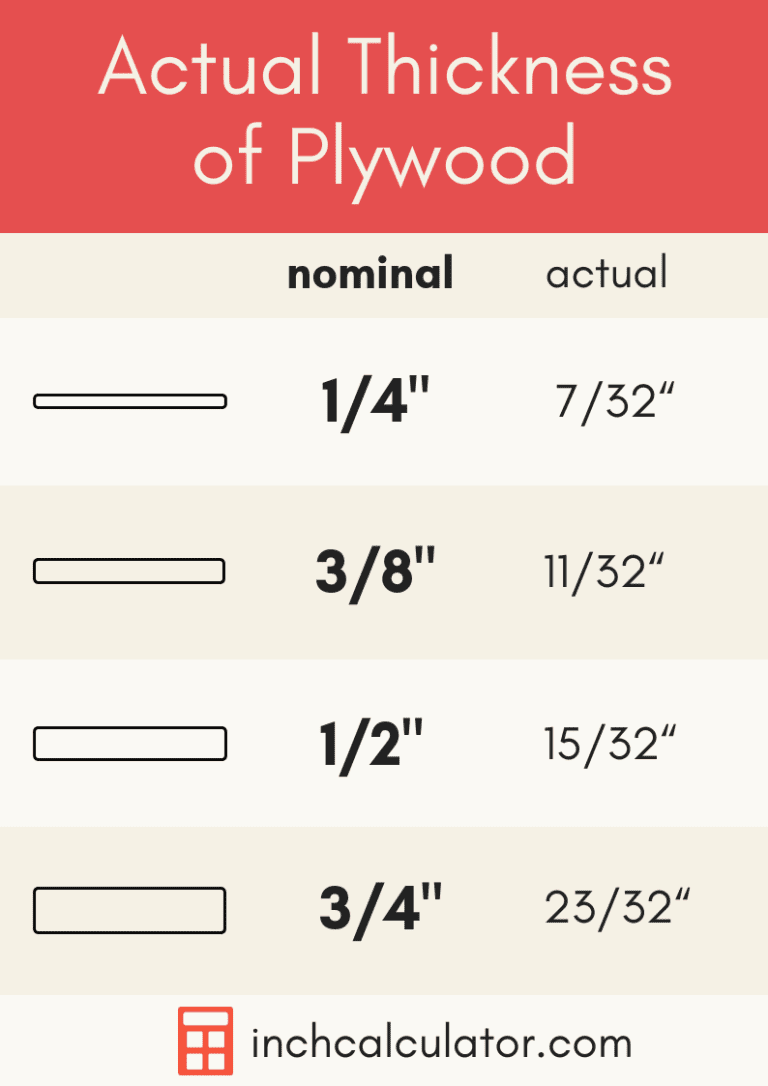
Half-inch plywood is thinner than regular lumber. It’s about 1/2 inch thick. Standard pocket hole jigs are set up for thicker wood.
Think 3/4 inch thick boards. When you try to drill a pocket hole in thin plywood, a few things can happen. The jig might not sit right.
The angle might be too steep. Or the screw might be too long.
If the screw is too long, it will poke out the other side. This ruins the look and strength. It can also split the thin wood.
Plywood has layers. These layers can separate. Drilling too deep or using the wrong screw can make this worse.
This is why special care is needed.
Many DIYers struggle with this. They want to use plywood for cabinet doors. Or drawer boxes.
Or shelves. They know pocket holes are easy. But they worry about ruining the material.
It’s a valid concern. You don’t want to waste wood.
My First Pocket Hole Plywood Project
I remember my first time trying pocket holes on thin plywood. It was for a set of garage shelves. I had a bunch of half-inch plywood sheets.
I wanted to build simple, strong shelves quickly. I had a standard pocket hole jig. I thought, “How hard can it be?” Famous last words!
I set up my jig like I always did for 3/4 inch wood. I drilled the holes. Then I grabbed my regular pocket hole screws.
They were the standard 1 1/4 inch ones. When I drove the first screw, I heard a crack. Oh no.
I pulled it apart. The screw had gone right through the thin plywood. It poked out the other side.
Plus, the wood was starting to split. My heart sank a little. I felt really annoyed at myself.
I almost gave up then. But I knew there had to be a way. I did some digging.
I learned about specialized jigs and shorter screws. That day taught me a big lesson. Always check your tools and materials.
Don’t assume what works for one wood type works for all.
Pocket Hole Jigs for Thin Materials
Standard Jigs: Most common jigs are for 3/4 inch wood. They have a fixed angle.
Adjustable Jigs: Some high-end jigs let you change the angle. This is helpful.
Specialty Jigs: A few jigs are made specifically for thin boards. They have a different pocket angle and depth.
Kreg Jig Specifics: Kreg Tool makes popular jigs. Their older models might be harder to adjust. Newer ones often have more flexibility.
Always check the manual.
The Right Jig Settings Are Key
If you want to use pocket holes in half-inch plywood, you need the right settings. The most important thing is the jig’s thickness setting. Most pocket hole jigs have a way to adjust for different wood thicknesses.
You need to set it for 1/2 inch. If your jig doesn’t have this, you might need a different jig.
The depth stop on your drill bit is also crucial. It controls how deep the drill bit goes into the wood. For half-inch plywood, you don’t want to drill too deep.
You need to set the depth stop so the drill bit stops before it goes all the way through the other side. Measure carefully.
Some people use a piece of tape on their drill bit. This acts as a guide. You wrap tape around the bit at the correct depth.
When the tape hits the surface, you stop drilling. This is a simple trick that works well. It’s better than guessing.
The angle of the pocket hole itself is also important. For thinner wood, a slightly shallower angle might be better. Some jigs have a setting for this.
If yours doesn’t, you might still be okay. The main problem is usually the screw length and drilling depth.
Choosing the Right Screws
This is where many people go wrong. Standard pocket hole screws are too long for half-inch plywood. If you use 1 1/4 inch screws, they will likely go through the wood.
This makes a mess. It also weakens the joint because the screw isn’t biting into the second piece correctly.
You need shorter screws. For half-inch plywood, you should look for 5/8 inch pocket hole screws. Sometimes you might find 1/2 inch screws.
But 5/8 inch is usually the sweet spot. These screws are designed to go into the thinner material. They will grip the second piece of wood properly.
These shorter screws are sometimes called “micro-pocket hole screws.” They are made for this exact situation. Make sure you buy screws specifically made for pocket holes. Regular wood screws won’t work the same.
Pocket hole screws have a special thread and head shape. This helps them pull the wood tight and sit flush.
Always double-check the screw length. It’s better to be a little short than too long. If the screw doesn’t go deep enough into the second piece, the joint won’t be as strong.
But if it’s too long, it will definitely poke through. It’s a balance you need to find.
Pocket Hole Screw Length Guide
3/4 inch Plywood/Wood: 1 1/4 inch screws
1/2 inch Plywood: 5/8 inch screws (sometimes 1/2 inch screws)
3/8 inch Plywood: 1/2 inch screws
Always check your specific jig and wood.
Putting It All Together: Step-by-Step
Let’s walk through how to make a pocket hole joint in half-inch plywood. Imagine you are joining two pieces of half-inch plywood edge to edge. You want a clean look without visible screws.
Step 1: Set Up Your Jig. Adjust your pocket hole jig for 1/2 inch thick material. Make sure the thickness setting is correct. If your jig doesn’t have a specific setting for 1/2 inch, set it to the closest thinner setting or a standard setting and adjust the depth stop.
Step 2: Set Your Drill Bit Depth. Attach the depth collar to your drill bit. Set it so the drill bit will stop drilling at the correct depth. For half-inch plywood, you want to drill a hole that is just a bit less than half an inch deep.
Measure this carefully. The goal is for the screw to grip the second piece, not go through.
Step 3: Clamp Your Wood. Clamp the piece of plywood securely to your jig. Make sure it’s stable. The jig should hold the wood firmly in place while you drill.
Step 4: Drill the Pocket Hole. Use your drill to create the pocket hole. Drill until the depth collar hits the jig or the tape hits the surface. Don’t drill too fast.
Let the drill do the work.
Step 5: Prepare the Second Piece. You don’t need to drill a pocket hole in the second piece. You will drill a regular pilot hole for the screw. Measure where the screw needs to go.
It should line up with the center of the first piece’s thickness.
Step 6: Drive the Screw. Bring the two pieces of plywood together. Use your pocket hole screws, which should be 5/8 inch. Drive the screw through the pocket hole and into the second piece.
Use a drill with a clutch setting. This prevents overtightening.
Step 7: Check Your Work. Once the screw is in, check the joint. Make sure the screw didn’t poke through. The two pieces should be pulled tightly together.
If it feels loose, the screw might be too short. If it poked through, the screw was too long or you drilled too deep.
Quick Pocket Hole Checklist for 1/2-Inch Plywood
- Jig Setting: Set for 1/2 inch or thinnest setting.
- Drill Depth Stop: Set to slightly less than 1/2 inch.
- Drill Bit: Use the correct bit for your jig.
- Screws: Use 5/8 inch pocket hole screws.
- Clamping: Ensure wood is held firmly.
- Drilling Speed: Drill at a moderate pace.
When Pocket Holes Are a Good Choice for Plywood
Pocket holes are not always the strongest joint possible. For critical structural components, you might want stronger joinery. But for many projects, they are perfectly fine.
Especially with half-inch plywood.
Consider using them for:
Cabinet carcasses: The main boxes of cabinets. Drawer boxes: Where speed and hidden fasteners are desired. Shelving units: Simple shelves that don’t hold extremely heavy loads.
Small decorative boxes: For gifts or storage. * Back panels on furniture: When you want a clean look.
If a joint will bear a lot of weight or stress, you might need to reinforce it. You could add glue to the pocket hole joint. Or you might use a different joint type altogether.
Think about what the finished piece will do. This helps you decide if pocket holes are enough.
For instance, if you’re building a bookshelf that will hold hundreds of pounds, pocket holes alone might not be enough for the main shelves. But for the sides of the bookshelf or the back panel, they are great. It’s all about the application.
When to Reconsider Pocket Holes
There are times when pocket holes in half-inch plywood might not be the best idea. If you need the absolute strongest joint, look elsewhere. Things like mortise and tenon joints or dovetails are stronger.
But they are much harder to make.
Also, if the plywood itself is poor quality, pocket holes can cause problems. If the plies are delaminating or the wood is very soft, it might not hold the screws well. This can lead to weak joints.
Always inspect your plywood before starting.
If the joint will be under constant bending force, it might fail over time. Pocket holes are best for joints that are mostly under compression or shear. Think about how the forces will act on the wood.
This helps you make the right choice.
For example, a shelf that will sag over time under weight might put stress on the joint. A tabletop where people lean on the edges might also be problematic. In these cases, you might need more support.
Or a stronger way to attach the tabletop to its base.
Joint Strength Comparison (Simplified)
- Pocket Holes: Good for hidden fasteners, quick assembly. Strength varies with material and screw.
- Butt Joints with Glue: Simple, but not very strong on their own.
- Dowel Joints: Stronger than butt joints, requires accurate dowel placement.
- Biscuits Joints: Good alignment, moderate strength.
- Mortise and Tenon: Very strong, traditional woodworking joint.
- Dovetail Joints: Extremely strong, often used for drawers and boxes.
For 1/2-inch plywood, pocket holes are a practical choice for many applications.
Tips for Maximum Strength and Durability
Even though pocket holes are easy, you can do a few things to make them stronger when using half-inch plywood.
1. Use Wood Glue. Always apply wood glue to the mating surfaces before you join them. This adds a lot of strength to any joint.
Even with pocket holes, glue is your friend. Wipe away any excess glue that squeezes out.
2. Pre-drill Pilot Holes. For the second piece of plywood (the one that doesn’t get the pocket hole), it’s a good idea to pre-drill a pilot hole for the screw. This hole should be slightly smaller than the screw shank.
This prevents the screw from splitting the wood, especially near the edge.
3. Don’t Overtighten. Use the clutch setting on your drill. Stop driving the screw as soon as it’s snug.
Overtightening can strip the threads in the wood. It can also crush the wood fibers. This weakens the joint.
4. Consider Reinforcement. If you’re concerned about strength, you can add extra support. For example, on a shelf, you could add a front edge band made of solid wood.
This adds rigidity. You could also add corner braces inside the shelf unit.
5. Use Quality Plywood. The quality of your plywood matters a lot. Look for hardwood plywood with many plies.
Avoid the cheap construction-grade stuff for projects where appearance or durability is important.
6. Test Your Setup. Before you drill into your project pieces, practice on scrap pieces of the same half-inch plywood. Make a few sample joints.
Test their strength. This helps you fine-tune your jig settings and screw choice.
Improving Pocket Hole Joint Strength
Attribute: Wood Glue
Benefit: Adds significant structural integrity.
Attribute: Pilot Holes
Benefit: Prevents splitting, especially in thin materials.
Attribute: Correct Screw Torque
Benefit: Avoids stripping and crushing wood fibers.
Attribute: Quality Materials
Benefit: Better holding power and less risk of failure.
Common Mistakes to Avoid
When working with thin plywood and pocket holes, certain mistakes are more common. Being aware of them can save you a lot of frustration.
Mistake 1: Using the Wrong Screws. This is number one. Using 1 1/4 inch screws on 1/2 inch plywood is a recipe for disaster. You’ll poke through or have very little grip on the second piece.
Mistake 2: Incorrect Jig Setup. Not adjusting the jig for the wood thickness is another big one. The angle and depth of the pocket hole depend on this. If it’s wrong, the screw won’t seat properly.
Mistake 3: Drilling Too Deep. Not using a depth stop or tape marker is risky. You might drill through the other side. This compromises the joint and the finish.
Mistake 4: Overtightening Screws. This strips the wood. The screw will just spin and won’t hold. It also weakens the wood around the hole.
Mistake 5: Not Using Glue. Relying solely on the screws is a mistake. Glue is essential for a strong, long-lasting joint. It fills small gaps and bonds the wood fibers.
Mistake 6: Using Poor Quality Plywood. If the plywood layers are weak or separated, the pocket hole won’t hold well. It’s worth spending a little more on better material.
Mistake 7: Not Testing First. Jumping straight into your project without testing on scrap wood can lead to errors. Practice makes perfect, especially with new techniques.
Real-World Scenarios with Half-Inch Plywood
Let’s look at a couple of common projects. How would pocket holes fare?
Scenario 1: Building a simple cabinet for a bathroom. You’re using half-inch plywood for the cabinet box. The sides will attach to the top and bottom. You’ll also attach a back panel.
In this case, pocket holes are a great fit. You can use 5/8 inch screws and the correct jig settings. For the cabinet box, the primary forces are usually compression.
The glue and screws will hold this together well. For the back panel, you’ll likely be attaching it to the edges of the cabinet box. Pocket holes work perfectly here for a clean look.
Scenario 2: Making custom drawer boxes for a dresser. You’ve decided on half-inch plywood for the drawer sides. You want to attach the sides to the front and back pieces.
This is a good use for pocket holes, but be mindful of the forces. Drawer sides experience a lot of shear stress. As you pull the drawer in and out, the joint is pulled.
Using glue is crucial here. Make sure your screws are the right length and driven correctly. You might also consider adding a reinforcing strip along the bottom edge of the drawer sides where they meet the front.
This gives the screws more material to bite into.
Scenario 3: Creating floating shelves for display. You’re using half-inch plywood for the shelf itself. It will mount to a wall bracket.
For floating shelves, strength is paramount. The shelf will hold weight. Pocket holes can be used to join the front and side edges of the shelf.
However, the way the shelf attaches to the wall bracket is the most critical part. You’ll need a very secure mounting system. The pocket holes on the shelf itself are fine for forming the box, but they won’t bear the load from the wall.
For the shelf structure, consider using thicker plywood or reinforcing the pocket hole joints with ample glue and perhaps even some dowels.
Pocket Holes and Load Bearing
Application: Shelves holding light decorative items.
Pocket Hole Suitability: High. Focus on hidden fasteners.
Application: Cabinet carcases.
Pocket Hole Suitability: High. Good for box construction.
Application: Drawer box sides under heavy use.
Pocket Hole Suitability: Moderate. Requires careful execution, glue, and proper screws. Consider reinforcement.
Application: Main structural shelves in a heavy-duty bookcase.
Pocket Hole Suitability: Low. Consider stronger joinery or doubling the material.
When It’s Normal and When to Worry
It’s normal to see a bit of wood fiber tear-out when drilling pocket holes in plywood. This is especially true for the less expensive grades. What’s not normal is the wood splitting completely through the thickness or the pocket hole collapsing.
If your screw doesn’t seem to be pulling the two pieces together tightly, that’s a sign something is wrong. It could be the screw is too short, or the pilot hole in the second piece is too large. Or the plywood is too soft.
You should worry if:
The screws regularly poke out the other side. The plywood edges are consistently splitting when you drive screws. The joints feel wobbly even after tightening.
The pocket holes themselves seem to be deforming or collapsing. * The plywood layers are separating around the pocket holes.
These issues can point to a problem with your technique, your tools, or the quality of your materials. It’s always best to stop and re-evaluate if you see these signs.
Quick Fixes and Tips for Plywood Pocket Holes
If you’ve made a joint and it’s not quite right, here are some quick things you can try.
Slightly Loose Joint: Sometimes, a joint is just a tiny bit loose. You can try tightening the screw a little more, but be careful not to strip it. Adding a bit of wood glue into the joint and clamping it again can sometimes help.
You could also try injecting a small amount of wood glue into the pocket hole and then reclamping.
Screw Poking Through: If the screw poked through just a tiny bit, you might be able to live with it. If it’s more significant, you might need to remove the screw, fill the hole with wood filler or a dowel, let it dry, and then re-drill. This is often more trouble than it’s worth on thin plywood, so prevention is key.
Splitting Wood: If you see minor splitting, try to avoid putting too much stress on that area. For future joints, make sure to pre-drill a pilot hole in the second piece. For existing joints, you can try to carefully apply wood glue into the split and clamp it.
Improving Grip: If your screws aren’t gripping well, ensure you’re using the correct 5/8 inch pocket hole screws. Make sure the pilot hole in the mating piece isn’t too large. You can also try a screw that is slightly longer, but only if you are absolutely sure it won’t poke through.
Troubleshooting Plywood Pocket Holes
Problem: Joint is slightly loose.
Possible Fixes: Tighten screw slightly, add glue and clamp, inject glue into pocket hole.
Problem: Screw pokes through.
Possible Fixes: Remove screw, fill hole, re-drill (often not worth it).
Problem: Wood is splitting.
Possible Fixes: Pre-drill pilot holes, use less force when driving screws.
Problem: Screw won’t grip.
Possible Fixes: Use correct screws, ensure pilot hole is sized correctly, check plywood quality.
Frequent Questions About Pocket Holes and Plywood
Can I use a standard pocket hole jig on half-inch plywood?
Yes, you can, but you must use the correct thickness settings on your jig and use shorter screws. Many standard jigs can be adjusted. Always check your jig’s manual for specific instructions on setting it for thinner materials.
What is the best screw length for half-inch plywood pocket holes?
The best screw length is typically 5/8 inch. These screws are specifically designed for thinner materials like 1/2 inch plywood. Using standard 1 1/4 inch pocket hole screws will likely result in them poking through the other side.
Will pocket holes be strong enough for cabinet shelves made of half-inch plywood?
For light to moderate loads, pocket holes with glue can be strong enough for cabinet shelves made of half-inch plywood. For very heavy loads, you might want to consider doubling up the shelves or using a stronger joinery method.
How deep should I drill pocket holes in half-inch plywood?
You should set your drill bit depth stop to drill a pocket hole that is slightly less than half an inch deep. The exact depth depends on your jig and screw. The goal is for the screw to engage well into the second piece of wood without going all the way through.
Does using wood glue with pocket holes in plywood make a big difference?
Yes, using wood glue makes a significant difference. Glue adds substantial strength to the joint. It bonds the wood fibers together.
Always apply glue to the mating surfaces before joining with pocket hole screws.
Can I use pocket holes for the corners of drawer boxes made from half-inch plywood?
Yes, you can. However, drawer boxes experience stress. Ensure you use the correct 5/8 inch screws and plenty of wood glue.
Proper pilot hole drilling in the mating piece is also important to prevent splitting. Consider reinforcement for heavy-duty drawers.
Final Thoughts on Plywood and Pocket Holes
Working with thinner materials like half-inch plywood can be a bit different. But with the right knowledge, you can absolutely use pocket holes successfully. The key is to adjust your jig, use the correct shorter screws, and always remember the power of wood glue.
Don’t be afraid to practice on scrap pieces first. This helps build your confidence. You’ll find that pocket holes are a fantastic way to build projects quickly and cleanly, even with thinner plywood.