How To Install Cement Board On A Plywood Floor Correctly
Feeling a bit overwhelmed by your flooring project? You’re not alone. Taking on a job like laying down cement board can seem tricky.
It’s a step many homeowners skip, but doing it right makes a huge difference for your final tile or stone look. We’re going to walk through it together, step by simple step. Let’s get this right the first time.
Installing cement board on a plywood subfloor is a crucial step for creating a stable, durable base for tile or stone. This process helps prevent cracks and keeps your finished floor looking great for years. Follow these guidelines for a successful installation.
What Is Cement Board and Why Use It?
Cement board is a building material. It’s made from cement and reinforcing fibers. Think of it as a strong, water-resistant panel.
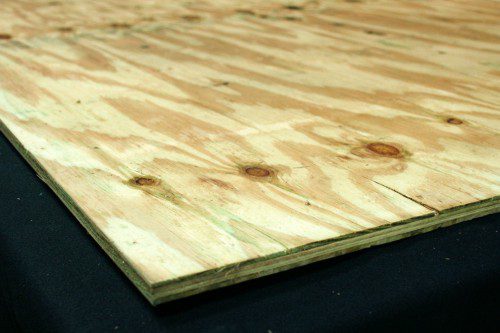
It sits right on top of your existing plywood subfloor. This creates a solid, flat surface. It’s way better than just putting tile directly on wood.
Why is this extra step so important? Plywood can move a little. It expands and shrinks with changes in humidity.
Tile and grout, however, are pretty stiff. If you put tile straight on plywood, that movement can cause tiles to crack. Grout lines might also split apart.
Cement board acts as a buffer. It isolates the tile from the subfloor’s movement. This makes your floor last much longer.
It also provides a stable, rigid surface. This is key for preventing the dreaded “hollow sound” under your feet. A good cement board installation means your tile or stone will feel solid.
It’s a pro trick that makes a pro-level finish possible. This guide will show you the best way to do it.
My First Time Laying Cement Board
I remember the first time I tackled a bathroom remodel. I was so excited to put down beautiful new tile. I’d watched a few videos, and everyone seemed to just slap it right on the plywood.
“Easy enough,” I thought. So, I skipped the cement board. Big mistake.
About six months later, a few tiles in the high-traffic area started to feel loose. Then, a small crack appeared in the grout near the tub. My stomach dropped.
I’d spent days on that tile job. That subtle flexing of the plywood was slowly but surely ruining my work. I ended up having to rip out a section and start over, this time with cement board.
That hard lesson taught me why following best practices is so vital. It saved me a lot of future headaches and money.
Preparation is Key
Before you even think about laying cement board, clean your subfloor. Sweep and vacuum it thoroughly. Make sure there are no nails sticking up or any debris.
Check the plywood for any soft spots or water damage. Fix those first. A good foundation makes everything else easier.
Gathering Your Tools and Materials
Before we start laying, let’s make sure you have everything you need. This will save you trips back to the store. You’ll need the cement board itself.
Common sizes are 1/4-inch and 1/2-inch thick. For most floors, 1/4-inch is fine. If your joists are spaced far apart, or you want extra rigidity, consider 1/2-inch.
You’ll also need screws specifically made for cement board. These are usually coated to resist corrosion. Don’t use regular drywall screws; they will rust and fail.
You’ll also need thin-set mortar. This is a special adhesive for tiles and cement board. Get a good quality powdered thin-set.
You’ll mix it with water.
Other tools include a utility knife or a scoring tool for cutting the board. A circular saw with a fine-tooth blade or a specialized diamond blade can also be used, but it’s dusty work. A measuring tape is a must.
You’ll need safety glasses and a dust mask, especially if you cut the board. A notched trowel is essential for spreading the thin-set. And of course, a screw gun or drill will make putting in screws much faster.
Your Essential Toolkit
- Cement board panels (1/4″ or 1/2″)
- Cement board screws (corrosion-resistant)
- Thin-set mortar (powdered)
- Utility knife or scoring tool
- Circular saw (optional, with dust control)
- Measuring tape
- Safety glasses
- Dust mask
- Notched trowel
- Screw gun or drill
- Mixing bucket and drill with mixing paddle
- Balancing tool or helper
Preparing the Plywood Subfloor
This step is crucial. Your plywood subfloor needs to be in good shape. First, make sure it’s clean.
Sweep up all dust and debris. Then, go over it with a vacuum cleaner. Any little pebble or nail can cause a bump later.
Check for any loose boards. If you find any, screw them down securely. Use screws, not nails.
Nails can work their way up over time.
Look for any dips or humps in the plywood. You want a perfectly flat surface. If there are high spots, you might be able to sand them down.
Low spots might need a leveling compound. This step ensures the cement board lies flat. A flat base is key for a flat tile job.
Also, check the entire subfloor for water damage. Damp spots or soft areas mean you have a leak somewhere. You need to fix that leak before you install anything.
Water-damaged plywood won’t hold screws well. It can also lead to mold and rot down the road. Your cement board will only be as good as the subfloor underneath it.
Subfloor Checklist
- Cleanliness: Free of dust, debris, and nails.
- Stability: All plywood sections are securely fastened.
- Flatness: No high or low spots.
- Integrity: No signs of water damage or rot.
Cutting and Laying Out Your Cement Board
Now, let’s talk about fitting the cement board. You usually start in a corner. Lay out your first piece.
You’ll need to cut pieces to fit around walls and obstacles. The easiest way for straight cuts is to score and snap. Use a utility knife or a specialized scoring tool.
Draw a deep line across the board where you want to cut. Then, firmly snap the board along that line.
For more complex cuts, like around pipes or doorways, you might need a jigsaw or a circular saw. Always wear safety glasses and a dust mask. Cement board dust is not good to breathe.
It’s also very fine and gets everywhere.
When you lay out the pieces, try to stagger the seams. This means the joints between boards shouldn’t line up in straight rows. Think of how bricklayers stagger bricks.
This makes the floor much stronger. A good layout avoids having weak lines running across your floor.
Leave a small gap, about 1/8 inch, between the cement board pieces. This gap is important. It lets the cement board expand and contract a little.
Also, leave a similar small gap where the cement board meets the walls. This gap allows for slight movement. You’ll cover these gaps later with thin-set mortar.
Cutting Tips
- Score and Snap: Best for straight cuts.
- Jigsaw/Saw: For curves and openings. Use a fine-tooth blade.
- Safety First: Always wear eye protection and a mask.
- Dust Control: Work in a well-ventilated area.
Applying Thin-Set Mortar
This is where the magic happens. You’re going to mix your thin-set mortar. Follow the manufacturer’s instructions on the bag.
You want a consistency like peanut butter. It should be thick enough to hold its shape but spreadable. Use a mixing paddle on a drill for best results.
Let it slake (rest) for about 5-10 minutes, then remix.
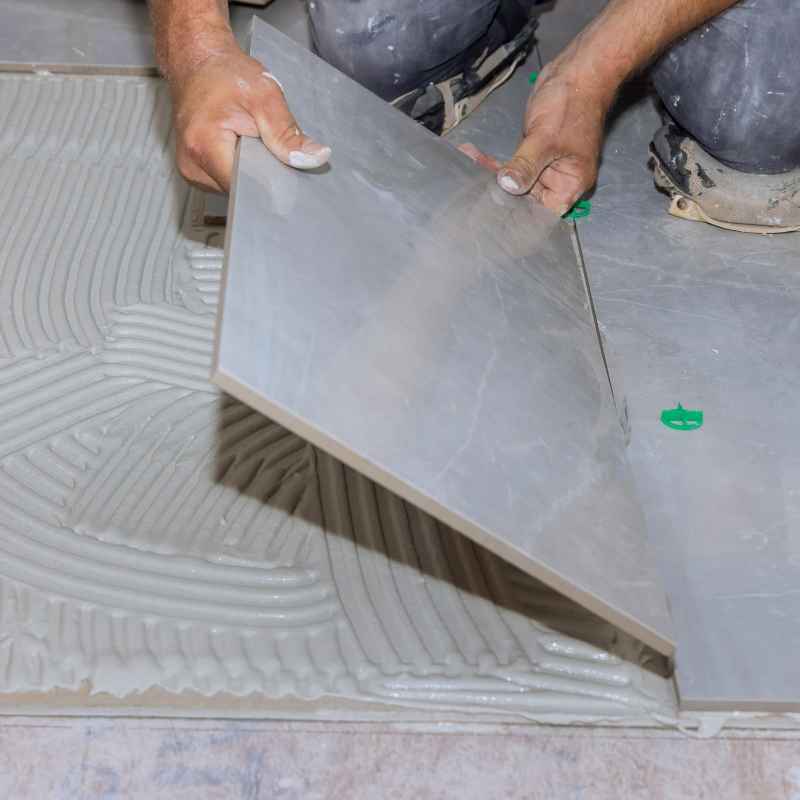
Now, spread a layer of thin-set onto the plywood subfloor. Use the flat side of your notched trowel first. Get a good, even coat over an area you can work in for about 15-20 minutes.
Then, go back with the notched side of the trowel. Hold it at about a 45-degree angle. Create parallel ridges in the mortar.
These ridges are important. They help the cement board bond well to the subfloor. They also allow any trapped air to escape.
Don’t cover too large an area at once. Thin-set can dry out before you get the board down. Work in sections, usually the size of one or two cement board panels.
Some installers prefer to “back-butter” the cement board. This means spreading a thin layer of thin-set on the back of the cement board itself. This ensures full coverage and a strong bond.
It’s a little extra work, but it really helps create a solid base.
Thin-Set Application
- Mix Correctly: Follow bag instructions for a peanut butter consistency.
- Spread Evenly: Use the flat side of the trowel first.
- Create Ridges: Use the notched side at 45 degrees.
- Work in Sections: Don’t cover too much area at once.
- Back-Buttering: Consider applying thin-set to the board’s back.
Securing the Cement Board with Screws
Once the thin-set is spread, you can place your cement board. Press it down firmly into the mortar. Use a twisting motion.
This helps embed the board into the ridges of thin-set. If you’re back-buttering, press it down firmly there too.
Now it’s time for screws. You’ll use your special cement board screws. Drive them in until they are slightly below the surface of the cement board.
You don’t want to break the surface of the board. You also don’t want the screw heads to stick up. They should be just flush or slightly recessed.
The spacing for the screws is important. Follow the manufacturer’s recommendations, but generally, they should be about 6 to 8 inches apart along the edges of the board. And about 8 to 12 inches apart in the field (the middle of the board).
Proper screw placement prevents the board from shifting or lifting.
As you screw down the board, you’ll see a little thin-set squeeze up between the board and the subfloor. This is good! It means you have a solid connection.
Wipe away any excess that comes up onto the surface of the cement board.
Screwing Down Your Work
- Press Firmly: Embed the board into the thin-set.
- Screw Spacing: 6-8″ on edges, 8-12″ in the field.
- Screw Depth: Slightly below the surface, not breaking the board.
- Watch for Squeeze-out: A sign of good adhesion.
Taping and Mortaring the Seams
After all the cement board is down and screwed, you need to address the seams between the panels. You’ll use fiberglass mesh tape specifically designed for cement board. This tape is sticky, which helps hold it in place while you work.
Apply the mesh tape over all the joints between the cement board panels. Make sure the tape is centered over the seam. Press it down firmly so it adheres well.
You want a smooth, flat surface over the tape.
Next, you’ll apply a layer of thin-set mortar over the taped seams. Use your trowel to spread the thin-set. Embed the mesh tape completely within the mortar.
You want to cover the tape entirely. Again, aim for smooth and flat. Don’t leave any bumps or ridges.
This step reinforces the seams. It makes the entire cement board surface act as one solid piece. It prevents grout from cracking in the future.
Once this mortar layer dries, you might want to lightly sand any rough spots. This ensures a perfectly smooth base for your tiles.
Seam Treatment
- Use Mesh Tape: Fiberglass tape for cement board seams.
- Center the Tape: Ensure it covers the joint evenly.
- Embed with Mortar: Cover the tape completely with thin-set.
- Smooth Finish: Aim for a flat, seamless surface.
Letting It Cure
Just like concrete, thin-set mortar needs time to cure properly. This isn’t just about drying; it’s about the chemical process that makes it hard and strong. Always check the manufacturer’s instructions for the specific thin-set you used.
But generally, you’ll want to let it cure for at least 24 hours.
During this curing period, keep the area dry and at a stable temperature. Avoid walking on the newly installed cement board. Don’t put any weight on it.
You want to let the mortar and the board settle into their final, strong state without disturbance.
Once it’s fully cured, the cement board will feel very solid and stable. It will be ready for the next steps of your project, whether that’s tiling, stone installation, or another finish. Rushing this step can undo all your hard work.
Patience here pays off in the long run.
Curing Time
- Minimum 24 Hours: Check product instructions.
- Keep Dry: Protect from moisture during curing.
- Stable Temperature: Avoid extreme heat or cold.
- No Traffic: Do not walk on it.
Real-World Scenarios and Common Issues
You’ll encounter different situations when installing cement board. In bathrooms, moisture is a big concern. While cement board is water-resistant, it’s not waterproof.
It needs to be sealed properly, especially around showers and tubs. Many people make the mistake of thinking it’s waterproof and skip sealing.
In kitchens, floors take a lot of abuse. Spills from cooking or dropped items are common. A properly installed cement board base ensures your tiles can handle this.
It prevents liquids from seeping down to the subfloor. This protects your home from rot and mold.
One common issue is using the wrong screws. Regular drywall screws will rust. They expand when they rust, which can crack the cement board.
Always use screws made for cement board or tile backer board. Another issue is not creating enough ridges with the trowel. If the thin-set doesn’t grab well, the board can become loose.
Over-wetting the thin-set is another pitfall. Too much water weakens the mortar. It also increases drying and curing time.
Always stick to the water-to-powder ratio recommended by the manufacturer. Too little water makes it hard to spread and achieve a good bond.
Common Pitfalls
- Wrong Screws: Leads to rust and cracks.
- Poor Thin-Set Ridges: Weak bond between board and subfloor.
- Over-Wetting Mortar: Weakens the adhesive.
- Skipping Seam Taping: Weak points in the floor.
- Not Letting it Cure: Premature movement can cause damage.
What This Means for Your Floor
When you install cement board correctly, your tile or stone floor becomes a long-term investment. It’s built to last. It resists cracking, chipping, and loosening.
This means fewer repairs down the line. You avoid the frustration of dealing with damaged tiles or grout.
A properly prepared subfloor with cement board also provides a stable surface. This makes the tiling process itself much smoother. Your tiles will lay flat, and your grout lines will be even.
This contributes to a professional, polished look for your entire room.
In basements or areas prone to moisture, the water resistance of cement board is a huge benefit. It adds a layer of protection against water damage. This is essential for preventing mold and mildew growth, which can be costly to fix.
It’s about building a healthy, durable home.
Benefits of Proper Installation
- Increased Durability: Resists cracking and damage.
- Longer Lifespan: Fewer repairs and replacements.
- Professional Look: Tiles lay flatter, grout lines are even.
- Moisture Protection: Safeguards against water damage.
- Peace of Mind: A solid, reliable floor.
Quick Tips for Success
Here are some quick tips to make your cement board installation go smoothly. First, plan your layout before you cut anything. Measure twice, cut once.
This saves material and time.
Use a steady hand when spreading thin-set. Aim for consistent coverage. Don’t rush the screwing process.
Make sure each screw is set correctly. This is vital for a secure board.
If you’re working on a large area, consider getting a helper. Having an extra pair of hands makes moving and positioning the boards much easier. It can also speed up the process considerably.
A second person can help mix mortar or hand you tools.
Always read the specific instructions for the cement board and thin-set mortar you are using. Different brands might have slightly different requirements. Following their guidelines is key to a successful outcome.
Pro Tips
- Plan Your Layout: Measure carefully before cutting.
- Steady Hand: Apply thin-set evenly.
- Don’t Rush Screws: Ensure proper depth and spacing.
- Get a Helper: Makes handling boards easier.
- Read Instructions: Follow manufacturer guidelines.
Frequently Asked Questions
Can I install cement board over vinyl flooring?
Generally, no. Vinyl flooring needs to be removed first. Cement board needs a solid, stable subfloor like plywood or concrete directly underneath it.
Vinyl is too flexible.
Do I need to seal cement board before tiling?
Most cement boards are water-resistant, not waterproof. It’s good practice to apply a liquid waterproofing membrane over the cement board, especially in wet areas like showers or around tubs. This adds an extra layer of protection.
How do I cut cement board without making a mess?
For straight cuts, a utility knife and scoring tool is the least dusty method. For cuts with a saw, use a blade designed for fiber cement and connect a shop vac to your saw for dust collection. Always wear a mask.
What happens if I don’t use thin-set mortar under cement board?
If you only screw the board down, it might not be stable. Thin-set mortar creates a solid bond between the cement board and the subfloor. Without it, the board could shift, leading to cracking in your tile or grout later.
Can I use drywall screws for cement board?
No, never use drywall screws. They are not designed for the moisture and stress involved. They will rust over time and can cause the board to crack.
Always use screws specifically made for cement board or tile backer board.
What is the difference between 1/4-inch and 1/2-inch cement board?
The thickness affects rigidity. 1/4-inch board is lighter and easier to cut. It’s suitable for most residential floors with properly spaced joists.
1/2-inch board offers more strength and stability, especially for longer spans between joists or if you want a very robust floor.
Putting It All Together
Installing cement board correctly is a foundational step. It’s an investment in the longevity and beauty of your tile or stone floors. By preparing your subfloor well, cutting and fitting carefully, and using the right materials like thin-set and proper screws, you create a surface that will stand the test of time.
Remember that patience during the curing process is just as important as the installation itself. You’re building a base that will support your chosen flooring for years to come.
Sponsored / affiliate links. As an Amazon Associate I earn from qualifying purchases. I may earn additional commission from eligible campaigns.