Best Polyurethane for Hardwood Floors: Top Options Detailed
Choosing the Best Polyurethane for Hardwood Floors: Top Options Explained can seem tricky at first. With so many choices, figuring out the right finish for your floors can feel overwhelming. Don’t worry, though! This guide breaks down everything step by step. We’ll simplify the process, helping you pick the perfect polyurethane and apply it like a pro. We’ll start with the basics to help you get started and then move into different types, applications, and their pros and cons. Let’s begin!
What You Need to Know About Hardwood Floor Finishes
When protecting and beautifying hardwood floors, the choice of finish is key. The finish not only protects the wood from scratches, spills, and wear but also enhances its natural beauty. Several types of finishes are available, each with unique properties. Some are durable and resistant to water damage, while others highlight the wood’s grain. Picking the right one depends on your lifestyle, budget, and desired look.
Familiarizing yourself with these options is crucial for making an informed decision, ensuring your floors look great and last for years to come. This involves exploring different application methods, considering the environment the floors are in, and understanding maintenance needs.
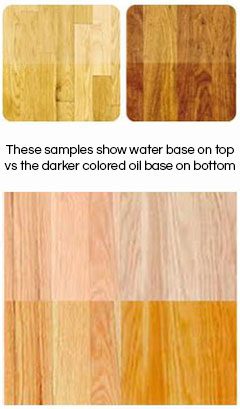
Types of Finishes: Oil-Based Polyurethane
Oil-based polyurethane is a classic choice for hardwood floors, known for its durability and warm amber tone. This finish penetrates the wood, creating a strong protective layer that can withstand heavy foot traffic. It’s often chosen for its long-lasting qualities and ability to hide minor scratches. However, it requires a longer drying time and has a strong odor, which can be an inconvenience during application. The ambering effect enhances the wood’s natural grain and gives it a rich look. Maintenance involves regular cleaning and occasional re-coating to maintain its protective properties.
- Durability: Oil-based polyurethane forms a tough, durable surface. This makes it a great choice for high-traffic areas like living rooms and hallways. The finish is resilient to scratches, scuffs, and impacts, ensuring the floors can handle daily wear and tear.
- Appearance: The amber hue enhances the wood’s natural color, giving it a rich, warm tone. This ambering effect makes the wood look more inviting and beautiful, enhancing its character.
- Application: Applying oil-based polyurethane takes more time because of longer drying times between coats. Proper ventilation is essential due to the strong odor.
- Maintenance: Regular cleaning with appropriate products and occasional re-coating are necessary to preserve the floor’s protection and appearance. This ensures the floor’s longevity and beauty.
A real-life example of oil-based polyurethane in action can be seen in historical homes, where it has provided years of protection and beauty, even with constant use. This illustrates how well oil-based finishes can stand the test of time.
Types of Finishes: Water-Based Polyurethane
Water-based polyurethane is a modern option, known for its low odor and quick drying time. It provides a clear finish that doesn’t significantly change the wood’s color, preserving its natural appearance. This finish is also environmentally friendly, making it a popular choice for those looking for a safer alternative. Water-based polyurethane is very durable and easy to apply, and it is a good choice for people with allergies because it has low VOCs (volatile organic compounds).
However, water-based finishes may not be as hard-wearing as oil-based polyurethane, especially in high-traffic environments. Maintenance is similar to oil-based finishes: regular cleaning and re-coating when needed to maintain the floor’s luster.
- Low Odor and VOCs: The reduced odor and fewer VOCs make water-based polyurethane easier and safer to apply. This is especially good for people with sensitivities and in homes with children or pets.
- Clear Finish: Water-based polyurethane maintains the wood’s original color, letting its natural tones shine through. This makes it ideal if you want to preserve the wood’s original appearance.
- Fast Drying Time: This significantly reduces the overall project time, allowing multiple coats to be applied within a day. This speeds up the finishing process.
- Durability: Modern water-based polyurethanes have improved significantly in terms of durability. While some people still think that water-based finishes aren’t as strong as oil-based options, they are close enough for most uses.
Consider a new homeowner choosing water-based polyurethane for their home. The low odor, quick drying time, and clear finish were perfect for them and their pets.
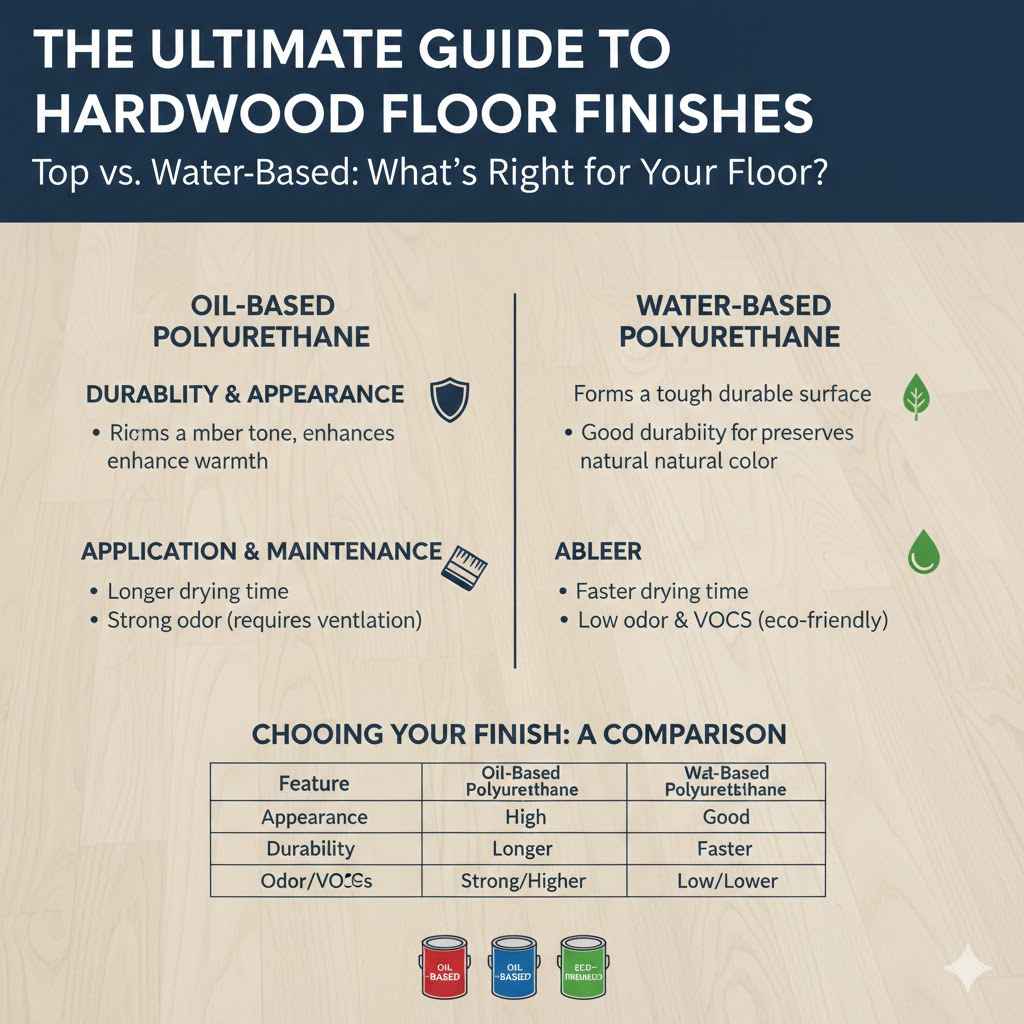
Choosing Between Oil and Water-Based Polyurethane
Picking between oil-based and water-based polyurethane involves weighing the pros and cons of each type. Oil-based finishes are durable and enhance the wood’s warmth, but they require longer drying times and have a strong odor. Water-based options dry quickly, are low in odor, and preserve the wood’s natural color, although they may not be as durable as oil-based finishes in very high-traffic areas. The decision should consider factors like the environment, the look desired, and the importance of ease of application.
| Feature | Oil-Based Polyurethane | Water-Based Polyurethane |
|---|---|---|
| Appearance | Amber tone, enhances warmth | Clear, preserves natural color |
| Durability | High | Good, but may vary |
| Drying Time | Longer | Faster |
| Odor | Strong | Low |
| VOCs | Higher | Lower |
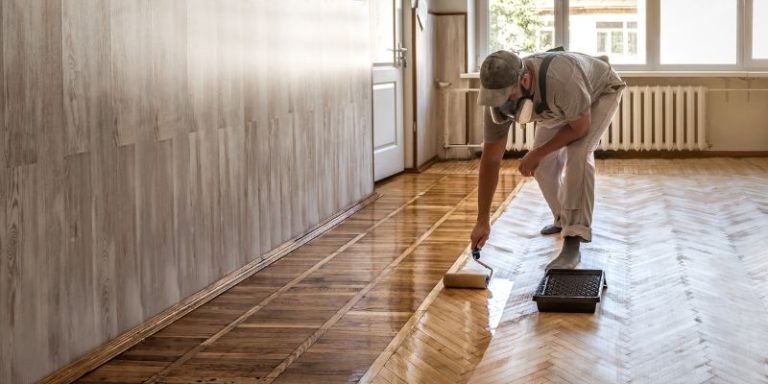
Application of Polyurethane: Tips and Tricks
Successful application of polyurethane involves preparation, technique, and patience. The wood must be thoroughly cleaned, sanded, and any imperfections addressed before applying the finish. Multiple thin coats, rather than a single thick one, are usually recommended for the best results. Proper ventilation is essential, particularly with oil-based products, to ensure safe application. The use of the correct tools, such as brushes or applicators, also impacts the finish’s look. Understanding the importance of each step is critical to achieving a professional-looking hardwood floor finish.
Surface Preparation: Sanding and Cleaning
Prepping the surface is the first thing you must do. Sanding the hardwood floor is a critical step in preparing it for polyurethane application. Sanding removes the old finish, smooths imperfections, and creates a surface that allows the new polyurethane to adhere properly. The process usually involves several passes with progressively finer grits of sandpaper to ensure a smooth, even surface. After sanding, the floor must be meticulously cleaned to remove dust and debris, which could interfere with the finish. This thorough prep work is essential for the final look of the floor.
- Sanding Techniques: Start with coarser sandpaper to remove old finishes and imperfections, then transition to finer grits for a smooth surface. Overlap passes to ensure uniform sanding.
- Dust Removal: Thoroughly vacuum and tack the floor to remove all sanding dust, as dust particles can spoil the finish. Use a tack cloth for the best results.
- Surface Inspection: Check for any remaining imperfections, such as scratches or dents. Fill and repair as necessary before applying the polyurethane.
- Edge Sanding: Don’t forget to sand the edges and corners where larger sanders can’t reach. A smaller handheld sander is great for this.
Consider a situation where a homeowner missed a spot while sanding. The polyurethane, when applied, highlighted this oversight, making it visually apparent. This emphasizes the importance of a thorough sanding.
Applying the Polyurethane: Brushing, Rolling, and Spraying
The method of applying the polyurethane is determined by the project’s size, finish type, and desired outcome. Brushing is often used for smaller projects and detailed work, providing good control and coverage. Rolling is a common choice for larger areas, offering a smooth finish with efficient application. Spraying, using an HVLP (High Volume Low Pressure) sprayer, is the fastest method, giving a uniform coat, but it requires practice and a well-ventilated space. Each method requires different tools and techniques to achieve the best results.
- Brushing Techniques: Use a high-quality brush and apply in the direction of the wood grain for even coverage. Avoid overloading the brush to prevent drips and bubbles.
- Rolling Techniques: Roll the polyurethane in the direction of the grain, using a consistent motion. Overlap strokes to ensure even application and avoid leaving roller marks.
- Spraying Techniques: Use consistent passes, overlapping slightly, and maintain a consistent distance from the surface. Ensure proper ventilation and wear protective gear.
- Number of Coats: The ideal number of coats will vary depending on the product and how you use the floor. Most options need at least two or three coats.
Imagine a homeowner who opted to brush the polyurethane onto their floors. Through careful application and attention to detail, they achieved a smooth, professional-looking finish.
Drying and Curing: Time and Environmental Factors
Drying and curing are crucial for the polyurethane’s final look. The drying time, determined by the type of finish, temperature, and humidity, must be observed to allow the finish to harden correctly. Curing is the process by which the polyurethane reaches its full hardness and durability. During these periods, it’s critical to keep the floor clean and avoid heavy traffic or placing furniture on it. Controlling the environment, specifically the temperature and humidity, plays an essential role in how fast the polyurethane dries and cures. Proper drying and curing are key for a durable and beautiful floor.
- Temperature and Humidity: Maintain the recommended temperature and humidity levels to encourage the best drying and curing times.
- Ventilation: Ensure adequate ventilation, especially when using oil-based finishes, to allow for faster drying and remove solvent fumes.
- Prevent Contamination: Protect the floor from dust, debris, and pet hair during drying to maintain a clean finish.
- Wait Times: Allow adequate drying time between coats and before putting furniture back in the room.
A recent study showed that the perfect temperature and humidity improved curing times, leading to a harder, more resistant finish. This illustrates how environmental conditions affect the finish.
Maintenance and Care for Polyurethane Floors
Proper maintenance is essential for preserving the beauty and durability of polyurethane-finished floors. Regular cleaning, using recommended products, prevents the build-up of dirt and protects the finish from wear. Avoiding abrasive cleaners, which can damage the coating, and protecting the floor from scratches and impacts help extend its lifespan. Knowing how to deal with spills and knowing when to re-coat the floor will keep your hardwood floors looking great for many years.
Regular Cleaning and Maintenance
Regular cleaning is the most important step in hardwood floor care, preserving their appearance and extending their lifespan. Sweep or vacuum regularly to remove dirt and debris that can cause scratches. Use a damp mop with a pH-neutral cleaner specifically designed for hardwood floors for periodic cleaning. Avoid harsh chemicals and abrasive cleaners that can harm the finish. Promptly address spills to prevent stains, and place mats in high-traffic areas to minimize wear. Simple cleaning habits will keep your floors looking beautiful for years to come.
- Sweeping and Vacuuming: Sweep or vacuum at least once a week to remove dirt and debris. This keeps abrasive particles from scratching the floor.
- Mopping: Mop your floors with a damp mop, using a pH-neutral cleaner made for hardwood. Avoid using too much water.
- Avoid Harsh Chemicals: Don’t use harsh chemicals, ammonia-based cleaners, or abrasive products, as they can remove the finish.
- Mats and Rugs: Place mats at entrances and use rugs in high-traffic areas to help protect the floor from scratches and wear.
Consider the benefits of consistent cleaning, such as how it significantly reduced the need for frequent re-coating. A proactive approach is much better than a reactive one.
Dealing with Scratches, Dents, and Spills
Addressing damage promptly is key to maintaining polyurethane-finished floors. Scratches can be minimized by using furniture pads and being careful when moving furniture. Minor scratches can often be repaired with a touch-up pen or by applying a fresh coat of finish. For dents, you may be able to steam them out or use wood filler, following the instructions. Spills should be cleaned up quickly to avoid stains. Quick action can prevent long-term damage and keep the floors in good shape.
- Scratches: Use furniture pads to prevent scratches. Light scratches can be touched up using a matching stain marker or a touch-up pen.
- Dents: Small dents can sometimes be steamed out. For larger dents, fill them with wood filler.
- Spills: Wipe up spills right away to prevent stains. Use a damp cloth to clean up liquids immediately.
- Preventative Measures: Place rugs in high-traffic areas, and use protective pads under furniture legs.
Imagine a scenario where a child spilled juice on a hardwood floor. Because the homeowner cleaned it up right away, the floor did not have any damage, and it still looked brand new.
When to Re-coat Your Hardwood Floors
Re-coating is a great way to maintain and restore the look of polyurethane-finished floors. The frequency of re-coating depends on foot traffic, how you use the floors, and how well you take care of them. Signs such as wear marks, scratches, and a dull look often indicate the need for re-coating. Proper preparation, including cleaning and light sanding, ensures the new coat adheres correctly. Re-coating protects the wood and refreshes the finish, extending its lifespan and keeping floors looking beautiful for a long time.
- Signs of Wear: Check for visible wear patterns, scratches, and dull spots, indicating the protective layer is wearing out.
- Frequency: The frequency varies. High-traffic areas may need re-coating every 3-5 years, while areas with less use can go longer.
- Preparation: Before re-coating, clean the floor thoroughly, and lightly sand to improve adhesion.
- Application: Apply a new coat of polyurethane, following application instructions.
For example, a family noticed their living room floor getting dull after five years. Because they re-coated the floors at this time, they looked as good as new.
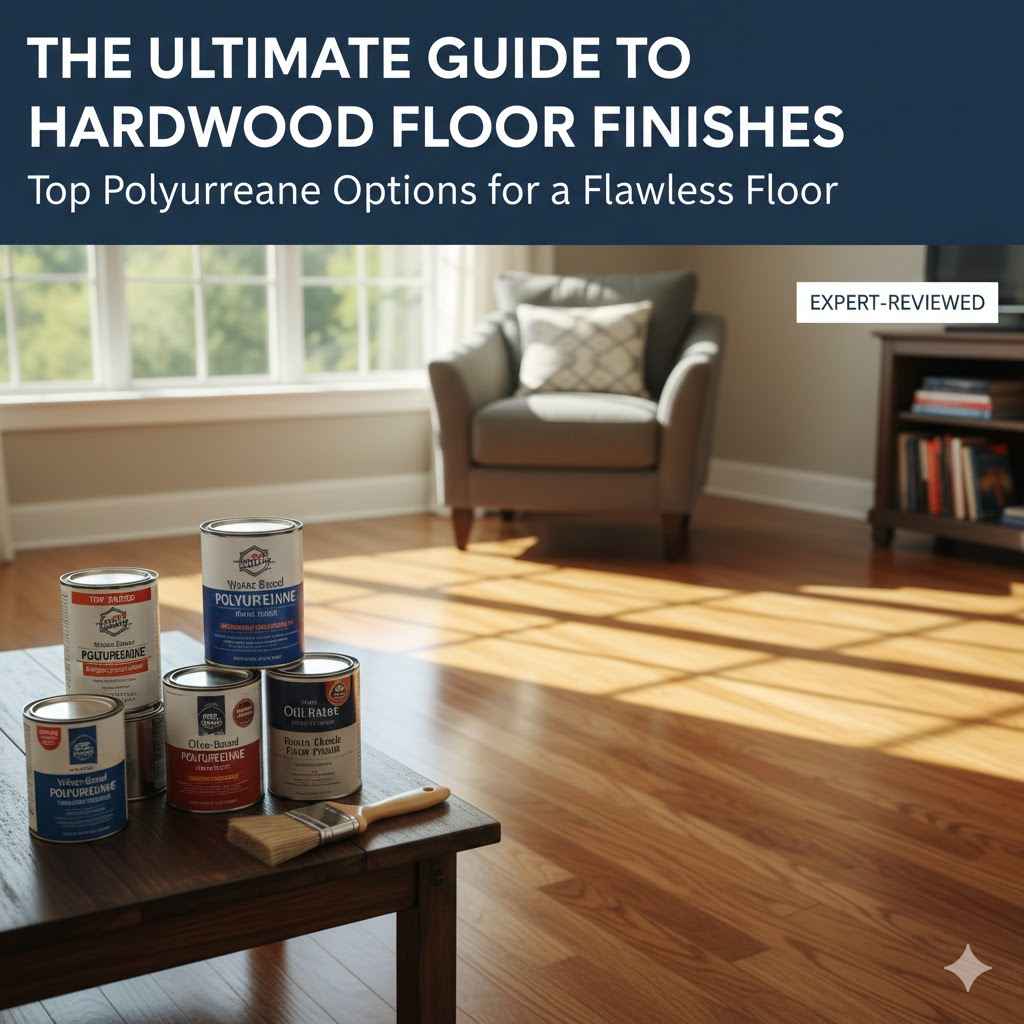
Best Polyurethane for Hardwood Floors: Top Options
Several brands and products stand out in the polyurethane market, each catering to different needs and preferences. These options vary in terms of durability, drying time, sheen, and ease of application. Oil-based finishes are favored for their durability and warm tones, while water-based options offer low odor and quick drying times. It’s crucial to research and choose the product that suits your floor type, lifestyle, and project goals, ensuring a beautiful, long-lasting finish.
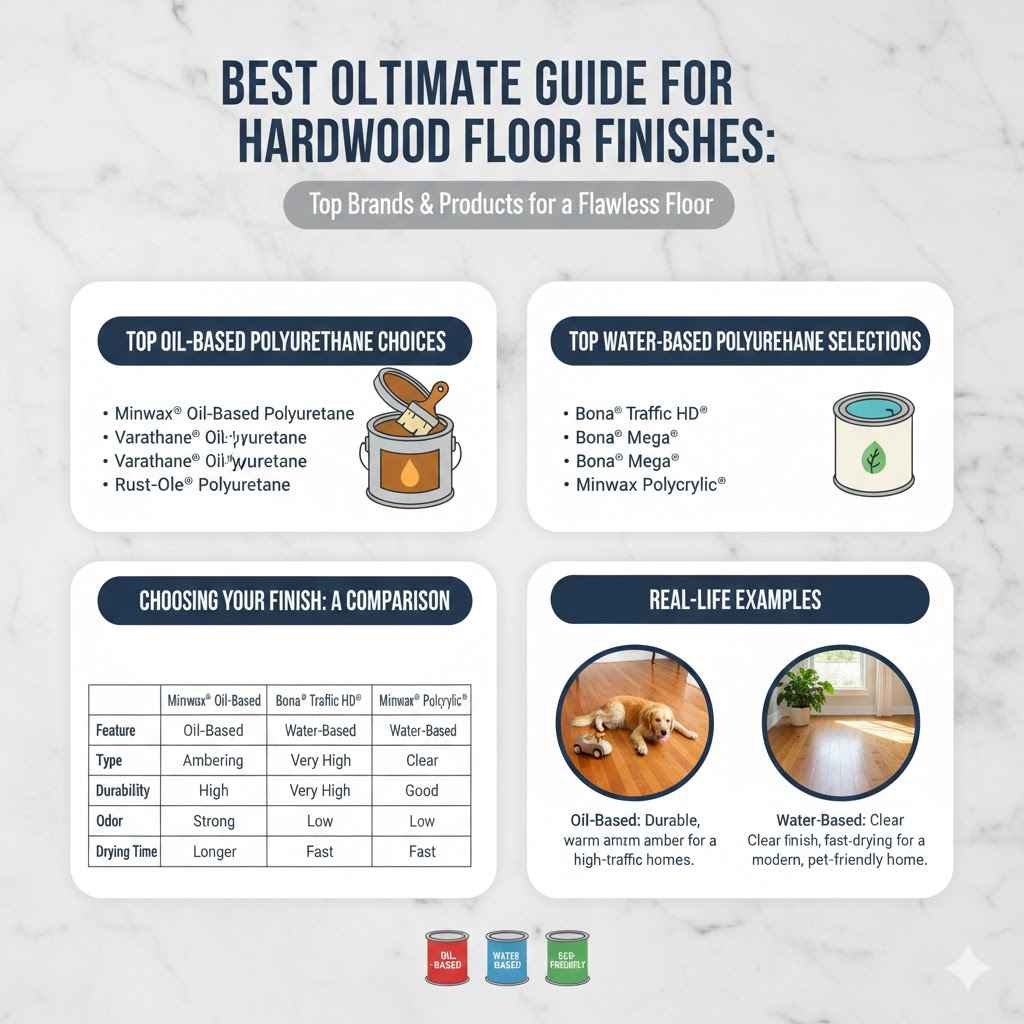
Top Oil-Based Polyurethane Choices
Choosing the best oil-based polyurethane involves looking at durability, appearance, and ease of use. Products often have unique characteristics that set them apart. Many options offer excellent durability, resist scratches, and enhance the wood’s warmth, while others offer a balance of hardness, drying time, and application ease. Assessing the features of each product will help you pick the one that fits your needs.
- Minwax® Oil-Based Polyurethane: A reliable choice known for its durability and ambering effect, enhancing the wood’s natural warmth. It offers good resistance to wear and tear.
- Varathane® Oil-Based Polyurethane: Recognized for its superior resistance to scratches and scuffs, which makes it ideal for high-traffic areas. Provides a durable surface.
- Rust-Oleum® Oil-Based Polyurethane: Is known for its easy application and good coverage, making it a good choice for both pros and people trying to do things themselves. Gives a nice finish.
Consider a house with dogs and kids. The homeowner needed a strong, oil-based polyurethane that could stand up to constant wear. Minwax was their choice, and the floors are doing great.
Top Water-Based Polyurethane Selections
Selecting the best water-based polyurethane means comparing clarity, durability, and drying time. Because water-based finishes have become more popular, many good products are available. These products give clear finishes and offer fast drying times, which makes them easy to use. Some options focus on scratch resistance, while others focus on low VOCs for a healthier indoor environment. Researching the specs, reviews, and test data is necessary to pick the right choice.
- Bona® Traffic HD®: A professional-grade, water-based option with exceptional durability and resistance to wear, often used in commercial settings. Offers a tough, beautiful finish.
- Bona® Mega®: Balances durability with ease of application and excellent leveling properties, making it a favorite for homeowners. Provides a smooth, lasting finish.
- Minwax® Polycrylic®: A clear, water-based finish that’s very easy to use, and has great clarity. Offers low odor and dries very quickly, so it can be easy for DIY people to use.
Imagine a homeowner wanted a clear finish with fast drying. They chose Minwax Polycrylic and were amazed at how easy it was to apply and how fast their floors dried.
Comparing Top Polyurethane Products
Comparing these polyurethane products side by side can help you make an informed decision. Key factors to consider include drying time, odor, VOC levels, and how well the floor resists scratches. Consider the specific features each product offers and its compatibility with your flooring and lifestyle. This direct comparison makes it much easier to select the perfect polyurethane for your project.
| Feature | Minwax® Oil-Based | Bona® Traffic HD® | Minwax® Polycrylic® |
|---|---|---|---|
| Type | Oil-Based | Water-Based | Water-Based |
| Clarity | Ambering | Clear | Clear |
| Durability | High | Very High | Good |
| Odor | Strong | Low | Low |
| Drying Time | Longer | Fast | Very Fast |
Frequently Asked Questions
Question: Can I apply polyurethane over an existing finish?
Answer: It’s generally not advisable. You’ll need to sand the existing finish to ensure proper adhesion before applying a new coat of polyurethane.
Question: How many coats of polyurethane should I apply?
Answer: For most hardwood floors, apply at least two to three coats. This provides adequate protection and durability.
Question: How long does polyurethane take to dry?
Answer: Drying times vary. Oil-based finishes usually take longer, sometimes up to 24 hours between coats, while water-based options dry faster, often within 2-4 hours.
Question: Can I use polyurethane on any type of wood floor?
Answer: Most hardwood floors can be finished with polyurethane. Always test the product in an inconspicuous area.
Question: How do I choose the right sheen for my polyurethane finish?
Answer: Sheen preferences are usually determined by the look you want. Choose from satin, semi-gloss, or gloss, considering the look of your home.
Final Thoughts
Picking the Best Polyurethane for Hardwood Floors: Top Options Explained is easier with the proper knowledge and a solid plan. Whether you choose oil-based or water-based polyurethane, understanding the advantages of each, from their unique aesthetic to their drying times and durability, is key. Careful preparation, including sanding and cleaning, is just as critical as the application process itself. Regular maintenance, such as sweeping and mopping, along with prompt attention to spills and scratches, helps you maintain the beauty of your floors for many years to come.
Remember to research and choose a product that best suits your needs. With the right approach, you can create a beautiful hardwood floor that lasts. Good luck with your project!