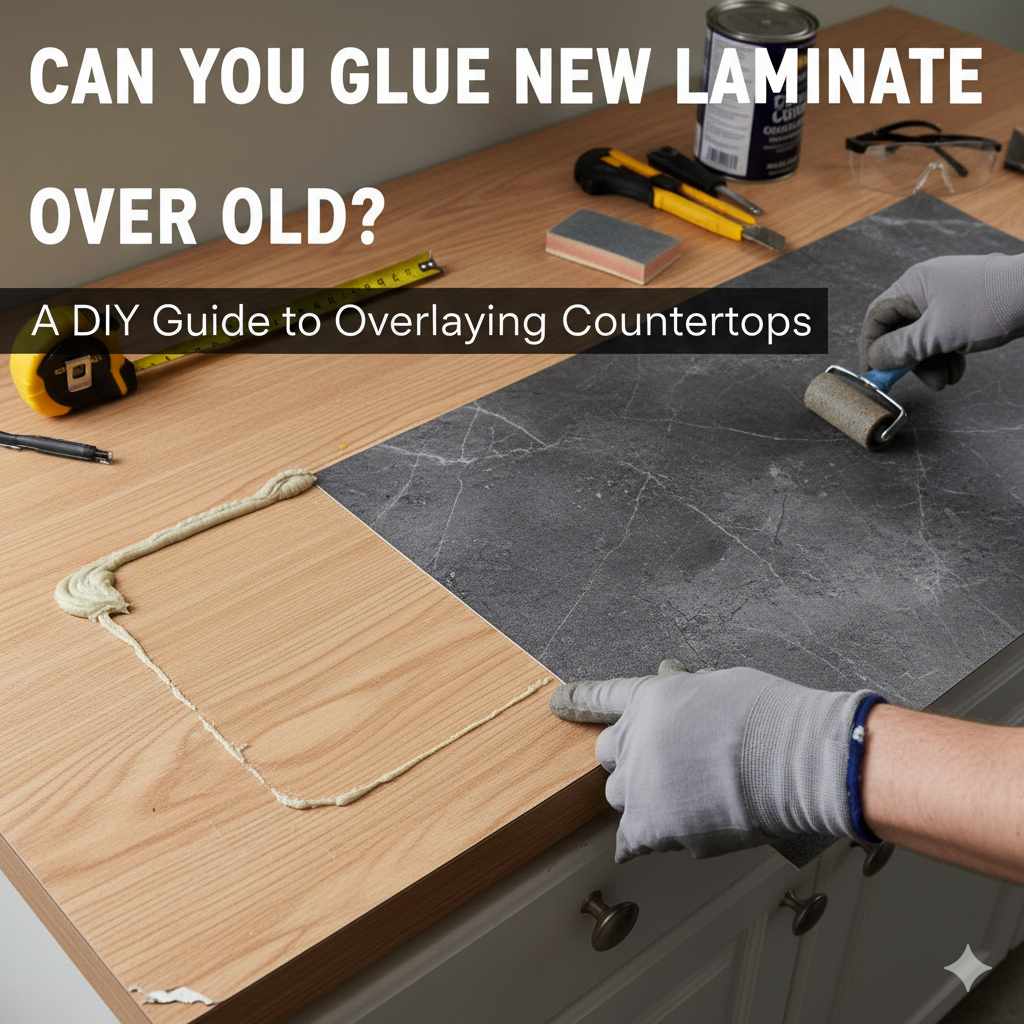
Can You Glue New Laminate Over Old? Essential Guide
Yes, you can often glue new laminate over old laminate, but it requires careful preparation and the right adhesive. This method can be a budget-friendly way to update your surfaces without a full replacement, provided the existing laminate is sound.
Updating your home doesn’t always mean a complete overhaul. Sometimes, a fresh look is just a few steps away. If your laminate countertops or cabinets are looking a bit tired, you might be wondering if you can simply glue new laminate right over the top. It’s a question many DIYers ask when looking for a quick, affordable update. The good news is, this is often a very achievable project! With the right approach, you can give your surfaces a stunning makeover without the mess and expense of removing the old layer. Let’s dive into how you can successfully glue new laminate over old, transforming your space one step at a time.
Can You Glue New Laminate Over Old Laminate Countertops?
The short answer is a resounding yes, you can glue new laminate over old laminate countertops, but with some important conditions. This technique is a popular DIY solution for refreshing worn-out surfaces without the need for demolition. It’s a fantastic way to save money and time, especially if your existing laminate is still firmly attached and in decent condition. However, success hinges entirely on proper preparation. If the old laminate is peeling, damaged, or loose, it’s not a suitable base for new material.
Think of it like painting: you wouldn’t paint over peeling paint. You need a smooth, stable surface for the new layer to adhere to and last. The same principle applies here. When done correctly, this method can yield professional-looking results that breathe new life into your kitchen or bathroom.

When is Gluing New Laminate Over Old a Good Idea?
This DIY-friendly approach is ideal in several scenarios. It’s a smart choice when you want to:
- Update Aesthetics on a Budget: If your current laminate is structurally sound but outdated in style or color, this is a cost-effective way to modernize.
- Avoid Demolition Hassles: Removing old laminate can be time-consuming and messy. Gluing over it bypasses this strenuous step.
- Minor Surface Wear: If the existing laminate has only minor scratches, stains, or is slightly faded, a new layer can cover these imperfections.
- Temporary Solution: If you’re planning a larger renovation down the line but want a quick refresh now, this is a great interim fix.
- Add a Seamless Look: New laminate can provide a consistent, updated surface without the seams and grout lines of tile.
When Should You Avoid Gluing New Laminate Over Old?
While tempting, this method isn’t always the best solution. You should steer clear of gluing new laminate over old if:
- The Old Laminate is Damaged: Any significant peeling, bubbling, lifting, or delamination of the existing laminate means it’s not a stable base. Trying to glue over it will likely result in a poor finish and premature failure.
- The Substrate is Compromised: If the underlying material (like particleboard or plywood) is water-damaged, soft, or rotting, you must address that first. New laminate won’t fix underlying structural issues.
- Significant Warping or Unevenness: If the old laminate is warped or the substrate beneath is uneven, the new laminate won’t lie flat, leading to an unsightly appearance and potential for cracking.
- Moisture Issues: If the area experiences high moisture (e.g., around a sink without proper sealing), and the old laminate shows signs of damage from this, you need to fix the moisture problem before any new installation.
- You Desire a High-End Finish: For a truly premium look and feel, or if you’re concerned about long-term durability and the potential for a slight “hollow” sound, removing the old laminate and installing fresh might be preferable.
Essential Tools and Materials You’ll Need
Gathering the right supplies is key to a smooth and successful project. Here’s what you’ll want to have on hand:
Tools:
- Safety Glasses: Always protect your eyes, especially when cutting or sanding.
- Work Gloves: To protect your hands from adhesives and sharp edges.
- Measuring Tape: For accurate measurements of your surfaces and laminate sheets.
- Utility Knife with Extra Blades: For precise cutting of laminate.
- Jigsaw or Circular Saw (with fine-tooth blade): For trimming laminate to size. A fine-tooth blade is crucial to prevent chipping.
- Sanding Blocks or Electric Sander (with medium-grit sandpaper): For preparing the surface.
- Screwdriver or Drill: If you need to remove any hardware or make minor adjustments.
- Putty Knife or Scraper: For removing old adhesive residue.
- Cleaning Rags: For cleaning the surface thoroughly.
- Contact Cement or Laminate Adhesive: The specific type recommended for laminate applications.
- J-roller or Laminating Roller: To ensure even pressure and adhesion across the entire surface.
- Clamps (optional but helpful): To hold edges in place while the adhesive sets.
- Straight Edge or Metal Ruler: For guiding cuts with your utility knife.
Materials:
- New Laminate Sheets: Choose your desired color and pattern.
- Contact Cement Primer (if recommended by adhesive manufacturer): For certain surfaces or difficult bonding situations.
- Mild Detergent and Water: For initial cleaning.
- Denatured Alcohol or Acetone: For a final degreasing and cleaning step.
- Caulk (matching your new laminate color): For sealing edges, especially around sinks.
Step-by-Step Guide: How to Glue New Laminate Over Old
Ready to get started? Follow these steps carefully for a fantastic finish.
Step 1: Inspect and Prepare the Existing Surface
This is the most critical step. Your old laminate needs to be a solid foundation.
- Thorough Inspection: Run your hands over the entire surface. Feel for any loose edges, bubbles, or lifting. Check for deep gouges or significant damage.
- Address Loose Areas: If you find any lifting, try to re-adhere it. Clean the area with a degreaser, then apply a strong, flexible adhesive (like a high-quality wood glue or specific laminate repair adhesive) under the lifted section. Weigh it down firmly with heavy objects or use clamps until fully cured according to the adhesive’s instructions.
- Repair Damage: Small chips or gouges can sometimes be filled with a wood filler or epoxy putty, then sanded smooth once dry. However, if damage is extensive, this method might not be suitable.
- Clean Thoroughly: Use a mild detergent and water solution to clean the entire surface, removing any grease, grime, or residue. Rinse well and allow it to dry completely.
- Degrease: Wipe down the surface with denatured alcohol or acetone. This removes any lingering oils or residues that could prevent the new adhesive from bonding properly. Allow this to evaporate completely.
Step 2: Sand the Surface
Sanding creates a slightly rougher texture, giving the new adhesive something to grip onto. This is essential for a strong bond.
- Light Sanding: Using a sanding block or an electric sander with medium-grit sandpaper (around 100-120 grit), lightly scuff the entire surface of the old laminate. You don’t need to remove the old finish, just create a dull, matte appearance.
- Clean Dust: After sanding, wipe down the surface again with a damp cloth to remove all sanding dust. Then, follow up with a clean, dry cloth. For best results, a final wipe with denatured alcohol can ensure no dust remains.
Step 3: Measure and Cut Your New Laminate
Accuracy here will save you a lot of frustration later.
- Measure Carefully: Measure the dimensions of the area you’re covering. For countertops, this typically means measuring the length and width, plus any overhang.
- Add a Small Overlap: It’s often best to cut your new laminate sheets slightly larger than the exact dimensions – perhaps an extra inch or two on each side. This allows for trimming to get a perfect, clean edge.
- Mark and Cut: Place your new laminate sheet on a stable surface, pattern-side down. Use a straight edge and your utility knife to score the laminate deeply along your cut lines. You may need to make multiple passes. Then, snap the laminate along the score line. For straighter, cleaner cuts, especially on longer lengths, a jigsaw or circular saw with a fine-tooth blade designed for laminate or plastic is recommended. Always cut from the underside if using a saw to minimize chipping on the visible surface.
Step 4: Apply the Adhesive
This is where the magic happens. Contact cement is the most common adhesive for this job.
- Read Adhesive Instructions: ALWAYS follow the specific instructions provided by the adhesive manufacturer. Contact cements typically require application to both surfaces.
- Apply Adhesive to Old Laminate: Using a brush, roller, or putty knife, apply an even, thin coat of contact cement to the prepared old laminate surface. Ensure full coverage, especially at the edges.
- Apply Adhesive to New Laminate: Apply an equally thin and even coat of adhesive to the back (non-decorative side) of your new laminate sheet.
- Allow to Dry (Tack Up): This is crucial for contact cement. Let both surfaces dry until they are tacky to the touch, but not wet. This usually takes about 10-20 minutes, depending on humidity and temperature. They should feel slightly sticky, like masking tape, but shouldn’t transfer to your fingers.
Step 5: Position and Bond the New Laminate
Once the adhesive is tacky, it’s time to join the two layers. This is a one-shot deal, so precision is key.
- Careful Alignment: Carefully align the new laminate sheet over the old surface. Starting from one edge or corner, gently lay it down. If you have an overhang, align it first.
- Prevent Trapping Air: To avoid trapping air bubbles, you can use a piece of thin cardboard or scrap wood placed between the new and old laminate. Lay down one edge, then gradually pull out the cardboard as you press the laminate down.
- Press Firmly: Once the laminate is in place, immediately begin to press it down firmly. Use a J-roller or a laminate roller to apply even pressure across the entire surface. Start from the center and work your way outwards to push out any trapped air.
- Use a Straight Edge: For countertops, use a straight edge and a block of wood to apply firm, even pressure along the edges and any significant flat areas.
- Clamping (Optional): For edges that might lift, you can use clamps to hold them in place while the adhesive cures, but be sure to protect the laminate surface with a scrap piece of wood.
Step 6: Trim Edges and Finish
Now it’s time to make it look perfect.
- Trim Excess: If you cut your laminate slightly oversized, use a sharp utility knife and a straight edge to carefully trim away the excess material along the edges. Take your time for clean cuts.
- Smooth Edges: Lightly sand any rough edges with fine-grit sandpaper (220 grit) or a fine sanding sponge.
- Seal Edges: For countertops, especially around sinks, it’s vital to seal the exposed edges of the new laminate. Apply a bead of silicone caulk that matches your laminate color to create a waterproof barrier.
- Clean Up: Remove any adhesive residue that may have squeezed out. Clean the entire surface with a damp cloth.
- Allow to Cure: Let the adhesive cure fully according to the manufacturer’s instructions before using the surface heavily. This can take 24-72 hours.
Pros and Cons of Gluing New Laminate Over Old
Like any DIY project, this method has its advantages and disadvantages. Understanding them will help you make an informed decision.
| Pros | Cons |
|---|---|
| Cost-Effective: Significantly cheaper than replacing countertops or cabinets. | Surface Integrity Required: Only works if the old laminate is in good condition. |
| Time-Saving: Avoids the labor-intensive process of removing old material. | Potential for Bubbling/Delamination: If not prepared or adhered correctly, air pockets or future lifting can occur. |
| Reduces Waste: Keeps existing materials out of landfills. | Slightly Thicker Surface: The new layer adds thickness, which might affect how cabinets close or how edge profiles look. |
| Easy DIY Project: With careful steps, it’s manageable for beginners. | Limited Design Options: May not be suitable for complex curves or detailed edges. |
| Quick Aesthetic Update: Provides a fast and dramatic visual improvement. | Durability Concerns: The bond strength is dependent on the adhesive and surface prep, potentially less durable than a single-layer installation. |
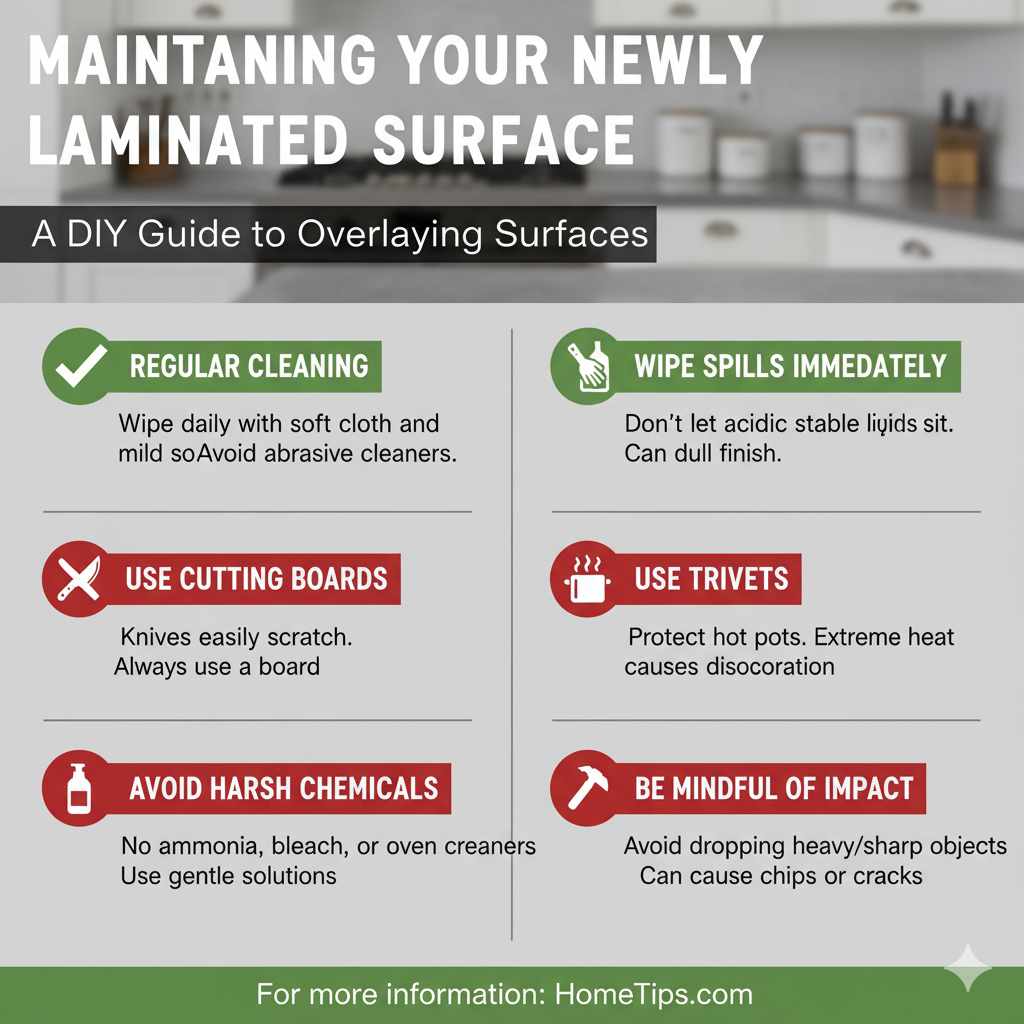
Maintaining Your Newly Laminated Surface
Once your new laminate is in place, a little care will ensure it looks great for years to come.
- Regular Cleaning: Wipe down surfaces daily with a soft cloth and mild soap and water. Avoid abrasive cleaners or scouring pads, as they can scratch the laminate.
- Wipe Spills Immediately: Don’t let spills, especially acidic liquids like lemon juice or vinegar, sit on the surface for too long, as they can dull the finish over time.
- Use Cutting Boards: Always use cutting boards when preparing food. Knives can easily scratch or cut through laminate.
- Use Trivets: Protect the surface from hot pots and pans. While laminate is somewhat heat-resistant, extreme heat can cause damage or discoloration.
- Avoid Harsh Chemicals: Stick to gentle cleaning solutions. Avoid ammonia, bleach, or oven cleaners, as these can damage the laminate’s protective layer. For stubborn spots, a paste of baking soda and water can be gently used.
- Be Mindful of Impact: Avoid dropping heavy or sharp objects on the surface, as this can cause chips or cracks.
For more information on laminate care and cleaning, resources like HomeTips.com offer excellent, practical advice.
Frequently Asked Questions (FAQ)
Here are some common questions homeowners have about this project:
Q1: What is the best adhesive to use for gluing new laminate over old?
A1: The most common and effective adhesive for this job is contact cement. It creates a strong, instant bond when applied to both surfaces and allowed to become tacky before joining. Always choose a high-quality, solvent-based contact cement specifically designed for laminate applications.
Q2: Can I glue new laminate over damaged or peeling old laminate?
A2: No, this is not recommended. The old laminate must be firmly adhered to its substrate and free from significant damage like peeling, bubbling, or delamination. If the existing surface is compromised, it cannot provide a stable base for the new laminate, and the project will likely fail.
Q3: How much overhang should I leave when cutting new laminate?
A3: It’s generally advisable to cut the new laminate slightly oversized, perhaps by 1-2 inches on each side that will be trimmed. This extra material provides a buffer for positioning and allows for precise trimming to achieve a clean, finished edge that aligns perfectly with your countertop or cabinet. You’ll trim this excess in the final steps.
Q4: What happens if I get air bubbles under the new laminate?
A4: Air bubbles are a common concern. To minimize them, apply the adhesive evenly, allow it to dry to the correct tackiness, and carefully align and lay down the new laminate. Once in place, use a J-roller or laminate roller to firmly press the laminate down, working from the center outwards to push any trapped air towards the edges. If a small bubble forms, you might be able to inject adhesive with a syringe and press it down, but it’s best to avoid them altogether through careful application.
Q5: Do I need to seal the edges of the new laminate?
A5: Yes, especially for countertops and areas around sinks. Sealing the exposed edges of the new laminate with a bead of silicone caulk creates a waterproof barrier. This prevents moisture from seeping underneath the laminate, which can cause damage to the substrate and lead to delamination or mold growth over time. Choose a caulk color that matches your new laminate for a seamless look.
Q6: How long does the adhesive need to cure before I can use the surface?
A6: While contact cement bonds instantly upon contact, it needs time to achieve its full strength. Most manufacturers recommend waiting at least 24 hours, and sometimes up to 72 hours, before subjecting the newly laminated surface to heavy use or moisture. Always check the specific product’s instructions for curing times.
Q7: Can I glue new laminate over old laminate on vertical surfaces like cabinet doors?
A7: Yes, you can glue new laminate over old laminate on vertical surfaces like cabinet doors, provided the old laminate is in good condition. The preparation steps (cleaning, sanding, degreasing) are the same. When applying the adhesive and bonding the new laminate, ensure even pressure is applied. Using a roller or a block of wood to press from top to bottom can help achieve good adhesion on vertical areas. Be mindful of gravity and ensure the laminate doesn’t shift before the adhesive fully cures.
Conclusion
So, can you glue new laminate over old? Absolutely! When approached with care and attention to detail, this DIY project offers a fantastic way to revitalize your countertops and cabinets without breaking the bank. The key to success lies in meticulous preparation: ensuring your existing laminate is sound, thoroughly cleaning and sanding the surface, and applying the adhesive correctly. By following these steps, gathering the right tools, and taking your time, you can achieve a durable, beautiful, and updated surface that you’ll be proud of. Remember, a little effort upfront can lead to a significant transformation, making your home look and feel fresh and new.