Can You Install Engineered Hardwood Over Existing Hardwood? Proven!
Yes, you can often install engineered hardwood over existing solid hardwood floors. This is a popular DIY project that can update your home’s look without the mess of demolition, provided your existing floor is in good condition and properly prepared.
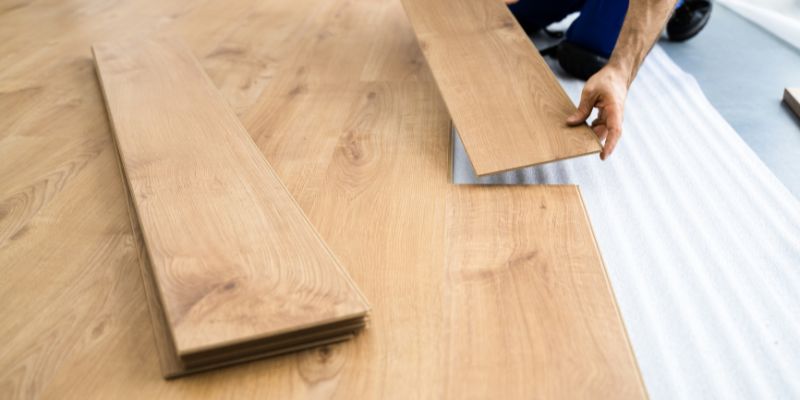
Ever look at your beautiful, but perhaps slightly dated, solid hardwood floors and wish for a fresh new look? Many homeowners dream of upgrading to the sleek, modern appeal of engineered hardwood. The big question that often pops up is: can I just lay the new flooring right on top of the old? It’s a common concern, and one that can save you a lot of time, money, and hassle if you get the right answer. Don’t worry, because as your woodworking guide, I’m here to walk you through it! We’ll explore whether this is a viable option for your home, what you need to consider, and how to do it right. Get ready to transform your space with confidence!
Why Consider Installing Engineered Hardwood Over Existing Hardwood?
Installing engineered hardwood over an existing solid hardwood floor is a fantastic way to achieve a new look without the extensive labor and cost associated with removing the old flooring. Think of it as giving your home a stylish makeover, layer by layer! This method is appealing for several key reasons:
- Cost Savings: Removing an old hardwood floor can be labor-intensive and may require renting special equipment. By skipping this step, you can significantly reduce project costs.
- Time Efficiency: Demolition is messy and time-consuming. Installing over an existing floor dramatically cuts down the project timeline, allowing you to enjoy your new floors sooner.
- Reduced Mess and Dust: Say goodbye to clouds of sawdust and debris! This method minimizes the mess, making it a more pleasant DIY experience, especially in occupied homes.
- Preservation: In some cases, the existing hardwood floor might have historical or sentimental value. Installing over it preserves the original floor beneath.
- Added Insulation and Sound Dampening: A second layer of flooring can offer some additional benefits in terms of thermal insulation and reducing sound transmission between floors.
The Crucial Question: Can You Install Engineered Hardwood Over Existing Hardwood?
The short answer is a resounding yes, you absolutely can, under specific conditions. However, it’s not a universal “go ahead.” The success of this project hinges entirely on the condition and suitability of your existing solid hardwood floor. If your current floor is:
- Solidly attached: No loose boards, squeaks, or lifting.
- Level: Free from significant dips, humps, or unevenness.
- Smooth: The surface should be free of old finishes, adhesives, or significant wear and tear that could prevent proper adhesion or create an uneven surface.
- Structurally sound: No rot, water damage, or insect infestation.
If your existing hardwood floor meets these criteria, you’re in a great position to install engineered hardwood on top. It’s like building a strong foundation for a beautiful new structure. If there are any doubts about the condition of your existing floor, it’s always best to consult with a flooring professional.
Understanding Engineered Hardwood
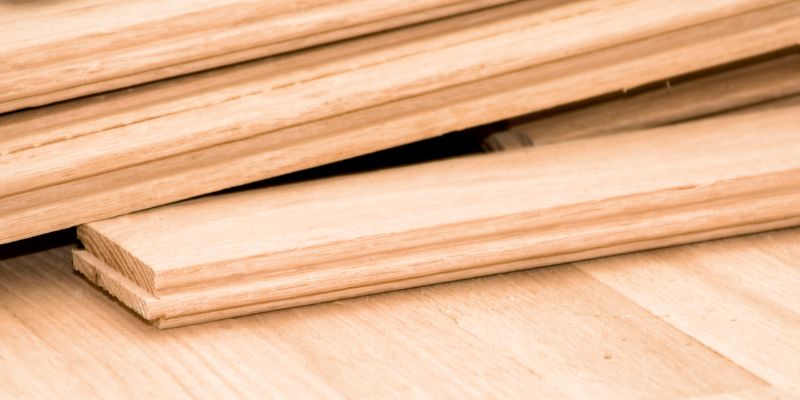
Before we dive into the “how-to,” let’s quickly touch on what engineered hardwood is. Unlike solid hardwood, which is milled from a single piece of wood, engineered hardwood is constructed with multiple layers. It typically consists of a real hardwood veneer on top, bonded to a core of plywood or high-density fiberboard (HDF). This construction makes it:
- More stable: Less prone to expanding and contracting with changes in humidity and temperature, making it suitable for basements and areas with fluctuating moisture.
- Versatile in installation: It can often be glued down, stapled, or even floated, depending on the product and subfloor.
- Durable: The real wood veneer provides the look and feel of solid hardwood, and the layered construction adds resilience.
The ability to install engineered hardwood over existing hardwood is largely due to its stability and the various installation methods available, particularly glue-down and floating methods.
When NOT to Install Over Existing Hardwood
It’s just as important to know when this approach won’t work. Here are the red flags that mean you should remove your old floor first:
- Loose or Damaged Boards: Any boards that are warped, cracked, lifting, or excessively squeaky are a problem. These issues will transfer to the new layer and compromise its stability.
- Uneven Surface: Significant high or low spots, cupping, or crowning in the existing floor will create an unstable and aesthetically unpleasing new floor.
- Waxy or Oily Finish: Some older floors might have been treated with wax or oil-based finishes that can prevent new adhesives from bonding properly.
- Excessive Gaps: Large gaps between the existing floorboards can allow moisture to penetrate to the subfloor or cause issues with the new flooring.
- Structural Issues: If the subfloor beneath the existing hardwood is damaged, you must address that first.
- Height Restrictions: Adding a new layer of flooring will increase the overall floor height. This can cause issues with door clearance, transitions to other rooms, or built-in cabinetry. Check your door clearances carefully!
If any of these apply to your current floor, the safest and most effective solution is to remove the old hardwood and address any underlying issues before installing the new engineered hardwood.
Preparing Your Existing Hardwood Floor for the New Layer
This is arguably the most critical step. Proper preparation ensures your new engineered hardwood floor will look great and last for years to come. Think of this as the essential sanding and priming before you paint a masterpiece.
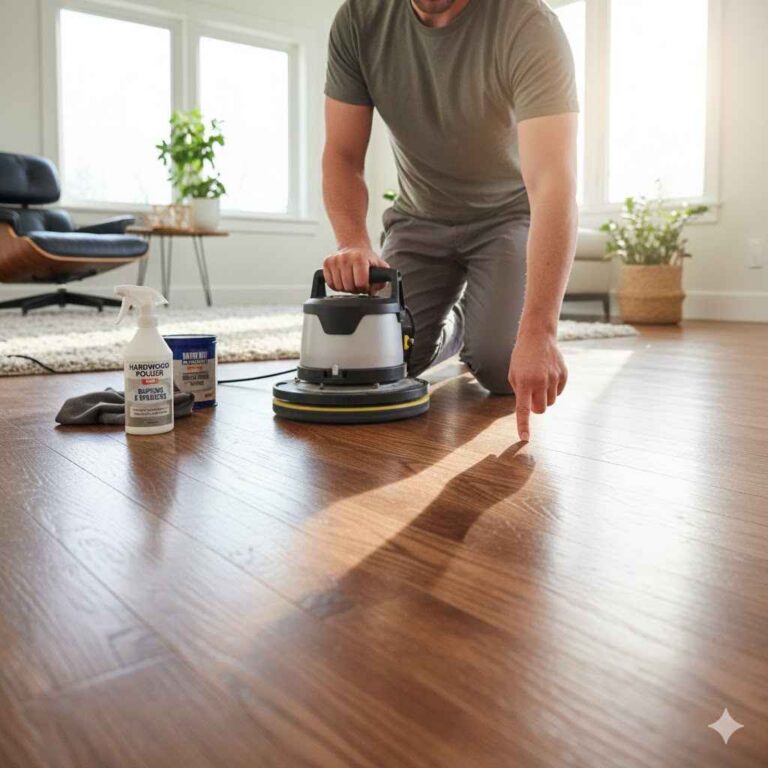
Step 1: Thorough Cleaning
Your existing floor needs to be spotless. Any dirt, grease, wax, or debris will prevent the new flooring from adhering correctly or create an uneven surface.
Tools and Materials:
- Vacuum cleaner with a brush attachment
- Broom
- Wood floor cleaner specifically designed for hardwood
- Clean cloths or microfiber mops
- Bucket
Process:
- Start by sweeping or vacuuming thoroughly to remove all loose dirt and dust.
- Prepare a cleaning solution according to the product’s instructions.
- Dampen a mop or cloth with the cleaner – do not saturate the floor, as excess water can damage hardwood.
- Wipe down the entire floor surface.
- Allow the floor to dry completely. You might need to go over it again with a dry cloth or mop to ensure no residue is left behind.
Step 2: Inspect and Repair
Now, get down on your hands and knees and give your existing floor a close inspection. Look for:
- Loose Boards: If you find any, try to secure them. You might be able to re-nail or re-glue them. If a board is severely damaged or warped, carefully remove it and replace it with a similar piece if possible, or leave the space empty if it’s a hidden area.
- Gaps: Small gaps can be filled with a wood filler that matches your existing floor color. Ensure the filler is completely dry and sanded smooth before proceeding.
- Warping or Cupping: If boards are significantly warped, this is a sign that the floor may need to be removed, as these issues are difficult to correct and will affect the new installation.
Step 3: Sanding (Optional but Recommended)
Even if your floor looks smooth, a light sanding can create a better surface for adhesives to grip. This is especially important if the existing finish is glossy or has a protective coating.
Tools and Materials:
- Random orbital sander or a floor buffer with a sanding screen
- Fine-grit sandpaper (e.g., 100-120 grit)
- Dust collection system (shop vac with a good filter)
Process:
- Attach the sandpaper or screen to your sander.
- Work in a systematic pattern, overlapping your passes.
- Sand the entire surface until it has a dull, uniform finish.
- Thoroughly vacuum all dust. You may need to wipe down with a tack cloth to pick up any remaining fine particles.
Step 4: Leveling the Floor
Any imperfections in levelness need to be addressed. A difference of more than 3/16 inch over a 10-foot span is generally considered unacceptable for most flooring installations. You can use a self-leveling compound for minor dips.
Tools and Materials:
- Self-leveling underlayment compound
- Mixing bucket
- Drill with mixing paddle
- Spiked roller
- Primer (if recommended by the compound manufacturer)
Process:
- Follow the manufacturer’s instructions carefully for mixing the compound.
- Prime the floor if required.
- Pour the mixed compound onto the lowest areas and spread it with a squeegee or trowel.
- Use a spiked roller to help the compound spread evenly and release air bubbles.
- Allow the compound to cure completely according to the manufacturer’s instructions.
Installation Methods for Engineered Hardwood Over Existing Hardwood
Once your existing floor is prepped, you can choose the best installation method for your engineered hardwood. The most common and suitable methods for installing over existing hardwood are:
1. Glue-Down Installation
This is often the preferred method when installing over an existing wood floor because it creates a strong bond between the layers, minimizing movement and potential for squeaks.
Tools and Materials:
- Engineered hardwood flooring
- Flooring adhesive recommended for engineered wood and your subfloor type
- Notched trowel (specific notch size recommended by adhesive manufacturer)
- Painter’s tape
- Utility knife
- Pry bar
- Measuring tape
- Chalk line or laser level
- Safety glasses
- Knee pads
- Gloves
- Optional: Expansion wedges
Process:
- Acclimate Flooring: Allow the engineered hardwood planks to acclimate in the room where they will be installed for at least 48-72 hours, following the manufacturer’s recommendations.
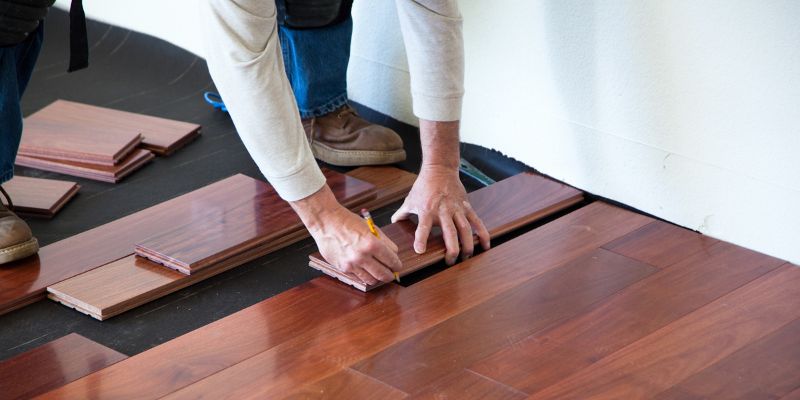
- Plan Layout: Determine your starting wall and plan the layout of your planks. Consider door openings and transitions. It’s often best to start along the longest, straightest wall.
- Apply Adhesive: Working in small sections (about 3-4 planks at a time), spread the recommended adhesive evenly onto the existing hardwood floor using the correct notched trowel. Ensure consistent coverage without over-applying.
- Lay Planks: Carefully place the first plank along your starting line. Fit subsequent planks together, ensuring a tight, gap-free connection. You may need to tap them gently into place with a rubber mallet and a tapping block.
- Secure Planks: As you lay each plank, press it firmly into the adhesive. Some installers recommend using a floor roller over the newly laid planks to ensure good contact.
- Cut Planks: Use a miter saw or jigsaw to cut planks to fit at the end of rows or around obstacles.
- Maintain Expansion Gap: Leave a small expansion gap (typically 1/4 to 1/2 inch) around the perimeter of the room and any fixed objects like cabinets or doorways. Use expansion wedges to maintain this gap.
- Clean Up: Immediately wipe away any excess adhesive that squeezes up between planks or gets on the surface of the new flooring with a damp cloth.
- Final Roll: Once a section is complete or the entire floor is laid, it’s often recommended to roll the entire floor with a heavy floor roller to ensure maximum adhesion.
- Cure Time: Allow the adhesive to cure fully according to the manufacturer’s instructions before walking heavily on the floor or replacing baseboards.
2. Floating Installation
A floating floor is not attached to the subfloor. Instead, the planks are joined to each other, and the entire floor “floats” as one piece. This method can be used over existing hardwood if the manufacturer’s instructions allow.
Tools and Materials:
- Engineered hardwood flooring (click-lock or glue-together system)
- Underlayment (if recommended by the flooring manufacturer – some engineered floors have attached underlayment)
- Utility knife
- Pry bar
- Measuring tape
- Chalk line or laser level
- Jigsaw or miter saw
- Hammer and tapping block
- Expansion wedges
- Safety glasses
- Knee pads
- Gloves
Process:
- Acclimate Flooring: As with glue-down, ensure the flooring is acclimated.
- Install Underlayment: If required, lay down the underlayment according to the manufacturer’s instructions. This often involves rolling it out and taping the seams.
- Plan Layout: Determine your starting wall and plank direction.
- Lay First Row: Start in a corner, leaving an expansion gap around the perimeter using expansion wedges.
- Connect Planks: Click or glue the next plank to the first, ensuring a tight fit. Continue along the row.
- Cut Last Plank: Measure and cut the last plank of the row to fit, remembering to account for the expansion gap.
- Start Second Row: Begin the second row with the offcut from the first row (if it’s long enough, at least 6-8 inches) to create a staggered pattern. This adds stability and visual appeal.
- Connect Rows: Angle the tongue of the second-row plank into the groove of the first-row plank and gently push down to lock them together. You may need to use a tapping block to ensure a tight seam.
- Continue Installation: Work your way across the room, row by row, always maintaining the expansion gap.
- Final Touches: Once the floor is laid, remove the expansion wedges. You will typically install quarter-round molding or base shoe around the perimeter to cover the expansion gap.
Important Note: Always check the specific installation instructions provided by your engineered hardwood manufacturer. They will specify the recommended installation methods, adhesives, underlayments, and any specific requirements for installing over existing hardwood.
Table: Pros and Cons of Installing Over Existing Hardwood
Here’s a quick look at the advantages and disadvantages of this popular DIY approach:
| Pros | Cons |
|---|---|
| Significant cost savings on labor and disposal. | Requires meticulous preparation of the existing floor. |
| Faster installation time, less disruption. | Adds to the overall floor height, potentially affecting doors and transitions. |
| Less mess and dust compared to demolition. | Not suitable if the existing floor is damaged, uneven, or has unsuitable finishes. |
| Preserves the original floor beneath. | May not be possible over very old or unstable existing hardwood. |
| Can add a layer of insulation and sound dampening. | Requires careful attention to expansion gaps to prevent buckling. |
Table: Tools and Materials Checklist
Having the right tools and materials on hand makes the job much smoother. Here’s a comprehensive list to get you started:
| Category | Tools/Materials | Notes |
|---|---|---|
| Preparation | Vacuum cleaner | With brush attachment |
| Wood floor cleaner | pH-neutral, designed for hardwood | |
| Random orbital sander / Floor buffer | Optional, for lightly abrading the existing surface | |
| Installation | Engineered hardwood flooring | Acclimated per manufacturer instructions |
| Flooring adhesive | Specific type recommended by manufacturer (if glue-down) | |
| Notched trowel | Size specified by adhesive manufacturer | |
| Cutting & Fitting | Miter saw | For clean, straight cuts |
| Jigsaw | For intricate cuts around obstacles | |
| Utility knife | For scoring and cutting underlayment or trim | |
| Measuring tape | Essential for accurate measurements | |
| Pry bar | For adjustments and removing pieces | |
| Finishing & Safety | Rubber mallet | For gently tapping planks into place |
| Tapping block | Protects plank edges during installation | |
| Expansion wedges | To maintain required gaps | |
| Safety glasses, knee pads, gloves | Crucial for protection | |
| Optional | Underlayment | If required by flooring manufacturer for floating installs |
| Optional | Floor roller | For ensuring good adhesive contact |
Important Considerations for a Successful Installation
Beyond the basic steps, a few extra considerations can make a big difference:
- Acclimation is Key: Never skip this step. Engineered hardwood needs to adjust to the temperature and humidity of your home before installation.
- Moisture Testing: Even if your existing floor seems dry, it’s wise to test the moisture content of the existing hardwood and the subfloor, especially if you have a basement or crawl space. High moisture can lead to buckling or adhesive failure. You can find guidelines on moisture testing from organizations like the International Code Council (ICC), which sets building standards.
- Manufacturer’s Warranty: Always review the warranty for your engineered hardwood. Some warranties may be voided if the flooring is not installed according to the manufacturer’s specific instructions, including their guidelines for installing over existing floors.
- Door Clearance: As mentioned, adding a new layer of flooring will raise the floor height. Measure the gap under your doors. If the new floor plus any underlayment is thicker than the existing floor, you might need to trim the bottom of your doors.
- Transitions: Pay close attention to how the new floor will meet other flooring materials in adjacent rooms. Use appropriate transition strips (reducers, T-molding, etc.) for a smooth and safe transition.
Frequently Asked Questions (FAQ)
Can I install engineered hardwood directly over my old, worn-out solid hardwood floor?
Generally, no. If your existing floor is significantly worn, uneven, damaged, or has a problematic finish, it’s best to remove it first. The new flooring needs a solid, level base to ensure stability and longevity.
What is the maximum thickness of engineered hardwood I can install over existing hardwood?
The thickness of the engineered hardwood itself isn’t usually the primary concern, but the total added height is. Adding more than about 3/4 inch (including any underlayment) can start causing issues with door clearances and transitions. Always check your door gaps!
Do I need to remove the baseboards before installing new flooring over existing hardwood?
Yes, it’s highly recommended. Removing the baseboards allows you to install the new flooring right up to the wall, ensuring a clean, professional finish and proper coverage of the expansion gap. You’ll usually re-install the baseboards or install new ones after the flooring is down.
Is it okay to glue engineered hardwood directly onto old hardwood without any underlayment?
If you are using a glue-down installation method, the adhesive acts as the bonding agent. In this case, a separate underlayment is typically not needed or recommended, as it can interfere with the adhesive’s bond. However, always check your flooring manufacturer’s guidelines.
What if my existing hardwood floor has a wax finish?
A wax finish can prevent adhesives from bonding effectively. If your existing floor has a wax finish, you will likely need to either strip the wax completely or lightly sand the floor to remove the finish before applying adhesive. Consult your adhesive manufacturer for specific advice.
Can I install engineered hardwood over existing hardwood in a bathroom?
While engineered hardwood is more stable than solid hardwood, it’s generally not recommended for bathrooms or other areas with high moisture and direct water exposure. Engineered hardwood can still be damaged by excessive moisture. For bathrooms, tile or luxury vinyl plank (LVP) are usually better choices.
How do I ensure my new flooring is level if the old floor has some dips?
You’ll need to use a self-leveling compound to fill in any low spots in your existing hardwood floor before installing the new engineered hardwood. This ensures a smooth, even surface for the new flooring, preventing issues like squeaks or uneven wear.
Conclusion
So, can you install engineered hardwood over existing hardwood? Absolutely! As we’ve explored, it’s a smart and achievable DIY project that can dramatically enhance your home’s aesthetic. The key to success lies in meticulous preparation. By ensuring your existing floor is clean, sound, level, and properly prepped, you create the perfect foundation for your new engineered hardwood. Whether you choose a glue-down or floating method, following the manufacturer’s instructions and taking your time will lead to beautiful, durable results. You’ve got this! Enjoy your refreshed and beautiful new floors!