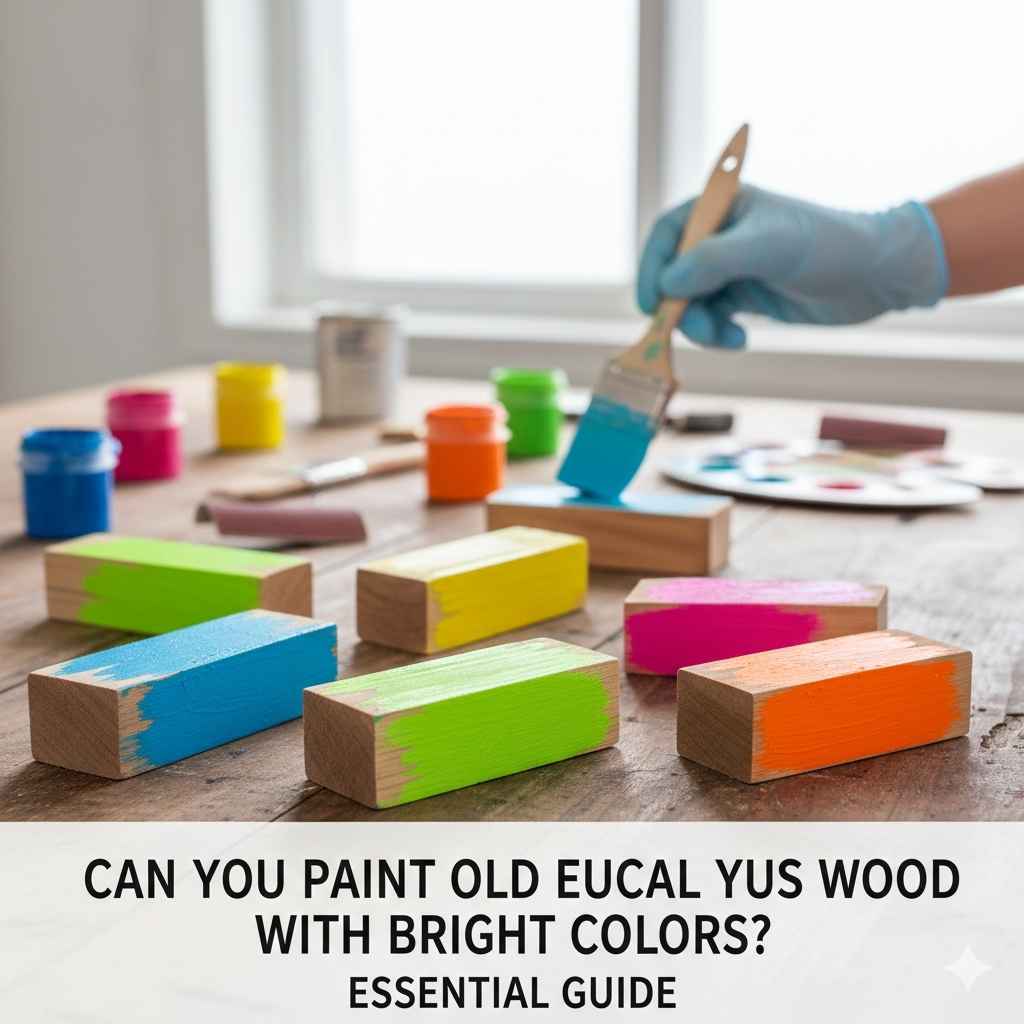
Can You Paint Old Eucalyptus Wood With Bright Colors? Essential Guide
Yes, you absolutely can paint old eucalyptus wood with bright colors! The secret is in the thorough preparation. Unlike softwoods, eucalyptus often has dense, oily pores that resist paint adhesion. With proper cleaning, sanding, and priming designed for oily woods, you can achieve a vibrant, long-lasting finish on your outdoor furniture or fencing.
Are you staring at some old, graying eucalyptus furniture or decking and dreaming of a stunning, vibrant pop of color? It’s completely understandable! Eucalyptus wood is tough, but when it starts looking dull, a fresh coat of bright paint can transform it completely. Many DIYers worry that the natural oils in eucalyptus will cause paint to peel quickly. That’s a real concern, but it is not a dealbreaker!
Don’t let stubborn wood stop you from achieving that sunny yellow or deep turquoise you want. With a little patience and the right technique, even beginners can master painting this durable timber. I’m Md Meraj, and I’ve walked this path many times. We are going to break this down into simple, easy-to-follow steps so you can feel confident moving forward.
Next, we’ll cover exactly what makes eucalyptus tricky and list every tool you need to get started on your colorful makeover.
The Straight Answer: Why Eucalyptus Needs Special Care Before Bright Painting
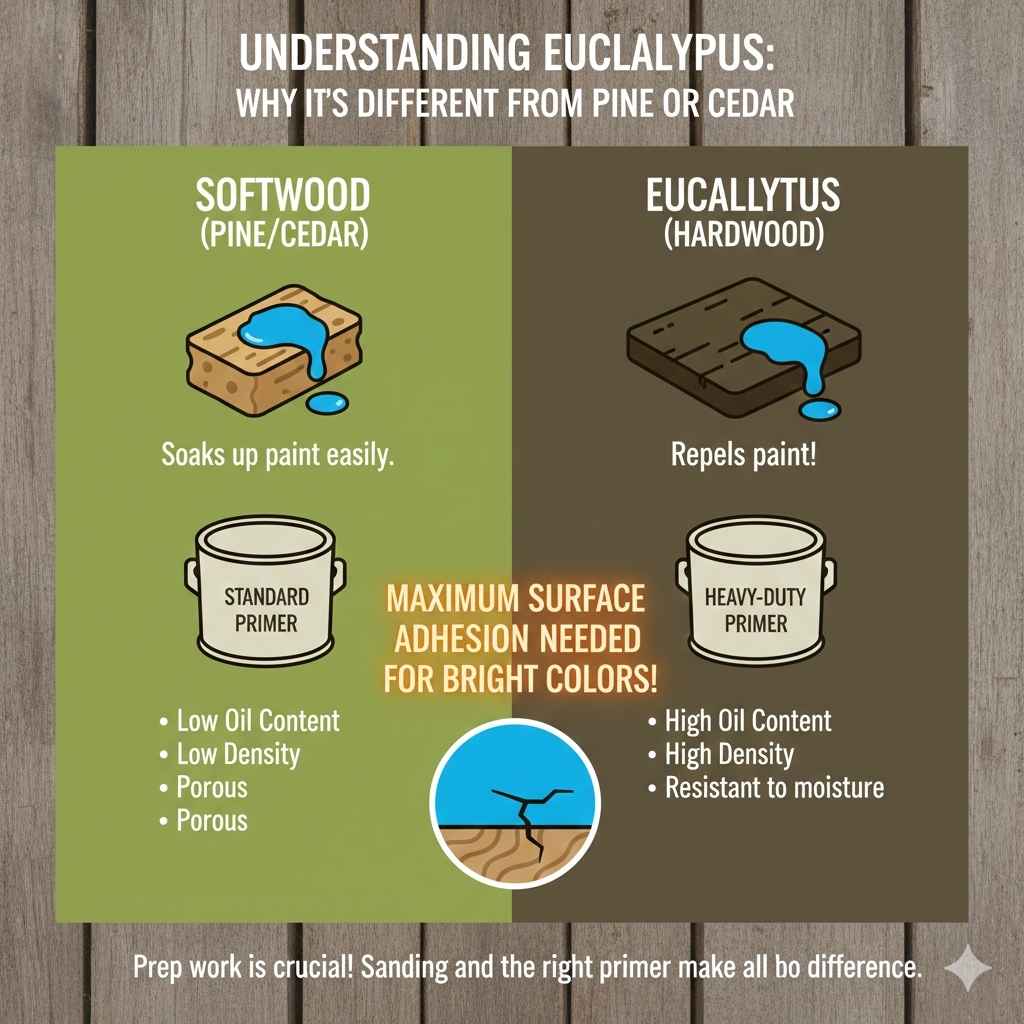
So, can you paint old eucalyptus wood with bright colors? Yes, but you must respect the wood first. Eucalyptus, especially older, weathered pieces, contains natural tannins and oils. These natural components are what make the wood so weather-resistant, but they are the enemy of good paint adhesion. If you just slap bright paint over those natural oils, you’ll see it bubble, crack, or peel off within months.
The key isn’t the color of the paint, but what you do before the color goes on. We need to de-oil the surface and give the paint something solid to grip onto.
Understanding Eucalyptus: Why It’s Different from Pine or Cedar
Most DIY guides focus on common softwoods like pine. Eucalyptus, however, is much denser. Think of it this way: Pine is like a sponge, soaking up primer and paint easily. Eucalyptus is more like sealed tile—the liquid wants to bead up and roll off.
- High Oil Content: These oils repel water and, unfortunately, many standard primers.
- Density: It’s a very hard wood, which means sanding takes a bit more elbow grease.
- Weathering: When left untreated, the surface fibers turn gray and often feel rough. This layer must go.
Because we are using bright colors—like reds, oranges, or light blues—we need maximum surface adhesion. Any slight imperfection in the prep work will show through the bright topcoat.
Essential Tools and Materials for Painting Eucalyptus
Getting the right gear makes this project feel less like a chore and more like a satisfying transformation. Gather these items before you even think about cracking open a can of paint. Remember, safety first!
Safety Gear (Non-Negotiable)
Working with cleaning chemicals and sanding dust requires protection. This is the first step in being a confident DIYer—protecting yourself.
- Safety Glasses or Goggles
- Nitrile or Chemical-Resistant Gloves (for cleaning solutions)
- Dust Mask or Respirator (N95 minimum for sanding)
- Drop Cloths or Plastic Sheeting
Preparation & Cleaning Supplies
This is where we tackle the oils and grime. We need to strip the wood back to its receptive core.
- Deck Cleaner or Mild Detergent (a dedicated wood cleaner works best)
- TSP Substitute or Mineral Spirits (for degreasing the oily surface)
- Stiff-bristle brush (not wire, which can scratch too deeply)
- Garden hose or low-pressure washer
Sanding and Priming Tools
This creates the “tooth” the paint needs to stick.
- Random Orbit Sander (highly recommended for efficiency)
- Sanding Blocks (for tight corners)
- Sanding Grit: 80-grit (for initial heavy removal), 120-grit (for smoothing), and 220-grit (for final feathering).
- Tack Cloths or Lint-Free Rags
- High-Quality Bonding Primer (Crucial step—see section below!)
Painting Supplies
For the vibrant topcoat!
- High-Quality Exterior Paint (Acrylic Latex or Oil-Based Alkyd for best durability)
- Quality Synthetic Brushes (for cut-ins and edges)
- Foam or Woven Rollers (for smooth surfaces; choose 3/8-inch nap or less for smooth finishes)
Step-by-Step Guide: How to Paint Old Eucalyptus Wood
Follow these steps in order. Skipping a step is like building a house on sand—it won’t hold up when the weather changes. We are aiming for a professional-grade finish that lasts for years.
Step 1: Inspection and Minor Repairs
First, look closely at your piece. Is it outdoor furniture? Decking? Check for loose joints, wobbly legs, or rotten spots. Eucalyptus is tough, but older wood can develop issues.
- Tighten all screws and bolts using the correct driver bit.
- If there are deep cracks or gouges, fill them with an exterior-grade wood filler designed for dense woods. Let this cure completely according to the manufacturer’s directions.
- If you are working with decking or siding, ensure any fasteners are countersunk slightly below the surface so they don’t interfere with sanding.
Step 2: Deep Cleaning and De-Oiling (The Most Important Phase)
We must remove the gray, weathered layer and extract surface oils. This prepares the wood to absorb primer correctly.
If your wood is heavily grayed, start with a dedicated deck or exterior wood cleaner containing oxalic acid (often found in deck brighteners) as per the instructions. This chemically opens the wood pores.
- Wet the Wood: Lightly mist the entire surface with clean water.
- Apply Cleaner: Mix your cleaner or a mild soap solution according to the package directions. Apply liberally with your stiff brush. Scrub vigorously, working with the grain. Don’t be gentle here; you are trying to lift surface contamination.
- Rinse Thoroughly: Use a garden hose or low-pressure setting on a washer to rinse away all soap residue. Any soap left behind will prevent the primer from sticking.
- The Oil Test (Degreasing): Once completely dry (give it at least 24–48 hours in dry weather), wipe down all surfaces that will be painted with a rag lightly dampened with Mineral Spirits or a TSP substitute. This acts as a final degreaser to pull out any stubborn, lingering natural oils. Wipe dry immediately.
Pro Tip from Meraj: After cleaning, let the wood dry for a full two days. Painting damp wood traps moisture, leading to premature failure, bubbling, and mold growth underneath your beautiful bright paint.
Step 3: Sanding for Adhesion (Creating the “Tooth”)
Sanding serves two purposes: removing any remaining dead wood fibers and creating microscopic grooves (a “tooth”) for the primer to lock onto.
- Aggressive Sanding (80-Grit): Use your orbital sander with 80-grit paper to smooth out the majority of the rough, gray surface. Sanding helps achieve a consistent color across the piece. Work slowly and methodically, always following the wood grain.
- Smoothing (120-Grit): Switch to 120-grit paper. This removes the deeper scratches left by the 80-grit paper, providing a smoother base for the primer coat.
- Final Prep (220-Grit): For the final light pass, use 220-grit. This smooths the surface without polishing it too much, ensuring the primer has a perfect texture to grab onto.
- Dust Removal: Use a shop vacuum to remove most of the dust. Follow up by wiping the entire piece down meticulously with a tack cloth or a cloth dampened slightly with mineral spirits again. Dust is the number one enemy of a smooth paint job.
Step 4: Priming with the Right Product (The Secret Weapon)
If you ignore everything else, do not ignore this step. Standard primers designed for pine or drywall will fail on eucalyptus. You need a specialized primer.
For oily woods like eucalyptus, you need a high-adhesion, stain-blocking, or shellac-based primer. These primers are designed to lock down tannins and oils.
Check out this guide from an industry resource regarding best practices for coating exotic hardwoods:
Sherwin-Williams Guide on Priming Oily Woods
Here is what you should look for in your primer:
| Primer Type | Best For | Pros |
|---|---|---|
| Shellac-Based Primer | Maximum oil sealing | Stops bleeding, fast drying, excellent adhesion to oils. |
| Alkyd/Oil-Based Primer (High Solids) | General exterior use | Good penetration and sealing, durable base for latex topcoats. |
| Stain-Blocking Water-Based (Use Caution) | Lightly oiled surfaces | Low odor, but requires very clean surface prep. |
- Application: Apply a thin, even coat of your chosen bonding primer. Do not try to achieve 100% coverage in the first coat; thin coats adhere better.
- Cure Time: Allow the primer to cure fully. Check the can, but this is often 12–24 hours. If you sand or paint too soon, you risk scraping off the bond you just created.
- Second Prime Coat (Optional but Recommended): For bright colors, a second primer coat is highly recommended. It evens out the color absorption and provides a uniform, neutral base, making your final bright color pop exactly as intended.
Step 5: Applying Your Bright Color Topcoat
Now for the fun part! Since you invested time in proper prep and priming, the topcoat application will be smooth and rewarding.
- Choose Your Paint: For exterior eucalyptus, use a high-quality 100% Acrylic Latex exterior paint or a durable Oil-Based Alkyd paint. Bright colors hold up well in modern acrylic formulas.
- Thin Coats are Key: Apply the first coat of your bright color thinly and evenly. Thick coats drip, sag, and take forever to cure. Work quickly but carefully, maintaining a wet edge.
- Recoat Time: Wait the recommended recoat time (usually 4–6 hours for latex). Do not rush this.
- Second Color Coat: Apply the second coat. This coat will deliver the deep, uniform, vibrant look you are after. Most bright colors require two full coats over a properly primed surface to look rich and hide any undertones.
Step 6: Curing and Finishing
Paint doesn’t truly harden immediately; it cures over several days or even weeks. Be gentle with the freshly painted wood during the first week.
- Allow the paint to dry to the touch (usually a few hours).
- Let the piece cure for at least 48–72 hours before placing it back into heavy use (like outdoor furniture). Full cure time might take up to a month, depending on humidity.
Troubleshoo ting Common Eucalyptus Painting Issues
Even with the best intentions, sometimes things go slightly sideways. Here are quick fixes for beginner snags:
| The Problem | Likely Cause | Quick Fix |
|---|---|---|
| Paint is bubbling after application. | Moisture or oil trapped beneath the paint/primer layer. | Sand off the blistered area down to bare wood. Clean thoroughly with mineral spirits and re-prime with shellac primer before repainting. |
| Bright color looks blotchy or uneven. | Inconsistent absorption due to patchy primer coverage or not enough primer coats. | Allow the paint to dry fully. Lightly scuff sand with 220-grit and apply a third, very thin topcoat, focusing on evening out the sheen. |
| Sanding dust keeps reappearing after wiping. | Wood is still slightly damp or dusty within its grain. | Use an air compressor (if available) or a shop vacuum to blast the dust out of the wood grain. Then use a fresh tack cloth. |
Choosing Bright Colors for Exterior Durability
While preparation handles adhesion, the type of bright color you choose affects how long it lasts outdoors.
Dark vs. Light Colors in Sunlight
Dark, vibrant colors look amazing, but they absorb more heat. This extra heat causes the paint film to expand and contract more rapidly, which can lead to premature cracking or chalking, especially on dense woods like eucalyptus.
- Dark Colors (Navy, Deep Red, Black): Offer incredible visual impact but require premium quality exterior acrylic paint to handle the heat expansion.
- Light Colors (Pastels, Yellows, Whites): Reflect heat, leading to less stress on the paint film and potentially longer life, though they might show dirt faster.
No matter your choice, investing in a high-quality exterior paint rated for UV resistance is critical. Cheap paint fades fast, ruining your bright effort.
The Primer Tint Trick for Bright Colors
If you are painting white furniture bright fire-engine red, you will need three or four red coats to cover the primer. Save time and paint!
Ask the paint store to tint your primer coat to a color close to your topcoat. For example, if you are using a bright turquoise, tinting the primer gray or light blue will let your second topcoat cover much more effectively. This saves you money and labor!
Tool Deep Dive: Why the Random Orbit Sander is Your Friend
When working on large, flat surfaces of old eucalyptus, hand sanding can exhaust you before you even finish Step 3. A Random Orbit Sander (ROS) is a game-changer for DIYers tackling dense woods.
The ROS moves the sanding pad in a small, random, overlapping circle, which prevents deep, noticeable scratches (called “swirls”) that a standard orbital sander can leave behind. For beginners, this tool is worth the small investment or rental fee.
How to Use the ROS on Eucalyptus
- Always start with the appropriate grit (we recommended 80-grit first).
- Keep the sander moving constantly. Do not rest the pad in one spot, or you will create an uneven dip in the wood.
- Apply light, even pressure. Let the machine do the work; pushing down harder only generates unnecessary heat and wears out your paper faster.
- Check your progress frequently by wiping the area down.
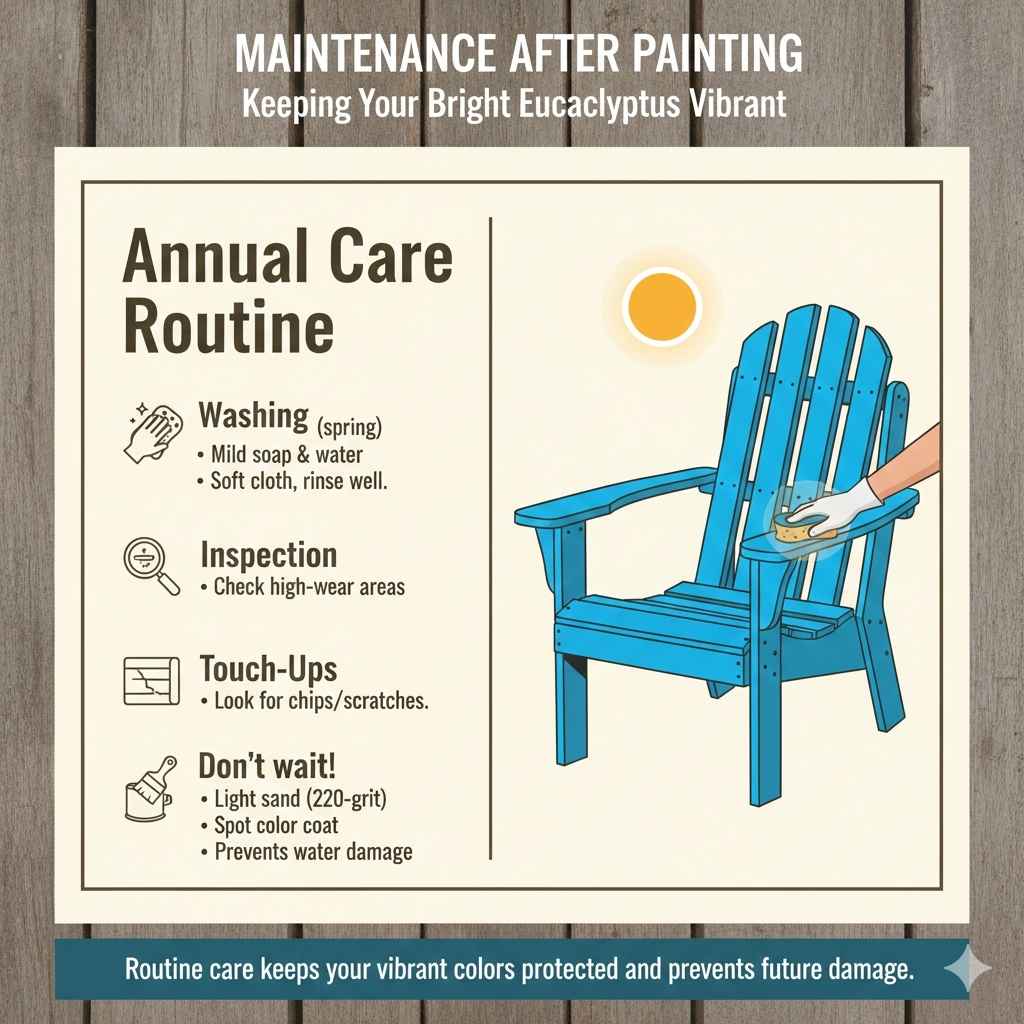
Maintenance After Painting
Congratulations! You have successfully painted your old eucalyptus bright colors. To keep that vibrancy showing year after year, a little routine maintenance goes a long way. Since eucalyptus is an exterior wood, it battles the elements constantly.
Annual Care Routine
- Washing: Annually (usually in the spring), wash the painted surface gently using mild soap and water and a soft cloth or sponge. Rinse well.
- Inspection: Check high-wear areas (like armrests or table edges) for small chips or scratches.
- Touch-Ups: If you find a chip, do not wait! Sand the small area lightly (220-grit), wipe clean, spot prime with your oil-blocking primer, and apply a thin touch-up coat of your bright color. This prevents water from wicking under the existing paint film and causing a larger failure later.
Frequently Asked Questions (FAQ) About Painting Eucalyptus Wood
Q1: Can I skip sanding entirely if I use a specialty bonding primer?
A: No. Even the best bonding primers need a slightly roughened surface, or “tooth,” to mechanically lock onto. Skipping sanding on oily eucalyptus almost guarantees peeling. Sanding removes the dead, gray surface layer, which is crucial.
Q2: What is the best type of paint for bright colors on exterior eucalyptus?
A: High-quality 100% Acrylic Latex Exterior paint is generally the best choice. It remains flexible as temperatures change, which helps prevent cracking when colors absorb a lot of heat.
Q3: How long do I need to wait between cleaning and priming?
A: Wait at least 48 hours of dry weather. After using mineral spirits for the final wipe, wait an additional 4 hours before applying primer. The wood must be completely dry inside the pores for the primer to seal effectively.
Q4: Do I have to use a specific primer, or can I use any exterior primer?
A: You must use a specialized primer. For eucalyptus, a shellac-based primer or a high-solids oil-based primer is necessary to block the natural oils from migrating up into the topcoat and causing it to fail prematurely.
Q5: If the eucalyptus is pressure-treated, does that change the process?
A: Yes, slightly. If the wood is pressure-treated (though less common for furniture than decking), ensure it is fully dry before starting. New pressure-treated wood must cure for months before painting. If it’s old, follow the cleaning and degreasing steps religiously, as treatments can also interfere with adhesion.
Q6: Can I use exterior stain instead of bright paint?
A: While stains are beautiful, they typically only penetrate lightly into dense eucalyptus. If you want a true, solid, vibrant color that hides the wood grain, paint is the better option, provided you follow the strict prep steps outlined above.
Q7: What grit should I use for sanding interior eucalyptus tabletops?
A: For interior items where you don’t need to remove heavy weathering, you can skip the harsh 80-grit. Start with 120-grit to knock back the sheen, and finish with 220-grit. You still must clean with mineral spirits before priming.
Conclusion: Your Bright Future for Old Eucalyptus
Seeing old, weathered wood transformed by a splash of vibrant color is one of the most rewarding experiences in DIY. You’ve learned that painting old eucalyptus wood with bright colors isn’t just possible; it’s achievable with a straightforward, methodical approach.
The magic isn’t in the paint can; it’s in the preparation: deep cleaning, thorough sanding, and, most importantly, applying the right bonding primer. By respecting the natural oils of the eucalyptus through careful degreasing and sealing, you are setting up your bright finish for success against sun and weather. Take your time with the prep work, treat the cleaning and priming phases with respect, and you will unlock a durable, beautiful finish that lasts for seasons to come. Grab those gloves and that orbital sander—that bright color makeover is waiting for you!