Can You Stain Caulk? Tips For Successful Staining
In the realm of home improvement and interior design, the interaction between materials often dictates aesthetic and functional outcomes. One commonly encountered query revolves around the compatibility of surface treatments with sealing agents, specifically: can you stain caulk? Understanding the chemical composition of caulk, typically silicone or latex-based, is crucial in determining its receptiveness to pigmentation.
Factors such as adhesion, porosity, and the nature of the stain play pivotal roles in this process. As homeowners and professionals alike grapple with enhancing their projects, unraveling the complexities of caulk staining invites a deeper exploration into effective techniques and materials. Dive in to discover the intricacies!
Can You Stain Caulk? Tips For Success And Techniques
Staining caulk can enhance the aesthetic appeal of your interior or exterior spaces by allowing it to blend seamlessly with surrounding surfaces. However, not all caulks are suitable for staining, and understanding the right techniques and products is crucial for achieving the desired results. This summary delves into the types of caulk that can be stained, factors to consider when choosing stains, and tips for application, ensuring your project achieves a professional finish while addressing the question: can you stain caulk?
Understanding Caulk and Its Uses
Definition and purpose of caulk. Common types of caulk used in construction and DIY projects.
Caulk is a magic paste that fills gaps and cracks. It keeps water, air, and pests out. Think of it as a sealant superhero! There are several types, each with a special power.
Some are great for bathrooms, while others shine on windows and doors. Here’s a quick look:
| Type of Caulk | Use |
|---|---|
| Acrylic | Great for indoor projects and easy to paint. |
| Silicone | Perfect for kitchens and bathrooms, super waterproof! |
| Polyurethane | Awesome for outdoor projects. |
Choosing the right caulk can make your projects easier and your home more comfortable. It’s like picking the right shoes for your big dance party!
Factors to Consider Before Staining Caulk
Surface preparation: Cleaning and drying. Compatibility of stains with different caulk types. Color and finish options for stained caulk.
Before you stain caulk, first make sure the surface is clean and dry. A dirty surface is like trying to paint a hungry dog—nothing good will come from it! Next, consider the type of caulk you have.
Some stains play nice with specific caulk types and others don’t. Finally, think about the color and finish you want. Do you prefer a matte look or something shiny? See the table below for a quick guide on all these factors.
| Factor | Tips |
|---|---|
| Surface Preparation | Clean and dry thoroughly |
| Caulk Type | Check compatibility with stains |
| Color and Finish | Choose between matte and shiny |
Step-by-Step Guide to Staining Caulk
Tools and materials needed for staining. Detailed process of applying stain to caulk. Tips for achieving an even finish.
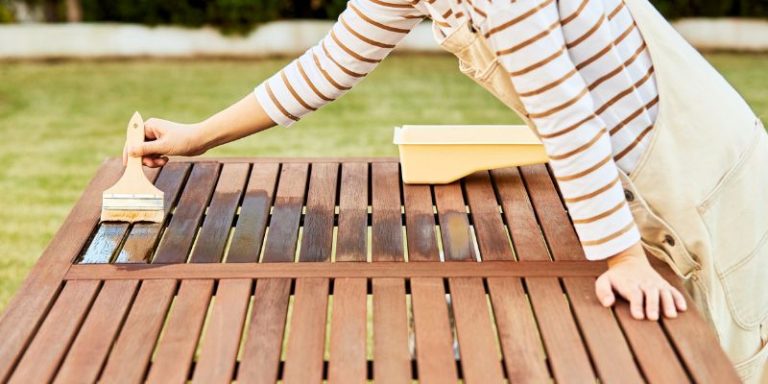
Staining caulk can be easy if you have the right tools and materials. Start with a stain that matches your project. You will also need a brush or sponge for applying the stain. Don’t forget gloves to keep your hands clean.
- Stain
- Brush or sponge
- Gloves
- Clean cloth
Apply the stain gently on the caulk, using even strokes. Wait for it to dry completely. For a smooth finish, sand lightly between coats if needed.
Be patient for the best results!
Common Challenges and Solutions When Staining Caulk
Issues with adhesion and longevity. Troubleshooting discoloration and uneven staining. Recommendations for touchups and maintenance.
Staining caulk can be tricky, like trying to teach a cat to fetch! Adhesion is a common challenge, as some stains don’t stick well and may peel off. Discoloration often happens when stains absorb unevenly, leaving your caulk looking like it had a messy day.
For touch-ups, use a small brush and blend carefully to avoid “oops” moments. Check out the table below for some handy tips!
| Challenge | Solution |
|---|---|
| Poor adhesion | Choose the right stain; test on a small area first. |
| Uneven staining | Apply thin layers and let dry between applications. |
| Touch-ups | Use a fine brush for precision. |
Alternatives to Staining Caulk
Using paint instead of stain: Pros and cons. Exploring other sealant options that don’t require staining.
Instead of staining caulk, many people choose to use paint. Here are some pros and cons:
- Pros: Paint offers a wide range of colors. It can be applied easily on various surfaces.
- Cons: Paint may not adhere well to all caulks.It can chip or peel over time.
There are also other sealant options that don’t need staining, like silicone or polyurethane. These sealants are durable and come in various colors, eliminating the need for any extra work.
Expert Tips for Best Results
Best practices for working with caulk. Recommendations for brands and products. When to consult a professional for advanced projects.
To get the best results with caulk, always clean the surface before applying. A dirty area is like a messy room—no one likes to step in it! Use high-quality products like Gorilla Caulk or DAP Dynaflex. These brands provide solid adhesion and long-lasting performance.
For tricky jobs, think about contacting a professional. Remember, even superheroes call for backup sometimes!
| Product | Purpose |
|---|---|
| Gorilla Caulk | General use, indoor and outdoor |
| DAP Dynaflex | Flexible, great for windows and doors |
Conclusion
In summary, while caulk can be stained, it’s essential to choose the right type of caulk and stain for optimal results. Always perform a test patch to ensure adhesion and color match. With proper technique, you can achieve a seamless finish that enhances the beauty of your project. Take the time to prepare and choose wisely for the best outcome.
FAQs
What Types Of Caulk Can Be Stained Effectively?
Types of caulk that can be stained effectively include paintable latex caulk and some silicone-based caulks specifically formulated for staining or painting. It’s essential to choose a caulk that explicitly states it is paintable or stainable on the packaging. Caulks designed for exterior use often have better adhesion and durability for stains. Always test a small area before applying stain to ensure desired results.
How Long Should You Wait After Applying Caulk Before Attempting To Stain It?
You should wait at least 24 hours after applying caulk before attempting to stain it. This allows the caulk to cure properly and ensures better adhesion of the stain. However, always check the manufacturer’s recommendations, as curing times may vary depending on the type of caulk used. For optimal results, it’s best to ensure the caulk is fully dry before proceeding with any staining.
What Preparation Steps Are Necessary Before Staining Caulk?
Before staining caulk, it’s essential to ensure the surface is clean and free of dust or debris. Next, allow the caulk to fully cure according to the manufacturer’s instructions, as applying stain too early can affect adhesion. Lightly sand the caulk to create a better surface for the stain to adhere to, and consider using a primer to enhance the final color. Finally, test the stain on a small area to ensure the desired result before proceeding with the entire application.
Are There Specific Stains Or Dyes That Are Recommended For Use On Caulk?
Yes, specific stains or dyes for caulk typically include those designed for non-porous surfaces, such as pigment-based dyes or water-based stains. It’s advisable to check product labels to ensure compatibility with the type of caulk, whether silicone or acrylic. Additionally, some manufacturers offer specially formulated caulk that can be stained or painted. Always conduct a patch test to achieve the desired result before full application.
What Are Common Challenges Or Issues When Trying To Stain Caulk, And How Can They Be Addressed?
Staining caulk can be challenging due to its non-porous nature, which prevents effective absorption of stains and can lead to uneven colors. To address this, it’s essential to choose a caulk specifically designed for staining or painting, such as those made from latex or silicone blends. Additionally, surface preparation by cleaning and lightly sanding the caulk can improve adhesion. Finally, using a high-quality stain and applying multiple thin coats can help achieve a more uniform color.