Can You Wash A Wood Cutting Board? Essential Truths
Yes, you absolutely can wash a wood cutting board, but never in a dishwasher. Handwashing gently with mild soap and immediate drying is the secret to keeping your wooden board sanitary, straight, and beautiful for years to come.
You’ve invested in a beautiful wooden cutting board. Maybe it’s sturdy maple or rich walnut. Now, it’s covered in onion smells and carrot stains. The age-old question pops up: Can I just toss this in the dishwasher? Hold that thought! Putting wood in that hot, steamy machine is the fastest way to ruin it. Wood is natural, and it hates extreme heat and soaking. That worry about germs is real, but so is the risk of cracking your board. Don’t stress; cleaning wood boards safely is easy once you know the simple rules. We will walk through the right way to clean, sanitize, and care for your favorite wooden companion, ensuring it lasts a lifetime in your kitchen.
The short, safe answer is: Yes, you must wash your wood cutting board. If you cut raw meat or poultry, cleaning is non-negotiable for food safety. However, the method of washing is everything when it comes to wood. Wood is porous; it soaks up water, much like a sponge. Dishwashers use long cycles of very hot water and aggressive detergents that destroy the natural oils and structure of the wood fibers.
Why the Dishwasher is Wood’s Worst Enemy
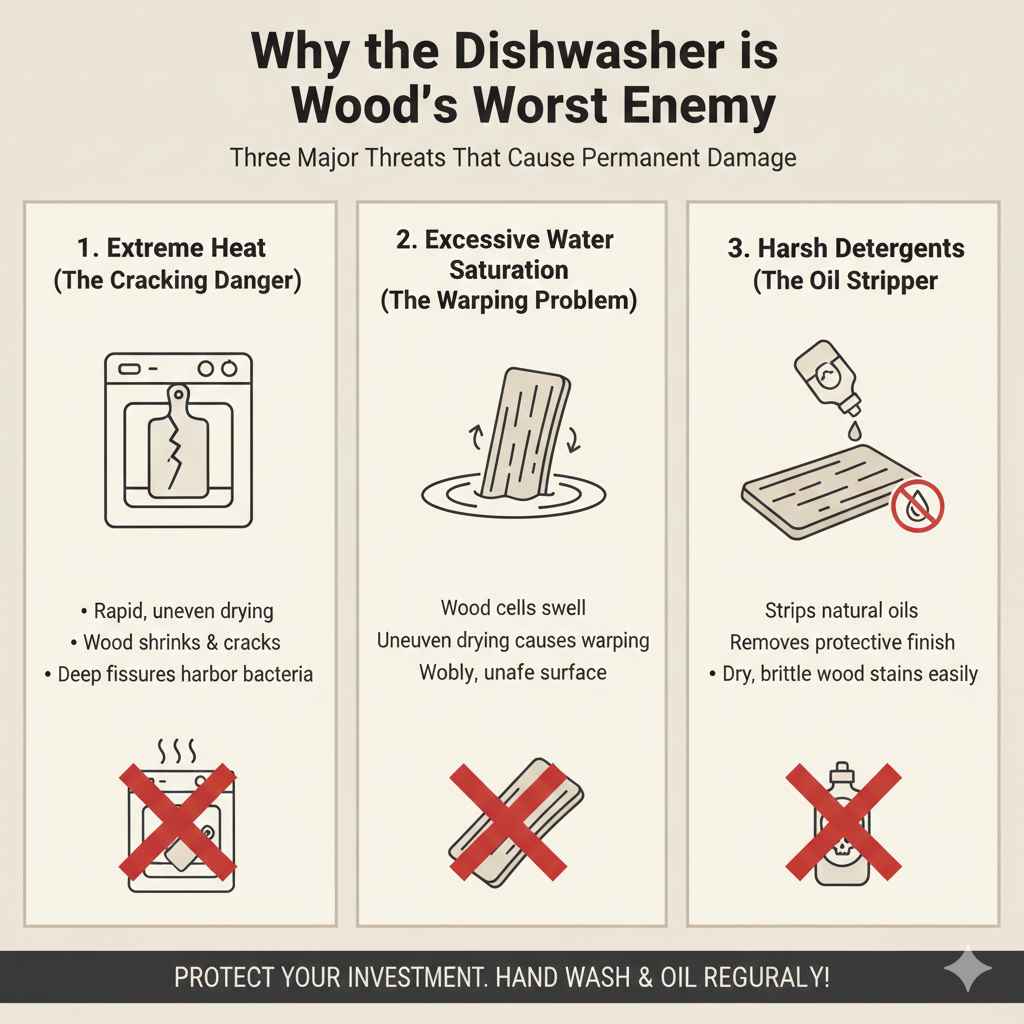
Think of your cutting board like a piece of fine furniture—it needs gentle care. The dishwasher subjects the wood to three major threats that cause permanent damage.
1. Extreme Heat (The Cracking Danger)
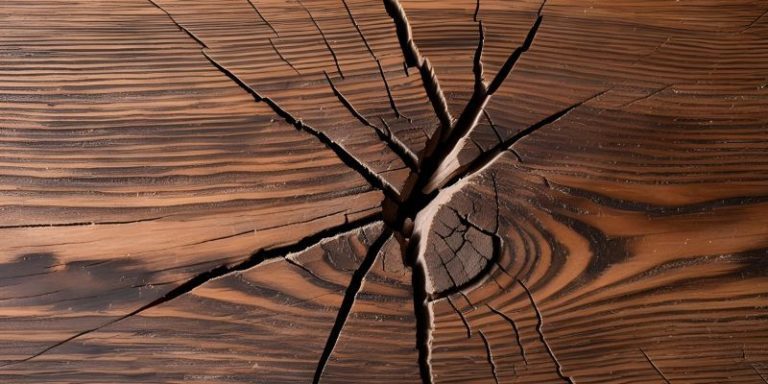
Dishwashers cycle water far hotter than what you can comfortably put your hands in. This intense heat causes the wood fibers to dry out rapidly and unevenly. When wood dries too fast, it shrinks unevenly, leading to warping, cracking, or splitting. A cracked board is not only unsightly but also harbors bacteria in those deep fissures.
2. Excessive Water Saturation (The Warping Problem)
Wood absorbs water. A quick rinse is fine, but a 60-minute high-pressure wash cycle means your board is soaking for an hour. This causes the wood cells to swell. As the board dries later, those swollen cells shrink, causing one side to contract faster than the other, leading to a noticeable curve or warp. A warped board wobbles on your counter, making chopping unsafe.
3. Harsh Detergents (The Oil Stripper)
Dishwasher detergents are strong chemical agents designed to strip away baked-on grease and food residue. They do a great job on dishes, but they mercilessly strip the natural oils and the applied mineral oil finish from your cutting board. Once those oils are gone, the wood becomes dry, brittle, and highly susceptible to stains and deep water penetration.
The Golden Rule: Handwash Only, Never Soak
For long-lasting beauty and safety, always default to handwashing. This allows you to control the temperature, the water volume, and the drying time. If you keep your board out of the dishwasher, you’ve already won half the battle!
The Safe Cleaning Arsenal: Tools You Need
You don’t need fancy gadgets. The best tools are simple, effective, and likely already in your kitchen cabinets. Gather these items before you start the cleaning process:
- Mild dish soap (avoid strong degreasers)
- Warm (not hot) running water
- A clean, non-abrasive sponge or soft dishcloth
- A clean towel for drying
- Coarse salt (for deodorizing and scrubbing stains)
- Half a lemon (for extra sanitizing and smell removal)
Step-by-Step: How to Safely Wash Your Wood Cutting Board After Use
Follow these steps immediately after you finish prepping or cooking. Don’t let food sit on the board, as this encourages bacteria growth and staining.
- Scrape Off Debris: Use the blunt side of your knife or a plastic scraper to remove any large food scraps. Brush loose crumbs into the trash or disposal.
- Rinse Briefly (Warm Water Only): Hold the board under a gentle stream of warm running water. Do not let the water pool on the surface. Rinse both sides briefly to wash away loose residue.
- Apply Soap and Scrub: Put a small drop of mild dish soap on your soft sponge. Scrub the entire surface of the board in small, circular motions. Pay special attention to knife grooves.
- Rinse Thoroughly: Rinse the soap off quickly under warm water. Again, keep the rinsing time brief—you are washing soap off, not soaking the wood.
- Immediate, Complete Drying: This is arguably the most critical step. Immediately dry the entire board, top, bottom, and edges, with a clean, absorbent towel.
- Air Dry Vertically: Stand the board up on its edge (like a book on a shelf) to allow air to circulate on both faces. Never leave a damp board lying flat on the counter overnight, as this traps moisture underneath and causes one side to swell more than the other, leading to warp.
Deep Cleaning and Sanitizing Wood Boards (The Gentle Way)
When your board has handled raw meat, or if it smells strongly of garlic or onions, you need a simple sanitizing routine. You do not need harsh bleach solutions, which can dry out the wood excessively.
Using Salt and Lemon for Natural Disinfecting
This method is excellent because the salt acts as a mild abrasive scrubber, while the acid in the lemon provides a natural disinfectant boost.
- Sprinkle Generously: After washing and rinsing (but before the final dry), generously sprinkle coarse kosher salt over the entire surface of the board.
- Cut and Scrub: Take half a lemon and use the cut side as a scrubbing pad. Squeeze slightly while rubbing the salt into the wood. The combination of the abrasive salt and the acidic lemon juice will lift stains and neutralize odors.
- Let it Sit (Briefly): Allow this salt/lemon mixture to sit on the board for 5 to 10 minutes—no longer.
- Final Rinse and Dry: Scrape the salty paste off into the trash, rinse the board very quickly, and immediately dry it thoroughly with a towel, followed by air drying vertically.
Sanitizing with Vinegar
White vinegar is a safe, non-toxic option for neutralizing surface germs. For a safer kitchen environment, many food safety experts, including those at the USDA Food Safety and Inspection Service, recommend vinegar solutions for general sanitizing on non-porous surfaces; we can adapt this for wood:
- Mix equal parts white vinegar and water in a spray bottle.
- Spray the board lightly after washing and before the final towel dry.
- Let it sit for just a few minutes, then wipe dry with a clean cloth. Do not rinse the vinegar off, as its slight acidity helps preserve the wood slightly, and the smell dissipates quickly.
Maintenance: The Key to Longevity – Oiling Your Board
Cleaning removes surface debris, but conditioning restores and protects the wood. An oiled board repels water better, resists stains, and prevents drying cracks. Think of oiling as putting lotion on dry skin!
When to Oil Your Board
The frequency depends on use, but a good starting point is:
- When the board looks visibly dry or dull.
- After about 4-6 deep cleanings (like the salt/lemon scrub).
- At least once a month with regular use.
- When water no longer beads up on the surface (this means it’s absorbing water instead of repelling it).
Choosing the Right Oil
This is where many beginners make mistakes. Never use standard cooking oils like olive oil, canola oil, or vegetable oil. These oils go rancid (turn sticky and smelly) when left on the wood.
Stick to food-safe, penetrating mineral oils:
| Oil Type | Safety & Use | Pro Tip |
|---|---|---|
| Food-Grade Mineral Oil | The industry standard. It never goes rancid and is highly penetrative. | Apply generously, let it soak for hours or overnight. |
| Beeswax/Mineral Oil Blend | Provides both deep conditioning (oil) and a water-resistant surface barrier (wax). | Great for the final finish, apply thinly after the mineral oil has soaked in. |
| Walnut Oil (Use Caution) | A good food-safe option, but avoid if anyone has a severe nut allergy. | It cures (hardens) over time, offering a durable finish if allergies aren’t a concern. |
How to Oil Your Board: A Quick Refresher
- Ensure the board is completely clean and bone-dry.
- Pour a liberal amount of mineral oil directly onto the surface.
- Use a clean, lint-free cloth or paper towel to rub the oil evenly into the grain, working in circular motions.
- Let the oil soak in for at least 30 minutes, but ideally several hours or overnight.
- Wipe off any excess oil that did not soak in. The board should feel smooth, not sticky or greasy.
- Flip the board and repeat the process on the other side to ensure even moisture saturation.
Troubleshooting Common Wood Board Issues
Even with the best care, wood boards might develop minor issues. Here is how to handle them with your beginner-friendly toolkit.
Issue 1: Bad Odors (Garlic, Fish, Onions)
Odors sink into the wood grain. The lemon and salt scrub works wonders, but for very stubborn smells, try this booster:
- After washing, make a thick paste of baking soda and water.
- Rub this paste vigorously into the board, especially the affected areas.
- Let the paste sit for 15–20 minutes to absorb the odor molecules.
- Rinse well and dry immediately.
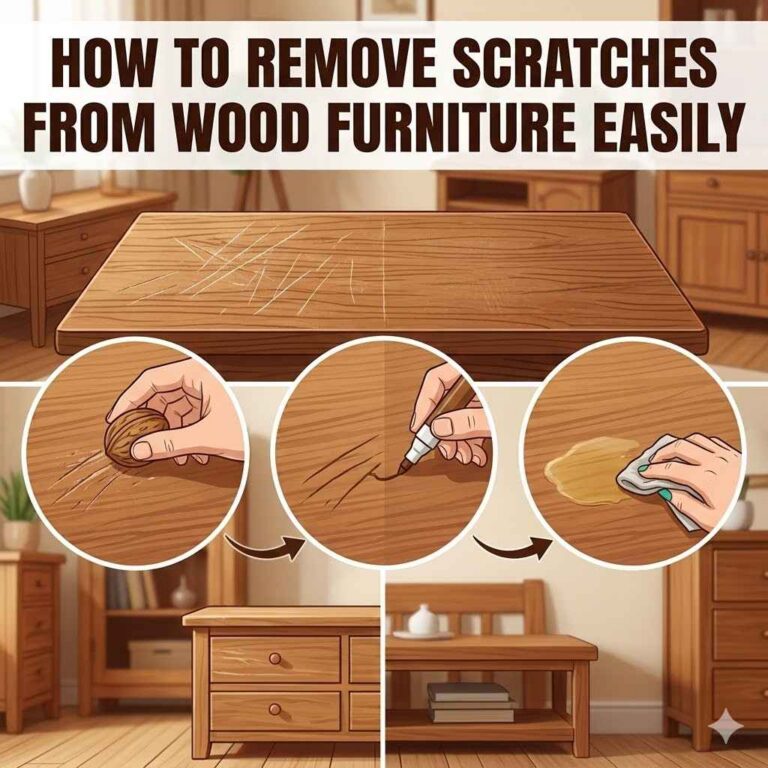
Issue 2: Light Stains (Coffee, Wine)
For fresh stains, the salt and lemon method usually clears it up. If the stain remains, a very light sanding might be needed. Use 220-grit sandpaper and gently rub only over the stained area, following the grain direction. Remember to re-oil the sanded area immediately afterward!
Issue 3: Minor Warping or Cupping
If the board has a slight curve, you can sometimes reverse it by strategically adding moisture to the concave (dished-in) side. This must be done very slowly and patiently:
- Flip the board so the convex (domed) side is facing up.
- Wet a thick towel and wring it out until it is damp, not dripping.
- Lay the damp towel only over the raised, convex side of the board.
- Let it sit for a few hours. The moisture encourages that side to swell slightly, hopefully flattening the board. Check frequently.
- Once flat, dry immediately and oil both sides thoroughly to lock in the new shape.
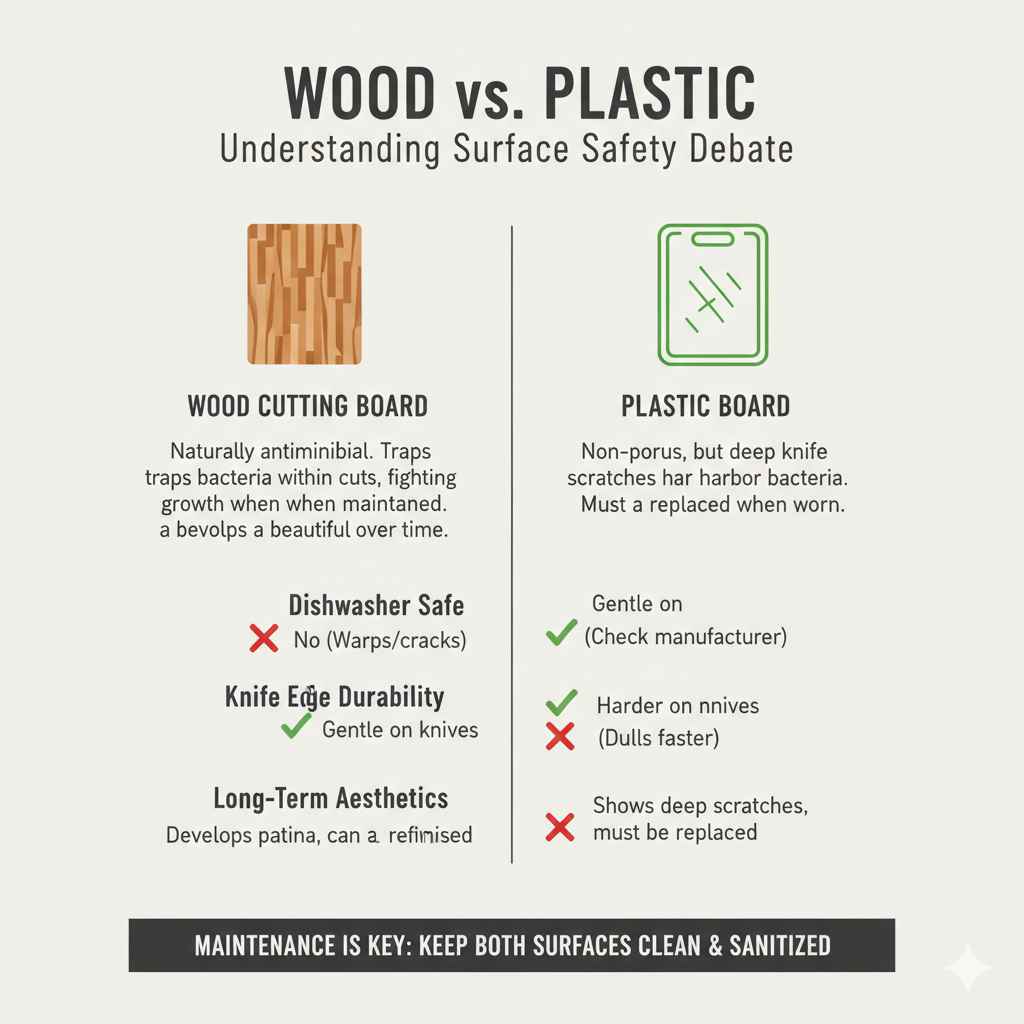
Wood vs. Plastic: Understanding the Surface Safety Debate
A common reason people avoid handwashing wood is the fear of hidden germs. Historically, studies have shown that wood is naturally antimicrobial. While plastic cutting boards are non-porous and don’t absorb moisture, they develop deep knife scratches that become perfect hiding spots for bacteria.
Wood, due to its natural cellular structure, traps bacteria within the cuts, and research suggests that, when properly maintained, wood actively fights bacterial growth better than scratched plastic over time. The key is consistent cleaning and proper oiling, which keeps the surface healthy and closed.
Here is a quick comparison of maintenance needs:
| Feature | Wood Cutting Board | Plastic Cutting Board |
|---|---|---|
| Dishwasher Safe | No (Will warp/crack) | Usually Yes (Check manufacturer) |
| Sanitizing Requirement | Hand wash, oiling is critical | Can tolerate harsh cleaners/dishwasher |
| Knife Edge Durability | Gentle on knives (Good) | Harder on knives (Dulls faster) |
| Long-Term Aesthetics | Develops patina, can be refinished | Shows deep scratches, must be replaced |
Safety First: When to Retire a Board
Even the best-cared-for wood board has a lifespan. You need to know when to hang it up for safety reasons. If your board starts developing deep, canyon-like cracks across the surface, or if the warping is so severe that it is unstable to use, it’s time to say goodbye. These deep crevices are impossible to clean effectively and become permanent homes for microscopic hitchhikers. A good, hard-working board might last you 10, 20, or even 30 years if treated right!
Frequently Asked Questions (FAQ) for Wood Board Care
Q1: Can I use bleach to sanitize my wooden cutting board?
A: It is strongly recommended that you avoid straight bleach. While a very diluted solution (1 teaspoon of bleach per gallon of water) can be used occasionally, strong bleach strips the natural oils essential for wood health, leading to drying and cracking very quickly.
Q2: My board smells strongly of fish. Will oiling it cover the smell?
A: No, oiling will not cover the smell; it might trap it! Always use the baking soda scrub or the salt/lemon method before you oil the board. Ensure the board is completely dry before oiling afterward.
Q3: Should I oil both sides of the board equally?
A: Absolutely! Oiling only one side means only one side is protected from absorbing moisture. This uneven protection almost guarantees the board will warp or cup over time. Always condition both sides to maintain balance.
Q4: Can I use furniture oil or tung oil instead of mineral oil?
A: No. Furniture oils or oils like linseed oil (unless specified as food-grade polymerized linseed oil) are not safe for surfaces that come into contact with food. Stick only to pure, food-grade mineral oil or certified board wax/oil blends.
Q5: How long does it take for the wood board to dry fully?
A: After rinsing, towel-drying should remove most surface moisture. To dry fully, stand it vertically for at least 1 to 2 hours before using it again or storing it. In humid conditions, allow more time.
Q6: Is it okay if my board develops knife marks over time?
A: Yes, knife marks (scoring) are normal signs of a well-loved, functional board. They are usually safe as long as they are shallow. When the scoring becomes so deep that food gets visibly stuck or cleaning becomes impossible, it is time to sand or retire the board.
Conclusion: Confidence in Your Kitchen Care
Caring for your wooden cutting board doesn’t require a degree in chemistry—it just requires consistency and respecting what wood needs. Remember the cardinal rule: warm water, mild soap, immediate drying, and standing it on its edge. By consistently skipping the dishwasher and giving your board a monthly oiling treatment, you are not just cleaning; you are preserving a valuable kitchen tool. With this simple routine, you’ll find your wooden board stays beautiful, safe, and ready for every meal prep session for decades to come. Go ahead and use that gorgeous wood—you now have the expert steps to keep it perfect!