Cord For Pendant Light: Your Essential Upgrade
Quick Summary:
Choosing the right cord for your pendant light is an essential upgrade for safety, style, and functionality. This guide simplifies selecting the perfect cord, covering material, length, gauge, and installation, empowering you to tackle this DIY project with confidence.
Is that pendant light hanging a little crooked, or perhaps the cord looks a bit tired? You’re not alone! Many of us overlook the simple cord that connects our beautiful pendant lights to power. But this humble cable is more than just a connector; it’s a key element in your light’s safety and its overall aesthetic. A worn-out or inappropriate cord can be a safety hazard and detract from your home’s charm. Don’t worry, though! Upgrading your pendant light cord is a surprisingly straightforward DIY project. We’ll walk through everything you need to know, step-by-step, so you can get it done safely and stylishly.
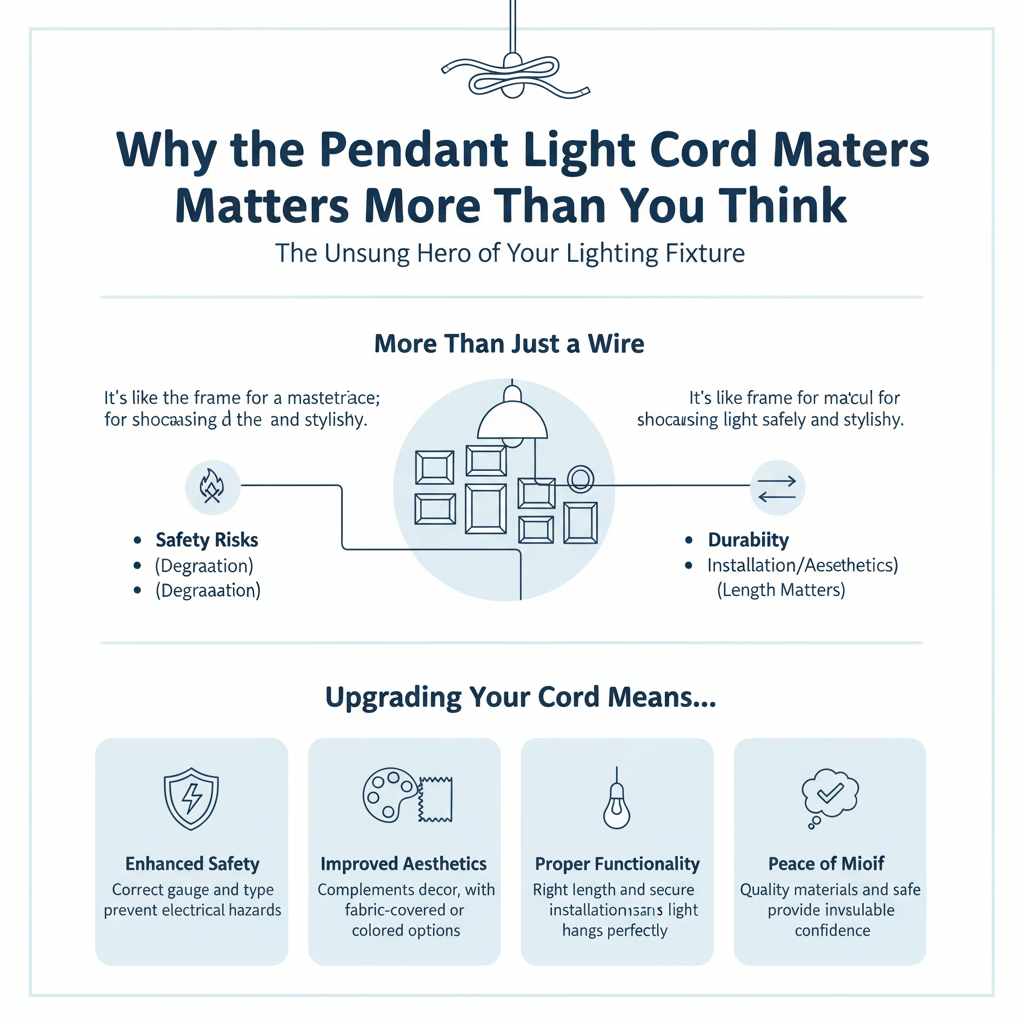
Why the Pendant Light Cord Matters More Than You Think
When you install a pendant light, your eyes naturally go to the fixture itself – the glass shade, the metal accents, the bulb. But the cord is always there, silently doing its job. Think of it like the frame for a masterpiece painting; it’s crucial for showcasing the main attraction and ensuring it stays put safely. A cord that’s too thin might overheat, a material that’s not rated for the environment could degrade, and a cord that’s too short or too long can make installation a headache or lead to a less-than-ideal look.
Upgrading your cord means:
- Enhanced Safety: Using the correct gauge and type of cord prevents electrical hazards like overheating and short circuits.
- Improved Aesthetics: A new cord can complement your decor, especially if you choose a fabric-covered or colored option.
- Proper Functionality: Ensuring the cord is the right length and properly secured means your light hangs perfectly and reliably.
- Peace of Mind: Knowing you’ve used quality materials and followed safe practices is invaluable.
Understanding Pendant Light Cords: The Basics
Before you head to the hardware store or browse online, let’s get familiar with what makes a pendant light cord suitable. It’s not just any wire; it’s a specialized component designed for specific electrical and environmental needs.
Types of Pendant Light Cords
Pendant light cords come in various materials, each offering a different look and set of properties:
- PVC (Polyvinyl Chloride): This is the most common type, offering durability and flexibility. It’s often found in standard black, white, or brown colors. It’s a good all-around choice for most indoor applications.
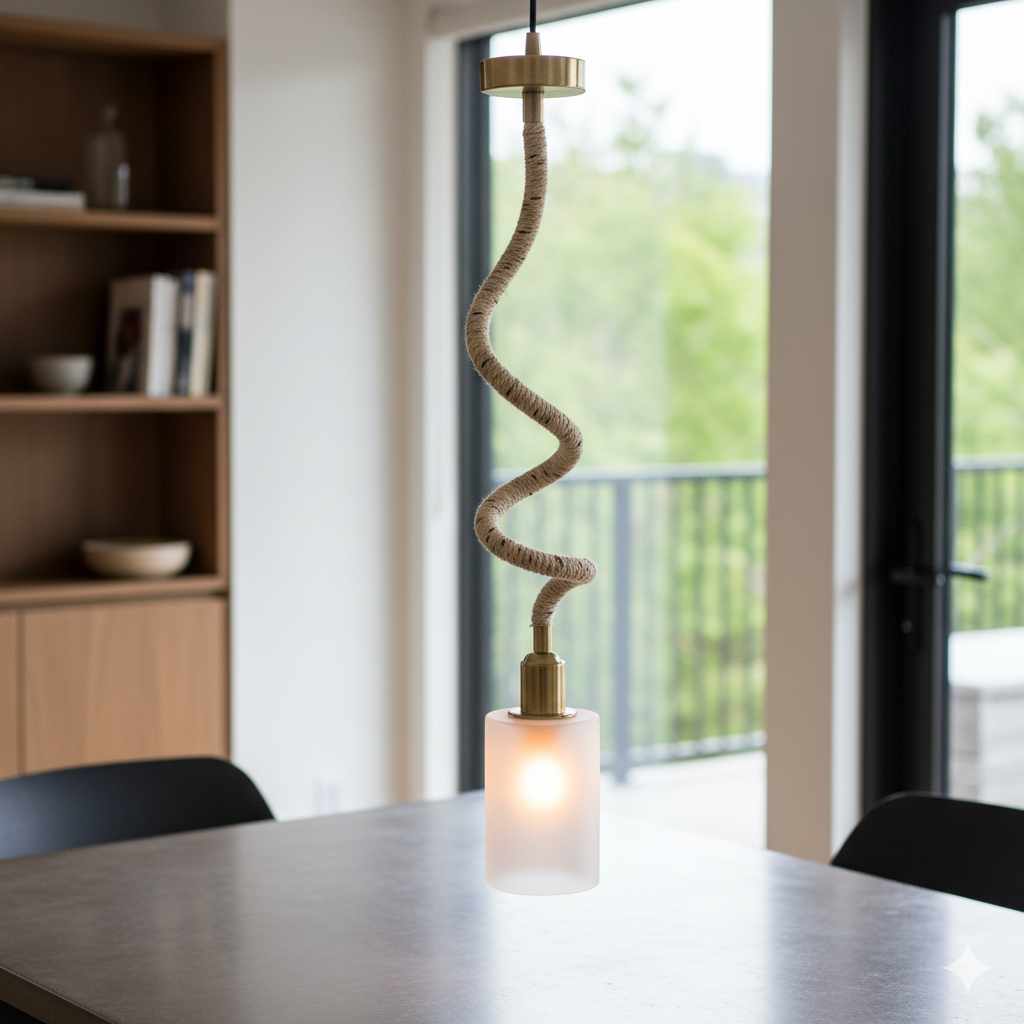
- Fabric-Covered (Braided/Woven): These cords add a touch of elegance and are available in a huge array of colors and patterns. They can be made from cotton, linen, rayon, or synthetic blends. They are excellent for decorative purposes and can really elevate the look of your pendant light.
- Rubberized/Silicone: These are highly durable and resistant to moisture, heat, and abrasion. They are ideal for environments where the cord might be exposed to tougher conditions, though they are less common for standard indoor pendant lights.
- Twisted Cloth: A classic look, often seen in vintage-inspired fixtures. These have a retro charm but can sometimes be less flexible than modern PVC or fabric cords.
Cord Construction: What to Look For
Beyond the outer material, the internal construction is vital. Most pendant light cords are:
- Two-Conductor (Non-Grounded): These have two insulated wires inside: a hot wire and a neutral wire. They are suitable for double-insulated fixtures or lamps where a ground connection isn’t required by the fixture’s design.
- Three-Conductor (Grounded): These have an additional wire – the ground wire – for safety. This is the preferred type for most fixtures, especially in areas where electrical codes mandate grounding. The ground wire is typically bare copper or green.
Always check your pendant light fixture’s requirements. If it has a metal casing and a two-prong plug, it’s likely double-insulated. If it has a three-prong plug or a metal casing that could become energized, a three-conductor cord is essential for safety.
Choosing the Right Cord for Your Pendant Light
Selecting the perfect cord involves considering several factors. Let’s break them down:
1. Material and Style
This is where you can really personalize your light! Think about your room’s decor.
- Modern/Minimalist: A sleek PVC cord in black or white, or a simple fabric cord in a neutral tone.
- Bohemian/Eclectic: A vibrantly colored fabric cord, a twisted cloth cord, or one with an interesting weave.
- Industrial/Farmhouse: A thicker, durable-looking PVC or a fabric cord in a darker, muted color.
Consider the weight of your pendant light fixture. Heavier fixtures might benefit from a cord with a slightly thicker insulation or a more robust outer material to ensure it can handle the load safely over time.
2. Cord Length: Measure Twice, Cut Once!
This is crucial for both aesthetics and safety. The cord needs to be long enough to reach your junction box (where the power comes from) and hang at your desired height, with a little extra for adjustments and connections. Too short, and you won’t be able to install it properly. Too long, and you’ll have a messy tangle of excess cord, which can also be a fire hazard.
How to Measure:
- Determine Hanging Height: Decide how low you want your pendant light to hang from the ceiling or its mounting point.
- Measure from Ceiling to Fixture: Measure the distance from the ceiling (or mounting point) down to where the top of your fixture will be.
- Add for Connections: Add about 1-2 feet (30-60 cm) to this measurement for slack needed at the ceiling connection and within the fixture canopy.
- Consider Ceiling Height: For very high ceilings, you’ll obviously need a longer cord. For standard 8-foot ceilings, a 6-foot cord is often sufficient, but always measure your specific space.
It’s always better to have a little extra cord length than not enough. You can often shorten a cord if needed, but you can’t magically add length.
3. Wire Gauge (Thickness)
Wire gauge refers to the thickness of the electrical conductors inside the cord. It’s indicated by a number, with a lower number meaning a thicker wire. The thicker the wire, the more electrical current it can safely handle. Using a cord with too small a gauge for the wattage of your bulb and the length of the cord can lead to overheating and a fire risk.
A general rule of thumb for most standard pendant lights (up to 100 watts) is to use a 18-gauge (18 AWG) cord. For longer runs or higher wattage fixtures, you might need a 16-gauge (16 AWG) or even a 14-gauge (14 AWG) cord.
Understanding Wire Gauge (AWG):
| Gauge (AWG) | Typical Use | Max Amperage (Approx.) |
|---|---|---|
| 18 AWG | Standard pendant lights, small lamps (up to 100W) | 10 Amps |
| 16 AWG | Heavier duty lamps, longer cord runs, fixtures up to 200W | 13 Amps |
| 14 AWG | Appliances, circuits, very high wattage fixtures | 15 Amps |
Note: These are general guidelines. Always consult the fixture’s specifications and local electrical codes. For more detailed information on wire gauges and electrical safety, you can refer to resources like the National Electrical Code (NEC).
4. Voltage Rating
Ensure the cord is rated for the voltage in your home, which is typically 120V in North America and 230V in Europe and other regions. Most replacement cords sold for lighting fixtures are designed for standard household voltages.
Tools and Materials You’ll Need
Gathering your supplies before you start makes the process much smoother. Here’s a checklist:
Essential Tools:
- New pendant light cord (appropriate length, gauge, and style)
- Wire strippers/cutters
- Screwdriver set (Phillips and flathead)
- Electrical tape
- Pliers (needle-nose can be helpful)
- Voltage tester (non-contact is easiest for beginners)
- Ladder or step stool
- Safety glasses
- Work gloves (optional, but recommended)
Materials:
- Your new pendant light cord
- Wire nuts (if needed for splices, though often the new cord will have connectors)
- The pendant light fixture itself
- Mounting hardware (usually comes with the fixture)
Step-by-Step: How to Replace Your Pendant Light Cord
Ready to dive in? This guide assumes you are replacing an existing cord or installing a new pendant light with a cord. Always prioritize safety!
Step 1: Safety First! Turn Off the Power
This is the most critical step. You absolutely must cut the power to the circuit you’ll be working on.
- Locate your home’s electrical panel (breaker box).
- Find the breaker that controls the lighting circuit for the area where you’ll be working.
- Flip the breaker to the “OFF” position.
- Test: Go to the light switch for the pendant light and try to turn it on. If it doesn’t come on, the power is off. For extra assurance, use a non-contact voltage tester at the junction box to confirm there’s no power.
Step 2: Access the Existing Cord and Wiring
You’ll need to get to where the current cord connects to the fixture and to the ceiling wiring.
- Lower the Fixture: If your pendant light is already installed, carefully lower it. This might involve unscrewing a canopy that covers the ceiling junction box. You may need to support the fixture’s weight while you work.
- Disconnect from Ceiling: Inside the canopy, you’ll see where the existing cord connects to the house wiring (usually via wire nuts). Gently twist and remove the wire nuts to separate the wires.
- Disconnect from Fixture: The other end of the cord will connect to the pendant light fixture itself, often through a small terminal block or by being fed into the fixture’s housing. You might need to unscrew a cap or part of the fixture to access these connections. Note how the old cord is wired before disconnecting.
Step 3: Remove the Old Cord
Once disconnected at both ends, carefully pull the old cord away from the fixture and from the ceiling.
Step 4: Prepare the New Cord
Your new cord might need some prep work.
- Measure and Cut: If your new cord is longer than you need, measure the desired length and cut it carefully.
-
Strip the Ends: At each end of the new cord, you’ll need to expose the wires.
- Carefully use your wire strippers to remove about 1/2 to 3/4 inch (1.5-2 cm) of the outer insulation. Be careful not to nick the inner wires.
- If it’s a three-conductor cord, you’ll see the hot (usually black or red), neutral (usually white), and ground (bare copper or green) wires. Strip about 1/2 inch (1.5 cm) of insulation from the end of each of these inner wires.
- Prepare for Connection: Some cords come with pre-attached connectors, while others require you to attach them. If your fixture has specific terminals, you might need to loop the stripped wire ends around screws or insert them into push-in connectors.
Step 5: Connect the New Cord to the Pendant Light Fixture
Refer to your pendant light’s manual. Generally, you’ll connect the wires as follows:
- Hot wire (from new cord) to Hot wire (on fixture).
- Neutral wire (from new cord) to Neutral wire (on fixture).
- Ground wire (from new cord) to Ground wire or grounding screw (on fixture), if applicable.
Ensure connections are secure. If using wire nuts, twist them on firmly. If using screw terminals, wrap the wire clockwise around the screw and tighten securely.
Step 6: Connect the New Cord to the Ceiling Wiring
This is where the cord meets your home’s electrical system.
-
Match Wires: Connect the wires from the new cord to the corresponding wires coming from the ceiling junction box.
- Hot: Connect the hot wire (black/red) from the cord to the hot wire (usually black) from the ceiling.
- Neutral: Connect the neutral wire (white) from the cord to the neutral wire (usually white) from the ceiling.
- Ground: Connect the ground wire (bare copper/green) from the cord to the ground wire (bare copper/green) from the ceiling, and also to any grounding screw in the junction box or fixture bracket.
- Use Wire Nuts: Twist appropriate-sized wire nuts securely onto each pair of connected wires. Give them a gentle tug to ensure they are holding.
- Tuck Wires: Carefully tuck all the connected wires and wire nuts up into the ceiling junction box.
Step 7: Reassemble and Test
- Secure the Canopy: Carefully push the pendant light fixture and its canopy up towards the ceiling. Screw the canopy back into place, ensuring no wires are pinched.
- Restore Power: Go back to your electrical panel and flip the breaker back to the “ON” position.
- Test the Light: Turn on the light switch. Your pendant light should now illuminate!
Troubleshooting Common Issues
Even with the best intentions, sometimes things don’t go perfectly the first time. Here are a few common hiccups:
-
Light Doesn’t Turn On:
- Check the breaker is fully on.
- Double-check all wire connections. Are the wire nuts secure? Are wires making good contact with terminals?
- Ensure the bulb is screwed in properly and is functional.
- Confirm power is reaching the junction box using your voltage tester (if comfortable).
-
Light Flickers:
- Loose wire connection is the most common cause. Re-check all connections, especially at the fixture and the ceiling.
- The bulb might be faulty or not seated correctly.
-
Cord Feels Warm:
- This is a serious safety concern! Turn off the power immediately.
- You may be using a cord with too small a gauge for the wattage of the bulb or the length of the run.
- The fixture itself might be drawing too much power or have an internal issue. Consult an electrician.
If you’re ever unsure or uncomfortable, don’t hesitate to call a qualified electrician. Safety is always the top priority.
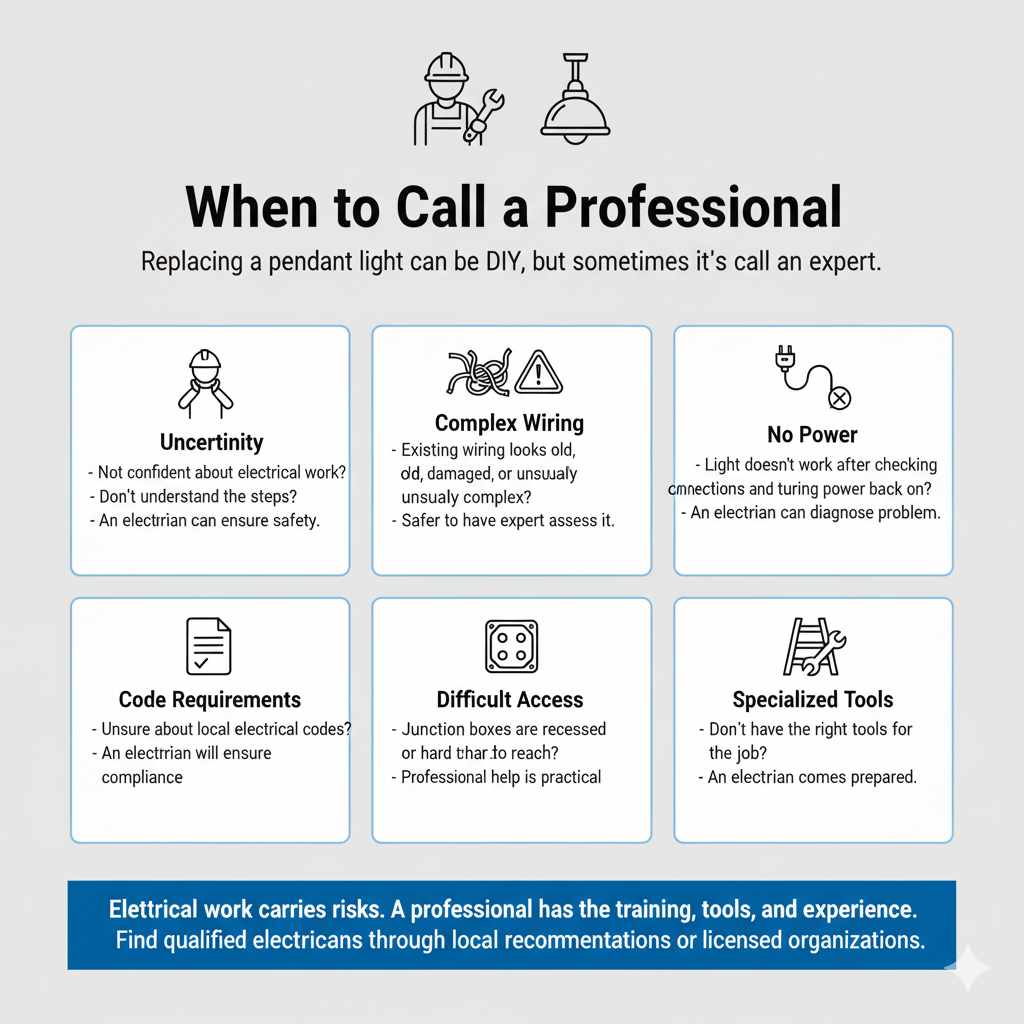
When to Call a Professional
While replacing a pendant light cord is a manageable DIY project for many, there are situations where it’s best to call in a pro:
- Uncertainty: If you’re not confident about electrical work or don’t understand the steps, an electrician can do it quickly and safely.
- Complex Wiring: If your existing wiring looks old, damaged, or unusually complex, it’s safer to have an expert assess it.
- No Power: If you’ve turned the power back on and the light still doesn’t work after checking your connections, an electrician can diagnose the problem.
- Code Requirements: If you’re in doubt about local electrical codes or whether your setup meets them, an electrician will ensure compliance.
- Recessed or Difficult-to-Access Junction Boxes: Some installations can be physically challenging, making professional help a practical choice.
Remember, electrical work carries risks. A professional electrician has the training, tools, and experience to ensure the job is done correctly and safely. You can find qualified electricians through local recommendations or professional organizations like the National Association of Home Inspectors (NAHI) for general home inspections, or look for licensed electricians in your area.
Frequently Asked Questions (FAQ)
Q1: How long should a pendant light cord be?
The ideal length depends on your ceiling height and desired hanging height. Measure from the ceiling to the bottom of the fixture, and add 1-2 feet for connections and slack. Standard 8-foot ceilings often use cords around 6 feet, but always measure your specific space.
Q2: What gauge wire do I need for a pendant light cord?
For most standard pendant lights (up to 100 watts), an 18-gauge (18 AWG) cord is sufficient. For longer cords or higher wattage fixtures, consider 16-gauge (16 AWG) or even 14-gauge (14 AWG) for increased safety.
Q3: Can I use a fabric-covered cord for my pendant light?
Yes, fabric-covered cords are a popular and stylish choice! Ensure the cord is rated for the voltage and amperage needed by your fixture and that it’s constructed with appropriate internal wiring (e.g., 18 AWG). They come in many colors and patterns to match your decor.
Q4: Do I need a grounded cord for my pendant light?
It’s always best to use a grounded (three-conductor) cord if your fixture is metal and has a grounding connection point, or if your home’s wiring includes a ground wire. This provides an extra layer of safety by preventing electrical shock in case of a fault.
Q5: What’s the difference between a two-conductor and a three-conductor cord?
A two-conductor cord has two internal wires (hot and neutral) and is used for double-insulated fixtures. A three-conductor cord has a third wire (ground) for safety and is typically used for fixtures with metal casings or when required by code.
Q6: How do I safely strip the wires on a new cord?
Use wire strippers specifically designed for electrical wire. Set the tool to the correct gauge and carefully score the outer insulation without cutting into the inner wires. Then, gently pull off the scored section. For the inner wires, strip about 1/2 inch (1.5 cm) of insulation.
Q7: What if my new pendant light cord doesn’t have connectors?
If your new cord doesn’t come with pre-attached connectors, you’ll likely use wire nuts to connect the cord wires to the fixture’s internal wiring or the house wiring. Ensure you use the correct size wire nut for the number and gauge of wires you are joining.
Conclusion
Upgrading the cord for your pendant light is a rewarding project that enhances both the safety and the beauty of your home lighting. By understanding the different types of cords, their specifications, and following these step-by-step instructions, you can confidently tackle this task. Remember to always prioritize safety by turning off the power before you begin and ensuring all connections are secure. A well-chosen and properly installed cord will not only keep your light functioning reliably but also contribute to the overall aesthetic you’ve worked so hard to create. So go ahead, give your pendant light the essential upgrade it deserves!