What Gauge Wire for Low Voltage LED Lighting? (AWG Chart)
Wire gauge for low-voltage LED lighting depends on amperage and wire length — 18 AWG handles short runs under 2 amps, but 12V automotive, marine, and landscape circuits need 16 AWG or thicker past 20-30 feet. Undersized wire causes dim, flickering LEDs and can overheat insulation, a real fire risk in tight spaces like an engine bay. This guide covers AWG sizing by amps and distance, voltage-drop math, and the right wire type for cars, boats, and landscape runs.
Disclosure: As an Amazon Associate, we earn from qualifying purchases from links in this article.
Wire gauge is the American Wire Gauge (AWG) number that tells you a wire’s cross-sectional thickness — the lower the number, the thicker the conductor and the more current it can carry without excess voltage loss. For 12V/24V LED circuits, gauge has to match both the amp draw of the LEDs and the total length of the run, not amps alone. Undersized gauge for a given amp-and-length combination is the single most common cause of dim or flickering low-voltage LED installs. This guide is part of our broader lighting and ceiling fan coverage, alongside guides to decorative LED lighting.
Why Wire Gauge Matters for LED Lighting
Wire gauge is the standardized measurement of a wire’s thickness. Thicker wires have lower gauge numbers, like 12 or 14 AWG; thinner wires have higher numbers, like 18 or 20 AWG. A too-thin wire resists current flow, which shows up as flickering or dimming LEDs.
The right gauge makes sure your LEDs get full power. If the wire is too thin, resistance causes voltage drop, dim output, and heat buildup at the connections. Undersized wire in a hot, vibration-prone spot — an engine bay or a tightly bundled harness — is also a genuine fire risk if it’s pushed past its safe amp rating. Matching gauge to the LED’s actual draw keeps the circuit safe, efficient, and bright for the life of the install.
What Is Low-Voltage LED Lighting?
Low-voltage LED lighting runs on 12 or 24 volts DC, unlike household circuits at 120 volts AC. Vehicles, boats, and RVs use 12-volt systems almost universally, and most outdoor landscape lighting transformers step household power down to 12V for the same reason: it’s far safer to work with and far more forgiving of wiring mistakes.
Low voltage is inherently safer — 12V DC isn’t enough to push a dangerous shock through dry skin, which is why it’s the standard for automotive interior lighting, off-road light bars, trailer wiring, and landscape and marine fixtures. The tradeoff is that low voltage pushes more current (amps) through the wire for the same wattage than a 120V circuit would, which is exactly why gauge selection matters more here than it does for household outlets.
Factors That Affect Wire Gauge Choice
Five variables determine which gauge a given LED run actually needs:
- Current (Amps): How much electricity the LEDs draw, found on the product label or spec sheet. A 10-foot LED strip typically draws 1-2 amps.
- Voltage: Most automotive and marine LEDs run on 12 volts; some RV and landscape systems use 24 volts. Check the label before wiring.
- Wire Length: Longer runs need thicker wire to offset resistance — always measure the full round-trip distance (source to LED and back), not just the one-way distance.
- Voltage Drop: Power weakens over long wire runs. Aim for under 3% drop on any circuit; some sources tolerate up to 5% for non-critical general lighting.
- Environment: Wire in hot engine bays or direct sun needs heat-resistant insulation rated for at least 105°C; marine installs need tinned copper to resist corrosion.
A short run with low amps can use thinner wire than a long run with high amps — running the numbers before buying wire prevents both a wasted purchase and a dim, underpowered result.
Common Wire Gauges for LED Lighting
These four gauges cover nearly every low-voltage LED scenario:
- 18 AWG: Good for short runs under roughly 2 amps and 15 feet one-way — interior dome lights, small accent strips.
- 16 AWG: The most common automotive/marine primary wire. Handles 2-3 amps over runs up to about 20 feet one-way — underglow kits, single light bars.
- 14 AWG: For higher amps or longer runs — roughly 5 amps up to 14 feet one-way, or lower amps over longer distances.
- 12 AWG: Heavy-duty for high-power setups like multi-light bars or amplifier feeds — handles 7-10 amps over runs up to about 16 feet one-way.
Thicker gauges (lower numbers) carry more current with less voltage drop. 16 AWG is the most versatile choice for typical automotive LED work, but always check the LED’s actual amp draw against the length table below rather than guessing.
Best Automotive LED Wire Pick
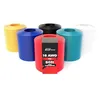
GS Power 300ft 16 AWG Pure Copper Primary Wire – $79.99
Oxygen-free pure copper, not copper-clad aluminum — matters because the voltage-drop numbers in this guide’s table are calculated for solid copper resistance, and CCA wire needs one gauge size thicker to match.
- Best for: Underglow kits, light bars, and multi-circuit automotive LED jobs
- Why we picked it: True copper conductor matches this article’s 16 AWG voltage-drop table exactly, with 6 color options for circuit tracing
- Main drawback: Costs more per foot than copper-clad aluminum alternatives
Compare more low-voltage LED wiring options
 Budget Option VIABRICO 16 AWG Red/Black 100ft – $12.99
|
 Connectors DxCRIMP Waterproof Crimp Kit – $29.96
|
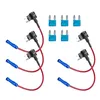 Fusing QEUOBUE Add-A-Circuit Fuse Tap – $5.69
|
As an Amazon Associate we earn from qualifying purchases.
How to Calculate the Right Wire Gauge
Sizing wire correctly takes five steps:
- Find the amp draw: Check the LED strip or fixture’s label or spec sheet for its current draw in amps.
- Measure the wire length: Measure the one-way distance from power source to LED, then double it for the round-trip total the current actually travels.
- Confirm the voltage: Most automotive and marine systems are 12V; some RV and landscape setups run 24V.
- Check a wire gauge table: Match amps and one-way distance to a gauge using the table below, which targets a 3% voltage-drop limit.
- Account for heat: In an engine bay or direct sun, choose wire insulation rated for at least 105°C.
A free online voltage-drop calculator can confirm the result once you know amps, one-way distance, and gauge — it takes under two minutes and removes any guesswork before you cut wire.
Table: Wire Gauge Recommendations for 12V LED Lighting
This table shows the maximum one-way wire length that keeps voltage drop under 3% at 12V, calculated from standard copper wire resistance per the NEC’s 3% voltage-drop guidance for feeder conductors:
| Current Draw | 18 AWG Max Length | 16 AWG Max Length | 14 AWG Max Length | 12 AWG Max Length |
|---|---|---|---|---|
| 1 amp | 28 ft | 45 ft | 71 ft | 113 ft |
| 2 amps | 14 ft | 22 ft | 36 ft | 57 ft |
| 3 amps | 9 ft | 15 ft | 24 ft | 38 ft |
| 5 amps | Not recommended | 9 ft | 14 ft | 23 ft |
| 7 amps | Not recommended | 6 ft | 10 ft | 16 ft |
| 10 amps | Not recommended | Not recommended | 7 ft | 11 ft |
Lengths above are one-way — double them for round-trip wire needed (positive and negative runs combined). For a 2-amp LED strip mounted 15 feet one-way from the battery, 16 AWG (22-foot max) comfortably covers the run at roughly 2% drop; 18 AWG (14-foot max) would fall short and dim the LEDs.
📊 The NEC recommends keeping voltage drop under 3% on feeder conductors and under 5% on branch circuits — automotive and marine wiring guides apply the same 3% target to avoid dim or flickering LEDs. — Source: AspectLED Professional Voltage Drop Guide, 2026
Types of Wire for Low-Voltage LEDs
Not all wire is interchangeable. Five types come up most often in LED projects:
- Stranded Wire: Flexible, made of many thin strands. The standard choice for vehicles, boats, and anywhere the wire flexes or vibrates.
- Solid Wire: Stiff, a single thick conductor. Fine for permanent, non-moving home or landscape runs; not for vehicles.
- Automotive Primary Wire: Heat- and oil-resistant insulation rated for engine-bay conditions — the standard for car, truck, and off-road LED wiring.
- Tinned Copper Wire: Corrosion-resistant coating for marine environments — standard on boats.
- Speaker Wire: Not rated for automotive heat or vibration and often lacks a real gauge-accurate copper core — a common cause of overheating when substituted for primary wire.
Stranded automotive primary wire is the right default for vehicle LED projects — it costs a bit more than speaker wire or generic hookup wire, but it’s rated for the heat, vibration, and flex a vehicle actually puts it through.
Tools and Supplies You’ll Need
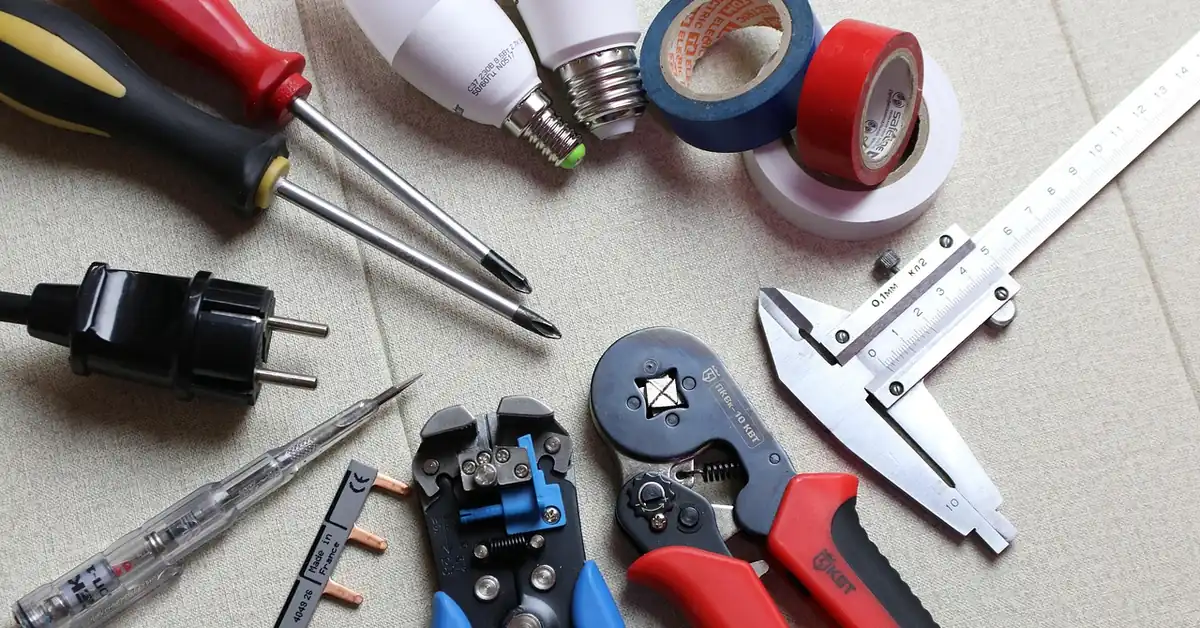
A typical low-voltage LED wiring job needs the following:
- Wire: Automotive-grade stranded wire in the gauge the table above calls for — typically $10-15 for a 25-foot spool of 16 AWG.
- Wire Cutters: For clean, square cuts that crimp reliably.
- Wire Strippers: To remove insulation without nicking the copper strands underneath.
- Connectors: Butt connectors or solder, sized to the wire gauge.
- Crimping Tool: A ratcheting crimper gives a more consistent, vibration-resistant connection than pliers.
- Heat Shrink Tubing: Insulates and seals connections against moisture.
- Multimeter: Tests voltage and continuity before and after the install.
- Electrical Tape: Extra insulation layer over heat shrink at stress points.
- Zip Ties: To route and secure wire runs away from moving or hot parts.
- Safety Glasses: For cutting and crimping work.
Total cost for a basic wiring kit typically runs $60-80 if you’re buying every tool new; most of these tools are reusable, so it’s a one-time cost for future projects.
Step-by-Step Guide to Wiring Low-Voltage LEDs
Once the gauge is chosen and tools are on hand, wiring follows the same sequence for most 12V LED installs:
- Plan the layout: Sketch where the LEDs and power source will sit before running any wire.
- Measure the wire run: Measure the one-way distance from power source to LEDs, then use the table above with the actual amp draw.
- Cut the wire: Cut two lengths — positive and negative — with clean, square cuts.
- Strip the ends: Strip about ½ inch of insulation from each end without nicking the strands.
- Connect to the LEDs: Crimp connectors onto the LED fixture’s leads and the new wire, matching polarity.
- Route the wire: Run wire along the frame or structure, securing it with zip ties away from heat and moving parts.
- Connect to power: Attach the positive wire to the source through a fuse sized to the LED’s amp draw, and the negative to a solid ground point.
- Insulate the connections: Cover every crimp with heat shrink tubing, then electrical tape at stress points.
- Test with a multimeter: Confirm full voltage is reaching the LEDs before closing anything up.
- Power on and inspect: Check for even brightness and no flicker across the whole run.
A single-circuit LED install typically takes one to two hours for a first-timer. Testing with a multimeter before final assembly catches most wiring mistakes before they become a rework job.
Avoiding Voltage Drop
Voltage drop is the loss of usable voltage as current travels through a wire’s resistance — the longer or thinner the wire, the more it loses. Staying under 3% drop keeps LEDs at full, even brightness; go much past 5% and the difference becomes visible as dimming, usually worse at the far end of a run than near the source.
Three things reduce voltage drop: a shorter wire run, a thicker gauge, and tight, corrosion-free connections at every splice. A loose or corroded crimp adds resistance on top of whatever the wire itself contributes, so a voltage-drop calculation is only as good as the connections backing it up.
Safety Tips for Wiring LEDs
Follow these precautions on every low-voltage LED job:
- Disconnect the battery: Disconnect the negative terminal before working on vehicle wiring to prevent shorts and shocks.
- Wear safety glasses: Wire snips and crimping can throw small metal fragments.
- Use insulated tools: Strippers and cutters with rubber grips reduce shock risk.
- Check for shorts: Test with a multimeter before powering up to catch shorts before they trip a fuse or start a fire.
- Route wires safely: Keep wire runs away from exhaust pipes, moving parts, and sharp edges that could cut insulation over time.
- Always fuse the circuit: Size the fuse to the wire’s ampacity, not just the LED’s draw, so the fuse — not the wire — is the weak link if something shorts.
Maintaining Your LED Wiring
A short annual routine keeps low-voltage LED wiring reliable:
- Check connections: Inspect crimps yearly for corrosion, especially in marine or outdoor installs.
- Clean wires: Wipe down exposed runs to remove dust and grime buildup.
- Test voltage: Check with a multimeter every six months to confirm full voltage is still reaching the LEDs.
- Replace worn wire: Swap out any section with cracked or frayed insulation right away.
- Secure loose wires: Add zip ties wherever a run has started to sag or rub.
This routine takes about 20 minutes a year and catches most wiring problems — corrosion, chafing, loose crimps — before they cause a failure.
Troubleshooting Wiring Issues
Common LED wiring problems and their usual cause:
- Dim lights: Wire is too thin for the amp draw and length — check it against the table above and step up a gauge.
- Flickering LEDs: Usually a loose crimp connection — recrimp it tightly or replace the connector.
- No power: Check the fuse first; a blown fuse is the most common cause of a dead circuit.
- Overheating wire: Usually wire that’s undersized for the amp load, or non-automotive wire (like speaker wire) substituted for primary wire — swap to correctly sized automotive-grade wire.
- Short circuit: A bare wire touching metal — reroute and re-insulate the exposed section immediately.
A multimeter and some patience resolve most of these. For a complex multi-zone system or anything involving the vehicle’s factory harness, a licensed automotive electrician is worth the cost.
Costs of Wiring Low-Voltage LEDs
Typical costs for a DIY low-voltage LED wiring job:
- Wire: $10-15 for a 25-foot spool of 16 AWG automotive wire.
- Tools: Cutters, strippers, crimper, and multimeter together typically run $40-50 if bought new.
- Supplies: Connectors, heat shrink, tape, zip ties, and a fuse typically total $15-25.
- Professional installation: A licensed electrician or auto electrical shop typically charges $50-150 depending on complexity.
- Annual maintenance: Replacement wire and tape for touch-ups usually run under $10 a year.
A full DIY kit for a single-circuit job typically runs $65-90 total including reusable tools — most of that cost is the one-time tool purchase, not the wire itself.
Environmental Impact of LED Wiring
LEDs draw a fraction of the power of the halogen or incandescent bulbs they replace, which matters directly for battery-powered and off-grid installs like vehicles, boats, and RVs. Copper wire is also fully recyclable, and buying wire in bulk spools rather than small pre-packaged lengths cuts down on plastic packaging waste.

When to Consult an Electrician
Most single-circuit low-voltage LED installs are within reach of a careful DIYer, but call a licensed electrician or automotive electrical specialist when:
- Complex setups: Multiple LED zones needing relays or a dedicated control module.
- No tools or experience: Wiring rewards precision — a pro already has the right tools and technique.
- High-amp systems: Anything drawing well above 10-15 amps carries more risk if sized or fused incorrectly.
- Vehicle warranty concerns: Some aftermarket electrical mods can affect a new vehicle’s warranty — check first.
A local auto electrical shop or licensed electrician can typically quote a flat rate for a single-circuit job, which is worth it for anyone unsure about fusing or grounding a new circuit correctly.
Why Choosing the Right Gauge Is Worth It
The right wire gauge is what makes a low-voltage LED install safe, bright, and reliable for years instead of a rework job in six months. It costs little more upfront than undersized wire and eliminates the two most common LED complaints — dim output and flickering — before they start.
Wrapping It Up
For most 12V automotive, marine, and landscape LED runs, 16 AWG automotive-grade stranded wire covers the majority of jobs up to roughly 20 feet one-way at 2-3 amps; step up to 14 or 12 AWG for longer runs or higher-draw light bars, and down to 18 AWG only for short, low-amp accent runs. Match gauge to the amp draw and one-way distance using the table above, fuse the circuit to the wire’s rating, and test with a multimeter before closing anything up.
FAQs
Quick answers to the most common questions about wire gauge for low-voltage LED lighting:
What gauge wire do I need for 12-volt LED lights?
16 AWG covers most 12V LED runs up to about 20 feet one-way at 2-3 amps. For 1-2 amps over runs under 15 feet, 18 AWG works. Always check the table above against your LED’s actual amp draw and distance.
Is 18 gauge wire good for LED lights on a truck?
Yes, for short runs — 18 AWG handles up to about 2 amps over 14 feet one-way at 3% voltage drop. For longer runs to underglow or exterior light bars, or anything drawing more than 2 amps, step up to 16 AWG to avoid dimming.
Can I use speaker wire for LED lighting?
Not recommended. Speaker wire often has a smaller effective copper cross-section than its labeled gauge and isn’t rated for automotive heat or vibration. Automotive-grade stranded primary wire in the correct gauge is safer and more durable.
How do I know if my wire is too thin?
If LEDs flicker, dim, or the wire feels warm to the touch under load, the wire is too thin for the amp draw and distance. Check the actual amp draw and one-way length against the gauge table above and step up a size.
How much does it cost to wire LEDs?
A basic DIY single-circuit job typically runs $65-90 total including reusable tools, or roughly $25-40 in wire and supplies alone if you already own crimpers and a multimeter. A professional installer typically charges $50-150.
What’s voltage drop, and why does it matter?
Voltage drop is the loss of usable voltage as current travels through a wire’s resistance. Staying under 3% drop, per NEC guidance, keeps LEDs at full brightness; a 16 AWG wire over a 15-foot one-way, 2-amp run stays around 2% drop, well within the safe range.
Sponsored / affiliate links. As an Amazon Associate I earn from qualifying purchases. I may earn additional commission from eligible campaigns.