DIY Surfboard Rack: Build Your Own In Simple Steps
Constructing a DIY surfboard rack encompasses a blend of engineering principles and craftsmanship, enabling enthusiasts to optimize space while ensuring the safe storage of their surfing equipment. Utilizing materials such as plywood and PVC pipe, and leveraging techniques like joinery and finishing, this project not only caters to functional storage but also allows for aesthetic customization to complement personal style. The sustainability aspect of crafting your own rack further enhances this endeavor, making it a gratifying venture for both seasoned surfers and novices alike.
Dive into the intricacies of creating your own DIY surfboard rack and discover how to elevate your surfing experience.
Build Your Own Stylish DIY Surfboard Rack Today!
Crafting a DIY surfboard rack is an excellent way to organize and protect your surfboards while adding a personalized touch to your space. This guide outlines essential materials, tools, and step-by-step instructions for creating a sturdy and stylish rack that suits your needs. Whether you’re an experienced craftsman or a beginner, these insights will help you create a functional piece that combines practicality with aesthetics, ensuring your boards are well-supported and ready for your next surfing adventure.
Understanding the Need for a Surfboard Rack
Importance of surfboard storage. Benefits of a DIY approach vs. purchasing one.
Storing your surfboards is super important. A good surfboard rack keeps them safe from dings and scratches. It also saves space, which means more room for snacks and beach gear. Building your own rack can be a fun adventure!
You get to customize it just how you like it. Plus, you’ll save cash for wax and sunscreen. Let’s break down some benefits:
| DIY Surfboard Rack | Purchased Rack |
|---|---|
| Cost-Effective | Usually More Expensive |
| Customizable | Limited Options |
| Fun Project! | Ready-Made |
Building your own rack means you can be the proud engineer of your surfboard kingdom. Plus, who doesn’t enjoy a little woodwork? Just remember, the only thing that should be falling is the waves, not your boards!
Essential Materials and Tools for Your Project
List of recommended wood types and their durability. Necessary tools for building a surfboard rack.
Building a surfboard rack is fun and requires the right materials and tools. Here are some options for wood and tools needed:
- Marine Plywood: Water-resistant and great for outdoor use.
- Cedar: Naturally resistant to rot and looks beautiful.
- Pine: Affordable but may need extra care to resist moisture.
Essential tools include:
- Measuring tape for accuracy.
- Circular saw for easy cutting.
- Screwdriver for assembly.
- Sandpaper for smoothing edges.
Having these materials and tools will make your surfboard rack project easier and more enjoyable!
Design Considerations for Your Rack
Different styles of surfboard racks (wallmounted, freestanding). Weight capacity and size considerations.
Choosing the right style for your surfboard rack can be exciting! You can opt for wall-mounted racks to save space or go for a freestanding option if you want a bit more flexibility. Think about how many boards you have and their weight. A lighter board might not need a heavyweight champion rack, but a bulky one will!
Here’s a quick guide:
| Style | Weight Capacity | Size Considerations |
|---|---|---|
| Wall-Mounted | Up to 50 lbs | Great for small spaces |
| Freestanding | Up to 150 lbs | Requires more floor space |
Pick what fits your style and your surfboards, and you’ll be riding the waves in no time!
Step-by-Step Instructions for Building a Wall-Mounted Rack
Preparing your workspace. Detailed building steps with measurements and illustrations.
First, find a nice, clean workspace. You don’t want sawdust in your cereal, right? Gather your tools: a saw, drill, level, and some screws. Measure and cut your wood pieces.
Most racks are about 3 to 4 feet wide, but you can size it to fit your boards. Make sure to mark where each piece will go. As you build, it helps to have a buddy—unless you think talking to a wall is fun!
| Material | Size |
|---|---|
| Wood Planks | 2″x4″ (Length: 4 ft) |
| Screws | 5″ (for wood) |
| Wall Mounts | Standard size |
This is where your masterpiece begins! Attach the wood to the wall with your mounts, ensuring it’s level.
A crooked rack won’t do you any favors when hanging boards. Secure each piece tightly, and stand back to admire your work. Just avoid any dance moves; you might accidentally knock it down!
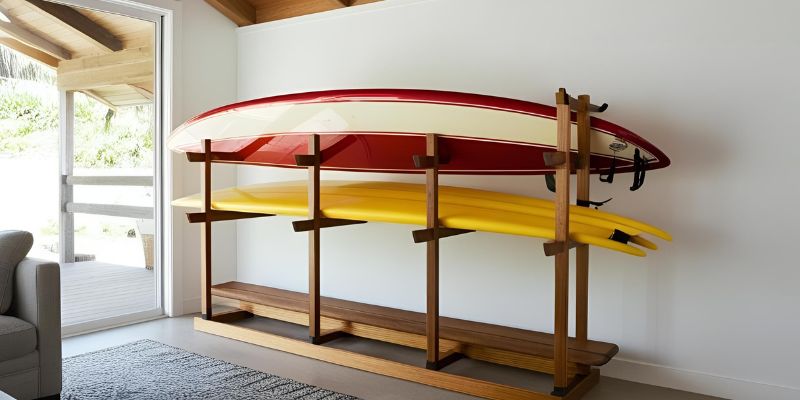
Step-by-Step Instructions for Building a Freestanding Rack
Preparing your workspace. Detailed building steps with measurements and illustrations.
Start by preparing your workspace. Make sure you have a clean, flat area to work. Gather your supplies like wood, screws, and tools.
Here’s how to build your rack:
- Cut wood pieces: two vertical posts at 6 feet and two horizontal supports at 3 feet.
- Attach the horizontal pieces to the vertical ones, forming a rectangle.
- Secure the structure with screws to ensure it is strong.
- Balance the rack to keep it stable; use clamps if needed.
Illustrate these steps to make it easier to follow. Always remember to wear safety gear while building!
Finishing Touches: Paint and Protect Your Rack
Recommended finishes for wood protection. Tips for aesthetic enhancements.
After building your rack, give it a stunning finish to protect the wood and enhance its look. Choose finishes like:
- Varnish: Adds shine and guards against moisture.
- Sealants: Help prevent wood from rotting and warping.
- Paint: Allows for color customization while providing a protective layer.
For aesthetic enhancements, consider:
- Using stencils to create fun designs.
- Adding cushions for your surfboard support.
- Using wood stains to bring out natural patterns.
These tips will make your surfboard rack beautiful and long-lasting!
Maintenance and Upkeep of Your Surfboard Rack
Regular checks for stability. Cleaning and protecting the finish.
To keep your surfboard rack in great shape, regular checks are key. Make sure the rack is stable. Look for any wobbly parts or loose screws.
Tighten them as needed to ensure safety.
- Inspect for signs of wear or damage.
- Clean the rack with a damp cloth to remove dust.
- Apply a protective finish to guard against the elements.
These simple steps will extend the life of your rack and keep your surfboards safe.
Innovative Ideas and Customizations for Your Surfboard Rack
Adding additional storage options (e.g., for wetsuits). Personalized designs and color schemes.
Creating a surfboard rack can be fun and unique with some cool ideas. Consider adding extra space for wetsuits or towels. This keeps everything together and organized. You can also personalize your rack.
Choose colors that match your style or add designs that show your personality.
- Add hooks on the side for wetsuits.
- Paint the rack in bright colors.
- Use stickers or stencils for designs.
Common Mistakes to Avoid When Building a Surfboard Rack
Miscalculating dimensions. Using inadequate materials.
Building a surfboard rack can be fun, but it’s easy to mess up! First, miscalculating dimensions is a big no-no. If your rack is too small, it might end up looking like a house for ants!
Measure twice, cut once, or you might surprise your surfboards with snug hugs! Secondly, using inadequate materials is a mistake that could lead to a sad, lopsided rack. Nobody wants their boards to practice yoga poses on a wobbly shelf!
| Mistake | What to Watch Out For |
|---|---|
| Miscalculating Dimensions | Make sure your rack is the right size for your boards. |
| Using Inadequate Materials | Choose strong materials to avoid a board collapse! |
FAQs About DIY Surfboard Racks
Addressing common queries and misconceptions. Expert tips for firsttime builders.
Many first-timers have questions about building a diy surfboard rack. Common misconceptions include thinking it’s too hard or expensive. Fear not! It can be fun and easy, like building a giant Lego set that holds your boards.
Always measure your space and boards to avoid surprise twists and turns.
| Common Questions | Expert Tips |
|---|---|
| Do I need fancy tools? | Nope!A saw and drill work just fine. |
| Can it hold multiple boards? | Absolutely! Stack ’em high, but not too high! |
| What materials should I use? | Wood is great, but PVC pipes can be a fun twist! |
Remember, laughter is the best glue when building. So, grab your tools and let your creativity surf the waves—safely and stylishly!
Conclusion
In conclusion, building your own DIY surfboard rack is a rewarding and practical project that enhances your surfing experience while optimizing storage space. With the right materials, tools, and a little creativity, you can design a rack that suits your style and needs. So grab your tools, embrace your creativity, and ride the wave of accomplishment as you enjoy your newly organized surfboards!
FAQs
What Materials Are Best Suited For Building A Diy Surfboard Rack?
For building a DIY surfboard rack, the best materials include wood (such as plywood or hardwood), which offers durability and sturdiness; PVC pipes, which are lightweight and water-resistant; and metal brackets for added support. Additionally, soft padding or foam can be added to prevent dings and scratches on the surfboards. Weather-resistant finishes or sealants are recommended for wood to protect against moisture. Overall, choosing materials that are durable and suitable for outdoor use will ensure a long-lasting surfboard rack.
How Do I Determine The Appropriate Size And Dimensions For My Surfboard Rack?
To determine the appropriate size and dimensions for your surfboard rack, first measure the length and thickness of your surfboards to ensure a snug fit. Consider the number of boards you want to store and their layout (horizontal or vertical). Assess the available space in your home or garage, allowing for easy access and ventilation. Finally, ensure the rack is sturdy enough to support the weight of your boards.
What Are Some Design Variations For Surfboard Racks That Can Accommodate Multiple Boards?
Design variations for surfboard racks that accommodate multiple boards include vertical wall-mounted racks with slots to hold boards upright, allowing for efficient space utilization. Freestanding A-frame racks provide stability and can be easily moved while holding several boards horizontally. Ceiling-mounted pulley systems are another creative option, suspending boards out of the way yet accessible. Additionally, modular racks with adjustable slots enable customization for different board sizes and numbers.
What Tools Do I Need To Successfully Build A Surfboard Rack At Home?
To successfully build a surfboard rack at home, you will need basic hand tools such as a saw, drill, and screwdriver, as well as measuring tape for accurate dimensions. Materials like wood (e.g., plywood or 2x4s), screws, and brackets are essential for constructing a sturdy frame. Additionally, sandpaper for smoothing edges and wood finish for protection can enhance the rack’s durability and appearance. Finally, a level will help ensure your rack is securely mounted and positioned correctly.
How Can I Ensure My Diy Surfboard Rack Is Stable And Secure For Storing Longboards And Shortboards?
To ensure your DIY surfboard rack is stable and secure for storing both longboards and shortboards, use sturdy materials like hardwood or metal for the frame and supports. Make sure the base is wide and heavy enough to prevent tipping, and consider anchoring it to the wall or floor for added stability. Incorporate soft padding or foam for the contact points to protect your boards from scratches and dents. Lastly, regularly check for any signs of wear or looseness and make adjustments as needed to maintain stability.