DIY Table Legs Wood: Create Stylish Custom Designs
In the realm of woodworking, the creation of ***DIY table legs wood*** projects serves as a fundamental intersection of design and functionality. Utilizing various joinery techniques and finishes, craftsmen can personalize their furniture to meet both aesthetic preferences and structural stability. Selecting the right type of timber and understanding its properties—such as grain patterns and durability—can significantly impact the outcome of your project. Additionally, complimentary hardware can enhance the overall design while ensuring longevity.
As we delve deeper into the intricacies of crafting custom table legs, discover innovative methods and tips that will transform your woodworking endeavors.
Crafting Unique DIY Table Legs From Wood
Discover creative ways to elevate your furniture projects with DIY table legs made from wood. This summary offers key insights and practical tips for crafting sturdy and stylish legs that enhance the aesthetic appeal of any table. Whether you’re looking to build a rustic farmhouse table or a modern minimalist design, this guide will provide essential information on material selection, construction techniques, and finishing touches, ensuring your DIY endeavors result in functional and visually striking pieces that fit your space perfectly.
Choosing the Right Type of Wood
Explore various woods suitable for table legs (e.g., oak, maple, pine). Discuss durability, aesthetics, and costeffectiveness of each wood type.
Wood choice affects your DIY table leg project. Each type has its own qualities.
- Oak: Strong and durable.It has a beautiful grain. Ideal if you want a sturdy table.
- Maple: Offers a smooth finish. It’s light in color, making it easy to match with other wood.
- Pine: A budget-friendly option. It’s soft and easy to work with. Great for beginners.
Think about durability, looks, and costs when choosing your wood.
Each type can create unique styles for your table.
Tools and Materials Needed
List essential tools for DIY projects (saw, drill, sandpaper, etc.). Outline necessary materials (wood planks, screws, wood glue, finish).
For a successful DIY table project, gather these essential tools:
- Saw: for cutting wood planks.
- Drill: for making holes and driving screws.
- Sandpaper: to smooth rough edges.
Gather the following materials to complete your project:
- Wood planks: the main structure of your table legs.
- Screws: to hold pieces together.
- Wood glue: for added strength.
- Finish: to protect and enhance wood.
Designing Your Table Legs
Describe different styles of table legs (straight, tapered, splayed). Provide guidance on selecting a design that complements the tabletop.
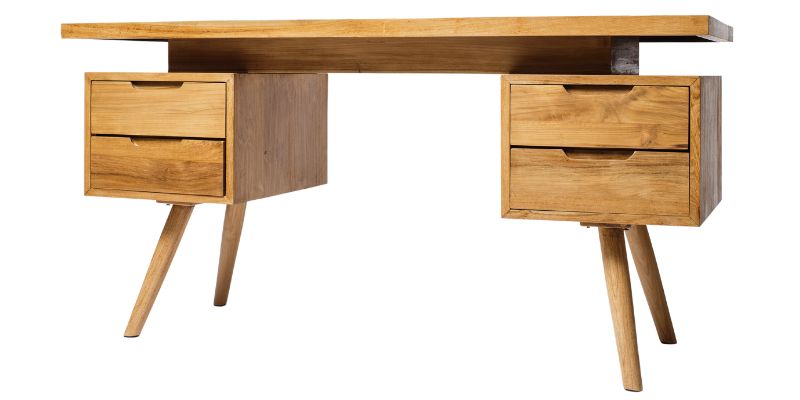
Choosing table legs can change the whole look of your furniture. Different styles include:
- Straight legs: Simple and sturdy, these legs offer a classic look.
- Tapered legs: These legs narrow toward the bottom, adding elegance to your table.
- Splayed legs: These legs spread outwards, providing a modern and playful feel.
Think about your tabletop design when selecting legs. For a round top, try tapered legs. If your table is rectangular, straight legs may work best.
Matching styles creates a balanced, beautiful piece.
Step-by-Step Instructions for Building DIY Table Legs
Detailed process, from measuring and cutting to assembly. Tips for ensuring precision and alignment during construction.
Begin by measuring your desired table leg height and width. Use a tape measure for accuracy. Cut the wood pieces according to these measurements with a saw.
Next, sand the edges to remove any splinters. This ensures the legs fit nicely and look good.
For assembly, place the legs at a 90-degree angle to the tabletop corners. Use clamps to hold them in place before drilling.
Tip: Make pilot holes for screws to prevent cracking. Double-check your measurements to keep everything aligned.
- Measure twice, cut once.
- Align legs carefully before securing.
- Use a level to check evenness.
Finishing Your Table Legs
Discuss sanding, staining, and sealing options. Provide advice on achieving a professionalquality finish.
After you’ve crafted those DIY table legs, it’s time to make them shine! Start by sanding them with fine-grit paper. Think of it as giving your legs a spa day—smooth and soft!
Next, choose a stain that matches your style. Dark wood? Light wood? It’s your call, Picasso!
Finally, seal the deal with a protective finish to keep your masterpiece safe from spills. You deserve a finish that squeaks “professional!” Here’s an easy-to-follow table:
| Step | Action |
|---|---|
| Sanding | Use fine-grit sandpaper for a smooth surface. |
| Staining | Choose a color that suits your taste. |
| Sealing | Apply a protective finish to keep it safe. |
With these steps, your table legs will look like they belong in a fancy store.
Now, go show off your masterpiece!
Installing Table Legs on Your Tabletop
Explain methods for securely attaching legs to the tabletop. Safety tips for balancing and stabilizing the completed table.
Attach your table legs securely for safety and stability. You have a few good methods to choose from:
- Use wood screws: Drill screws through the leg brackets into the tabletop.
- Pocket holes: Create hidden holes in the table-frame for a clean look.
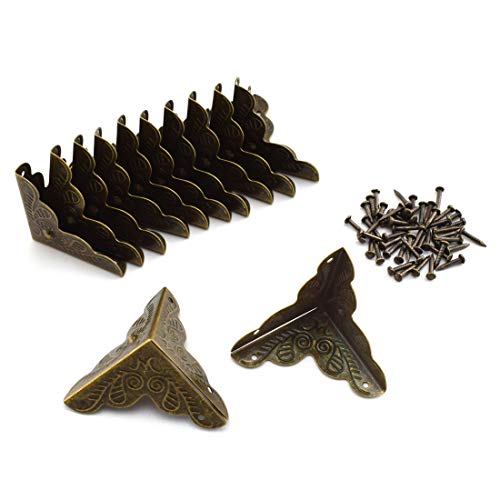
- Metal brackets: Use strong brackets to connect legs and tabletop.
To ensure your table stands steady:
- Check for evenness on all four legs.
- Adjust or use pads to level any uneven legs.
- Keep the weight evenly distributed on the tabletop.
Maintenance Tips for Wooden Table Legs
Share best practices for cleaning and maintaining wood finishes. Discuss how to repair scratches and damages over time.
Keeping your wooden table legs looking great is easier than you think! For cleaning, use a soft cloth and a little warm, soapy water. Avoid harsh chemicals—your table legs aren’t fans of strong stuff! If you spot scratches, a simple wood scratch repair kit can do wonders.
Just think of it as a spa day for your furniture!
| Tip | How to Do It |
|---|---|
| Cleaning | Use a soft cloth with warm soapy water |
| Repairing Scratches | Use a wood scratch repair kit |
Remember, regular maintenance is key. Treat your table legs like your favorite pets—they’ll be happier, and so will you!
Inspiration and Creative Ideas for Unique Table Legs
Showcase innovative designs and customizations for table legs. Include examples of upcycling materials for unique creations.
Designing unique table legs can be fun and creative. Consider these innovative ideas:
- Rustic wood: Use reclaimed wood for a warm, natural look.
- Metal accents: Combine wood with metal pipes for a modern twist.
- Repurposed furniture: Transform old chair legs into stylish table supports.
- Colorful paint: Brighten your table legs with bold colors for a pop of personality.
With these options, you can make a table that reflects your style and creativity!
Conclusion
In conclusion, crafting your own DIY table legs from wood not only adds a personal touch to your furniture but also enhances your home’s aesthetic. With a variety of styles and designs to choose from, this project is both rewarding and customizable. Embrace your creativity and transform simple wood into stunning table legs that reflect your unique style and craftsmanship.
FAQs
What Types Of Wood Are Best For Making Diy Table Legs?
For DIY table legs, hardwoods like oak, maple, and walnut are excellent choices due to their durability and strength. Softwoods such as pine and cedar are also popular, offering a lightweight option that’s easier to work with. Consider using plywood for a budget-friendly alternative that can still provide good stability. Ultimately, the best wood depends on the desired aesthetic, weight, and how much wear the legs will endure.
How Can I Properly Measure And Cut Wood For Table Legs To Ensure Stability?
To properly measure and cut wood for table legs, first determine the desired height of the table and mark that measurement on each leg while ensuring uniformity. Use a square to mark a straight line across the wood at your measurements for an accurate cut. When cutting, utilize a miter saw for precise and clean edges, ensuring the cuts are at a right angle for stability. Finally, sand the edges after cutting for a smooth finish and to avoid any wobbling when the legs are attached.
What Are Some Creative Designs For Diy Table Legs That Complement A Modern Aesthetic?
For a modern aesthetic, consider using hairpin legs made from steel or brass for a minimalist yet stylish look. Another option is to create geometric wooden legs with clean lines and angles, which can be stained or painted to match your tabletop. Concrete or stone pedestals provide an industrial vibe and can be molded into unique shapes. Lastly, incorporating reclaimed materials, like old pipes or driftwood, adds a rustic touch while still being contemporary.
How Do I Finish And Seal Wooden Table Legs To Protect Them From Wear And Moisture?
To finish and seal wooden table legs, first sand them smoothly with progressively finer grit sandpaper to prepare the surface. Apply a wood primer if desired, then choose a suitable sealant such as polyurethane or a penetrating oil, applying it with a brush or cloth in thin, even coats. Allow each coat to dry as per the manufacturer’s instructions, lightly sanding between coats for better adhesion. Finally, ensure the finish is fully cured before placing the table in use, providing optimal protection against wear and moisture.
What Tools And Materials Do I Need To Construct Sturdy Diy Table Legs?
To construct sturdy DIY table legs, you’ll need high-quality materials such as hardwood or metal for durability. Essential tools include a saw (circular or miter), drill, screws, wood glue, and a level to ensure stability. Additionally, clamps can help hold pieces together while the glue sets, and sandpaper will smooth out any rough edges for a finished look. Lastly, measuring tape and a square will ensure accurate cuts and alignment.