DIY Wood Console Table: Craft Your Perfect Entryway Piece
In the realm of functional design, a DIY wood console table presents an engaging intersection of craftsmanship and aesthetics. This versatile piece of furniture serves as a focal point in various interior settings, from entryways to living rooms, providing both style and utility. Utilizing various joinery techniques and selecting the right wood species can significantly influence the table’s durability and visual appeal.
Moreover, customizability allows homeowners to tailor the dimensions, finishes, and hardware to suit their unique spaces. Delving into the intricacies of building your own console table not only enhances your woodworking skills but also results in a personalized home accent that tells a story. Explore the full article to unlock the secrets of creating your own stunning DIY wood console table.
Creating A Stylish DIY Wood Console Table For Your Home
A DIY wood console table is a versatile piece of furniture that can enhance any living space while offering both style and functionality. This guide delves into the essential steps, materials, and design options to create your own custom console table. From selecting the right type of wood to applying the finishing touches, building a personalized console table can be a rewarding project that showcases your creativity and craftsmanship. Discover innovative techniques and ideas that make this project accessible for woodworkers of all skill levels.
Benefits of Building a DIY Wood Console Table
Cost effectiveness compared to storebought options. Customization to fit your style and space. Satisfaction of handcrafting your own furniture.
Building a DIY wood console table offers many advantages. First, it is cost-effective; materials are often cheaper than store-bought versions. You can save money while creating something unique.
Second, customization allows you to design the table to match your personal style and space. You can choose wood, size, and finish. Finally, there is satisfaction in crafting your own furniture. It feels great to see your hard work come to life!
Essential Tools and Materials Needed
List of tools (saw, drill, sander, etc.). Types of wood recommended (pine, oak, etc.). Additional materials (wood glue, screws, finish).
Ready to build your new favorite piece of furniture? Grab some essential tools first! You’ll need a saw to cut the wood, a drill to make holes (no, not for hiding snacks), and a sander for that smooth finish. For wood types, consider using pine for budget-friendly options or oak for something fancy.
Don’t forget your wood glue, screws, and a good finish to make it shine. Here’s a handy table for easy reference:
| Tools | Recommended Wood Types | Additional Materials |
|---|---|---|
| Saw | Pine | Wood Glue |
| Drill | Oak | Screws |
| Sander | Maple | Finish |
Step-by-Step Guide to Building Your Console Table
Detailed plan and measurements for the table. Instructions for cutting the wood pieces. Assembly techniques and tips for alignment.
Start with a clear plan for your console table. Measure and mark the wood pieces: a top, two sides, and a shelf. Here’s a simple guide:
- Top: 48” x 18”
- Sides: 28” x 14” (2 pieces)
- Shelf: 42” x 16”
Next, cut the wood pieces carefully using a saw. For assembly, use wood glue and screws.
Align pieces well for a strong structure. Keep a square handy to check corners. Follow these steps, and you’ll have a beautiful console table!
Design Ideas for Your DIY Console Table
Various styles (modern, rustic, farmhouse). Options for tabletop shapes (rectangular, round). Incorporating storage solutions (shelves, drawers).
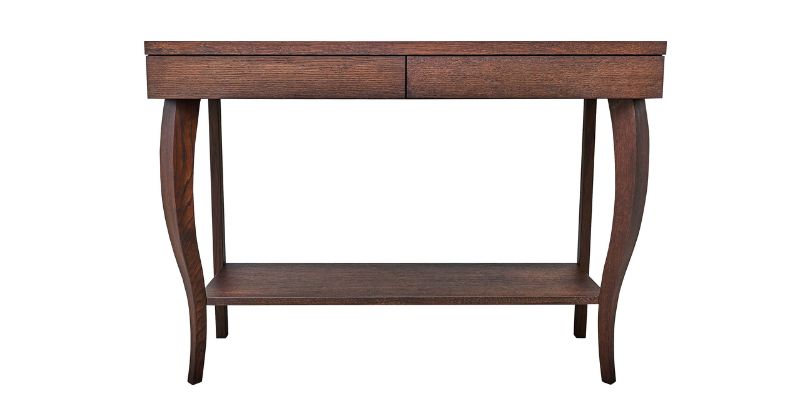
Creating a DIY console table is fun and allows for unique designs. Explore various styles to match your home. Modern designs feature clean lines, while rustic adds warmth with natural wood.
Alternatively, go for a cozy farmhouse look with distressed finishes. You can choose different tabletop shapes as well:
- Rectangular for a classic touch
- Round for a friendly vibe
Additionally, think about storage solutions. Adding shelves or drawers can help keep your space organized and stylish.
Finishing Touches for a Professional Look
Techniques for sanding and preparing the wood. Types of stains and finishes to consider. Hardware options (handles, knobs) to enhance aesthetics.
To make your DIY wood console table look professional, focus on the final details. Start by sanding the wood smooth with fine grit sandpaper. This helps to avoid rough spots.
Choose a stain that fits your style, like deep walnut or light oak. Then, finish with a top coat for protection. Consider stylish hardware options:
- Brushed nickel handles
- Antique bronze knobs
These elements will elevate the overall appearance of your table and make it shine!
Common Mistakes to Avoid When Building a Console Table
Underestimating materials needed. Skipping the planning phase. Neglecting safety measures.
Building a console table can be fun, but be careful not to make common mistakes.
Underestimating materials needed can lead to interruptions. Always have extra supplies on hand.
Skipping the planning phase can cause issues down the line. Create a clear blueprint before you start.
Don’t forget about safety measures. Always wear protective gear and work in a safe area.
- Measuring twice is better than cutting wrong.
- List all materials before shopping.
- Have a first aid kit nearby.
Maintenance Tips for Your DIY Wood Console Table
Cleaning methods to preserve wood finish. Tips for preventing scratches and wear. Recommendations for reapplying finish or stain.
To keep your lovely console table looking sharp, gentle cleaning is a must. Use a soft cloth and a mix of water and mild soap. This way, dust bunnies won’t stand a chance! Prevent scratches by placing coasters under drinks.
Remember, your table isn’t a superhero, so avoid dragging heavy items across it. Reapply finish every few years to revive its shine. It’s like a spa day for your table!
| Tip | How to Do It |
|---|---|
| Cleaning | Use a damp cloth with mild soap |
| Prevent Scratches | Always use coasters and placemats |
| Reapply Finish | Every 2-3 years; use a suitable wood stain |
Inspiration from Successful DIY Console Table Projects
Case studies or examples of popular designs. Photos and descriptions of unique features. Links or references to online communities for inspiration.
Looking for some cool ideas? Check out successful DIY projects that turned plain wood into stunning console tables! For example, one design features stylish hairpin legs, giving it a modern twist.
Another project used reclaimed wood, adding a rustic vibe. These tables have drawers, making them super handy for storing remote controls or snacks. Need motivation? Join online communities like Pinterest or Instagram, where DIY fans share their fantastic tables.
| Project | Features | Link |
|---|---|---|
| Modern Hairpin Table | Stylish legs, sleek design | View Project |
| Rustic Reclaimed Table | Warm wood, ample storage | View Project |
Conclusion
In conclusion, creating a DIY wood console table is a rewarding project that allows you to personalize your space while showcasing your craftsmanship. With a variety of designs and wood types to choose from, you can tailor your table to fit any decor. Embrace your creativity, gather your materials, and transform your living area with a beautiful, custom-made piece.
FAQs
What Materials Do I Need To Build A Diy Wood Console Table?
To build a DIY wood console table, you’ll need the following materials: wooden boards (like pine or plywood) for the tabletop and legs, wood screws for assembly, wood glue for added stability, and sandpaper for finishing. Additionally, you may want to use wood stain or paint for a decorative finish, along with a clear sealant to protect the wood. You’ll also need basic tools such as a saw, drill, and measuring tape. Don’t forget safety equipment like goggles and a mask when working with wood and power tools.
How Do I Determine The Right Dimensions For My Console Table?
To determine the right dimensions for your console table, first consider the available space where it will be placed, ensuring it doesn’t obstruct traffic flow. Measure the height, width, and depth based on your room’s proportions and the intended use of the table, keeping in mind that console tables typically range from 28 to 36 inches in height. Additionally, take into account the style and design of the table to ensure it complements your existing decor. Finally, visualize the proportions by using painter’s tape to outline the desired dimensions on the floor, helping you to gauge the fit within the space.
What Tools Are Necessary For Constructing A Wood Console Table At Home?
To construct a wood console table at home, you’ll need a few essential tools: a saw (preferably a miter saw or circular saw) for cutting the wood to size, a drill for making holes and driving screws, and a measuring tape for accurate measurements. Additionally, sandpaper or a sander will help smooth the surfaces, while wood glue and clamps will secure joints. A level is important to ensure the table is even, and a finish (such as paint or stain) will enhance its appearance.
Are There Specific Wood Types That Work Best For A DIY Console Table?
Yes, certain wood types are ideal for a DIY console table due to their durability and aesthetic appeal. Hardwoods like oak, maple, and walnut are popular choices for their strength and beautiful grain patterns. Softwoods like pine or cedar can also work well, especially for a more rustic look, though they may be less durable. Ultimately, the best choice depends on your design preferences and intended use.
What Are Some Popular Design Styles For Wood Console Tables That I Can Consider For My Project?
Popular design styles for wood console tables include rustic, minimalist, industrial, and mid-century modern. Rustic styles often feature reclaimed wood and natural finishes, emphasizing an organic look. Minimalist designs prioritize simplicity with clean lines and a sleek aesthetic, while industrial styles incorporate metal accents and distressed wood for an urban feel. Mid-century modern blends functionality with elegant curves and vibrant wood finishes, making it a timeless option.