Do You Sand After Staining Before Polyurethane
Lots of people wonder about woodworking projects, especially when it comes to finishing. A common question pops up: Do You Sand After Staining Before Polyurethane? It can seem tricky at first because you’ve already put stain on your wood. You don’t want to mess up the color you worked hard to get just right.
But don’t worry! We’ll walk through this simply, step by step. Get ready to learn how to get a smooth, beautiful finish on your wood.
Sanding After Staining Is It Necessary
Many woodworkers, especially those new to the craft, pause at the staining stage. They’ve achieved a color they love, and the idea of sanding again might feel counterintuitive. This step can seem like a hurdle.
Will sanding remove the stain? Will it make the wood look blotchy or uneven? These are valid concerns that often lead to confusion.
This section will clarify why this step is important and how it actually helps your final finish. We’ll break down the purpose of sanding between coats and after staining. You’ll see it’s a key to a professional-looking result, not a way to ruin your work.
Why Sanding After Staining Matters
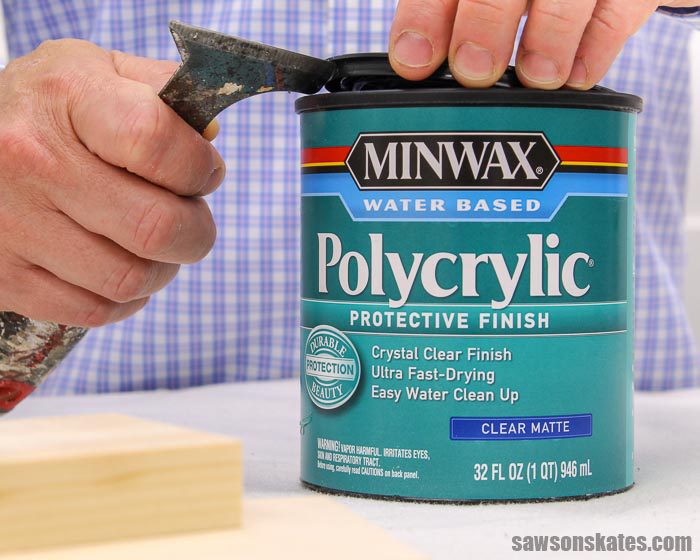
Sanding after staining, but before applying polyurethane, is a crucial step for achieving a smooth, durable, and visually appealing finish. It’s not about removing the stain itself but about preparing the surface for the protective topcoat. Think of it like preparing a canvas before painting; you want a clean, even surface for the paint to adhere to.
When you stain wood, microscopic fibers can swell and lift. These can create a rough texture that you might not feel right away, but it will be noticeable under a clear coat like polyurethane. Sanding at this stage gently knocks down these raised fibers.
This gentle sanding process also helps to remove any dust particles or imperfections that may have settled on the stain while it was drying. Even in a clean workshop, dust is an ever-present challenge. Sanding ensures these tiny invaders don’t get trapped under your polyurethane, which would create bumps and a less than smooth feel.
It also helps to even out any slight variations in stain absorption that may have occurred, giving you a more uniform color appearance before the protective layer goes on.
Preparing for the Topcoat
The primary goal of sanding after staining is to create an ideal surface for the polyurethane to bond with. Polyurethane is a protective coating that needs a good foundation to adhere properly. If the wood surface is still rough from raised grain, the polyurethane might not spread evenly.
This can lead to a finish that looks streaky or uneven in sheen, appearing dull in some spots and overly glossy in others.
A light sanding also helps to “de-nib” the wood. This term refers to the process of removing any small splinters or rough spots that might have appeared. These can be caused by the stain itself or by handling the wood.
Removing these nubs ensures a smooth feel to the touch. When you run your hand over the wood after proper sanding and before applying polyurethane, it should feel silky. This tactile smoothness is a good indicator that the surface is ready for the next layer.
Removing Raised Grain
When wood is exposed to moisture, such as from stain or even high humidity, its natural fibers can swell and stand up. This is called raised grain. Even if you didn’t notice it before staining, it often becomes more apparent after the stain has dried.
These raised fibers create a texture that feels rough to the touch, like fine sandpaper. If you apply polyurethane directly over raised grain, the clear coat will seal these rough fibers in place, resulting in a finish that is not smooth and may even snag on things.
The sanding process after staining is typically done with a very fine-grit sandpaper. The aim is not to remove wood or stain, but to gently abrade these raised fibers. This makes them lay flat against the surface.
It’s a delicate operation that smooths the wood without altering the color you’ve worked to achieve. Using a sanding block or a very light touch with an orbital sander can help ensure you don’t sand through the stain.
How Staining Affects Wood Grain
Wood is a natural material with a porous structure. Stains are liquid or semi-liquid products designed to penetrate these pores and impart color. When a stain is applied, it saturates the wood fibers.
As the stain dries, especially if it contains water or solvents that evaporate, the wood fibers can react. This reaction often causes the fibers to swell and then stand up, a phenomenon known as raised grain. This is a common occurrence and a normal part of the finishing process for many wood types.
The type of wood also plays a role in how much it raises. Woods like oak and ash, which have very open grain structures, tend to exhibit more noticeable raised grain than tighter-grained woods like maple or birch. Furthermore, the type of stain used can influence this.
Water-based stains are generally more prone to raising grain than oil-based stains because water is absorbed more readily by the wood fibers, causing them to swell more significantly.
Understanding this behavior is key to successful wood finishing. Recognizing that raised grain is a normal part of the process allows you to prepare for it. It means you shouldn’t be surprised if the wood feels a bit rough after staining and drying.
This anticipation helps you approach the next step, sanding, with confidence, knowing its purpose is to rectify this natural effect of staining.
Open Grain vs. Closed Grain Woods
Wood species are broadly categorized into two groups based on their grain structure: open-grained and closed-grained. This distinction significantly impacts how they accept stains and how they react to finishing steps like sanding.
- Open-Grained Woods These woods have large, prominent pores that are easily visible to the naked eye. Examples include oak, ash, mahogany, and walnut. Because of their large pores, they tend to absorb stain readily. This can lead to deeper, richer colors. However, they are also more prone to significant raised grain when stained, as the moisture from the stain causes the large fibers surrounding these pores to swell considerably. Sanding after staining is particularly important for open-grained woods to smooth out this pronounced grain.
- Closed-Grained Woods These woods have smaller, less visible pores. Examples include maple, birch, cherry, and pine. They absorb stain more slowly and evenly. This often results in a more uniform color application without as much risk of blotchiness. Raised grain can still occur, but it is typically less severe compared to open-grained woods. While sanding is still beneficial, it might be less critical for achieving a smooth surface compared to open-grained varieties.
When choosing wood for a project, knowing whether it’s open or closed-grained can help you anticipate its behavior during the staining and finishing process. This knowledge allows you to adjust your techniques, such as how long you let the stain penetrate or how fine a grit you use for sanding between coats.
The Role of Stain Penetration
The way stain penetrates the wood is central to its color and texture. Stain works by soaking into the wood fibers. The depth of this penetration determines the richness and permanence of the color.
When the stain soaks in, it fills the pores and microscopic channels within the wood. This is what gives the wood its new hue.
However, this absorption process also involves moisture or solvents. As these carriers evaporate, they leave behind the color pigments and binder. This evaporation can cause the wood fibers to swell and then dry out, leading to the raised grain effect.
Therefore, the very process that gives the wood its color can also create a surface that needs further preparation for a smooth finish. A deeper stain penetration usually means a more vibrant color but also a higher likelihood of significant raised grain, making post-stain sanding more important.
Do You Sand Between Stain and Polyurethane
The question of whether to sand between staining and applying polyurethane is a common one, and the answer is a resounding yes, with a crucial caveat: use a very fine grit sandpaper. This step is not about removing the stain you just applied. Instead, it’s a light scuff-sanding aimed at smoothing out any imperfections and preparing the surface for optimal adhesion of the polyurethane topcoat.
Think of it as a polishing step rather than a stripping step.
This light sanding is essential for achieving that glass-like, smooth finish that makes wood projects look professional. Skipping this step can result in a finish that feels rough, looks uneven, and is more prone to chipping or peeling over time. It ensures the polyurethane adheres well and creates a durable protective layer.
The key is using the right grit and applying just enough pressure to accomplish the task without damaging the stain color.
The Purpose of Scuff Sanding
Scuff sanding is a technique used in finishing to create a slightly roughened surface. This might sound contradictory when you want a smooth finish, but it’s a vital preparatory step. The primary purpose of scuff sanding between stain and polyurethane is to improve adhesion.
Polyurethane, like many finishes, adheres best to a surface that has a little “tooth” or grip. A perfectly smooth, glossy surface can be too slick for the polyurethane to bond with effectively.
By lightly abrading the surface with a very fine-grit sandpaper (typically 220 grit or higher), you create microscopic scratches. These tiny imperfections provide mechanical anchors for the polyurethane. This enhanced adhesion means the protective coating is less likely to peel, chip, or delaminate over time.
It’s a crucial step for the longevity and durability of your wood finish. It ensures the layers work together as a cohesive protective system for your wood.
Choosing the Right Grit Sandpaper
Selecting the correct grit of sandpaper for sanding after staining and before polyurethane is critical. Using a sandpaper that is too coarse can easily remove the stain, leaving you with a patchy, lighter color, and potentially deep scratches that will be visible through the polyurethane. The goal is to lightly abrade the surface, not to remove material.
For this specific step, you should reach for very fine-grit sandpaper. Sandpaper is graded by numbers, where a higher number indicates a finer grit. Common recommendations for sanding between stain and polyurethane are:
- 220-grit sandpaper This is often considered the standard for this task. It’s fine enough to smooth raised grain and create a good surface for adhesion without being aggressive enough to easily remove stain.
- 320-grit sandpaper If you want an even smoother surface, or if your stain is particularly delicate, 320-grit can be an excellent choice. It offers a gentler abrasion.
- 400-grit sandpaper For very fine finishes or when working with very soft woods, 400-grit can also be used. This is an extremely fine grit that will ensure maximum smoothness.
Always start with the finest grit you think is necessary and test it in an inconspicuous area if you are unsure. The key is to use enough pressure to knock down the raised grain and create a slight profile for the polyurethane, but not so much that you cut through the stain layer.
Practical Steps for Sanding After Staining
Successfully sanding after staining and before applying polyurethane involves a few key steps. It’s about being gentle and thorough. You’ve invested time in staining your piece to achieve a specific look, and this intermediate sanding step is designed to enhance that look and protect it.
By following these practical steps, you can ensure a smooth transition from stained wood to a beautifully finished surface.
The process begins once your stain has completely dried. This is very important; attempting to sand while the stain is still wet or even slightly tacky can lead to a gummy mess, pulling the stain off the wood and creating an uneven finish. Always refer to the stain manufacturer’s instructions for drying times, as these can vary depending on the product and environmental conditions like humidity and temperature.
Drying Time is Crucial
Patience is a virtue in woodworking, and it’s especially important when it comes to drying times. The stain must be thoroughly dry before you even think about sanding. If you try to sand too soon, you risk lifting the stain, creating muddy patches, or dragging pigment across the surface.
This would undo all the hard work you put into achieving an even stain color.
Different types of stains have different drying characteristics. Oil-based stains typically take longer to dry, often 24-48 hours, and sometimes even longer in humid conditions. Water-based stains usually dry faster, sometimes within 4-6 hours, but they can still require longer for a complete cure, especially before applying a topcoat.
Always check the product label for specific drying and recoating times. A good rule of thumb is to wait at least 24 hours, or until you are absolutely certain the stain is dry to the touch and does not feel cool or damp.
Consider the environment where your project is drying. Good ventilation and moderate temperatures (around 70°F or 21°C) will help the stain dry more efficiently. High humidity can significantly slow down the drying process for both oil and water-based finishes.
If you’re in a hurry, you might use a product designed for faster drying, but always respect the recommended time frames for sanding and recoating.
Light Sanding Technique
When it comes time to sand, remember the mantra: light and even. You are not trying to remove the stain. You are gently knocking down the raised grain and smoothing out any dust nibs that may have settled.
The goal is to create a smooth surface for the polyurethane to adhere to, not to alter the color.
Here’s how to do it:
- Start with your chosen fine-grit sandpaper (220-grit or higher).
- Fold the sandpaper or use a sanding sponge for a softer touch. You can also use a sanding block to ensure even pressure.
- Sand in the direction of the wood grain. Always follow the grain lines.
- Apply very light pressure. Let the sandpaper do the work.
- Make long, smooth strokes across the entire surface. Overlap your strokes slightly.
- Work systematically, covering the entire area you plan to apply polyurethane to.
- Frequently check the surface by running your hand over it. It should feel noticeably smoother.
Avoid sanding in circles or against the grain, as this will create visible scratches that will show up under the polyurethane. The sanding should take only a few minutes per section. The wood should feel silky smooth after this step.
If you notice any areas where the stain seems to have been removed, you’ve likely sanded too aggressively and may need to re-stain or accept a slightly altered color.
Cleaning Up Dust After Sanding
Dust is the enemy of a smooth finish. After sanding, it’s absolutely essential to remove all traces of dust before applying polyurethane. Even the finest dust particles can create an undesirable texture under your clear coat.
This cleaning process is just as important as the sanding itself.
Here’s how to effectively remove sanding dust:
- Vacuum first Use a vacuum cleaner with a soft brush attachment to remove the bulk of the dust from the surface, edges, and crevices of your project. Move in the direction of the grain.
- Use a tack cloth A tack cloth is a specially treated, slightly sticky cloth designed to pick up fine dust particles that vacuuming might miss. Gently wipe the surface with the tack cloth, again moving with the grain. Do not press hard, as you don’t want to leave any residue from the tack cloth itself.
- Compressed air (optional) If you have access to compressed air, you can blow away loose dust from harder-to-reach areas. Be sure to wear eye protection and aim away from your project if there’s any chance of blowing dust back onto the surface.
- Final wipe down A clean, dry microfiber cloth can be used for a final gentle wipe, again following the grain.
The surface should look and feel completely clean and smooth. If you see any dust specks, repeat the tack cloth step. This meticulous cleanup ensures your polyurethane goes on smoothly and adheres properly, creating a flawless finish.
When Not to Sand After Staining
While sanding after staining and before polyurethane is a standard practice for many finishing projects, there are a few specific situations where you might skip this step. These exceptions usually involve particular types of finishes or desired aesthetic outcomes. It’s important to understand the specific requirements of your chosen products and the look you are aiming for before deciding to bypass this intermediate sanding.
For instance, some specialty stains are designed to be a final color coat themselves, or they are meant to be overcoated with a specific type of finish that does not require sanding between layers. Additionally, if your goal is a very rustic or heavily distressed look, a perfectly smooth finish might not be desired, and therefore, the need for intermediate sanding is reduced. Always consult the manufacturer’s instructions for the best results.
Specialty Stains and Finishes
Some wood finishing products are formulated differently and may not require the traditional sanding step. For example, oil-based stains that contain a significant amount of binder might act more like a thin stain-and-finish in one product. If the product is labeled as a “stain and seal” or “stain and topcoat,” it might be designed for direct application of subsequent coats without sanding.
However, even with these products, a light scuff sand might still be beneficial for optimal adhesion of the final coat.
Another scenario involves certain types of finishes. For example, if you are applying a shellac finish, it is generally recommended to lightly sand between coats. However, if you are using a wipe-on polyurethane or a very thin oil-based finish, the surface may not raise grain as much, and the finish itself might be more forgiving.
Always read the product label and technical data sheets carefully.
For instance, some faux finishing techniques or antiquing methods might involve layering colors or glazes. In these cases, the texture and adhesion characteristics of the underlying layers might be different, and the standard sanding procedure might not apply. When in doubt, always perform a test on a scrap piece of wood to see how the products interact.
Achieving a Distressed or Rustic Look
If your project calls for a distressed, antique, or rustic appearance, the need for perfectly smooth surfaces is often reduced or eliminated. In these styles, a certain level of texture, imperfection, and visible grain is part of the charm. For such finishes, you might choose to skip the sanding step after staining if the slightly rough texture contributes to the desired effect.
For example, when creating a farmhouse table or an old barn wood look, the natural texture of the wood and any minor roughness after staining can actually enhance the aged appearance. You might still want to ensure there are no sharp splinters, but a perfectly smooth finish is not the goal. In such cases, after the stain is dry, you might proceed directly to applying a protective topcoat like wax or a matte polyurethane, or you might even skip a heavy topcoat altogether if the finish is for decorative purposes only.
However, even for distressed finishes, it’s wise to consider the overall durability needed. If the piece will see a lot of wear and tear, you might still want a smooth, well-adhered protective layer, even if the overall aesthetic is not perfectly polished. This often involves a compromise—perhaps a very light scuff sand and a matte topcoat to maintain some texture while still providing protection.
Polyurethane Application and Sanding
Applying polyurethane is the final stage of protecting and beautifying your stained wood. This protective layer can transform a stained piece into something durable and water-resistant. However, the smoothness and clarity of this final finish depend heavily on the preparation of the surface before application.
Sanding is not just for between stain and polyurethane; it’s also relevant between coats of polyurethane itself.
This section will guide you through the process of applying polyurethane and how sanding plays a role in achieving a flawless, professional-looking final coat. You’ll learn about the types of polyurethane, how to apply them, and the importance of sanding between coats for the best results.
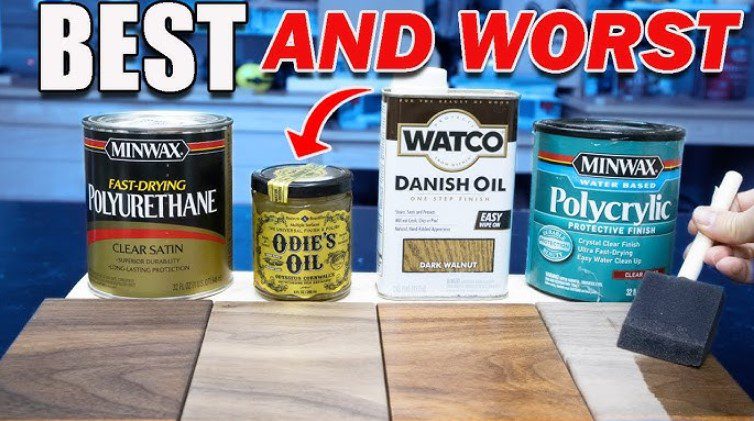
Types of Polyurethane
Polyurethane is a versatile finish that offers excellent durability and protection. There are several types available, each with slightly different properties, application methods, and drying times. Understanding these differences can help you choose the best product for your project and finishing goals.
- Oil-Based Polyurethane This is a very durable and traditional choice. It dries to a hard, protective film that offers good resistance to heat, water, and chemicals. However, it tends to yellow slightly over time, giving a warm amber tone that can be desirable for certain woods. It also has a strong odor and longer drying times, often requiring sanding between coats.
- Water-Based Polyurethane Also known as polyurethane varnish or acrylic polyurethane, this type dries clear and does not yellow over time. It’s ideal when you want to preserve the true color of your stain. It dries much faster than oil-based versions, has a low odor, and cleanup is easy with water. While very durable, it may not offer quite the same level of scratch resistance as oil-based in some formulations.
- Wipe-On Polyurethane This is a thinner version of either oil-based or water-based polyurethane that is applied with a cloth. It’s known for being very easy to use and provides a smooth, even finish with fewer drips and runs. It’s excellent for small projects or intricate pieces where brushing might be difficult. It often builds up slower than brushing, requiring more coats.
Regardless of the type, all polyurethanes provide a protective barrier. Your choice will depend on factors like desired appearance (amber tone vs. clear), drying time, ease of application, and the level of durability required for the project.
Sanding Between Polyurethane Coats
Just like between stain and the first coat of polyurethane, sanding between coats of polyurethane itself is a critical step for achieving a professional, smooth finish. This process is often called “denibbing” or “de-nibbing.” It’s not about removing the previous coat but about smoothing out any imperfections that may have occurred during application.
When you apply polyurethane, tiny dust particles can settle on the wet surface, or small imperfections like drips or brush marks can appear as it dries. If you apply the next coat directly over these, they will be sealed in, creating a rough or uneven finish. Light sanding with a very fine-grit sandpaper (320-grit or higher, often 400-grit is preferred) removes these imperfections.
The sanding creates a fresh surface for the next coat to adhere to. This enhances the overall smoothness and clarity of the final finish. It also helps to level out the finish, ensuring a uniform sheen.
After sanding, always clean up the dust thoroughly with a tack cloth before applying the next coat of polyurethane.
Achieving a Smooth and Glossy Finish
The combination of proper staining, careful intermediate sanding, and meticulous polyurethane application is what leads to a truly smooth and glossy finish. The initial sanding after staining removes raised grain and provides a smooth base. Then, each subsequent sanding between polyurethane coats refines the surface, leveling out minor imperfections and preparing for the next layer.
Using a good quality polyurethane is important, but the technique of application is equally vital. Apply thin, even coats, working with the grain. Avoid overworking the finish or applying it too thickly, as this can lead to drips and an uneven texture.
Allow each coat to dry thoroughly according to the manufacturer’s instructions before sanding and applying the next.
The final coat is typically applied without sanding afterward, unless you are planning to rub out the finish to a satin or matte sheen using rubbing compounds. For a high gloss finish, the last coat should be applied to a perfectly smooth, dust-free surface that has been lightly sanded from the previous coat. The result of this careful process is a wood surface that is not only beautiful in color but also incredibly smooth to the touch and highly protected.
Frequently Asked Questions
Question: Do I need to sand every time I apply polyurethane
Answer: Yes, for the smoothest finish, it is generally recommended to lightly sand between most coats of polyurethane. Use a very fine grit like 320 or 400. This removes imperfections and ensures good adhesion for the next coat.
The final coat is usually not sanded unless you are planning to buff it to a satin or matte finish.
Question: Can I use steel wool instead of sandpaper after staining
Answer: While fine steel wool (0000 grade) can sometimes be used for light scuff sanding, sandpaper or a sanding sponge is generally preferred after staining. Steel wool can leave behind fine metal particles that may rust if they get trapped under the finish, especially with oil-based products. Sandpaper gives you more control and ensures a cleaner surface.
Question: How long should I wait after staining before sanding
Answer: You should wait until the stain is completely dry. This can take anywhere from 6-24 hours or even longer, depending on the type of stain and humidity. Sanding too soon can lift the stain, causing blotchiness.
Always check the manufacturer’s recommendations for drying times.
Question: What if I accidentally sanded through the stain
Answer: If you sanded through the stain and see the bare wood, you will need to reapply the stain to that area. Be sure to feather the edges of the re-stained area into the surrounding color as much as possible. Then, let it dry completely before proceeding with the next steps.
Question: Is it okay to sand a piece of wood after applying the final coat of polyurethane
Answer: Typically, you do not sand the final coat of polyurethane if you want a glossy finish. Sanding the final coat is usually done only if you intend to rub out the finish to a lower sheen, like satin or matte, using rubbing compounds. For high gloss, the last coat should be applied to a clean, smooth surface and left as is.
Summary
Yes, you should sand after staining and before polyurethane. This step, using fine-grit sandpaper, knocks down raised grain and removes dust. It ensures your polyurethane adheres well and creates a smooth, durable finish.
Always let stain dry completely and clean dust thoroughly. This practice is key for a professional look.