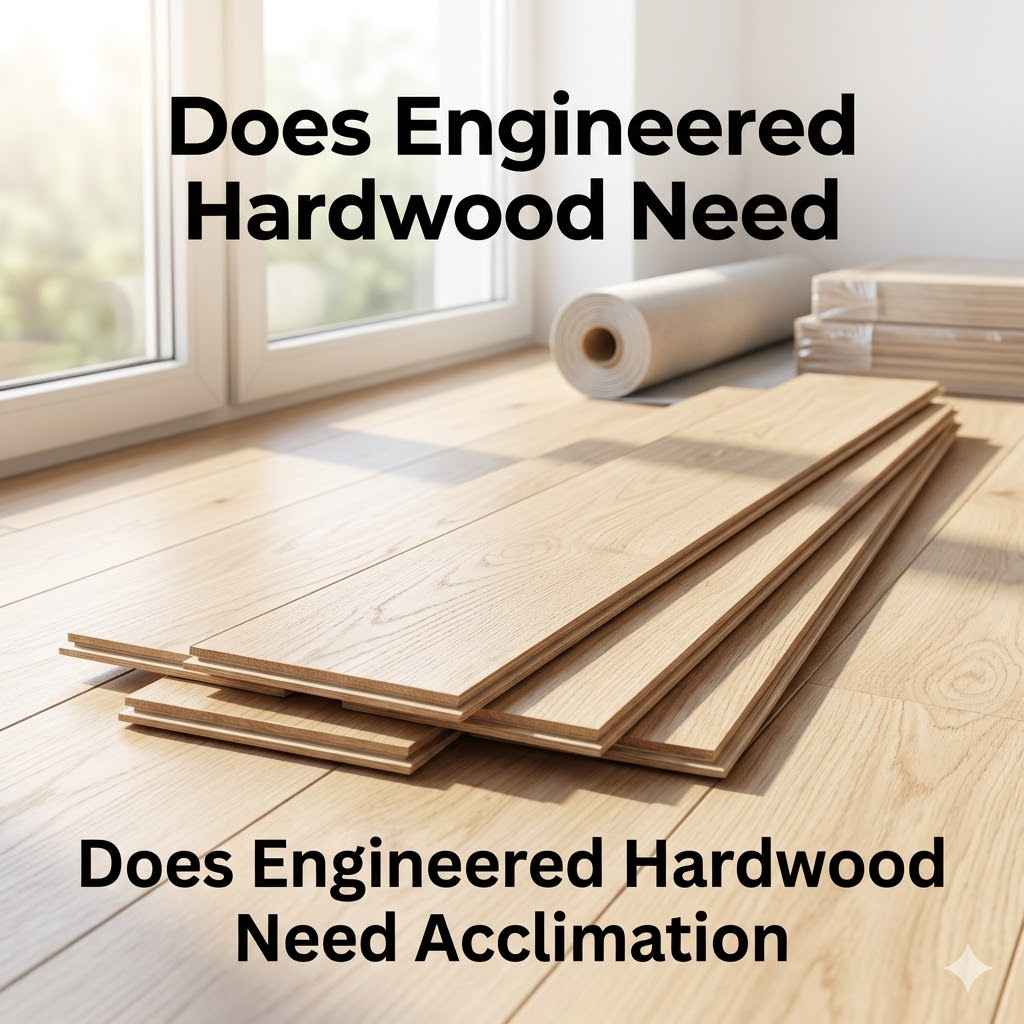
Does Engineered Hardwood Need Acclimation
You might be wondering about your new engineered hardwood floors. It’s a common question, especially if you’re installing them yourself. Many people find it a bit confusing to know if they need to let the wood sit before putting it down.
This guide will make it super simple. We’ll walk you through it step by step, so you can feel confident about your beautiful new floors. Let’s get your wood ready the right way.
Why Acclimation Matters for Engineered Hardwood
When you’re thinking about installing engineered hardwood floors, one of the first things people ask is whether it needs to sit in the room for a while before they put it down. This period of letting the wood adjust to the environment is called acclimation. For beginners, this step can seem a little mysterious, and it’s easy to get mixed up on whether it’s really necessary or how long it should take.
Getting this right is key to making sure your floors look great and last a long time without problems. We’ll break down exactly why Does Engineered Hardwood Need Acclimation? and what that means for your project.
Understanding Wood and Its Environment
Wood is a natural material that likes to breathe and react to the air around it. When you bring new wood flooring into your home, it’s often coming from a different place with different levels of moisture and temperature. Think of it like bringing a plant inside from a greenhouse; it needs to get used to the new conditions.
If you don’t let the wood adjust, it can swell up or shrink too much after it’s installed.
This change happens because wood contains moisture. The amount of moisture in the wood is called its moisture content. When the air in your home is very dry, the wood will lose moisture and shrink.
If the air is very humid, the wood will absorb moisture and expand. These changes can cause problems like gaps between the planks or even buckling if the wood doesn’t have time to settle into the room’s normal conditions.
Moisture Content Explained
Moisture content is a simple way to measure how much water is in wood. It’s usually shown as a percentage. For example, wood with 8% moisture content has 8 percent of its weight as water.
Different types of wood naturally have different moisture contents. Wood used for flooring is typically dried in kilns to a specific moisture level that is suitable for indoor use. However, this level needs to match the typical conditions of the room where it will be installed.
If the wood’s moisture content is too high or too low compared to your home, problems can arise.
The Role of Home Environment
Your home has a specific indoor climate. This includes the temperature and the humidity level. These factors can change throughout the year.
For instance, in the winter, heating systems can make the air very dry, while in the summer, air conditioning and humidity can make it moister.
Engineered hardwood flooring is made up of layers. The top layer is real hardwood, and the layers underneath are usually made of plywood or HDF (High-Density Fiberboard). This construction makes it more stable than solid hardwood, but it can still be affected by changes in humidity and temperature.
How Engineered Hardwood is Made
Understanding how engineered hardwood is built helps explain why it behaves the way it does. It’s a smart design that combines the beauty of real wood with added stability.
The core of engineered hardwood is made from multiple layers of material. These layers are glued together with their grain running in different directions. This cross-grain construction is what gives the flooring its strength and makes it resist changes caused by moisture and temperature much better than solid wood.
The Core Layers
Beneath the beautiful top layer of real hardwood, you’ll find several layers of other materials. These are often made from plywood, which is thin sheets of wood glued together, or from HDF, which is a dense board made from wood fibers.
These core layers are arranged so that the grain of each layer runs perpendicular to the layers above and below it. Imagine stacking plywood sheets with each one turned 90 degrees from the one below. This “cross-ply” construction is the secret to engineered hardwood’s stability.
It helps to lock the wood in place and prevents it from expanding or contracting as much as solid wood would when the humidity changes.
The Top Layer
The top surface of engineered hardwood is where the real beauty comes from. This layer is made from a veneer of actual hardwood, like oak, maple, or walnut. The thickness of this top layer can vary, and a thicker veneer means the floor can often be sanded and refinished more times if needed.
The quality of this top layer determines the look and feel of your floor. It’s this layer that shows the natural wood grain and color. While the core provides stability, the top layer provides the aesthetic appeal that makes engineered hardwood so popular.
The Acclimation Process Explained
So, you’ve got your new engineered hardwood boxes sitting in the room where they’ll be installed. What’s next? The acclimation period is all about letting those planks get used to the temperature and humidity levels of their new home.
This isn’t just a suggestion; it’s a really important step that most manufacturers require.
When you follow the acclimation process correctly, you’re helping to prevent future problems like gaps, cupping, or warping. It’s like letting dough rise before baking – it needs that time to reach its best state. Let’s look at how to do it right.
How Long Should Wood Acclimate
The time you need to let your engineered hardwood acclimate can vary. It depends on a few things, like how different the shipping environment was from your home’s environment, and what the manufacturer recommends.
Generally, most manufacturers suggest acclimation for at least 48 to 72 hours. However, some situations might call for longer. If your flooring was shipped during extreme weather, like very hot or very cold temperatures, it might need more time to adjust.
Always check the specific instructions that came with your flooring.
Factors Affecting Acclimation Time
The environment where the flooring is stored before installation is a big factor. If the flooring was stored in a climate-controlled warehouse that closely matches your home’s conditions, it might need less time. Conversely, if it was shipped or stored in a very different environment (e.g., a hot, humid shipping container arriving in a dry, heated home), it will need more time.
The type of engineered hardwood and the thickness of its top veneer can also play a small role, but the main driver is the difference between the storage conditions and the installation room conditions. The goal is to equalize the moisture content of the wood with the average moisture content of the air in your home.
Manufacturer Recommendations Are Key
Every flooring product is a little different. The people who made your specific engineered hardwood flooring know their product best. They will provide guidelines on how long to acclimate it and under what conditions.
These guidelines are usually found in the installation manual that comes with the product.
Ignoring these instructions can sometimes void the warranty. So, before you even open the boxes, take a look at the manufacturer’s paperwork. It’s the best source of information for your particular flooring.
Best Practices for Acclimation
To make sure your engineered hardwood acclimates properly, you need to follow a few simple rules. These rules help ensure the wood is in the best possible state to be installed and will remain stable for years to come.
The flooring should be stored in the room where it will be installed. This allows it to adjust to the exact temperature and humidity levels of that space. Storing it in a garage, basement, or another room might not give you accurate results.
Storing the Boxes
Keep the engineered hardwood in its original, unopened boxes. This protects the planks from dust, damage, and any sudden changes in the environment. Don’t stack the boxes too high, as this can sometimes affect air circulation.
Aim for a stable stack that allows air to move around.
The boxes should be placed on a flat, level surface. Avoid placing them directly on concrete floors, especially in basements, as concrete can sometimes emit moisture. If you’re concerned about this, you can place them on a vapor barrier or a few scraps of plywood.
Environmental Conditions During Acclimation
The room where the flooring is acclimating should have the same temperature and humidity that will be present when the floor is in use. This means running your HVAC system as you normally would. If it’s winter, your heating should be on.
If it’s summer, your air conditioning should be running.
Try to keep the humidity levels stable. For most engineered hardwood, a relative humidity level between 30% and 50% is ideal. If your home’s humidity is significantly different from this range, you might consider using a dehumidifier or humidifier during the acclimation period and even after installation to maintain these levels.
Monitoring Moisture Levels
While many people rely on the recommended time, experienced installers often check the moisture content of the wood. This gives a more precise way to know when the wood is ready.
A moisture meter is a tool that measures the percentage of moisture in wood. It’s a small, handheld device with probes that you insert into the wood. Getting readings from multiple planks and different boxes will give you a good average.
Using a Moisture Meter
A moisture meter is a worthwhile investment if you plan to do any flooring installation. It’s fairly easy to use. You simply push the probes into the surface of the wood.
The meter will then display a reading of the moisture content.
When using a moisture meter, always test multiple planks from different boxes to get a representative reading. Also, try to test in a few different spots on each plank to ensure you’re getting an accurate picture of the wood’s moisture level throughout.
Target Moisture Content
The ideal moisture content for engineered hardwood flooring is usually between 6% and 9%. However, this can vary slightly depending on the manufacturer and the type of wood. The most important thing is that the moisture content of the flooring is consistent with the moisture content of the subfloor and the typical indoor environment.
If the flooring’s moisture content is significantly higher or lower than the subfloor, or if it’s outside the manufacturer’s recommended range, it’s not ready for installation. You’ll need to continue acclimating it until the readings are acceptable.
Why Skipping Acclimation Is Risky
It might be tempting to save time and skip the acclimation process, especially if you’re excited to see your new floors installed. However, this is one of the most common mistakes DIYers make, and it can lead to costly problems down the road.
When you don’t give the wood enough time to adjust, it’s more likely to react to changes in your home’s environment after installation. This can affect how the planks fit together and the overall look and durability of your floor.
Common Problems from Skipping Acclimation
There are several issues that can arise if you don’t acclimate your engineered hardwood. These problems can range from minor cosmetic flaws to more serious structural damage to your flooring.
One of the most frequent issues is gapping. This is when the planks shrink after installation, leaving visible spaces between them. On the other hand, if the wood expands too much because it absorbed moisture, it can cause cupping, where the edges of the planks lift up, or buckling, where the entire floor rises up in places.
Gapping Between Planks
Gapping happens when the wood dries out and shrinks after it’s been installed. If the wood was too moist when installed, it will continue to lose moisture and contract as your home’s heating system dries out the air, especially in winter. This shrinkage pulls the planks apart, creating noticeable gaps.
These gaps can be unsightly and can also collect dust and dirt, making them difficult to clean. In some cases, the gaps can become large enough to catch your feet on or allow small objects to fall through.
Cupping and Buckling
Cupping occurs when the edges of the planks are higher than the center. This happens when the edges absorb more moisture than the center, causing them to swell. If the entire floor swells unevenly, it can lead to buckling, where sections of the floor lift off the subfloor.
Buckling is a more serious problem. It means the flooring is under too much stress and has nowhere to expand. This can happen if the flooring was installed too tightly or if it absorbed a significant amount of moisture and expanded beyond its limits.
Correcting buckling often requires removing and reinstalling portions of the floor.
Warranty Voiding
Most flooring manufacturers have specific installation requirements outlined in their warranty documents. Skipping the acclimation period is often a direct violation of these requirements.
If you file a warranty claim for issues like gapping, cupping, or buckling, and the manufacturer finds that the flooring was not acclimated according to their guidelines, they may deny your claim. This means you’ll be responsible for the cost of repairs or replacement yourself.
Understanding Warranty Terms
It’s crucial to read your flooring’s warranty information carefully before you purchase and certainly before you install it. These documents will specify the required acclimation time, temperature, and humidity ranges, as well as how to properly measure moisture content if required.
The warranty is there to protect you if there’s a manufacturing defect. However, it’s also designed to ensure that the product is installed correctly to perform as intended. Proper acclimation is a fundamental part of correct installation.
Consequences of Non-Compliance
If your flooring fails due to issues that could have been prevented by acclimation, and you didn’t follow the manufacturer’s instructions, you’re essentially on your own. The warranty won’t cover the damage.
Repairing these types of flooring issues can be expensive. It might involve replacing individual planks, or in severe cases, removing and reinstalling a large section of the floor. This is why taking the time to acclimate the wood is a small price to pay for long-term peace of mind and a beautiful, stable floor.
When Acclimation Might Be Less Critical
While acclimation is generally a must-do for engineered hardwood, there are a few specific scenarios where its importance might be slightly reduced, or the process might look a little different. These are exceptions, not the rule, and always require careful consideration and confirmation with the manufacturer.
One such case is when you’re installing flooring in a brand-new construction home that has been climate-controlled for an extended period. Another might be if the flooring is being installed over a radiant heating system, which has its own set of specific acclimation requirements.
New Construction Homes
In new construction, especially if the home has been climate-controlled for a significant amount of time (months, not just weeks), the indoor environment might already be very stable. If the builders have maintained consistent temperature and humidity levels from the early stages of construction, the air in the home might be very similar to the air where the flooring was manufactured.
However, even in these situations, it’s still wise to measure the moisture content of both the flooring and the subfloor. This provides concrete data rather than assumptions about the home’s environment. If the readings are close and within the manufacturer’s acceptable range, the acclimation time might be shorter.
Stable Indoor Climate
A home that has had its HVAC system running consistently for an extended period will have a more stable relative humidity (RH) and temperature. This stability is crucial for wood products. If the home’s environment has been maintained within the manufacturer’s recommended parameters for a long time, the flooring may require less acclimation time to match it.
Think of it this way: if the flooring arrives in an environment that is already very similar to its intended home, the shock of moving to a new climate is less severe. This reduces the need for a long adjustment period.
Measuring the Environment
The most reliable way to determine if acclimation can be shortened in a new home is by using tools. A hygrometer can measure the relative humidity, and a thermometer measures the temperature. These readings should be compared to the manufacturer’s specifications for acclimation.
If the RH and temperature in the new home are within the acceptable range for your flooring, and have been for a while, you can then proceed to measure the moisture content of the flooring itself. If the flooring’s moisture content matches the subfloor and the home’s environment, you might be able to proceed with installation sooner.
Flooring Over Radiant Heating Systems
Radiant heating systems, which heat the floor from underneath, have unique requirements for flooring installation. Engineered hardwood is often a good choice for these systems because of its stability.
When installing over radiant heat, the acclimation process needs to be carefully coordinated with the heating system’s operation. The manufacturer will have specific instructions that often involve running the radiant heat system at a certain temperature for a period before and during installation.
Specific Radiant Heat Protocols
Manufacturers typically provide a detailed protocol for acclimating and installing flooring over radiant heat. This usually involves gradually increasing the temperature of the radiant heating system to a specific level (e.g., 70-75°F or 21-24°C) and maintaining it for a set duration, such as 72 hours.
This process helps to drive out any excess moisture from both the subfloor and the flooring material itself. It also ensures that the flooring is stable at the operating temperature it will experience once installed.
Subfloor Moisture Testing
Testing the moisture content of the subfloor is exceptionally important when installing over radiant heating. The subfloor must be well within acceptable moisture limits before the engineered hardwood is even brought into the room. If the subfloor has too much moisture, it can transfer heat unevenly and damage the flooring.
The acceptable moisture content for the subfloor will be detailed in the flooring manufacturer’s installation guide, as well as potentially in the radiant heating system’s manual. Always adhere to the stricter of the two if there’s a discrepancy.
Manufacturer Approval for Deviations
Ultimately, the final authority on acclimation requirements is the manufacturer of your engineered hardwood flooring. If you believe your situation might be an exception, or if you have questions about the process, you should always contact their technical support department.
They can provide guidance based on the specific product you have purchased and the conditions of your installation. Never deviate from recommended practices without explicit approval from the manufacturer. This ensures you maintain your warranty and achieve the best possible results for your new floor.
Checking Your Subfloor and Home Environment
Before you even think about acclimating your engineered hardwood, it’s crucial to ensure that your home and the subfloor are ready. The best flooring in the world can have problems if the base it’s installed on isn’t right, or if the general conditions in your home are extreme.
This means checking the moisture levels of your subfloor and making sure your home’s climate is within the acceptable ranges. These are fundamental steps for a successful flooring installation that lasts.
Subfloor Moisture Testing
The subfloor is the foundation of your new floor. It’s usually made of plywood or concrete. If the subfloor is too wet, it can cause moisture to transfer up into your engineered hardwood, leading to swelling, buckling, and even mold growth.
You need to test the moisture content of your subfloor using a specialized meter. For concrete subfloors, a calcium chloride test or an in-situ probe test is often recommended. For wood subfloors, a pin-type moisture meter is commonly used.
Concrete Subfloors
Concrete subfloors can hold a lot of moisture, especially if they are new or located above a basement or crawl space that isn’t properly sealed. Testing is essential. A common and reliable method is the calcium chloride test, which measures the amount of moisture vapor emitted by the concrete.
Another method is the in-situ probe test, which involves drilling holes into the concrete and inserting probes to measure the relative humidity within the slab. Both of these tests have specific procedures and acceptable limits outlined by flooring manufacturers.
Wood Subfloors
Wood subfloors, like plywood or OSB (Oriented Strand Board), also need to be checked for moisture. They can absorb moisture from the air or from a damp crawl space. The moisture content should be within a few percentage points of the moisture content of the flooring itself, as recommended by the manufacturer.
Using a pin-type moisture meter for wood subfloors is straightforward. Insert the pins into the wood, and the meter will give you a reading. Ensure you take readings from multiple areas of the subfloor to get an accurate average.
Maintaining Proper Home Humidity
The environment in your home plays a significant role in the stability of your engineered hardwood floors. Fluctuations in humidity are a primary cause of wood movement.
Aim to keep your home’s relative humidity (RH) within the range recommended by your flooring manufacturer. This range is typically between 30% and 50% RH. Maintaining consistent humidity helps prevent issues like gapping and cupping.
Using Humidifiers and Dehumidifiers
During dry winter months, your heating system can drastically lower indoor humidity. In such cases, a humidifier can add moisture back into the air, bringing the RH up to the desired level. Conversely, during humid summer months, a dehumidifier can remove excess moisture.
Using these appliances consistently can help create a stable environment for your floors, both during acclimation and throughout their lifespan. It’s a good practice for the overall health of your home and its occupants as well.
Monitoring Humidity Levels
A simple device called a hygrometer can measure the relative humidity in your home. Place hygrometers in different rooms, especially where the flooring will be installed, to get an accurate reading. Regularly check these readings and adjust your humidifier or dehumidifier as needed.
Monitoring humidity is an ongoing process. It’s not just about the acclimation period; it’s about maintaining the best possible conditions for your floors year-round. This proactive approach helps prevent many common flooring problems before they even start.
Frequently Asked Questions
Question: Do I need to acclimate engineered hardwood if I live in a very humid climate?
Answer: Yes, even in humid climates, acclimation is important. While the wood might absorb moisture slowly, it still needs time to adjust to the specific humidity levels and temperature of your home’s interior before installation. High interior humidity can still cause expansion issues if not managed.
Question: Can I acclimate engineered hardwood in a basement?
Answer: It’s generally not recommended to acclimate flooring in a basement unless the basement is fully conditioned (heated and air-conditioned) and maintains consistent humidity levels similar to the main living areas. Basements can be prone to moisture and temperature fluctuations that are not representative of the installation room.
Question: What happens if I install engineered hardwood while it’s too wet?
Answer: If the wood is too wet when installed, it will likely absorb moisture from the air and expand. This expansion can cause the planks to push against each other, leading to cupping (edges lift up), buckling (floor lifts off the subfloor), or squeaking sounds as the wood moves.
Question: How do I know if my engineered hardwood is acclimated enough?
Answer: The best way is to follow the manufacturer’s specified acclimation time (usually 48-72 hours). For more certainty, use a moisture meter to measure the moisture content of the flooring planks. It should be within the range specified by the manufacturer and consistent with your subfloor and home environment.
Question: Can I stack the boxes of engineered hardwood too high during acclimation?
Answer: It’s best not to stack the boxes too high. Overly high stacks can restrict air circulation around the boxes, preventing the planks inside from acclimating evenly. Follow the manufacturer’s recommendations on stacking height, usually no more than 4-6 boxes high.
Final Thoughts
So, Does Engineered Hardwood Need Acclimation? Absolutely. Letting your engineered hardwood adjust to your home’s environment is a vital step for a beautiful and long-lasting floor. It prevents gaps, cupping, and other problems.
Follow the manufacturer’s instructions, check moisture levels if possible, and ensure your home’s climate is stable. Taking this time will save you trouble later.