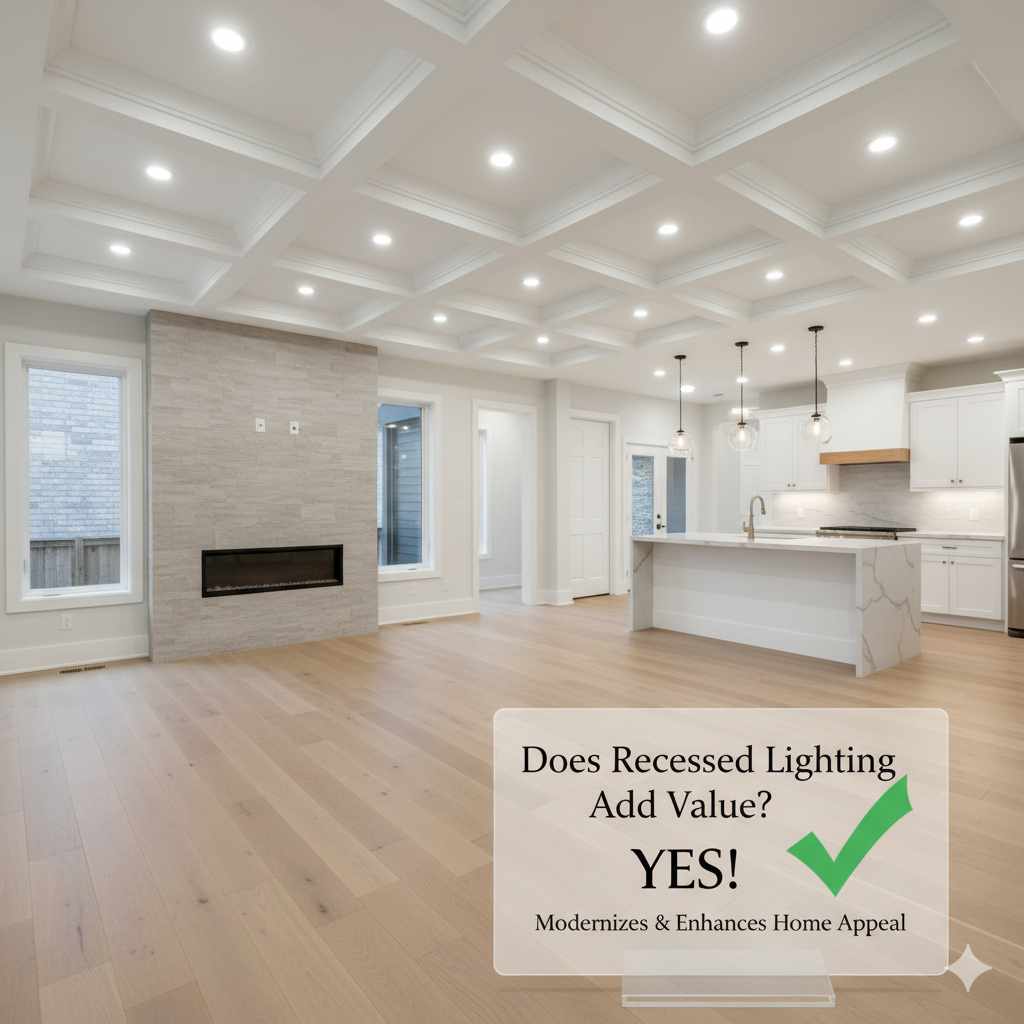
Does Recessed Lighting Add Value? Essential Guide
Does recessed lighting add value? Yes, recessed lighting can significantly enhance your home’s appeal and marketability, often leading to a good return on investment when selling. It provides a clean, modern look, improves functionality, and makes spaces feel larger and brighter, which buyers find very attractive.
Hey there, home improvers! Ever looked at a room and thought, “It just needs something more”? Maybe it feels a bit dim, or the fixtures are a little… well, old-fashioned. You’re not alone! Many of us wonder about lighting and how it affects our homes, especially when it comes to selling. Recessed lighting, those sleek lights tucked neatly into the ceiling, is a popular choice. But the big question is: does it actually add value to your home? We’re going to break down exactly what recessed lighting is, why it’s so popular, and how it can make your house shine brighter to potential buyers. Stick with me, and we’ll figure out if this is the right upgrade for you!
What Exactly is Recessed Lighting?
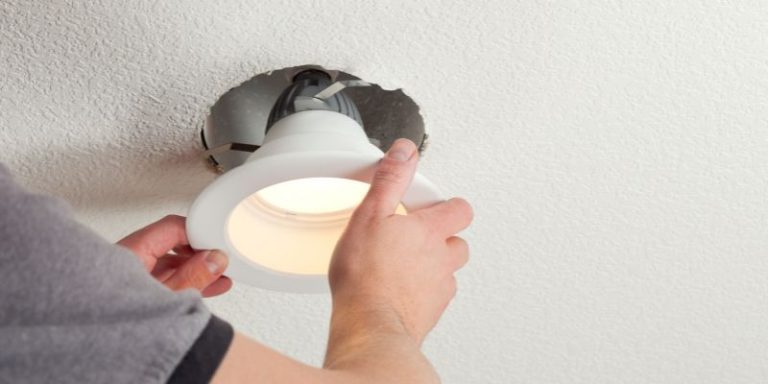
Recessed lighting, often called “can lighting” or “pot lights,” refers to light fixtures that are installed into a hollow space in the ceiling. They sit flush with the ceiling surface, giving a clean, uncluttered look. Unlike pendant lights or chandeliers that hang down, recessed lights are designed to blend in, providing illumination without drawing attention to themselves. This makes them incredibly versatile for almost any room in the house.

Why is Recessed Lighting So Popular?
There are several reasons why homeowners and designers love recessed lighting:
- Aesthetics: The biggest draw is the clean, modern look. They don’t take up visual space, making rooms feel larger and more open. This is a huge plus for buyers who want a contemporary feel.
- Versatility: Recessed lights can be used for general ambient lighting, task lighting (like over a kitchen counter), or accent lighting (to highlight artwork). You can control the mood of a room by dimming them or directing their beams.
- Improved Functionality: They provide even, consistent light distribution, eliminating dark corners and making spaces more functional for everyday activities.
- Energy Efficiency: Modern LED recessed lights use significantly less energy than older incandescent bulbs, saving you money on electricity bills and reducing your environmental footprint.
Does Recessed Lighting Add Value to a Home?
The short answer is a resounding yes, recessed lighting generally adds value to a home. Here’s why:
When you’re looking to sell your house, making it appealing to the widest range of buyers is key. Recessed lighting ticks a lot of boxes for potential homeowners:
- Modern Appeal: Buyers, especially those looking at newer or renovated homes, expect modern features. Recessed lighting is a hallmark of contemporary design. It signals that the home has been updated and is move-in ready.
- Enhanced Space Perception: A well-lit home feels larger and more inviting. Recessed lighting can make smaller rooms feel more spacious and open by eliminating bulky fixtures and providing uniform light.
- Improved Functionality and Livability: Buyers want homes that are practical and comfortable. Good lighting is essential for everything from cooking and working to relaxing. Recessed lighting provides excellent task and ambient lighting, making the home more functional.
- “Wow” Factor: Strategic placement of recessed lighting can create dramatic effects, highlighting architectural features, artwork, or creating a warm, inviting ambiance in living areas and kitchens. This can leave a lasting positive impression.
- Energy Savings: Especially with LED technology, recessed lighting is energy-efficient. This appeals to buyers concerned about utility costs and environmental impact.
While it’s difficult to put an exact dollar figure on the increase in value, as it depends on many factors like location, the overall condition of the home, and the quality of the installation, most real estate professionals agree that a well-executed recessed lighting installation is a worthwhile investment that can positively influence a home’s sale price and speed up the selling process.
Factors Influencing Value Added
Not all recessed lighting installations are created equal. The amount of value added depends on:
- Quality of Installation: Professional, clean installation with proper wiring and fixture placement is crucial. Poorly done work can detract from value.
- Type of Fixtures: Using high-quality, energy-efficient LED fixtures is always better. Dimmable options and adjustable beams also add appeal.
- Placement and Design: Thoughtful placement that addresses the room’s function and enhances its features will add more value than random placement.
- Overall Home Condition: Recessed lighting will add more value to a home that is otherwise well-maintained and updated. It’s part of a package of desirable features.
Recessed Lighting vs. Other Lighting Options
Let’s compare recessed lighting to other common choices to see where it shines:
| Lighting Type | Pros | Cons | Value Added Potential |
|---|---|---|---|
| Recessed Lighting | Clean look, versatile, makes rooms feel larger, good for general/task/accent lighting, energy-efficient (LED) | Requires ceiling access for installation, can feel “institutional” if overused or poorly placed, bulbs can be hard to reach for replacement (depending on fixture type) | High, especially with modern design and LED technology |
| Surface-Mount Fixtures (e.g., Flush Mounts, Semi-Flush Mounts) | Easier installation than recessed, good for lower ceilings, can be stylish | Can feel dated if not modern, take up visual space, less flexible for task/accent lighting | Moderate, depends heavily on style and current trends |
| Pendant Lights & Chandeliers | Statement pieces, good for accent and task lighting (e.g., over islands), add decorative flair | Can make rooms feel smaller, require specific placement, can be dated if not chosen carefully, can obstruct views | Moderate to High, depending on style and placement; often seen as a design choice rather than a functional upgrade for general lighting |
| Track Lighting | Highly adjustable, good for accent lighting and highlighting specific areas | Can look industrial or dated, often less aesthetically pleasing for general room lighting, visible hardware | Low to Moderate, usually seen as functional rather than enhancing overall home value |
| Wall Sconces | Provide ambient and accent lighting, can add decorative appeal, save ceiling space | Requires wall wiring, can be less effective for primary room illumination, can clutter walls | Moderate, adds to layered lighting design |
As you can see, recessed lighting offers a unique blend of aesthetics and functionality that often appeals more to buyers looking for a modern, updated home compared to some other options.
Where to Install Recessed Lighting for Maximum Value
Strategic placement is key to maximizing the value and appeal of recessed lighting. Here are the best spots:
Kitchens
Kitchens are a prime area for recessed lighting. They provide excellent general illumination and can be combined with task lighting.
- General Lighting: Install a grid of lights evenly spaced throughout the kitchen to provide overall brightness. Aim for spacing that ensures no dark spots. A common guideline is to space them about as far apart as they are high from the counter surface (e.g., if they are 8 feet from the counter, space them 8 feet apart).
- Task Lighting: Place lights directly over countertops, islands, and sinks. This provides focused light for food preparation and cleaning. Consider using adjustable or gimbal fixtures here to direct light where needed.
- Under Cabinet Lighting: While not technically recessed, it complements recessed lighting beautifully by eliminating shadows cast by upper cabinets.
Living Rooms and Family Rooms
These spaces benefit from a warm, inviting ambiance. Recessed lighting can provide this without the clutter of hanging fixtures.
- Ambient Lighting: Use a grid of lights around the perimeter of the room, a few feet away from the walls. This washes the walls with light and makes the room feel larger.
- Accent Lighting: Use adjustable or eyeball trims to highlight artwork, architectural features, or bookshelves.
- Task Lighting: Place lights strategically over reading areas or entertainment centers.
- Dimmer Switches: Essential for creating different moods, from bright and functional to cozy and relaxed.
Hallways and Entryways
These transitional spaces are often overlooked but are the first impression of your home.
- Consistent Illumination: Install lights evenly spaced down the center of hallways to ensure safe passage and a welcoming feel.
- Entryway Warmth: A few well-placed lights in an entryway can make a significant difference in its welcoming appeal.
Bathrooms
Recessed lighting is ideal for bathrooms, providing bright, shadow-free light.
- General Lighting: A few lights spaced evenly can illuminate the whole room.
- Vanity Lighting: Place lights above or beside the vanity mirror for bright, shadow-free illumination for grooming. Ensure the lights are rated for damp locations.
- Shower Lighting: Install recessed lights specifically rated for wet locations inside the shower enclosure for safety and to prevent shadows.
Bedrooms
Recessed lighting can create a serene and functional bedroom environment.
- Ambient Lighting: Use dimmable recessed lights for general illumination.
- Reading Nooks: Position lights to provide focused light for bedside reading without the need for lamps.
- Closet Lighting: Install lights inside larger walk-in closets for better visibility.
Choosing the Right Recessed Lighting Fixtures
When you’re looking at recessed lighting, you’ll encounter a few types of fixtures and components. Don’t worry, it’s simpler than it sounds!
Housing Types
The housing is the part that goes into the ceiling. The type you choose depends on your ceiling and installation situation:
- Remodel (or Old Work) Housings: These are designed for existing ceilings where you don’t have access from above. They have clips that secure them to the drywall. This is the most common type for retrofitting.
- New Construction Housings: These are used when the ceiling is open, like during a new build or a major renovation. They are attached directly to the joists.
- IC (Insulation Contact) Rated Housings: These are crucial if there is insulation above your ceiling. They are designed to be safely installed directly against insulation without posing a fire hazard. If you’re unsure, always opt for IC-rated housings.
- Non-IC Rated Housings: These require a gap of about 3 inches between the housing and insulation. If you have insulation, you must use IC-rated housings or ensure this gap is maintained, which is often more complex.
Trim Types
The trim is the visible part of the fixture that faces down into the room. It affects the look and how the light is directed.
- Baffle Trim: Has a ribbed or grooved interior to reduce glare. Good for general lighting.
- Reflector Trim: Has a shiny interior to maximize light output. Available in various finishes like white, chrome, or gold.
- Gimbal/Adjustable Trim: Allows you to tilt and swivel the light source to direct light onto specific objects like artwork.
- Opal/Frosted Lens Trim: Diffuses light for a softer glow.
- Wafer-Thin LED Trims: These are ultra-slim, integrated LED units that don’t require a separate housing and are perfect for tight spaces or when you want a very low-profile look. Many are “wet-rated” for bathrooms.
Light Source Options
This is where the light itself comes from.
- Integrated LED Housings: The LED light source is built directly into the housing. These are very energy-efficient, long-lasting, and often come with specific color temperatures (warm white, cool white, etc.). They are a popular choice for new installations and remodels.
- Standard Housings with LED Bulbs: You can use housings designed for traditional bulbs and then screw in LED replacement bulbs. This offers flexibility if you want to change bulb types later, but ensure the bulb fits and is compatible with the fixture.
Color Temperature and Brightness
When choosing LED lights, pay attention to:
-
Color Temperature (Kelvin): Measured in Kelvin (K).
- 2700K-3000K: Warm white, similar to incandescent bulbs. Great for living rooms, bedrooms, and dining areas for a cozy feel.
- 3500K-4000K: Neutral or cool white. Good for kitchens, bathrooms, and workspaces where brighter, more task-oriented light is needed.
- 5000K+: Daylight. Very bright and crisp, often used in garages or commercial spaces, but can be too harsh for most homes.
- Brightness (Lumens): Lumens measure how much light a bulb produces. The higher the lumens, the brighter the light. For general room lighting, you’ll typically need 700-1000 lumens per fixture. Task lighting might require more.
- Color Rendering Index (CRI): A higher CRI (80+ or 90+) means colors will look more natural under the light.
For the best value and modern appeal, consider integrated LED fixtures with dimmable capabilities and a color temperature of around 3000K for living areas and 3500K-4000K for kitchens and bathrooms.
How to Install Recessed Lighting: A Beginner’s Guide
Installing recessed lighting can be a rewarding DIY project! It requires some basic electrical knowledge and careful work, but it’s definitely achievable for a confident beginner. Always turn off the power to the circuit you’ll be working on at the breaker box before starting any electrical work. If you’re not comfortable with electrical wiring, it’s best to hire a licensed electrician. Safety first!
Tools and Materials You’ll Need
- Recessed light housings (choose remodel/old work, IC-rated if needed)
- Recessed light trims (with integrated LEDs or for LED bulbs)
- Wire strippers/cutters
- Screwdriver set (Phillips and flathead)
- Pliers
- Utility knife
- Pencil
- Tape measure
- Stud finder
- Drywall saw or keyhole saw
- Voltage tester (non-contact is easiest for beginners)
- Wire nuts
- Electrical tape
- Safety glasses
- Dust mask (if working in an attic)
- Ladder
- (Optional) Fish tape for pulling wires
Step-by-Step Installation Process
This guide assumes you are installing into an existing ceiling (remodel type).
- Plan Your Layout: Decide exactly where each light will go. Measure and mark the center points on the ceiling. Use a stud finder to ensure you aren’t placing a fixture directly under or too close to a joist or existing wiring.
- Turn Off Power: Go to your electrical panel and turn off the breaker for the circuit you’ll be working on. Use your voltage tester at the nearest existing light fixture or outlet on that circuit to confirm the power is OFF.
- Cut the Holes: Trace the template provided with your housing onto the ceiling at your marked locations. Carefully cut out the drywall using a drywall saw or keyhole saw.
-
Run Electrical Wire: This is often the trickiest part. You’ll need to run electrical cable (e.g., 14/2 NM-B wire for a 15-amp circuit) from your power source (usually an existing junction box or switch) to each new light location.
- If working from an attic, it’s easier to drop wires down through the holes.
- If working from below, you might need to cut larger access holes or use a fish tape to pull wires through walls and ceilings.
- Ensure wires are properly secured and follow local electrical codes (e.g., how far from joists they can be run, how they are fastened). For guidance on safe wiring practices, refer to resources like the Consumer Product Safety Commission (CPSC).
-
Wire the Fixture: Once the wire is pulled to a hole, carefully strip about 1/2 inch of insulation from the ends of the black (hot), white (neutral), and bare copper (ground) wires. Connect the wires from the power source to the wires inside the junction box of the recessed light housing:
- Black wire to black wire
- White wire to white wire
- Ground wire to ground screw or wire
Use wire nuts to secure the connections and wrap with electrical tape for extra security.
- Install the Housing: Push the junction box and wires up into the ceiling hole. Then, push the housing itself up into the hole. The remodel clips will spring out and grip the underside of the drywall. Secure the housing by tightening screws on the clips.
- Install the Trim and Bulb: If using integrated LED trims, they usually plug directly into the housing and then snap into place. If using a housing for separate LED bulbs, screw in your chosen LED bulb. Then, attach the trim piece according to its instructions – often by pushing it up until it clicks or by using spring clips.
- Test the Lights: Once all fixtures are installed and wired, go back to the breaker box and turn the power back on. Test each light to ensure it works.
Important Note: Electrical codes and best practices can vary by location. Always consult your local building department or a qualified electrician if you have any doubts. For more in-depth DIY electrical guidance, check out resources like This Old House, a trusted name in home improvement.
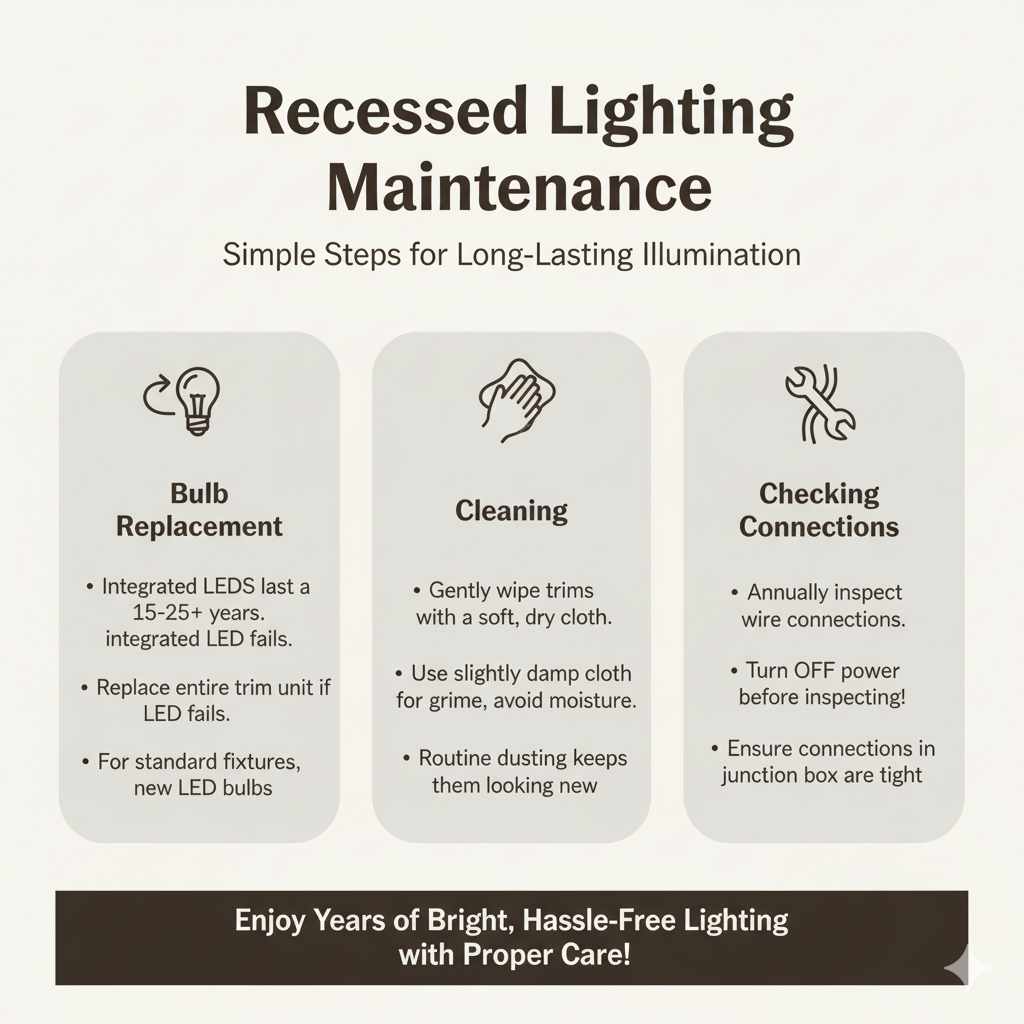
Recessed Lighting Maintenance
One of the benefits of modern LED recessed lighting is its low maintenance. However, there are a few things to keep in mind:
- Bulb Replacement: With integrated LEDs, you won’t need to replace bulbs for many years (often 15-25 years or more!). If a fixture does fail, you’ll typically need to replace the entire integrated trim unit. For fixtures using standard bulbs, simply screw in a new LED bulb when needed.
- Cleaning: Dust can accumulate on the trims. You can gently wipe them down with a soft, dry cloth during routine cleaning. If a trim is particularly grimy, use a slightly damp cloth, ensuring no moisture gets into the electrical components.
- Checking Connections: Periodically (perhaps once a year or if you notice any flickering), it’s a good idea to turn off the power and visually inspect the wire connections in the junction box if accessible. Ensure they are still tight and secure.
FAQs About Recessed Lighting and Home Value
How much does recessed lighting cost to install?
The cost varies significantly based on the number of fixtures, the type of fixtures chosen (integrated LED vs. housing + bulb), and whether you hire a professional electrician or do it yourself. For DIY, fixtures can range from $15-$50+ each. Professional installation typically costs $150-$300 per fixture, including parts and labor, but can be more for complex jobs.
Can recessed lighting make a small room look bigger?
Yes, absolutely! By eliminating bulky ceiling fixtures and providing even, unobtrusive illumination, recessed lighting can make a room feel more spacious and open. This is a key reason why it’s considered a value-adding upgrade.
Do I need an electrician to install recessed lighting?
While it’s a DIY-friendly project for those with basic electrical knowledge, it’s highly recommended to hire a licensed electrician, especially if you’re new to electrical work or if your home’s wiring is older. Incorrect electrical work can be dangerous and a fire hazard.
Is it worth installing recessed lighting just before selling?
Generally, yes. It’s a relatively affordable upgrade that can significantly improve a home’s perceived value and appeal to buyers. It’s a good investment for making your home more marketable, especially if your current lighting is outdated or inadequate.
What is the difference between recessed lighting and pot lights?
There is no difference. “Recessed lighting” is the technical term, while “pot lights” is a common nickname, especially in Canada and parts of the US, referring to the cylindrical housing that looks a bit like a pot.
How many recessed lights do I need in a room?
A common rule of thumb is to divide the room’s length and width by 2, then multiply those numbers to get the number of lights. For example, a 12×16 foot room might need (12/2) x (16/2) = 6 x 8 = 48? No, that’s not right! A better rule is to divide the room dimensions by 2 feet for spacing. So for a 12×16 room, you might place them roughly 6 feet apart in rows. Another method is to space them 4-6 feet apart for general lighting. Always consider ceiling height and room function. A lighting layout calculator or a professional can help determine the optimal number and placement.
Are LED recessed lights better than incandescent?
Yes, in almost every way for homeowners. LEDs are far more energy-efficient (using up to 80% less energy), last much longer (reducing replacement costs and hassle), produce less heat (improving safety and reducing cooling costs), and offer a wider range of color temperatures and dimming capabilities.
Conclusion:
So, does recessed lighting add value? Absolutely. It’s a smart, modern upgrade that enhances both the aesthetics and functionality of your home. From creating a clean, expansive feel in any room to providing crucial task lighting where you need it most, recessed lights are a versatile solution. They signal to potential buyers that your home is updated, well-maintained, and designed for comfortable, contemporary living.
Whether you’re planning to sell soon or simply want to enjoy a more beautifully lit home, investing in recessed lighting is a decision that pays off. With careful planning, the right fixture choices, and attention to detail (especially when it comes to electrical safety!), you can transform your living spaces. Remember, a well-lit home is a more inviting home, and that’s a value that’s hard to beat.