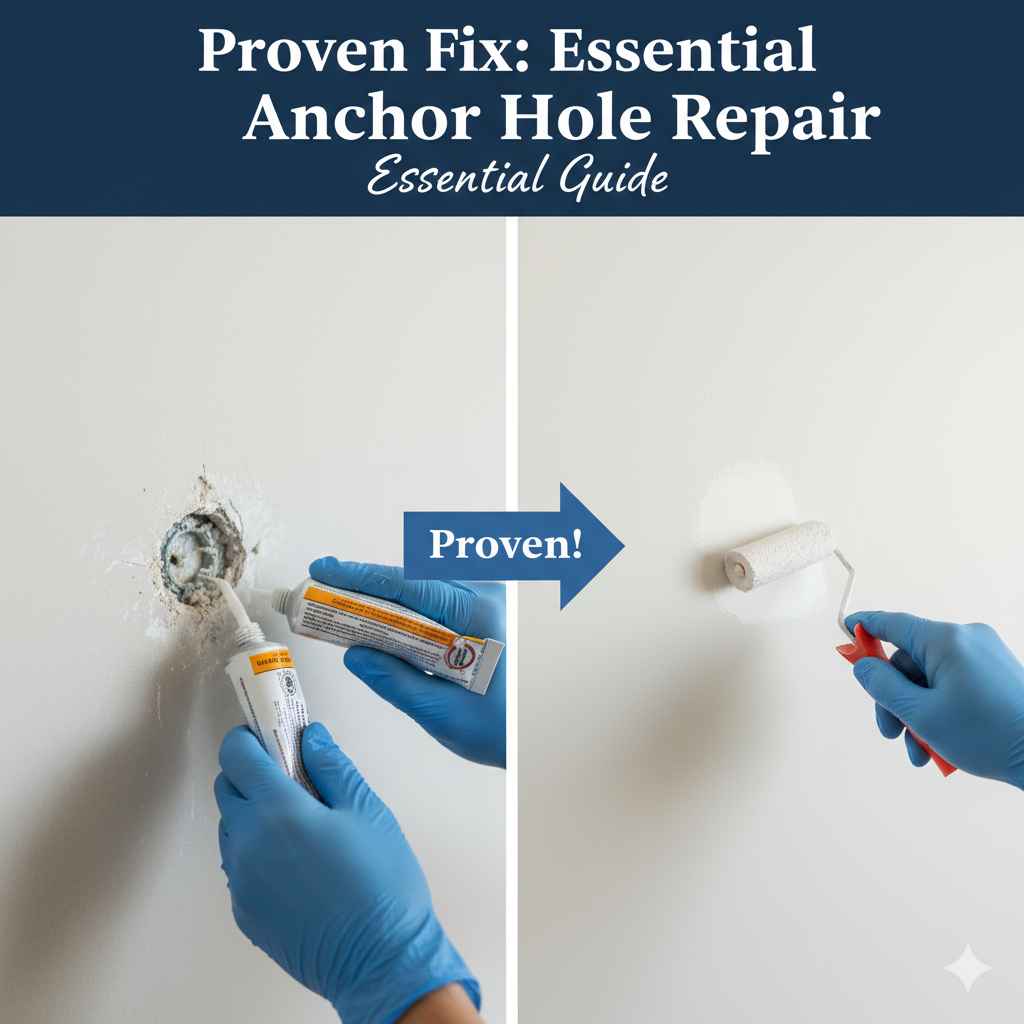
Proven Fix: Essential Anchor Hole Repair
The proven fix for a stripped anchor hole, especially for drywall or plaster, involves using wood glue or epoxy mixed with a filler like wood toothpicks or shredded paper to pack the hole tight. This creates a rock-solid anchor point for your screw or toggle, restoring strength immediately without needing to patch and repaint the wall first.
Hello there! I’m Md Meraj, and I know how frustrating it is when you’re hanging that new shelf or picture, and suddenly—spin, spin, spin—the anchor just spins freely in the wall. That stripped anchor hole is a common problem in many homes, whether you’re dealing with old plaster or slightly damaged drywall. It feels like a big project to fix, but I promise you, it’s surprisingly easy. You don’t need fancy tools or a contractor! We are going to turn that wobbly mess into a strong spot you can trust again. Stick with me, and we’ll go through the simplest, most reliable ways to repair those anchor holes, getting your wall ready for decoration in no time.
Why Anchor Holes Strip and How to Spot Them
Before we start drilling and patching, let’s quickly understand what causes these irritating gaps. Anchor holes strip when the material around them—usually drywall (gypsum board) or older plaster—crumbles or wears away, creating a void larger than the anchor can grip.
Common Causes of Anchor Failure
This usually happens for a few main reasons:
- Over-tightening: Turning the screw too hard causes the plastic anchor or the material inside the wall to strip out.
- Weight Load: Placing too much weight on a small anchor eventually forces the grip to fail, especially with heavy items like large mirrors or heavy curtain rods.
- Old or Brittle Material: In older homes, plaster can become dry and crumbly, making it very hard for any anchor to hold securely over time.
- Wrong Anchor Size: Using an anchor that is too small for the drilled hole will never create a tight grip, leading to early failure.
Identifying a Stripped Hole vs. a Loose Screw
Sometimes you might just have a loose screw, which is an easy fix. But if the screw turns endlessly without tightening, you have a stripped hole.
| Symptom | Diagnosis |
|---|---|
| Screw spins easily, no resistance. | Stripped Anchor Hole. The wall material is gone. |
| Screw stops turning but feels slightly wobbly. | Potentially Loose Anchor (Try removing and reinserting). |
| The head of the screw pulls slightly into the wall. | Severe stripping or using the wrong toggle type. |

Method 1: The “Toothpick and Glue” Fix (Best for Small Drywall Holes)
This is my favorite quick fix for minor stripping, especially when you don’t want to make a big repair. It works wonderfully because the glue—be it wood glue or, as many ask, Gorilla Glue—fills the void, and the wood shavings (from toothpicks or wooden skewers) provide physical structure for the screw to bite into.
Tools and Materials Needed
Gathering your simple supplies first makes the job stress-free. Remember, safety first: wear safety glasses when handling sharp objects or pouring glue.
- Wooden toothpicks or thin wooden skewers
- Strong adhesive (Wood Glue or Heavy-Duty Construction Adhesive like Gorilla Glue)
- Damp rag or paper towels
- A small utility knife or razor blade
- The original screw (or one slightly longer, if needed)
Step-by-Step Guide: Filling the Void
This process might seem basic, but its simplicity is what makes it so reliable for small anchor repairs.
- Remove the Old Anchor: Gently pull out the old plastic anchor or any loose debris from the hole. You want a clean opening.
- Prepare the Filler: Take several wooden toothpicks. You want enough to completely pack the hole once inserted.
- Apply the Adhesive: Dip the tips of the toothpicks into your glue. Wood glue works great, but if you need extra gripping power, heavy-duty construction adhesive (like the famous Gorilla Glue products) is an excellent choice for maximum bond strength in the void.
- Pack the Hole Tightly: Start inserting the glued toothpicks into the stripped hole. Push them in until the hole is completely packed and you can’t fit any more in. You are creating a new, dense wood-and-glue plug.
- Trim the Excess: Once the hole is packed solid, let the glue set for just a moment (follow the glue instructions—usually only a few minutes until tacky). Use your utility knife or razor blade to carefully slice off the protruding ends of the toothpicks flush with the wall surface.
- Let It Cure (Important!): This is the crucial part. Allow the glue to dry completely. For most standard wood glues, this means waiting at least 4 to 24 hours depending on the humidity and glue type. If you rush this, the plug will just break out when you drive the screw in.
- Redrill and Reinstall: Once fully dry, you can drill a very small pilot hole (slightly smaller than your screw threads) right into the center of your newly cured plug. Then, drive your original screw directly back into the plug. It will bite securely into the dense wood material you just created.
Method 2: Using Epoxy or Fast-Setting Filler (For Larger or Repeatedly Stripped Holes)
When toothpicks aren’t enough, or if the hole is already quite large (say, bigger than 3/8 inch), you need a more substantial filler that hardens rock-solid. Epoxy or specialized patching compounds offer incredible strength, essentially rebuilding the wall structure around the screw location.
Epoxy vs. Plaster Repair
If you are dealing with old plaster walls, using a two-part epoxy putty designed for wood or general repair can be superior to standard drywall spackle. For drywall, a strong setting-type compound works well.
| Material | Best For | Cure Time (Approximate) |
|---|---|---|
| Two-Part Epoxy Putty | Very large holes, high-stress areas, plaster. | 30 minutes to work, 1 hour to harden. |
| Setting-Type Joint Compound (e.g., Durabond) | Medium drywall holes where some sanding is expected. | 30–90 minutes depending on depth. |
| Wood Glue & Toothpicks | Small, simple drywall or wood stud repairs. | 4–24 hours. |
The Epoxy/Putty Method Steps
This method creates a durable patch that mimics the strength of wood or concrete within the void.
- Clear the Area: Ensure the stripped hole is clean of any dust or loose paper backing from the drywall.
- Mix the Epoxy (If applicable): If using a two-part epoxy putty, knead the required amounts of the two components together until you have a uniform color. Work quickly, as epoxy has a short working time.
- Force the Filler In: Using a putty knife or your finger (wearing gloves!), press the epoxy or patching compound firmly into the hole. You need to push it deep to ensure there are no air pockets. The goal is to overfill the hole slightly.
- Insert a Support Dowel (Optional but Recommended): For very large holes, push a small wooden dowel or a large, robust wooden skewer deep into the center of the wet epoxy. This acts as an internal reinforcement cage.
- Allow Full Cure: This is vital for epoxy. Do not touch or test the repair until the manufacturer’s recommended full cure time has passed (often several hours). Rushing this will cause the screw to rip out the semi-hard material.
- Drill the Pilot Hole: Once rock hard, use a drill bit that is slightly smaller than the diameter of your screw threads. Carefully drill into the center of the patch.
- Drive the Screw: Drive the screw into the cured plug. The screw threads will cut new, strong grooves into the hardened epoxy or filler, providing a grip far stronger than the original wall material.
Method 3: The “Bigger Toggle” Solution (For Major Drywall Damage)
Sometimes, the damage is so extensive that filling a small hole just won’t hold the weight you intend to hang. In these cases, the best fix is not just patching the hole but replacing the anchor mechanism itself with something designed to spread the load over a much larger area.
When to Switch to Toggle or Molly Bolts
If you were initially using a simple plastic expansion anchor, moving up to a toggle bolt or a molly bolt (a sleeve anchor) is the way to go. These anchors expand behind the wall, creating a sturdy metal brace against the backside of the drywall sheet.
If the original hole is already too big for even a standard toggle anchor, you will need to widen the hole slightly to insert the toggle wings properly.
Steps for Upgrading to a Toggle Anchor
This is slightly more involved, but it gives you load-bearing strength comparable to anchoring directly into a stud.
- Assess the Hole Size: Check the size of the toggle anchor you purchased. If the existing hole is significantly smaller than the collapsed metal wings of the toggle, you must widen it.
- Widen Carefully: Use a utility knife or a small drill bit to carefully widen the existing hole just enough so that the metal wings can pass through when folded up. Work slowly; you want the final hole to be just big enough for the wings to squeeze through, but no wider.
- Insert the Toggle: Collapse the metal wings of the toggle bolt, insert them through the widened hole, and allow them to spring open behind the drywall.
- Tighten the Anchor: Hold the bolt head and slowly tighten the bolt. As you tighten, the metal wings will pull firmly against the back of the drywall, creating a massive footprint that distributes the weight, fixing the stripped area completely.
- Check Stability: Give the anchor a good tug to ensure the metal wings are seated securely against the back surface of the drywall or plaster.
For excellent guidance on selecting the right toggle anchor for different wall types, organizations like the Green Building Advisor often have detailed charts on load capacities for various fasteners in different materials.
Fixing Anchor Holes in Plaster Walls: A Special Consideration
Plaster is fundamentally different from drywall. Drywall is gypsum sandwiched between paper; plaster is a hard layer of lime, gypsum, or cement over a lath (a thin wooden or metal mesh). When plaster strips, it usually crumbles completely rather than just tearing the paper facing.
Key Difference: Plaster Requires Density
Because old plaster can be brittle, filling the hole needs a material that bonds well to both the old plaster surface and the screw threads.
1. Use Wood Glue First (If Dry): If the plaster seems powdery, brush a thin coat of regular wood glue inside the hole and let it sit for 10 minutes. This consolidates the brittle surface.
2. Use Epoxy or Wood Fillers: For plaster, skip regular drywall mud. Use the two-part epoxy putty (Method 2) or the dense toothpick and glue method (Method 1). The density of the filler is key to preventing future crumbling around the anchor point.
3. Go Slightly Smaller: When drilling the pilot hole into the cured filler in plaster, err on the side of drilling a pilot hole that is slightly smaller than you think you need. Plaster doesn’t flex well under thread pressure.
Tips for Long-Lasting Repairs and Future Prevention
A good fix is one that lasts! Here are a few key tips from years of experience hanging things around the house to ensure this repair holds for years to come.
Tips for Maximizing Hold Strength
- Don’t Skip the Cure Time: I cannot stress this enough. Whether you use wood glue or epoxy, the moment the glue is cured, its structural integrity is achieved. Rushing this step is the #1 reason repairs fail quickly.
- Use a Pilot Hole: Even when filling a hole, always drill a small pilot hole before driving the screw in, especially when fixing into dense epoxy or hard wood filler plugs. This ensures the screw drives straight and creates the perfect thread pathway without pushing the repair material out.
- Consider a Longer Screw: If the original hole was stripped because the anchor sat too deep, using a slightly longer screw (but not so long it hits plumbing or wiring!) can sometimes grab solid material beyond the original damaged zone.
- Use the Right Tool: Use a cordless drill on a low clutch setting for driving the screws into the new plug. This prevents you from accidentally over-torqueing and stripping your brand-new repair spot.
Preventing Stripped Holes Next Time
Prevention is always easier than repair. When hanging anything new:
- Always locate studs first if hanging anything heavy (over 20 lbs). Studs are always best!
- When drilling, drill exactly the diameter recommended on the anchor packaging. Don’t go bigger.
- When screwing in plastic anchors, stop immediately when you feel strong resistance. The anchor should be snug, not strained.

Frequently Asked Questions (FAQ) About Anchor Hole Repair
Q1: Can I just use wood filler instead of toothpicks?
A: Yes, you can use regular wood filler or spackle, but it is usually not as strong as using wood filler combined with wooden elements (like toothpicks or dowels). Standard filler often shrinks significantly when drying, leaving air gaps. For heavy-duty holding, denser materials are better.
Q2: How long do I have to wait for Gorilla Glue to dry before screwing into it?
A: Gorilla Glue (polyurethane glue) takes time. While it might feel stiff in an hour, it fully cures over 24 hours for maximum strength. For a reliable anchor repair, wait at least 4–6 hours, but 24 hours is safest if the object will bear significant weight.
Q3: What if the hole is right next to another screw? Can I still fix it?
A: If the holes are too close (less than 3 inches apart), repairing one might compromise the structural integrity of the other. If you must repair both, use the epoxy method (Method 2) for both holes, allowing them to cure completely, and then opt for the largest, lightest-duty anchor possible for the item you are hanging.
Q4: Do I need to paint over the repair before I hang something?
A: No. If you used toothpicks and glue or epoxy, the material filling the hole is structural. It does not need to be painted to gain strength. You can paint the small plug area after it cures if you want it to match the wall perfectly, but wait until the paint is completely dry before hanging the object.
Q5: My plaster wall is crumbling badly around the hole. What’s the best anchor type now?
A: For crumbling plaster, ditch the small plastic anchors entirely. You must use a self-drilling metal anchor (Molly Bolt) or a proper spring-loaded toggle bolt. These distribute the load over a large, flat area behind the brittle plaster, preventing the load from being concentrated on one small weak point.
Conclusion: You’ve Got This!
Dealing with a stripped anchor hole feels like a setback, but as we’ve seen, it’s really just an opportunity to learn a surprisingly simple, effective repair trick. Whether you chose the quick toothpick-and-glue method for a small fix or upgraded to a powerful epoxy plug or a heavy-duty toggle anchor for a bigger job, you’ve successfully taken that wobbly spot and made it stronger than before.
Remember, home improvement is all about building confidence one small project at a time. By following these clear, step-by-step instructions, you’ve ensured that your shelf, artwork, or cabinet is now securely mounted and ready to hold its intended weight. Grab your tools, trust the cure time, and enjoy the satisfaction of a job well done. Happy hanging!