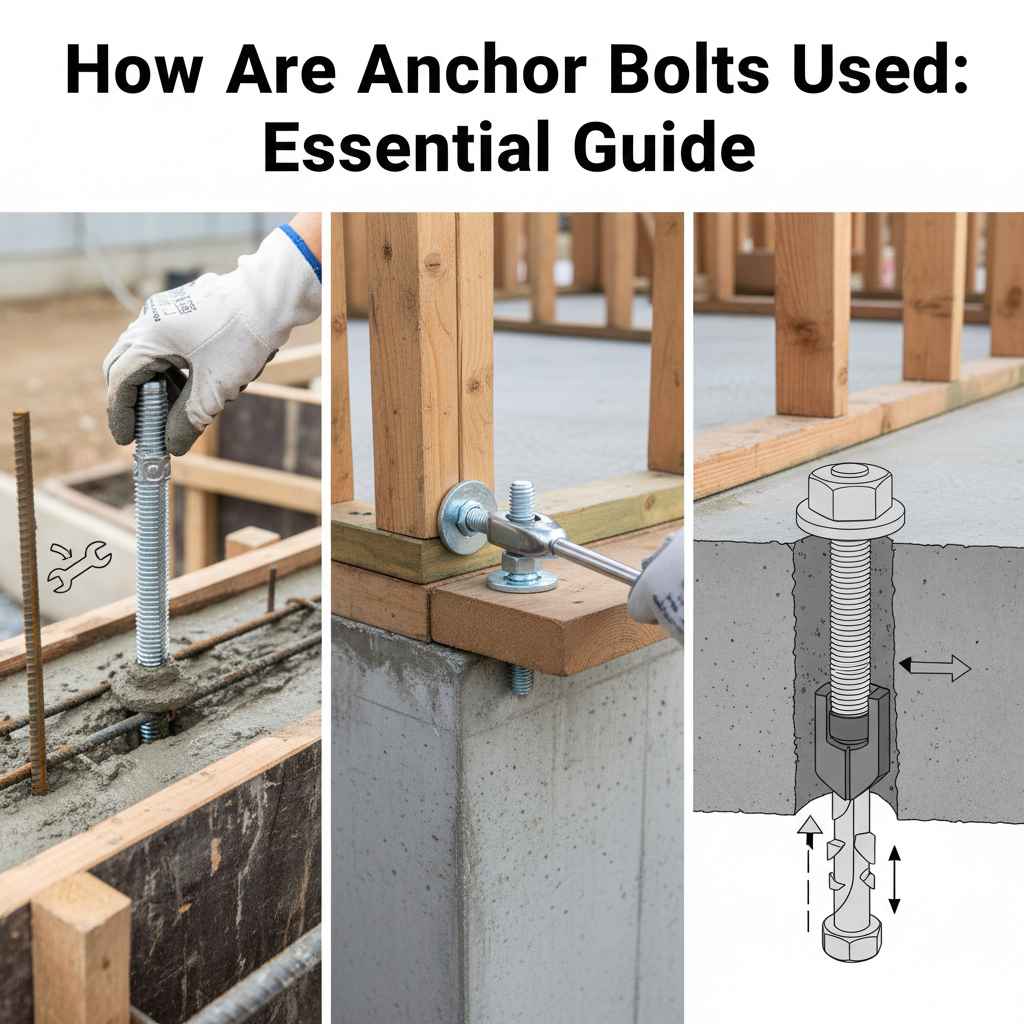
How Are Anchor Bolts Used: Essential Guide
Anchor bolts are threaded rods or heavy-duty fasteners driven deep into concrete or masonry foundations to securely connect structural elements, like wood sill plates or steel columns, preventing uplift and shifting. They ensure a rigid, permanent connection between the structure and its base, which is crucial for safety and longevity in building projects.
Welcome! If you’ve ever looked at the bottom of a house or deck and wondered how it stays firmly stuck to the concrete pad, you’re looking at the work of anchor bolts. Sometimes these things seem complicated, especially when you are just starting out with a big project. It can feel daunting to mix metal, concrete, and wood!
But don’t worry one bit. We are going to walk through exactly what anchor bolts are and how they are used, step by step. By the time we are done, you’ll feel confident understanding and perhaps even installing these vital connectors. This guide keeps things simple, focuses on practical application, and keeps your project safe and strong. Let’s get that base rock-solid!
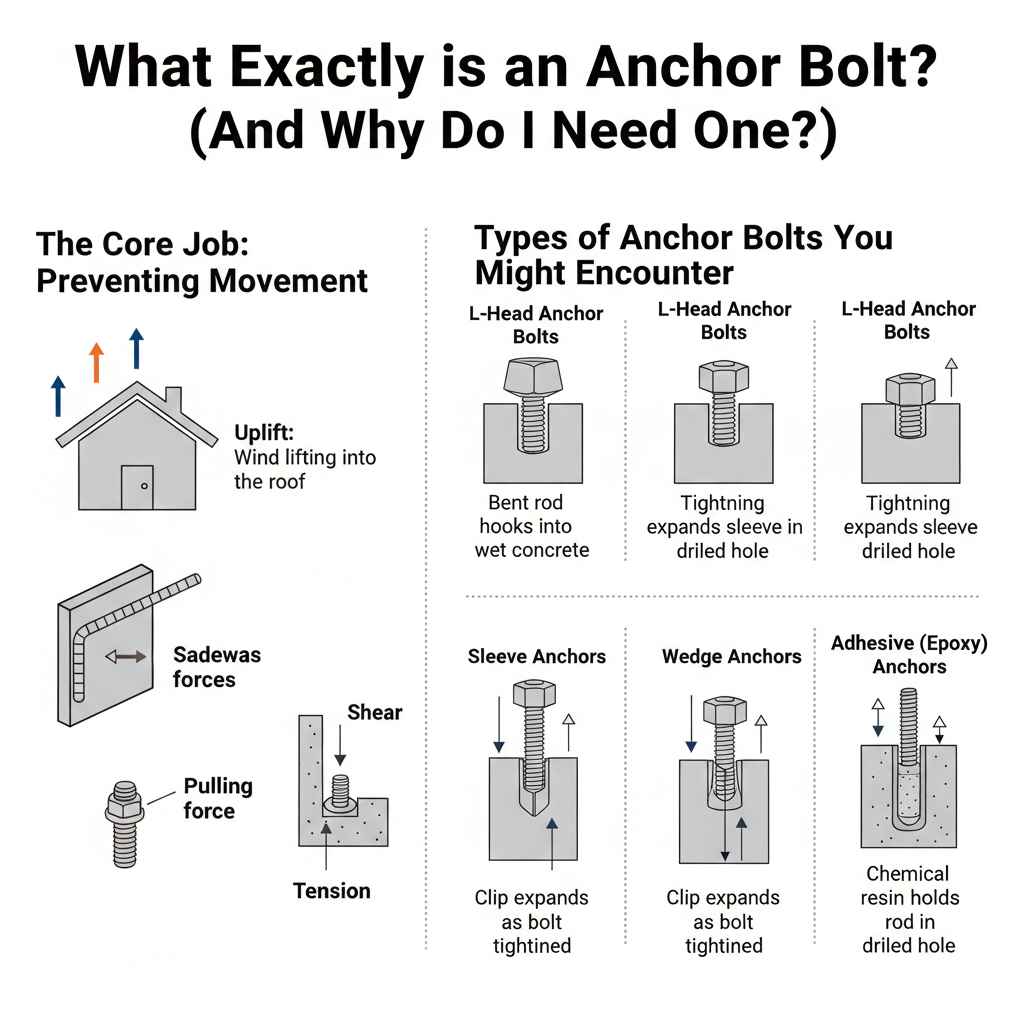
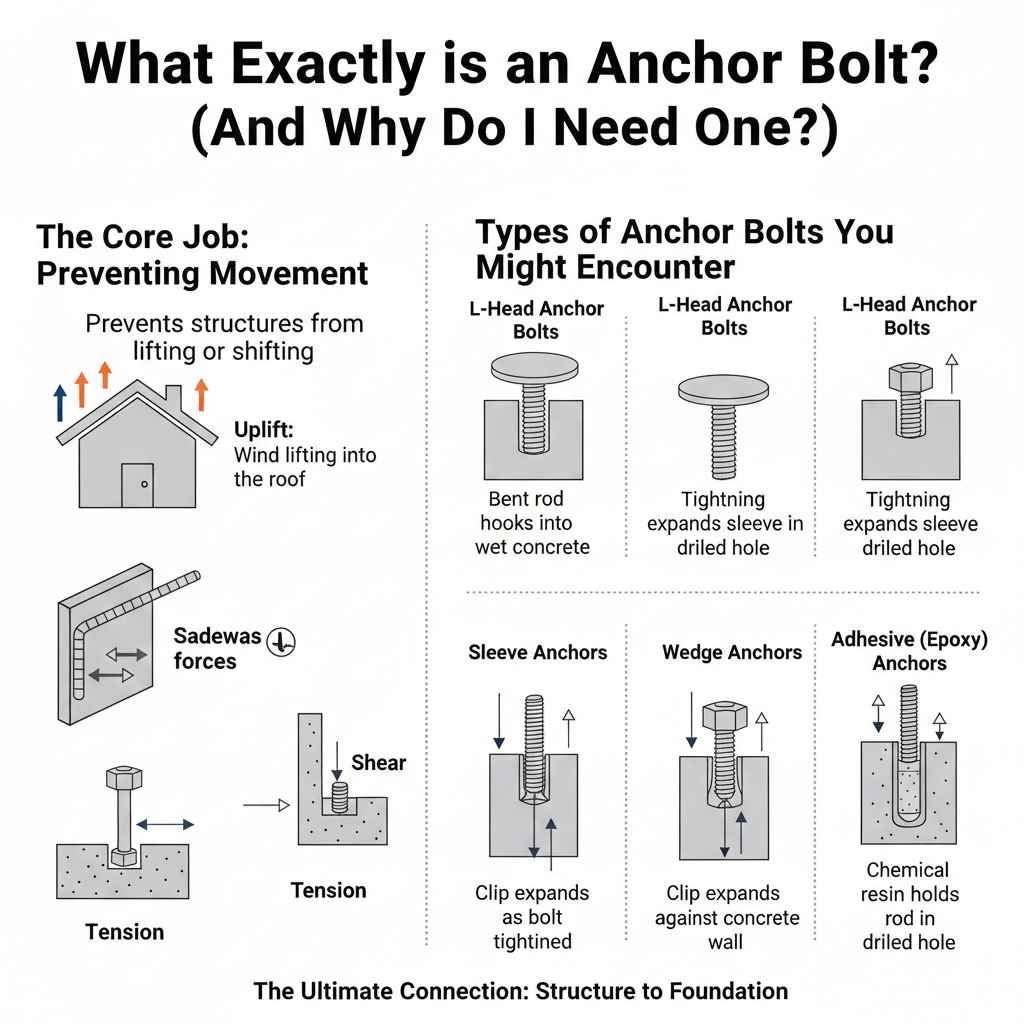
What Exactly is an Anchor Bolt? (And Why Do I Need One?)
An anchor bolt might sound like something only professional engineers use, but it’s actually a very simple, strong fastener. Think of it as the ultimate glue between a structure and its concrete foundation. Without them, the wind could lift your shed, or a small shift in the ground could twist your deck frame.
The Core Job: Preventing Movement
The main purpose of an anchor bolt is to resist forces that try to pull the structure away from its base. These forces include:
- Uplift: Wind blowing hard enough to lift a roof or a floor off its foundation.
- Shear: Horizontal forces, like earthquakes or high winds pushing sideways on a wall.
- Tension: The constant pull trying to yank the bolted material upward.
Anchor bolts work by using mechanical interlock. They are either embedded into the wet concrete when it’s poured, or they are drilled into cured concrete and then mechanically expanded or chemically adhered. This creates a permanent, immovable grip.
Types of Anchor Bolts You Might Encounter
Not all anchor bolts are the same! Knowing the difference helps you pick the right tool for the job. Here are the most common types you’ll deal with when working on foundations or existing concrete:
- L-Head Anchor Bolts (Most Common for New Concrete): These have a 90-degree bend at the embedded end. When the concrete cures around that ‘L’, it hooks securely. This is the classic bolt often used when setting forms for a foundation pour.
- Headed Anchor Bolts: Similar to a large version of a regular bolt, it has a distinct head on the embedded end, offering great tensile strength.
- Sleeve Anchors: These are great for retrofitting. You drill a hole, insert the anchor, and tighten the nut. As you tighten, an outer sleeve expands outward, gripping the sides of the hole tightly.
- Wedge Anchors: A piece of threaded rod with a clip or wedge at the bottom. As you tighten the nut above the concrete, it pulls the rod up, forcing the wedge open against the concrete wall for a very strong hold.
- Adhesive (Epoxy) Anchors: These use a chemical resin injected into a drilled hole. A threaded rod is inserted into the resin, which then hardens like super-strong epoxy. This is fantastic for very heavy loads or when precise placement is needed in existing concrete.
How Are Anchor Bolts Used in Wood Frame Construction? (The Sill Plate Connection)
When discussing home building, the most common application for anchor bolts is securing the sill plate to the foundation. The sill plate is the first horizontal piece of lumber that sits directly on top of the concrete foundation wall or slab.
The Role in Wood Framing
In wood frame construction, the anchor bolt acts as the critical link between the ground (concrete) and the structure (wood). If the sill plate isn’t anchored, the entire house could slide off the foundation during severe weather.
For DIYers or remodelers working with an existing structure, you will often need to fasten new sill plates or secure framing members to old concrete. This is where drilling and anchoring come into play, as opposed to setting bolts during a fresh pour.
Step-by-Step Guide: Anchoring Wood to Existing Concrete
Let’s assume you are setting a new sill plate for a shed or deck frame onto an already cured concrete foundation. You need robust anchors that grip the existing material, like wedge anchors or epoxy anchors. This process requires accuracy!
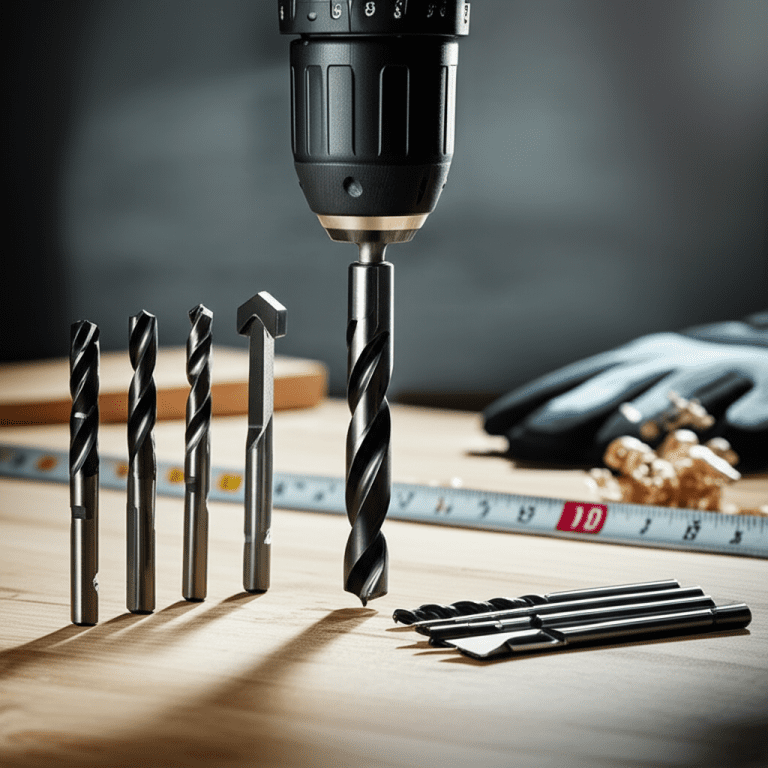
Tools You Will Need
- Heavy-duty Hammer Drill (must have hammer setting)
- Appropriate Masonry Drill Bit (sized according to your anchor specifications)
- Safety Glasses and Hearing Protection
- Tape Measure and Chalk Line
- Wrench or Impact Driver (to tighten the nuts/bolts)
- Vacuum or compressed air (to clean the holes)
- The Anchor Bolts (e.g., Wedge Anchors)
- A Level and square
The Installation Process
Follow these steps closely for a reliable connection. Remember to always check local building codes (often published by municipal building departments) for required spacing and embedment depth; these specifications are non-negotiable for structural safety.
- Mark the Location: Before drilling, you must know exactly where the bolt needs to go. For sill plates, anchor bolts must align with studs or structural members to transfer loads correctly. A common rule of thumb is to place anchors within 6 to 12 inches from any corner or end, and then spaced evenly—usually every 4 to 6 feet—along the length. Use a chalk line to mark straight lines where the lumber will sit.
- Layout the Drill Pattern: Now, determine the exact drill points along your line, ensuring they line up with the center of where your sill plate (or whatever you are anchoring) will sit.
- Drill the Hole (The Most Important Part): Fit your hammer drill with the correct size masonry bit for your anchor. Put on your safety gear! Drill the hole straight down into the concrete. Crucially, the hole depth must be deeper than the anchor’s required embedment depth—usually about 1/4 inch deeper to account for concrete dust in the bottom. Do not wobble the drill; keep it plumb.
- Clean the Hole Thoroughly: This step is often rushed, but it determines 90% of the anchor’s holding power, especially with epoxy anchors. Use a shop vacuum with a narrow nozzle or canned air to blow out all dust from the hole. The hole walls must be clean for the anchor to bite or for the epoxy to bond.
-
Insert the Anchor:
- For Wedge/Sleeve Anchors: Tap the anchor gently into the hole until the washer sits flush against the concrete surface (or slightly above the wood if installing the wood first).
- For Epoxy Anchors: Follow the manufacturer’s instructions precisely for injecting the adhesive resin. Insert the threaded rod slowly, twisting slightly, ensuring the resin fills the void without trapping air.
- Install the Structure (The Wood): Place your sill plate (or mounting plate) over the protruding threaded ends of the anchors. Slide on the washers and then the nuts.
- Torque to Specification: This is where you achieve the final grip. Using the correct size wrench or torque wrench, tighten the nuts. Do not overtighten, especially with epoxy anchors, as this can cause the concrete to spall (chip) or the resin to fail. Tighten until the anchor is snug and the structure is firmly pulled down against the concrete surface. (See the table below for general torque guidance, but always use the manufacturer’s spec!)
Torque Requirements Comparison (Example Only)
Torque is vital. Too loose, and it fails under wind load; too tight, and you break the concrete or the anchor itself. This table gives a general idea; always confirm with your specific anchor packaging.
| Anchor Diameter | Recommended Torque (Foot-Pounds) | Typical Application |
|---|---|---|
| 1/2 inch | 50–75 ft-lbs | Deck ledger boards, standard sill plates |
| 5/8 inch | 90–130 ft-lbs | Heavier framing, sign posts |
| 3/4 inch | 150–200 ft-lbs | Structural steel connections |
Understanding Embedment and Spacing
For an anchor bolt to work, it needs to be deep enough in the concrete to achieve its full holding strength. This depth is called the embedment depth.
Why Depth Matters (Embedment)
If an anchor bolt isn’t deep enough, the force trying to pull it out might cause the concrete directly surrounding the bolt to crack or fail before the bolt itself breaks. This is called a “pullout failure,” and it means your structure isn’t secure.
For structural elements anchored to a foundation, building codes—like those often referenced by the International Residential Code (IRC)—dictate minimum embedment. For example, a standard 1/2-inch diameter anchor in typical 3000 PSI concrete might require at least 4.5 to 7 inches of embedment, depending on whether it’s near an edge or supporting a high load.
Spacing Rules for Strong Foundations
You can’t just stick bolts wherever they fit on the lumber; they need proper separation to avoid interfering with each other’s holding capacity. If anchors are too close, the stress from one bolt weakens the concrete wedge supporting its neighbor.
Key spacing rules to remember:
- Edge Distance: This is how far the center of the bolt must be from the edge of the concrete slab or wall. Too close to the edge, and the concrete fractures easily. Minimum edge distances can range from 3 inches to 7 inches, depending on the anchor type and concrete strength.
- Spacing Between Bolts: The distance between two adjacent anchor bolts should generally be at least twice the required embedment depth. If your embedment is 6 inches, the bolts should be at least 12 inches apart.
Always consult the anchor manufacturer’s technical data sheets (often found on their website) or review your local building department’s documentation for the exact required spacing and embedment for the specific anchors you purchase. Reputable sources like the American Concrete Institute (ACI) provide extensive guidelines on these engineering principles.
Anchor Bolts vs. Other Fasteners: A Clear Difference
DIYers often confuse anchor bolts with simpler hardware. It’s important to know when a lag screw or a concrete screw just won’t cut it.
When to Use Anchor Bolts (Structural Loads)
You must use true anchor bolts (those designed to be set deep into concrete) when:
- Securing structural wood members to a foundation (like house sill plates).
- Anchoring columns, posts, or heavy steel structures.
- Any application where the connection must resist high uplift forces (like wind sheer on a tall structure).
When Alternatives Might Work (Non-Structural Loads)
For lighter duty tasks where movement isn’t a safety concern, you might use simpler methods:
- Concrete Screws (Tapcons, etc.): Good for attaching base plates for non-load-bearing walls, light fixtures, or railings that do not transfer significant house loads. They are easier to install but have much lower shear and tension ratings.
- Lag Screws (in wood): These are purely for fastening wood to wood or wood to a very thick, sturdy wood element—they do not penetrate concrete for structural holding.
Comparison Table: Anchor Bolt vs. Concrete Screw
| Feature | Anchor Bolt (Wedge/Epoxy) | Concrete Screw (e.g., Blue Tip) |
|---|---|---|
| Installation Method | Drill deep hole, use heavy torque or chemical adhesive. | Drill shallow pilot hole, drive screw with impact driver. |
| Holding Power (Load Rating) | Very High (Designed for structural loads) | Low to Medium (Good for light fixtures, furring strips) |
| Removal | Difficult (Requires cutting or grinding the embedded portion) | Relatively easy to unscrew. |
| Best For | Sill plates, heavy machinery anchoring, structural steel. | Attaching non-structural ledger boards or brackets. |
Safety First: Essential Precautions When Working with Anchors
Working with power tools and heavy anchors demands respect. A small slip can cause a serious injury or ruin a foundation. Safety isn’t just a suggestion; it’s part of ensuring your project lasts.
Personal Protective Equipment (PPE) Checklist
Before you even pick up the hammer drill, make sure you have:
- Safety Glasses: Masonry drilling creates extremely hard, fast-moving debris. Good safety glasses (preferably sealed goggles) are mandatory.
- Hearing Protection: Hammer drills are loud. Protect your hearing long-term.
- Gloves: Sturdy work gloves protect against sharp edges on the anchors and vibration from the drill.
- Dust Mask/Respirator: Especially important if drilling epoxy anchors or working in a dusty, enclosed area.
Drilling and Handling Safety Tips
Here are a few practical safety checks for the drilling process itself:
Check for Utilities: This is paramount! Before drilling any hole into a concrete slab or wall, verify there are no buried utility lines (electrical conduit, water pipes, gas lines) directly underneath your proposed drilling spot. If you are drilling into an existing slab, this often means contacting your local utility locating service (like calling 811 in the US) if you suspect lines are present beneath the structure.
Drill Cool: Drilling concrete generates intense heat. If your bit gets too hot, it can break or lose its temper, becoming useless or dangerous. If it starts smoking, stop, let the bit cool down, or use a spray bottle with water to mist the area as you drill to keep the bit temperature down.
Don’t Over-Torque Epoxy: When tightening nuts on epoxy anchors, stop when you meet resistance or hit the manufacturer’s specified torque. Forcing it can crush the cured epoxy plug or crack the concrete cone, completely negating the anchor’s strength.
Real-World Application Example: Building a Deck Ledger Board
One of the most common homeowner projects involving anchor bolts is attaching a deck ledger board (the piece that attaches the deck frame to the house foundation). If your deck is against a concrete wall rather than wood siding, you use anchor bolts here.
Why Anchor Bolts are Needed Here
The ledger board supports the entire weight of the deck and all the people on it. It must resist gravity (downward force) and movement away from the house (uplift/shear force from people bouncing or shifting). A simple lag screw into concrete is usually insufficient for this load.
The Code-Approved Approach for Ledger Anchors
While local codes vary widely, the general approach for a ledger attached to concrete involves heavy-duty anchors, spaced appropriately:
- Anchor Choice: Typically, high-strength wedge anchors or epoxy anchors are specified for this critical connection.
- Placement: Anchors are usually required near the top and bottom of the ledger board, often spaced according to engineering tables based on joist spacing. Many modern standards recommend staggering the anchors rather than placing them directly on top of one another.
- Washing and Gasket: When attaching wood to concrete, you must prevent moisture from sitting between the two materials, which leads to rot. The sill plate (or in this case, the ledger board) must be separated from the concrete by a foam sill sealer gasket. The bolt passes through the gasket and the wood, pulling the wood tightly against the gasket, which rests on the concrete. This keeps water out.
For detailed information on best practices for connecting structures to masonry, you can often find helpful summaries provided by organizations such as the Federal Highway Administration (FHWA), which deals with heavy-duty structural connections that inform best practices for residential foundations.
Troubleshooting Common Anchor Bolt Issues
Even with the best planning, you might run into trouble during installation. Here are quick fixes for things that often frustrate DIYers.
Problem 1: The Drill Bit Isn’t Cutting
What’s Happening: You’re drilling into extremely hard aggregate concrete, or your hammer drill isn’t on the correct setting.
The Fix: Ensure your hammer drill is fully engaged in the hammer mode. If you are using a new, expensive bit, check that it is rated for masonry. If you hit a piece of rebar (steel reinforcement) inside the concrete, you need to slightly shift your hole location (by at least 3 inches) and start over. Rebar cutters are specialized and not usually worth buying for a one-off job.
Problem 2: The Hole is Too Big (or Loose)
What’s Happening: You might have wobbled the drill, or used the wrong size bit, resulting in a hole that is too large for the anchor to grip properly (especially common with sleeve anchors).
The Fix: If the hole is only slightly oversized, sometimes switching to the next size up anchor works. If it’s significantly too big, the anchor won’t achieve its listed capacity. In this case, do not use that anchor. For a permanent fix, clean the hole meticulously and use a high-strength, structural epoxy (like those mentioned earlier) to fill the void. Let the epoxy cure completely before torquing the bolt.
Problem 3: The Anchor Spins While Tightening
What’s Happening: This is a classic problem with wedge anchors installed in soft or dusty concrete. As you torque the nut, the friction is so low that the entire rod spins inside the hole instead of tightening.
The Fix: If you can hold the shaft with a pair of locking pliers while torquing the nut, that often works. If it still spins, you must remove the anchor. Drill out the hole (slightly larger if necessary), clean it out completely, and use an epoxy anchor instead. The epoxy will bond the rod to the concrete walls, preventing any spinning.
Frequently Asked Questions (FAQ) for Beginners
Q1: Can I just use regular lag bolts instead of anchor bolts for my deck posts on concrete?
A: Generally, no. Standard lag bolts are designed for wood-to-wood connections. For heavy loads transferring from a structure (like a deck or wall) to concrete, you need hardware specifically rated for concrete, like wedge or epoxy anchors, which have significantly higher pullout ratings.
Q2: How deep do anchor bolts need to be set into the concrete?
A: This is called the embedment depth, and it depends on the bolt diameter and the load. Typically, for structural support, it ranges from 4.5 inches to 8 inches. Always check the specific packaging or engineering specifications required by your local building code for safety.
Q3: What is the difference between a ‘through-bolt’ and an ‘anchor bolt’?
A: A ‘through-bolt’ goes entirely through the material being fastened (like going through a 2×4 and into the concrete, with the nut on the other side). An ‘anchor bolt’ typically refers to the type embedded into fresh concrete or one that uses expansion/epoxy within cured concrete to hold something on the surface.
Q4: Do I need epoxy anchors if I’m anchoring a fence post base?
A: For lighter loads like a residential fence post, a high-quality wedge anchor or sleeve anchor is often sufficient and easier to install than epoxy. Epoxy is usually reserved for extremely heavy industrial loads, situations where you need maximum edge distance control, or when anchoring into hollow block or brick.
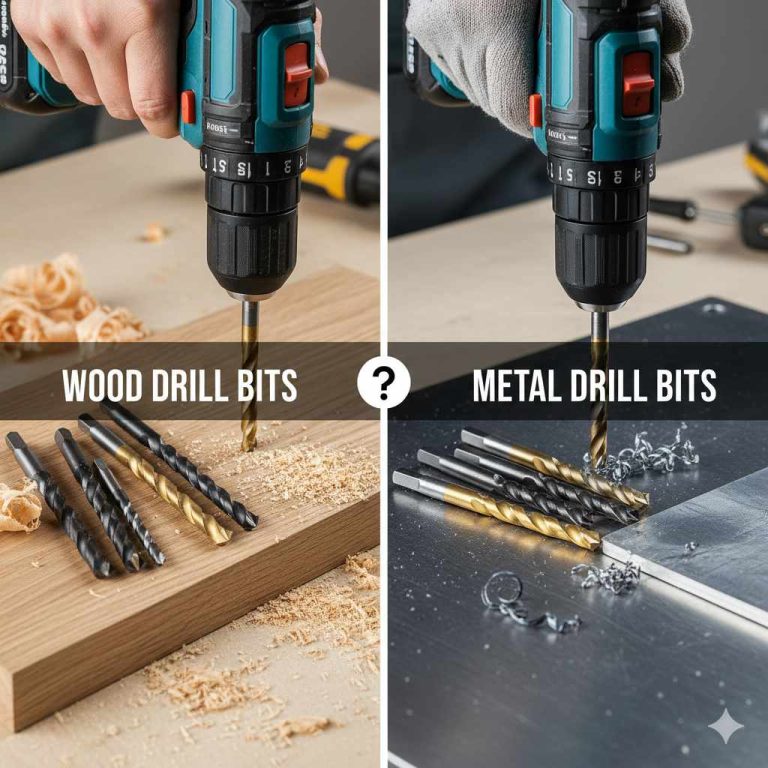
Q5: What tool is best for drilling the holes for anchor bolts?
A: A heavy-duty hammer drill is essential for drilling into dense, cured concrete. A standard drill will struggle or overheat. Make sure you use the correct diameter masonry bit matched precisely to the anchor you are inserting.
Q6: Can I reuse an anchor bolt if I need to remove the structure later?
A: If you used an expansion-style anchor (wedge or sleeve), you can usually just unscrew the nut, and the anchor remains in the concrete, ready for re-use of the hardware above the surface, though reusing the bolt shaft itself is generally not recommended due to potential corrosion or stress damage.
Conclusion: Building Confidence with Solid Connections
You’ve seen that anchor bolts are not mysterious pieces of hardware—they are the foundational handshake between your wood structure and the concrete that supports it. By understanding the different types, respecting the required embedment depth, and carefully following the steps for installation—especially the crucial step of cleaning those drilled holes—you can confidently secure almost any structure you build.
Remember, whether you are setting bolts into fresh concrete or retrofitting a sill plate onto an existing foundation, precision prevents failure. Take your time measuring, always prioritize your safety gear, and torque those nuts exactly as the manufacturer recommends. With these guidelines in your toolbox, you are now ready to tackle your next project, knowing that the base of your work is solid, safe, and built to last for years to come. Go build something great!