How Long Does Minwax Gel Stain Last After Opening? Expert Tips
If you’re new to woodworking or staining projects, figuring out How Long Does Minwax Gel Stain Last After Opening? can feel tricky. It’s a common question that pops up, especially when you’re trying to plan your projects and avoid wasting materials. Don’t worry, though! It’s simpler than you might think. This guide is here to provide you with straightforward answers and easy-to-follow advice. We’ll explore everything you need to know to get the most out of your Minwax Gel Stain, starting with what affects its lifespan.
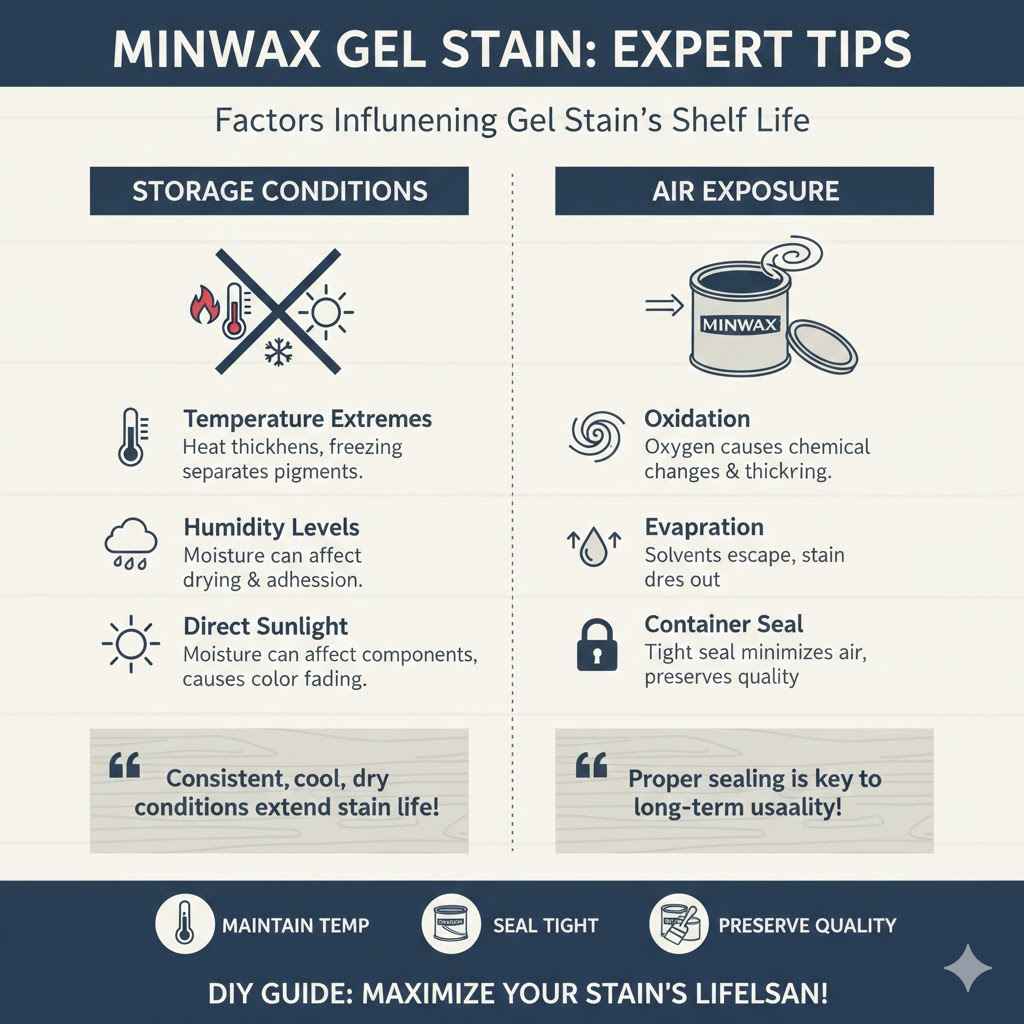
Factors Influencing Minwax Gel Stain’s Shelf Life
Several things affect how long your Minwax Gel Stain stays good to use after you pop the lid. These factors determine how well the stain performs, the color consistency, and its overall quality over time. Considering these elements can really help you maximize your stain’s life and get the best results on your projects. Keeping an eye on these items ensures you’re not caught off guard by a ruined can of stain.
Storage Conditions and Their Impact
Where you store your stain is a big deal. High heat or freezing temperatures can really mess it up. Think of it like food – you wouldn’t leave milk out on the counter all day, right? The same is true for gel stain. A cool, dry place is best, like a closet or a basement. Keeping it out of direct sunlight is also a good idea. Sunlight can fade the color and change the stain’s consistency over time. By managing your stain’s environment, you’re directly affecting its longevity.
- Temperature Extremes: Heat can cause the stain to thicken, and freezing can separate the pigments, making it unusable.
- Humidity Levels: High humidity can introduce moisture, which can affect the stain’s ability to dry and adhere properly.
- Direct Sunlight: Exposure to sunlight can break down the stain’s components, leading to color fading and changes in the product’s effectiveness.
Consider a scenario: You live in a place with big temperature swings, like the desert. If you store the stain in your garage, where it’s hot during the day and cold at night, your stain’s life will be shorter than if you store it inside your home where the temperature stays pretty even. The more consistent the conditions, the longer your stain will remain useful. You’re building a solid foundation for successful projects every time you store stain correctly.
The Role of Air Exposure in Stain Deterioration
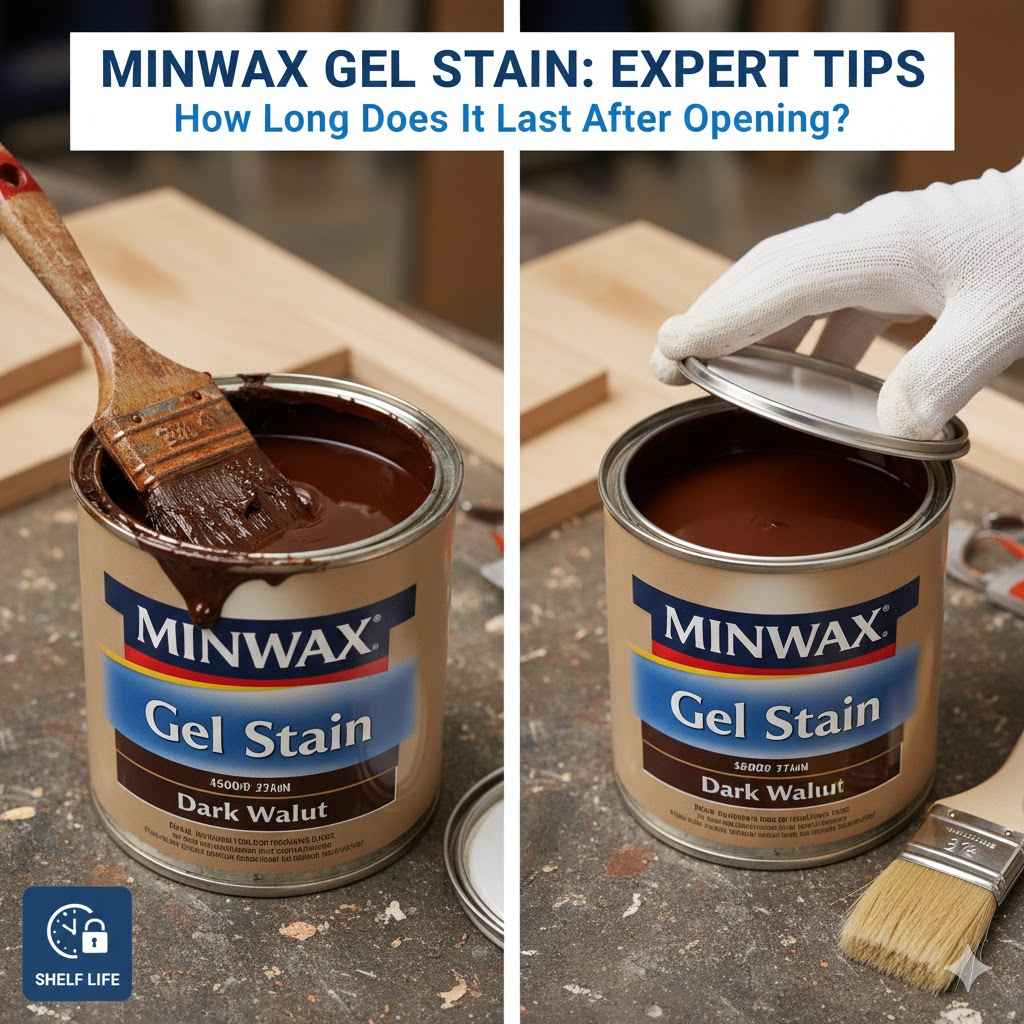
When you open a can of gel stain, you introduce it to air. Air contains oxygen, and oxygen can cause chemical changes in the stain over time. These changes can make the stain thicker, make it dry out, or even change the color. That’s why keeping the can sealed tightly is so important. Once it dries out, the stain won’t apply smoothly, and it might not penetrate the wood as well. Sealing the container is as important as the stain itself when it comes to long term usability. Proper sealing is how you keep your materials ready to go.
- Oxidation: Exposure to air can cause oxidation, leading to changes in the stain’s chemical composition.
- Evaporation: Solvents in the stain can evaporate when exposed to air, causing it to thicken and dry out.
- Container Seal: A tight seal minimizes air exposure, preserving the stain’s quality. This includes the lid itself and its condition.
Think about a can of paint that’s been sitting open for a while. The top layer might become thick and unusable. That’s the effect of air. With gel stain, a good seal slows down this process. By keeping air out, you’re helping your stain last longer and stay ready for your next project. It’s like putting a lid on a jar of jam – it keeps it fresh!
Deciphering Signs of Deterioration in Minwax Gel Stain
Knowing what to look for can help you determine if your Minwax Gel Stain is still good to use. Some changes are normal, but others indicate that the stain may not perform as intended. Recognizing these signs helps you avoid unexpected problems during a project and ensures you get the results you want. Being aware of the usual suspects is important for all woodworkers, from beginner to experienced.
Visual Clues: What to See
Your eyes can often tell you a lot about the condition of your stain. The way the stain looks, its consistency, and any visible changes are key indicators. A healthy stain should have a consistent color and a smooth, gel-like texture. If you notice lumps, separation, or a change in color, it’s a good idea to proceed with caution. The look of your stain can tell you if you’re good to go.
- Color Changes: Any shifts in color, like fading or darkening, can indicate the stain is past its prime.
- Lumps or Clumps: These may point to the stain drying out or the pigments clumping together.
- Separation: If the liquids and pigments in the stain have separated, it might not mix well and could lead to uneven application.
Suppose you open a can, and you see a thick layer on top that looks different from the rest. The stain has probably been exposed to air and is starting to dry out. Or, imagine you’re working on a project, and the stain has a bunch of tiny lumps in it. This can mess up the look of your project and waste your time. Spotting these visual cues early can save you time and headaches later. They are important clues in the stain’s story.
Texture and Consistency Tests
Besides looking at the stain, you can also test its texture and consistency to see if it’s still good. A healthy gel stain should be smooth and easy to stir. If it’s thick, lumpy, or difficult to mix, it might not spread evenly on your wood. You can use a stir stick to check. This simple test helps you find out if the stain is still up to the task.
- Thickness: If the stain is too thick, it may not spread well and could leave uneven coverage.
- Smoothness: A smooth texture is important for even application and a professional finish.
- Mixing Difficulty: If the stain is hard to mix, it may contain dried particles, which can make application difficult.
Here’s a practical example: You’re getting ready to stain a new coffee table. You open the can and try to stir the stain. If it’s like stirring thick peanut butter, it could be a sign it’s dried out and might not apply properly. Or, picture this: You’re applying the stain, and it’s dragging on the wood. This could mean the stain is too thick or has particles in it. Both situations can negatively affect your work. Doing a quick test will save you time later.
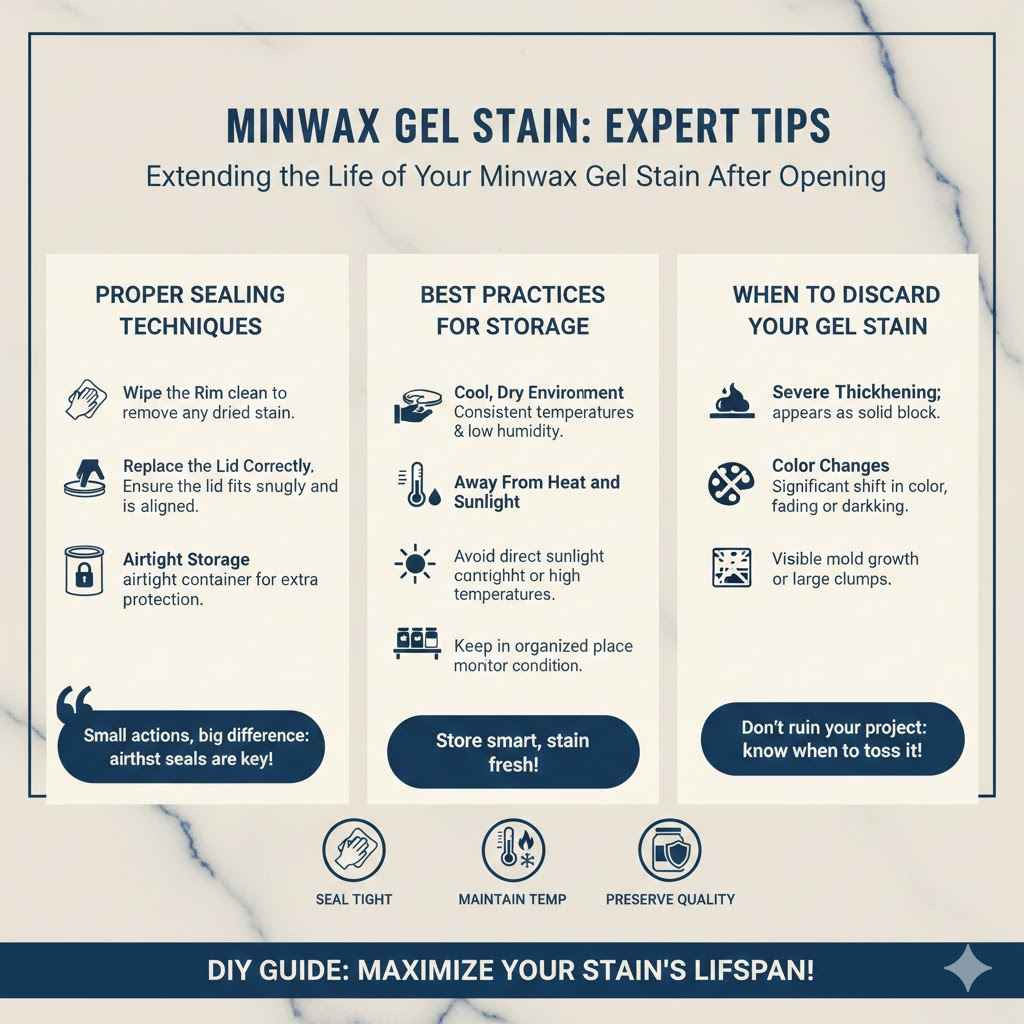
Extending the Life of Your Minwax Gel Stain After Opening
You can take some simple steps to make your Minwax Gel Stain last longer. These practices help keep your stain in good condition so it works well whenever you need it. By using these practices, you can maximize your investment and cut down on waste.
Proper Sealing Techniques
Sealing the container correctly is one of the most important things you can do. The goal is to create an airtight seal to keep air out and prevent the stain from drying out or changing. This helps to protect it from the elements. Properly sealing your can will help your stain stay ready.
- Wipe the Rim: Before closing the can, wipe the rim clean to remove any dried stain that could prevent a tight seal.
- Replace the Lid Correctly: Make sure the lid fits snugly and is properly aligned before you close it.
- Consider Airtight Storage: For extra protection, you could transfer the stain to an airtight container.
Imagine you spill some stain on the rim of the can. If you just close the lid, the stain can prevent the lid from sealing properly. Take a moment to wipe the rim clean. This small action can make a big difference in how well the lid seals. Another simple example: After you finish staining, you store the can in a place that has regular temperature changes. If the lid is sealed well, the stain is more likely to stay in good shape. Tight seals are easy to do but extremely impactful.
Best Practices for Storage
How you store the stain has a big effect on how long it lasts. Finding a cool, dry place away from direct sunlight is key. This helps keep the stain from drying out, changing color, or going bad. Store your stain where it has a safe environment.
- Cool, Dry Environment: Find a spot with consistent temperatures and low humidity, like a closet.
- Away From Heat and Sunlight: Avoid locations that are exposed to direct sunlight or high temperatures.
- Organized Storage: Keep the stain in a place where it’s easy to find and monitor its condition regularly.
Think about a wooden toolbox. If you store your stain there, make sure the toolbox is not in a sunny garage. High temperatures can change the stain and make it hard to work with. If you keep the stain in a well-organized area, you’ll easily be able to tell if it’s still good. Properly storing your stains is as important as the staining process.
When to Discard Your Gel Stain
There are some clear signs that it’s time to toss your stain. While it’s sad to waste, using bad stain can ruin your project. Knowing when to get rid of it saves you time and frustration. If you notice any of these signs, don’t hesitate to dispose of it properly.
- Severe Thickening: If the stain has become extremely thick and hard to mix, it’s likely dried out.
- Color Changes: A significant shift in color, such as fading or darkening, suggests it’s no longer effective.
- Mold or Clumps: If you see any mold growth or large clumps, the stain is unusable.
Consider this: You open a can, and the stain looks like a solid block. No matter how much you try to mix it, it won’t budge. Or, imagine you apply the stain, and it’s uneven. The color looks off, and it just doesn’t look right. In both situations, the stain is probably gone bad. It’s better to discard the old stain and get a new one to avoid any problems. Knowing the telltale signs is crucial.
Frequently Asked Questions
Question: Can I use Minwax Gel Stain after the date on the can?
Answer: The date on the can is usually a “best by” date, not a strict expiration. However, the quality of the stain may decrease over time, even if stored correctly. It is important to look for signs of deterioration before use.
Question: What’s the best way to clean up spilled Minwax Gel Stain?
Answer: Clean up spills with mineral spirits while the stain is still wet. Follow the solvent’s safety guidelines, and make sure the area is well-ventilated.
Question: Can I add anything to thin my Minwax Gel Stain?
Answer: You can use mineral spirits to thin Minwax Gel Stain. Add small amounts and mix well. However, be cautious, as thinning can affect the stain’s color and performance.
Question: How can I tell if the stain has gone bad?
Answer: Look for changes in color, texture, or the presence of lumps. If it’s overly thick, difficult to stir, or has separated, it’s likely gone bad.
Question: Can I store the stain in its original container?
Answer: Yes, you can store it in its original container if you clean the rim and seal the lid tightly. For longer storage, consider using an airtight container.
Final Thoughts
When you’re working on your next woodworking project, keeping your Minwax Gel Stain fresh is crucial for success. You’ve learned about how things like storage conditions and air exposure affect how long your stain lasts. We discussed ways to recognize if your stain is still good to use, from visual cues to texture tests. Plus, you’ve discovered simple steps for extending the life of your stain, such as proper sealing and smart storage. Now you’re equipped to handle your stain like a pro!