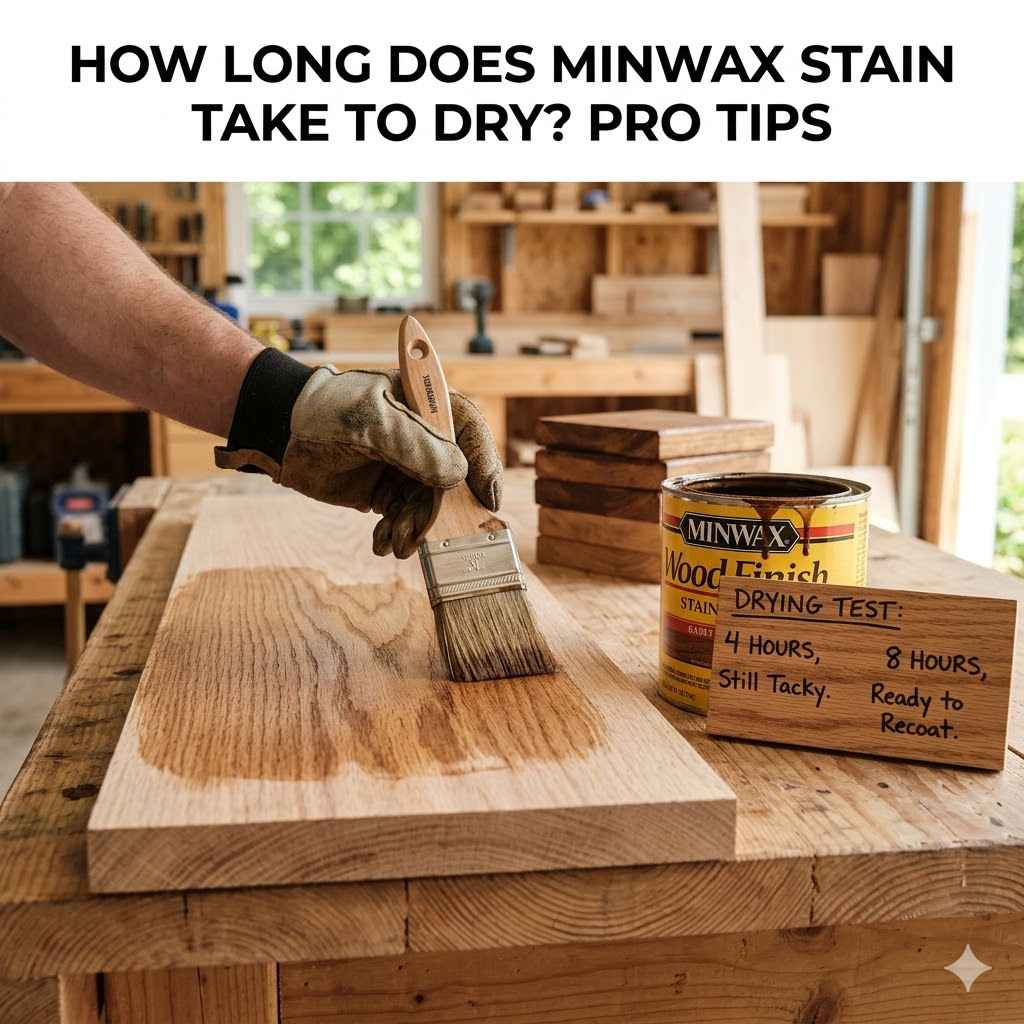
How Long Does Minwax Stain Take To Dry? Pro Tips
Many people starting a DIY project wonder, “How Long Does It Take for Minwax Stain to Dry? Pro Tips”. It can be a bit tricky to figure out the exact drying time because many things can change it.
Don’t worry, we’ll make it super simple. This guide will walk you through everything step-by-step so you can get your project done right.
Figuring out how long Minwax stain needs to dry is a common question for DIYers. This topic is important because waiting too long or not long enough can mess up your finished project. You want your wood to look great, and that starts with letting the stain dry properly.
This section will break down the basic drying times and what influences them.
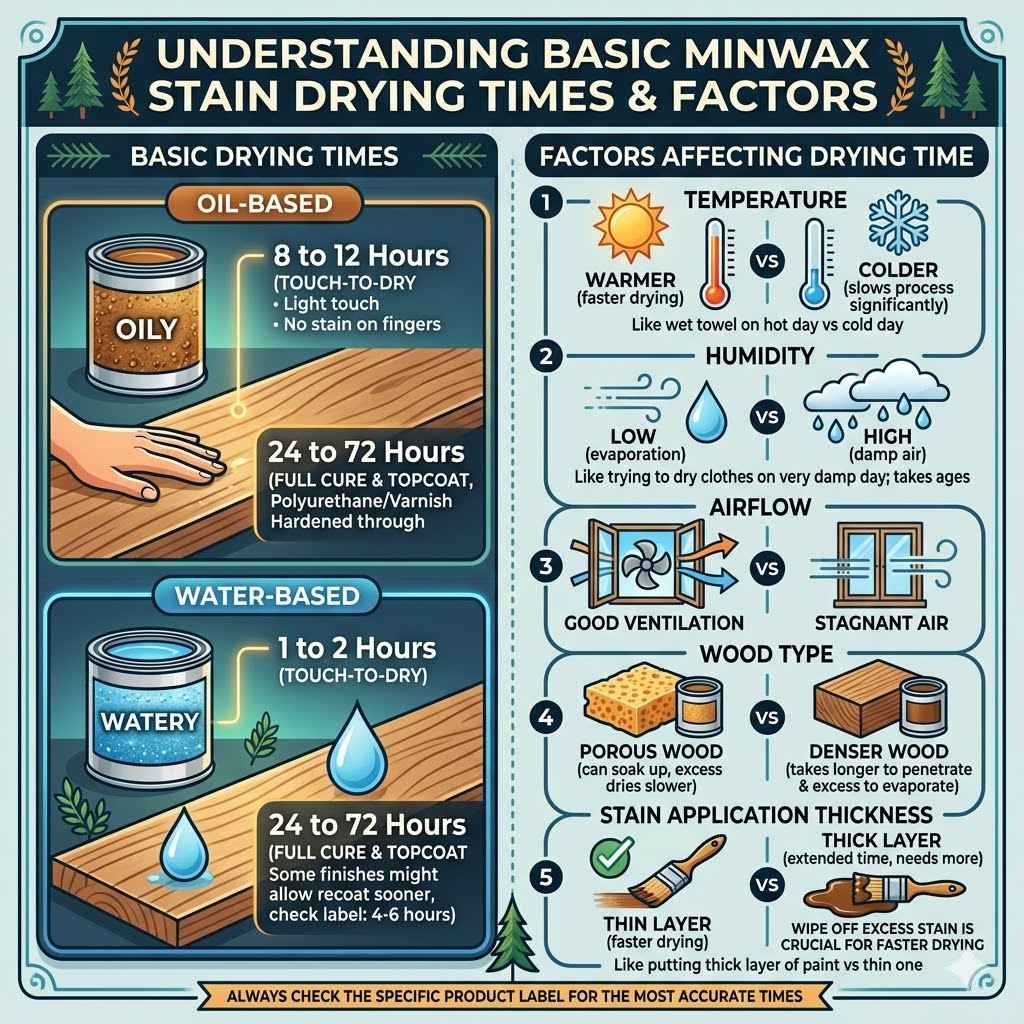
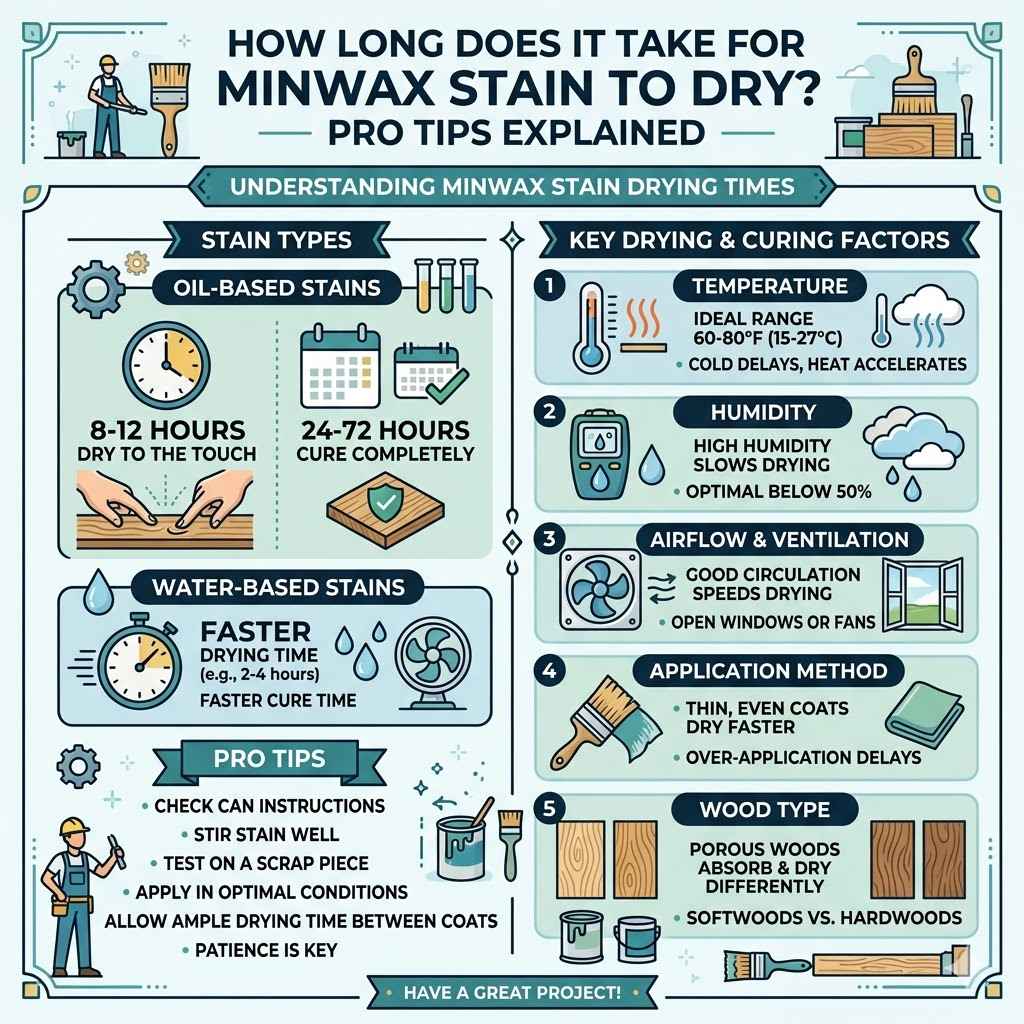
Understanding Basic Minwax Stain Drying Times
Generally, most Minwax oil-based wood stains need about 8 to 12 hours to dry to the touch. This means you can lightly touch the surface without getting stain on your fingers. However, for a proper topcoat like polyurethane or varnish, it’s best to wait longer, often 24 to 72 hours.
This allows the stain to fully cure, meaning it’s hardened all the way through.
Water-based stains often dry faster. They might be dry to the touch in 1 to 2 hours. Full curing for topcoats can still take 24 to 72 hours, but some water-based finishes might allow recoating sooner, sometimes within 4 to 6 hours.
Always check the specific product label for the most accurate times.
Factors Affecting Minwax Stain Drying Time
Several things can speed up or slow down how long your Minwax stain takes to dry. It’s not a one-size-fits-all situation.
Temperature: Warmer temperatures generally help stains dry faster. Colder weather slows down the drying process significantly. Think of it like leaving a wet towel out on a hot day versus a cold one.
Humidity: High humidity in the air can make drying take much longer. Moisture in the air makes it harder for the solvents in the stain to evaporate. It’s like trying to dry clothes on a very damp day; it takes ages.
Airflow: Good ventilation is key. When air moves freely across the surface, it helps carry away the evaporated solvents and moisture. Stagnant air means slower drying. Opening windows or using fans can make a big difference.
Wood Type: Some types of wood absorb more stain than others. Denser woods might take longer for the stain to penetrate and for the excess to evaporate. Porous woods can soak up a lot, and if you leave too much on, it will dry slower.
Stain Application Thickness: Applying the stain too thickly will naturally extend the drying time. It’s like putting on a thick layer of paint versus a thin one; the thick layer needs more time to dry completely. Wiping off excess stain is crucial for faster drying.
These factors combined mean that a project done on a warm, dry, breezy day might dry much faster than the same project done on a cool, humid, still day. It’s why experienced woodworkers often plan their projects around favorable weather conditions.
How To Tell If Minwax Stain Is Dry
Knowing when your stain is truly dry is more than just touching it. You need to be sure it’s ready for the next step to avoid smudges or uneven finishes.
The Touch Test
The most common way to check is the touch test. Gently press a fingertip onto an inconspicuous area of the stained surface. If any stain transfers to your finger, it’s not dry yet.
It should feel dry and not tacky at all.
However, feeling dry to the touch doesn’t always mean it’s fully cured. It’s just ready for a light coat of finish or another layer of stain if you’re doing multiple coats. True curing takes much longer.
Checking for Stickiness
Another sign is stickiness. If the surface feels gummy or sticky when you lightly press on it, it’s definitely still wet. This stickiness indicates that the solvents haven’t fully evaporated.
Sometimes, even if it feels dry, you might notice a slight tackiness after a few hours. This is normal for some oil-based stains. The key is to wait until this tackiness disappears completely before moving on.
Using a Rag Test
A more thorough check involves a clean, lint-free rag. Gently rub a small section of the stained wood with the rag. If any color lifts onto the rag, the stain needs more time to dry.
This is a good way to ensure you’ve removed all the loose pigment.
This test is particularly useful after wiping off excess stain. It confirms that the stain that remains has bonded well with the wood and is beginning to dry properly.
The Smell Test
Oil-based stains have a distinct odor from the solvents they contain. As the stain dries, this smell will gradually fade. If you can still strongly smell the solvents, it’s a good indication that the stain is not fully dry and the solvents are still evaporating.
The scent will diminish over time. When the strong chemical smell is replaced by a faint, almost pleasant wood smell, it suggests that most of the drying process is complete. However, relying solely on smell isn’t the most accurate method.
Pro Tips for Faster Minwax Stain Drying
Want to speed things up without sacrificing quality? These tips will help your Minwax stain dry more efficiently, so you can get to your topcoat sooner.
Optimize Your Environment
This is the most impactful step. Aim for a room that is warm, dry, and has good airflow.
Temperature Control: Try to stain in a room that is between 70°F and 75°F (21°C to 24°C). Avoid staining in temperatures below 65°F (18°C) as this will significantly slow down drying. If your workspace is too cold, consider using a small heater, but be cautious not to overheat the area or create fire hazards.
Humidity Management: Keep humidity levels as low as possible, ideally between 40% and 50%. You can use a dehumidifier in the workspace to remove excess moisture from the air. Avoid staining in basements or garages on humid days if possible.
Boost Airflow: Use fans to circulate air around your project. Box fans placed strategically can help move air across the surface of the wood. Ensure the fans aren’t blowing directly on the wet stain, which could cause an uneven finish. Gentle circulation is best.
These environmental factors are crucial. A controlled environment allows the solvents and oils in the stain to evaporate at their optimal rate. It’s like giving the stain the perfect conditions to do its job quickly and effectively.
Apply Thin Coats and Wipe Thoroughly
How you apply and finish the stain makes a big difference.
Thin Application: Apply the stain in thin, even coats rather than trying to get a dark color in one thick application. This allows the stain to penetrate the wood and the excess to be wiped off easily.
Wipe Off Excess Promptly: After allowing the stain to penetrate for the recommended time (usually 5-15 minutes, check the can), wipe off all excess stain with a clean, lint-free cloth. The longer you leave excess stain on, the longer it will take to dry and the higher the chance of a blotchy or uneven finish.
Use the Right Cloths: Microfiber cloths or old t-shirt material work well for wiping. Avoid paper towels as they can leave lint behind.
The key is to let the stain soak into the wood fibers but remove what doesn’t get absorbed. This ensures that only the pigment embedded in the wood needs to dry, which happens much faster than drying a thick layer of stain on the surface.
Consider a Pre-Stain Conditioner
For certain woods, especially softwoods like pine or poplar, a pre-stain wood conditioner can help. It seals the wood so it absorbs stain more evenly. This can lead to a more uniform color and, indirectly, a more consistent drying time because there are fewer dark, thick patches of stain.
While it doesn’t directly speed up drying, it prevents the stain from soaking too deeply into porous areas, which would otherwise take longer to dry. It helps achieve the desired color more efficiently, often with less stain applied.
Use a Water-Based Stain or Gel Stain
If speed is your absolute top priority, you might consider switching stain types.
Water-Based Stains: These dry much faster than oil-based stains. Some can be ready for a topcoat in just a few hours. They also clean up easily with water.
Gel Stains: Gel stains sit on top of the wood rather than penetrating deeply. This can lead to more predictable results, especially on tricky woods, and they often dry faster because there’s less absorbed solvent. They are also good for vertical surfaces as they are less likely to drip.
While these alternatives offer faster drying, they might have a different look or application feel compared to traditional oil-based stains. Always test them on scrap wood first.
Common Mistakes That Slow Down Minwax Stain Drying
Even with the best intentions, DIYers often make mistakes that prolong drying time. Understanding these pitfalls can save you a lot of waiting.
Over-Applying Stain
One of the most common mistakes is applying too much stain. People often think more stain means a richer color, but it just leads to a thick layer that can’t dry properly.
This is especially true if you don’t wipe off the excess thoroughly. That extra stain sitting on the surface is what holds up the drying process, leaving your project unusable for days.
Not Wiping Off Excess
Following up on over-application, failing to wipe off excess stain is a major culprit for slow drying. The purpose of wiping is to remove the stain that hasn’t penetrated the wood.
If you skip this step or don’t do it well, you’ve essentially painted a layer of stain onto your wood. This layer needs to dry, and it takes much longer than absorbed stain.
Working in Poor Conditions
Ignoring temperature, humidity, and airflow is a recipe for slow drying. Staining a piece of furniture in a damp, cold garage on a rainy day will test anyone’s patience.
The solvents in the stain need the right conditions to evaporate. Without them, the process grinds to a halt, leaving your project in a sticky limbo.
Applying Thick Topcoats Too Soon
Rushing to apply a topcoat over slightly damp stain is another common error. The topcoat traps the remaining moisture and solvents, preventing the stain from ever drying completely.
This can lead to a gummy finish, poor adhesion of the topcoat, and a project that never looks quite right. Patience is crucial here.
Real-Life Scenarios and Results
Let’s look at how drying times can play out in real projects.
Scenario 1: The Weekend Coffee Table Project
Sarah wanted to refinish her old coffee table over a weekend. She chose Minwax Dark Walnut oil-based stain. She applied it on Saturday morning in her basement, which was cool and a bit humid.
She wiped off the excess after 15 minutes. By Saturday evening, it still felt a little tacky. She decided to wait until Sunday morning.
By Sunday afternoon, it was dry to the touch but still had a slight tack. She applied a coat of polyurethane, but noticed a very faint smudge on one corner. The table was usable by Sunday night, but the slight tackiness meant she was worried about durability.
Result: Sarah’s project was usable sooner, but the less-than-ideal drying conditions meant the stain wasn’t fully cured. This could lead to future finish problems. A pro would have waited until Monday morning for complete dryness or used fans and a dehumidifier.
Scenario 2: The Patient Bookshelf Build
Mark was building a new bookshelf. He used Minwax Provincial oil-based stain. He applied it in his garage on a warm, dry afternoon with a gentle breeze from an open door.
He wiped off the excess after 10 minutes. By Saturday evening, the wood felt completely dry and not tacky. He waited until Sunday morning to apply his first coat of polyurethane.
The polyurethane went on smoothly without any issues. He waited 24 hours between coats of polyurethane.
Result: Mark’s patience and good drying conditions led to a perfectly finished bookshelf. The stain had ample time to dry and cure properly before the topcoat was applied, ensuring a durable and smooth finish.
How Long Does It Take For Minwax Stain To Dry? Pro Tips Explained
To recap, understanding How Long Does It Take for Minwax Stain to Dry? Pro Tips is about more than just looking at the clock. It involves paying attention to your environment, how you apply the stain, and being patient.
Oil-based stains usually need 8-12 hours to dry to the touch and 24-72 hours to cure. Water-based stains dry faster. Key factors influencing this are temperature, humidity, airflow, wood type, and application thickness.
You can test dryness by touch, checking for tackiness, or using a rag.
To speed things up, optimize your workspace with warmth, low humidity, and good ventilation. Apply stain thinly and wipe off all excess promptly. Using water-based or gel stains can also offer quicker drying times.
Avoiding common errors like over-application and rushing the process is crucial for a quality finish.
By following these simple steps, you can ensure your Minwax stain dries properly and efficiently, leading to beautiful, lasting results for your woodworking projects.
Frequently Asked Questions
Question: How long does Minwax Polyshades take to dry?
Answer: Minwax Polyshades is a combined stain and polyurethane product. It typically takes about 4 to 6 hours to dry to the touch. For recoating, it’s usually recommended to wait at least 6 to 8 hours, but checking the specific product instructions is always best, as humidity and temperature can affect drying time.
Question: Can I speed up stain drying with a heat gun?
Answer: Using a heat gun directly on wet stain is generally not recommended. It can cause the stain to dry unevenly, leading to streaks or a blotchy appearance. It can also potentially scorch the wood.
Gentle, consistent airflow from fans is a safer way to improve drying.
Question: What is the difference between ‘dry to the touch’ and ‘cured’ for wood stain?
Answer: ‘Dry to the touch’ means the surface doesn’t feel sticky when lightly touched. ‘Cured’ means the stain has fully hardened throughout its depth and is ready for heavy use or protective topcoats without issues. Curing takes much longer than simply drying to the touch.
Question: How long should I wait between coats of Minwax oil-based stain?
Answer: If you are applying multiple coats of Minwax oil-based stain for a darker color, you should wait until the previous coat is dry to the touch, typically 8-12 hours. Ensure there is no tackiness before applying another coat. For best results, wipe off excess stain after each application.
Question: Is it okay to stain wood if the temperature is below 65°F (18°C)?
Answer: It is not ideal to stain wood in temperatures below 65°F (18°C). Cold temperatures significantly slow down the evaporation of solvents in oil-based stains, leading to much longer drying times and potentially a poor finish. It’s best to wait for warmer conditions or use a heated, controlled environment.
Conclusion
Getting your Minwax stain to dry properly is key to a great finish. Remember to consider temperature, humidity, and airflow. Always wipe off excess stain thoroughly and be patient before applying topcoats.
These simple steps will ensure your projects look their best.