How Long Pressure Treated Wood Dry: Essential Guide
Pressure-treated wood needs to dry before painting or staining, but how long? Generally, wait at least 24-48 hours after purchase, and up to a few weeks or months for optimal results. Proper drying ensures better adhesion and a longer-lasting finish. This guide breaks down the factors and methods for drying your project wood.
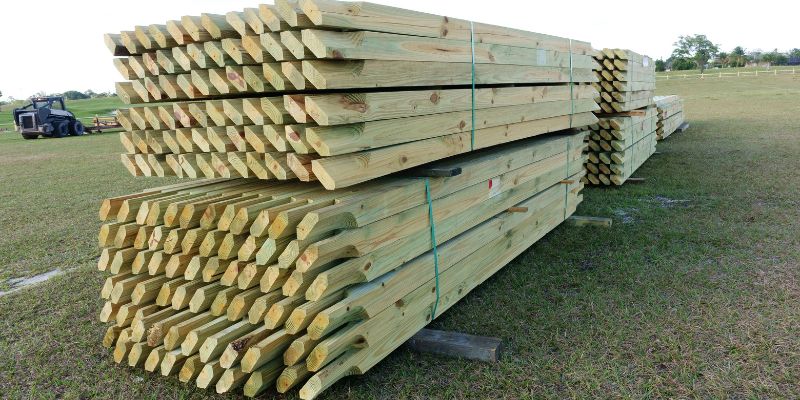
Hey there, fellow woodworkers! Ever stared at a stack of that greenish, wonderfully durable pressure-treated lumber, eager to start building that deck, fence, or planter box, only to wonder, “When can I actually do something with this?” It’s a super common question, and for good reason. That fresh-from-the-yard wood is often quite wet from the treatment process, and trying to paint, stain, or even seal it too soon can lead to peeling, bubbling, and a finish that just doesn’t last. It can be frustrating when you’re ready to get your hands dirty, but patience is key here! We’ll walk through exactly why this wood needs to dry and the best ways to help it along, so you can achieve beautiful, long-lasting results on your projects. Let’s dive in and get that wood ready!
Why Does Pressure-Treated Wood Need to Dry?
Pressure-treated wood is lumber that’s been infused with chemicals under pressure. This process makes it resistant to rot, decay, and insect infestation, which is why it’s so popular for outdoor projects. However, the chemicals are carried into the wood by a water-based solution. When you buy it, the wood is often quite saturated with this solution, meaning it’s holding a lot of moisture.
Trying to apply finishes like paint or stain to wood that’s still saturated is like trying to paint a wet sponge. The finish won’t adhere properly. The chemicals and the excess water can prevent the paint or stain from penetrating the wood’s surface. This leads to several problems:
- Poor Adhesion: Finishes can peel, flake, or bubble off the wood because they can’t bond to the surface.
- Uneven Color: Stains might not absorb evenly, resulting in splotchy or patchy coloration.
- Reduced Durability: The protective qualities of your paint or stain will be compromised, leading to premature wear and tear.
- Wood Movement: As the wood dries naturally after you’ve applied a finish, it can shrink. If a finish is already on it, this movement can crack or damage the finish.
The goal is to let enough of that initial moisture evaporate so the wood can accept and hold your chosen finish effectively. Think of it as letting the wood prepare itself for its final, beautiful coat.
Understanding the Moisture Content
The key to knowing when your pressure-treated wood is ready is understanding its moisture content. For most applications where you’ll be applying a finish, you want the wood’s moisture content to be below a certain threshold. This threshold varies slightly depending on the type of finish you plan to use, but a good general guideline is to aim for a moisture content of around 15-20% or lower.
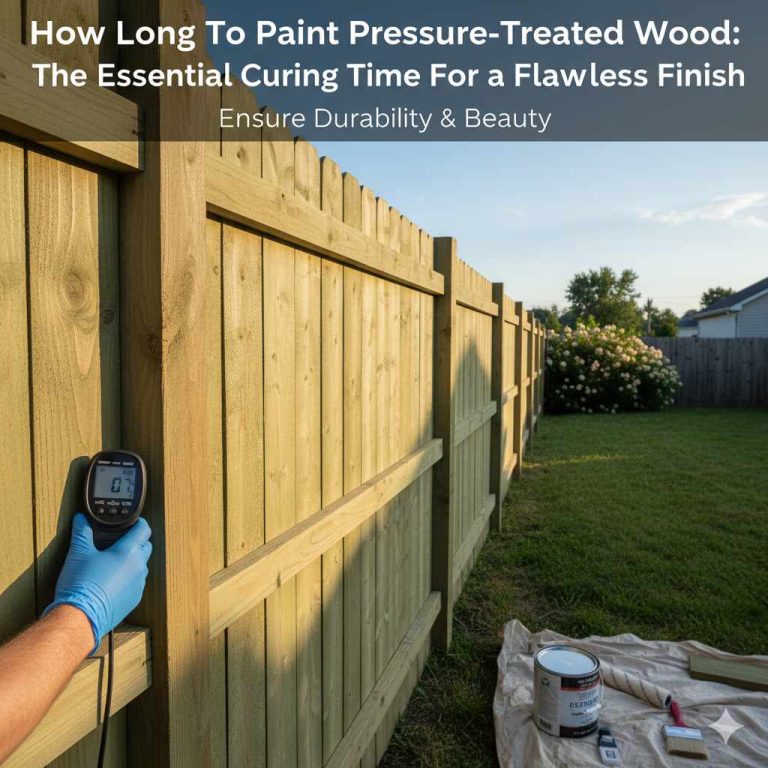
You can measure moisture content using a moisture meter. These tools are relatively inexpensive and are invaluable for any serious woodworker. They have two prongs that you insert into the wood to get a reading. For pressure-treated wood, it’s important to note that the treatment chemicals themselves can sometimes affect moisture meter readings, potentially making them read slightly higher than the actual wood moisture. However, they are still the best tool for assessing readiness.
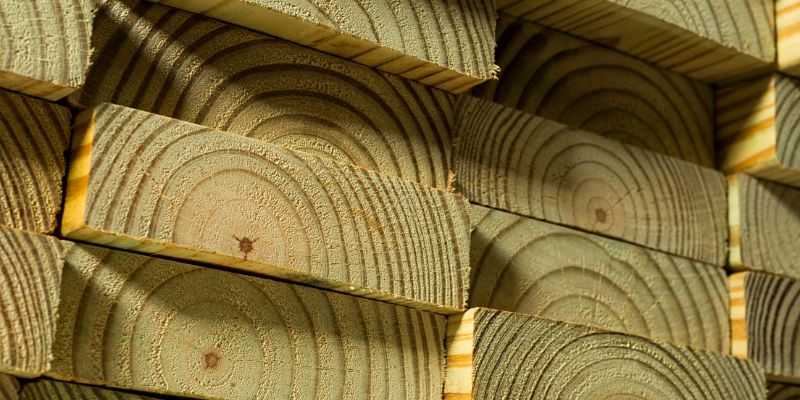
When you first purchase pressure-treated wood, especially if it’s been recently treated and is still wet from the process, its moisture content can be anywhere from 30% to well over 50%. This is why it feels heavier and often looks darker than untreated wood.
How Long Does Pressure-Treated Wood Typically Need to Dry?
This is the million-dollar question, and the answer is: it depends! There’s no single, fixed number because several factors influence how quickly pressure-treated wood dries. These include:
- Environmental Conditions: Temperature, humidity, and airflow are huge factors. Warm, dry, and breezy conditions will speed up drying significantly compared to cool, humid, and still air.
- Wood Species and Size: Denser hardwoods will take longer to dry than softer woods. Thicker boards will also dry more slowly than thinner ones.
- How Wet It Was: Wood treated with higher concentrations of chemicals or that was more saturated during the treatment process will naturally take longer to dry.
- Storage Method: How you stack and store the wood during the drying process makes a big difference.
As a general rule of thumb:
- Initial Drying (Post-Purchase): Most pressure-treated lumber needs at least 24-48 hours to dry enough to handle without excessive dripping or tackiness from the treatment solution. This is the minimum to start building if you’re not immediately applying a finish.
- Drying for Finishing: For painting or staining, you’ll typically need to let it dry for several weeks to a few months. A common recommendation is to wait at least 6 weeks, but this can be longer in less ideal conditions or for thicker lumber.
The most reliable way to know is to use a moisture meter. Insert the meter into several pieces of wood across different parts of the board. If your readings are consistently below 20%, you’re likely good to go for most finishes.
Factors Affecting Drying Time
Let’s break down those factors that influence how long you’ll be waiting:
1. Environmental Conditions
This is perhaps the most significant external factor. Think of it like drying laundry outside:
- Temperature: Warmer temperatures increase the rate of evaporation.
- Humidity: Low humidity allows moisture to evaporate from the wood more easily. High humidity slows down the process because the air is already saturated with water.
- Airflow: Moving air, like a breeze or a fan, carries away the moist air from the wood’s surface, allowing more moisture to evaporate.
This is why wood dries much faster in the summer than in the winter, and faster in arid climates than in humid ones. For optimal drying, you want warm, dry, and breezy conditions.
2. Wood Species and Dimensions
Different types of wood have different densities and cell structures, which affect how quickly they release moisture.
- Species: Softer woods like pine and fir, commonly used for pressure-treated lumber, tend to dry faster than denser hardwoods.
- Dimensions: Thicker boards have more mass and a longer path for moisture to travel to the surface. A 2×12 will take significantly longer to dry than a 1×4, even if they are the same length.
3. Treatment Process and Saturation Level
The way the wood was treated and how much of the treatment solution it absorbed plays a role. Wood treated with higher levels of preservative chemicals, or wood that was more thoroughly saturated during the pressure treatment process, will naturally hold more liquid and take longer to dry out.
4. Storage and Stacking
How you store the wood while it’s drying can either help or hinder the process. Proper stacking is crucial.
- Air Circulation: Stack the boards with spacers (called stickers) between them. These spacers should be uniform in thickness and placed directly on top of each other. This creates air gaps that allow air to circulate freely around all surfaces of the wood, promoting even and efficient drying.
- Location: Store the wood in a location that maximizes airflow and exposure to favorable conditions. An open, shaded area is often better than a closed, humid shed. Avoid direct, intense sunlight for prolonged periods, as this can cause warping and checking (cracking).
- Protection: While you want airflow, you also need to protect the wood from direct rain, which will re-saturate it and set back the drying process. A simple tarp or lean-to can provide this protection while still allowing air circulation.
How to Speed Up the Drying Process
While you can’t control the weather, you can implement strategies to encourage faster drying:
- Proper Stacking: As mentioned, use stickers to create air gaps. This is the most important step for efficient drying.
- Elevate the Stack: Keep the bottom of the stack off the ground to allow air to circulate underneath.
- Use Fans: If you’re in a humid or still-air environment, using fans to move air around the stacked lumber can significantly speed up drying.
- Choose the Right Lumber: When purchasing, look for wood that appears to be less saturated. Sometimes, boards that have been sitting in the yard for a while might be slightly drier.
- Wipe Down Surfaces: After you bring the wood home, you can lightly wipe down the surfaces with a clean cloth to remove any surface residue from the treatment process, which might slightly impede initial evaporation.
It’s important to balance speed with avoiding damage. Trying to force drying too quickly with excessive heat can lead to warping or cracking.
When is it Ready for Finishing? (The Test)
So, you’ve waited weeks, maybe months. How do you really know it’s ready? The most accurate method is the moisture meter, aiming for 15-20% moisture content. But if you don’t have one, here are some less precise but often effective indicators:
- Appearance: The wood should look and feel drier. The greenish hue from the treatment chemicals may have faded slightly, and the wood might feel lighter.
- Water Drop Test: Place a few drops of water on the surface of the wood. If the water beads up and sits on the surface, the wood is likely still too wet or has a waxy residue from the treatment that needs to be weathered off. If the water soaks in quickly, it’s a good sign the wood is ready to accept a finish.
- Sanding Test: Try sanding a small, inconspicuous area. If the wood sands cleanly and doesn’t clog your sandpaper immediately, it’s usually a good indicator of dryness.
- Weathering: Sometimes, the best approach is simply to let the wood weather naturally outdoors for a few months. This allows the surface chemicals to leach out and the wood to acclimate to ambient moisture levels. This is often the recommended approach for the best long-term finish.
For projects where appearance is critical, like a deck railing or a patio table, allowing the wood to weather for a few months is often the best strategy for achieving a beautiful, lasting stain or paint job. For structural elements where appearance isn’t paramount, you might be able to proceed sooner after the initial 24-48 hour period.
Drying Times for Different Finishes
The type of finish you intend to apply can also influence how dry the wood needs to be:
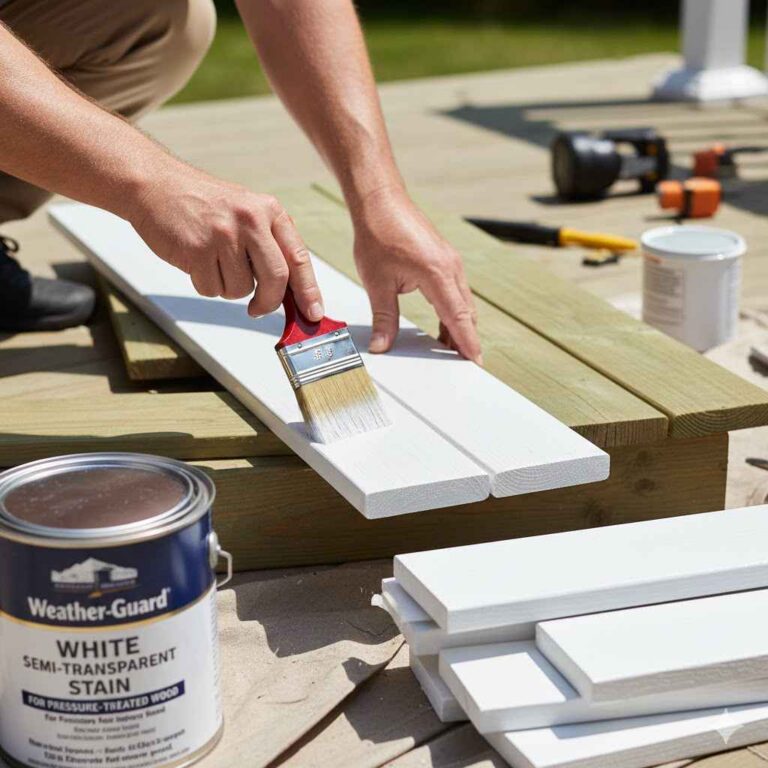
Paint:
- Paint needs a stable surface to adhere to. Excess moisture can cause the paint to bubble or peel.
- For best results, aim for a moisture content below 20%, ideally closer to 15%.
- Allowing the wood to weather for a few weeks to a month before painting can help ensure better adhesion.
Stain:
- Stains penetrate the wood to provide color and protection. If the wood is too wet, the stain won’t penetrate evenly, leading to a blotchy appearance.
- A moisture content of 15-20% is generally recommended.
- Many manufacturers suggest allowing pressure-treated wood to dry for at least 6 weeks to 3 months before staining to ensure proper absorption.
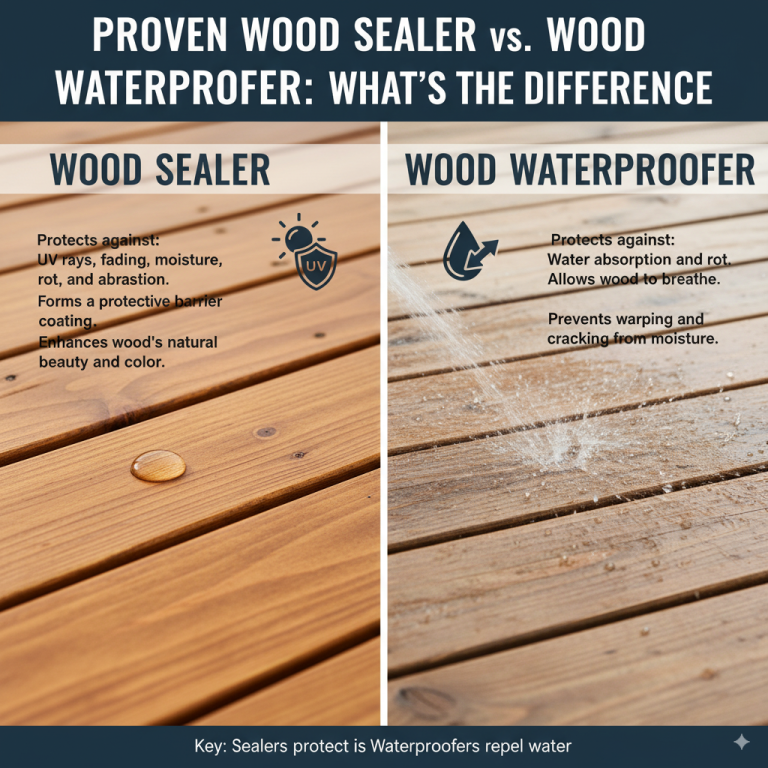
Sealers/Water Repellents:
- These finishes are designed to protect the wood from moisture. Applying them to already wet wood is counterproductive.
- Aim for a moisture content below 20%.
- Similar to stains, allowing some weathering time can improve performance.
No Finish (Leaving it Natural):
- If you plan to let the wood weather naturally to a silvery-gray color, you don’t need to worry as much about drying time for finishing.
- The wood will still dry over time, and its appearance will change as it’s exposed to the elements.
Here’s a quick reference table:
| Finish Type | Recommended Moisture Content | Typical Waiting Period (After Purchase) | Notes |
|---|---|---|---|
| No Finish (Weathering) | N/A | Immediate to 24-48 hours (for handling) | Wood will naturally gray over time. |
| Paint | Below 20% (ideally 15%) | Several weeks to 3 months | Ensures good adhesion, prevents bubbling. |
| Stain | 15-20% | 6 weeks to 3+ months | Promotes even absorption and color consistency. |
| Sealers/Water Repellents | Below 20% | Several weeks to 3 months | Allows wood to accept the protective coating. |
What Happens if You Don’t Let It Dry?
We’ve touched on this, but let’s reiterate the consequences of rushing the process:
- Peeling and Flaking Finishes: This is the most common issue. Paint and stain simply won’t bond well to wet wood, leading to an unsightly mess that’s difficult and costly to fix.
- Mold and Mildew Growth: Trapped moisture within the wood, especially under a finish, creates an ideal environment for mold and mildew to grow.
- Warping and Cupping: As the wood continues to dry after a finish is applied, it will shrink. If the finish is already locked in, this uneven drying can cause the wood to warp, cup, or twist.
- Reduced Lifespan of the Finish: Even if it looks okay initially, an improperly applied finish will degrade much faster, requiring more frequent reapplication.
- Staining Issues: For stains, premature application can lead to blotchy, inconsistent color that’s very difficult to correct without stripping and starting over.
It’s always better to be patient and do it right the first time!
Best Practices for Storing Pressure-Treated Wood for Drying
Proper storage is key to ensuring your wood dries evenly and without damage. Here’s how to do it right:
- Stack with Stickers: Lay down two or more parallel supports (like 1×2 or 2×2 lumber, or even flat stones) to elevate the entire stack off the ground. Place your lumber on top of these supports. Then, place thin, uniform spacers (stickers) between each layer of lumber. These stickers should be positioned directly above the supports below. This creates crucial air gaps for circulation.
- Ensure Airflow: Choose a location that is open and allows for good air movement. Avoid stacking wood tightly against a wall or in a damp, enclosed space.
- Protect from Direct Rain: While airflow is important, direct rain will undo your drying efforts. Cover the top of the stack with a tarp or build a simple lean-to. Ensure the cover extends beyond the edges of the stack to prevent water runoff from soaking the wood. Crucially, leave the sides and ends open for ventilation.
- Keep it Flat: Avoid stacking the wood too high, as the weight can cause the lower boards to flatten or damage the stickers. Ensure the stickers are uniform in thickness to keep the lumber flat.
- Check Periodically: Inspect your stack every week or so. Look for any signs of mold, insect activity, or excessive warping. You can also use this time to check the moisture content with a meter if you have one.
Remember, the goal is to simulate outdoor drying conditions but with protection from direct precipitation.
Can You Use a Dehumidifier or Kiln?
While specialized drying kilns are used by lumber mills, they aren’t practical for most DIYers. However, you can use a dehumidifier in a contained space, like a garage or shed, to speed up drying. Here’s how:
- Contained Space: Place the lumber in a relatively well-sealed garage or shed.
- Use a Dehumidifier: Run a dehumidifier in the space, ensuring it’s emptied regularly or has a continuous drain setup.
- Air Circulation: Use fans within the space to keep air moving around the lumber.
- Monitor: Keep an eye on the lumber and the dehumidifier’s performance.
This method can significantly reduce drying time, but it requires a suitable space and constant monitoring. It’s often more efficient for smaller projects or for bringing wood down to a specific moisture level for indoor use.
FAQ: Your Pressure-Treated Wood Drying Questions Answered
Q1: How long after buying pressure-treated wood can I build with it if I’m not painting or staining?
A1: If you are not applying any finish and the project is for outdoor use, you can typically start building with pressure-treated wood after just 24-48 hours. This allows the surface to dry enough so it’s not excessively wet to handle and won’t drip much treatment solution. However, it will still be quite moist internally.
Q2: My pressure-treated wood looks greenish. Does that mean it’s still wet?
A2: The greenish color is often from the copper-based preservatives used in the treatment process. While it can fade as the wood dries and weathers, the color itself isn’t a direct indicator of moisture content. You’ll need a moisture meter or perform a water-drop test to accurately gauge dryness for finishing.
Q3: Can I speed up drying by putting pressure-treated wood in the sun?
A3: While sunlight and heat do speed up evaporation, prolonged direct, intense sunlight can cause the wood to dry too quickly and unevenly. This can lead to warping, cracking, and checking. It’s better to have good airflow in a shaded or partially shaded area, or use fans.
Q4: Is it okay to use pressure-treated wood indoors?
A4: While modern pressure-treated wood is generally considered safe for indoor use, it’s often recommended to use it for outdoor projects where its rot and insect resistance are most beneficial. If you do use it indoors, ensure it’s fully dry and consider sealing it, especially if there’s any concern about off-gassing or contact with skin, although this is rare with current treatments. Check the EPA’s guidelines on wood preservatives for more information.
Q5: I live in a very humid climate. Will my pressure-treated wood ever dry?
A5: Yes, it will, but it will take longer. In humid conditions, focus heavily on maximizing airflow with stickers and fans. You might also consider using a dehumidifier in a contained drying space if you need to speed up the process for a specific project. Patience is key in high-humidity environments.
Q6: How do I know if the treatment chemicals are still on the surface after it has dried?
A6: The water-drop test is a good indicator. If water beads up on the surface even after the wood feels dry to the touch, there might still be a residue or the wood is not yet porous enough to accept a finish. In such cases, letting it weather naturally for a few more weeks often resolves this issue.
Q7: What’s the difference in drying time between 2x4s and 4x4s?
A7: Thicker lumber like 4x4s will take significantly longer to dry than thinner boards like 2x4s. This is because there is more mass and moisture to be removed from the core of the thicker piece. You can expect a 4×4 to take roughly twice as long, or even longer, to reach the same moisture content as a 2×4 under identical conditions.
Conclusion
So, there you have it! Understanding how long to let pressure-treated wood dry before building or finishing is crucial for project success. While it’s often ready to build with after just a day or two, waiting several weeks to a few months for it to dry sufficiently for painting or staining will save you a lot of heartache down the road. Remember to prioritize airflow with proper stacking, consider your environmental conditions, and use a moisture meter for the most accurate results.
By being patient and following these guidelines, you’ll ensure your beautiful projects, whether it’s a sturdy deck, a charming planter, or a robust fence, will not only look great but will also stand the test of time. Happy building, and enjoy the process!