How Long Should Paint Dry Before Removing Tape
If you’re new to painting, you’ve probably wondered: How Long Should Paint Dry Before Removing Tape? It’s a common question because you want clean lines without pulling off paint. Sometimes it feels tricky to know the exact right moment. Don’t worry, it’s simpler than you think!
This guide will walk you through it step-by-step. We’ll help you get that perfect finish every time.
The Art of Tape Removal Timing
Knowing when to remove painter’s tape is key to getting crisp, professional-looking paint lines. If you pull the tape too soon, the wet paint can smear and bleed under the tape. This makes your lines look messy and uneven.
On the other hand, if you wait too long, the paint can dry and seal the tape to the wall. This often results in the paint peeling off with the tape, leaving jagged edges and requiring touch-ups. It’s a balance that can feel frustrating for beginners who just want a smooth, clean result from their hard work.
This section explores the science behind paint drying and how it relates to tape removal. We’ll look at the different factors that influence how quickly paint dries and why this timing matters so much for achieving sharp paint lines. Understanding these basics will give you the confidence to tackle any painting project with better results.
Understanding Paint Drying Stages
Paint doesn’t just dry; it goes through different stages. The first stage is called “tack-free.” This is when the surface of the paint feels dry to the touch, but the paint underneath is still wet. It won’t smudge when you lightly touch it, but it’s not fully hardened yet.
This stage is crucial for tape removal.
The next stage is “curing.” This is when the paint is fully hardened and durable. This can take days, weeks, or even months depending on the type of paint. Removing tape during the curing stage is almost always a bad idea because the paint is fully bonded to the tape.
For achieving clean lines, we focus on that initial tack-free stage.
The speed of drying depends on several things. Humidity in the air plays a big role; higher humidity slows down drying. Temperature also affects it; warmer temperatures generally help paint dry faster.
Airflow is another factor; good ventilation speeds up the process. Different paint formulations also dry at different rates. For example, latex paints dry faster than oil-based paints.
How Long Should Paint Dry Before Removing Tape
So, How Long Should Paint Dry Before Removing Tape? The general rule of thumb for most latex or acrylic paints is to remove the tape when the paint is dry to the touch but not fully cured. This usually happens between 1 to 24 hours after application. However, it’s best to test a small, inconspicuous area first.
For latex and acrylic paints, aim to remove the tape while the paint is still slightly pliable but has formed a dry skin. This “dry to the touch” stage is the sweet spot. If you can press your finger on the painted edge lightly without paint sticking to your finger, it’s likely ready.
This prevents smearing and ensures a clean break between the painted surface and the tape.
Oil-based paints take longer to dry. For these, you might need to wait several hours, or even up to 24 hours, for them to reach that slightly dry but still flexible stage. Always check the paint can for specific drying times recommended by the manufacturer.
These times can vary significantly between brands and product types.
-
Latex and Acrylic Paints
For water-based paints like latex and acrylic, the ideal time to remove tape is typically when the paint feels dry to the touch. This usually means waiting at least 1 to 4 hours. The paint should have formed a solid surface that won’t lift or smear easily.
However, it’s important that the paint isn’t so dry that it has become completely rigid, as this can lead to peeling. Imagine a slightly firm Jell-O; it holds its shape but still has some give. This is the perfect state for clean tape removal.
-
Oil-Based Paints
Oil-based paints dry more slowly. They often require a longer waiting period before tape removal. You might need to wait anywhere from 8 to 24 hours.
The key is that the paint has reached a stage where it has set, but it’s not fully hardened. It’s about finding that point where the paint resists smudging but can still be cleanly cut by the edge of the tape. Patience is key with these types of paints to avoid a messy outcome.
-
Environmental Factors
The drying time of paint is heavily influenced by your surroundings. High humidity levels, common in bathrooms or kitchens, will slow down the drying process significantly. Cold temperatures also inhibit drying.
Conversely, in very dry and warm conditions with good airflow, paint might dry faster than expected. Always consider these elements when deciding the best time to pull off your tape. A breezy, warm day will dry paint much quicker than a cool, damp evening.
The Importance of Proper Tape Removal Technique
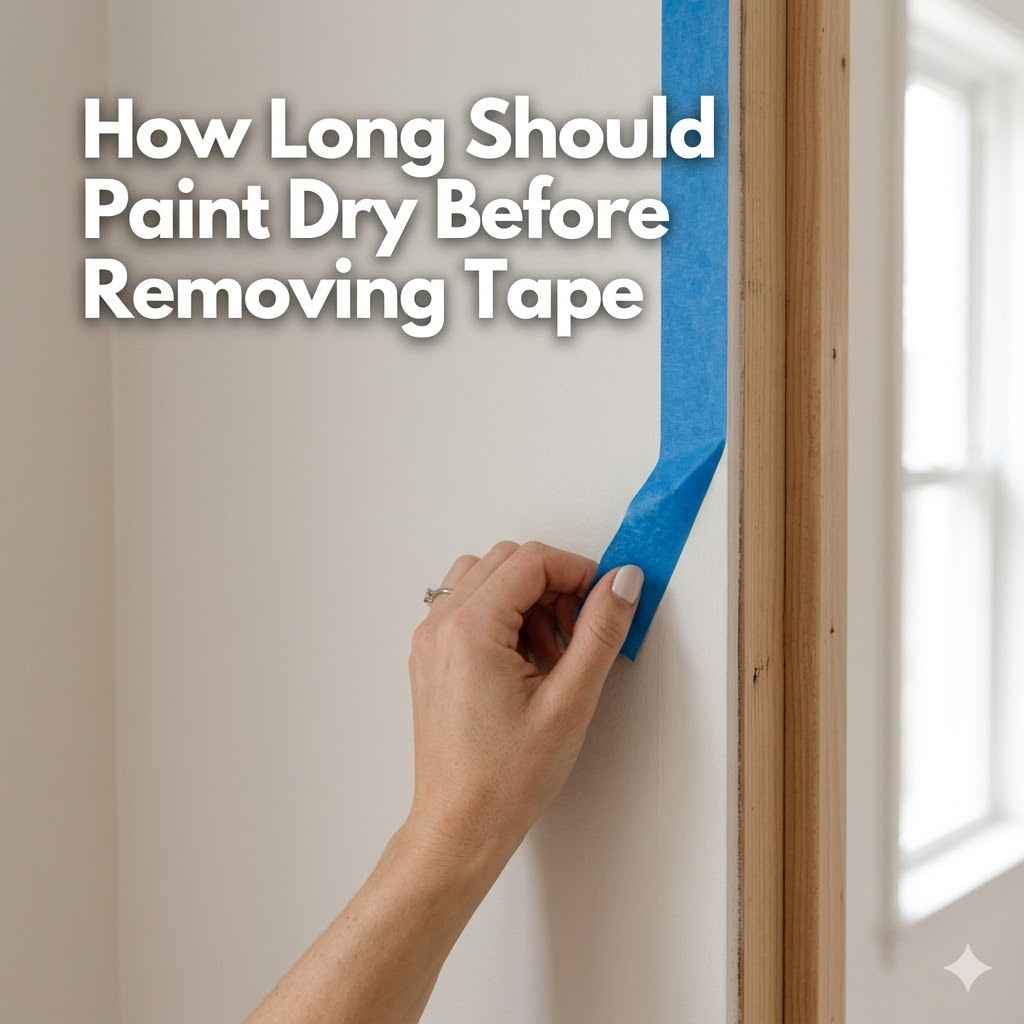
Even if you wait the perfect amount of time, how you remove the tape matters just as much. Yanking it off quickly can still cause damage. A slow, steady pull at a 45-degree angle is usually the best method.
This helps to cut a clean line and prevents the tape from pulling up the paint.
Before you start, you might want to score the edge of the tape with a sharp utility knife or a putty knife. This creates a definitive cut line. This scoring action separates the paint from the tape’s adhesive edge.
It ensures that if the paint has bonded slightly, the score line acts as a barrier. This technique is especially useful when dealing with paints that might be slightly stickier or when you’ve waited a bit longer than ideal.
Always work in good lighting so you can see the edge of the tape and the paint line clearly. This helps you to adjust your speed and angle as needed. If you see any paint starting to lift with the tape, stop immediately.
Try to gently ease the tape off at a shallower angle or use your scoring tool again.
-
The 45-Degree Angle Pull
Pulling the tape at a 45-degree angle is a standard technique that works for most situations. This angle allows the tape to peel away from the surface smoothly. It minimizes the upward force that can lift fresh paint.
Imagine peeling a sticker from a surface; a gentle, angled pull is always more effective than a straight, hard tug. This angle helps to guide the tape away from the painted edge cleanly.
-
Scoring the Edge
A helpful tip is to lightly score the edge where the tape meets the paint. You can use a utility knife or a thin putty knife for this. This action creates a clean cut line.
It helps to prevent paint from sticking to the tape. This step is particularly useful if you’re unsure about the paint’s dryness or if you’ve waited a bit longer. It ensures a sharp, defined line.
-
Work in Good Light
Good lighting is essential for seeing the exact line between the paint and the tape. This helps you to pull the tape at the correct angle and speed. You can better spot any areas where the paint might be sticking to the tape.
Clear visibility allows for precise movements and reduces the chances of errors. Always ensure your work area is well-lit.
Factors Affecting Paint Drying Times
Several factors influence how quickly paint dries. Understanding these can help you predict when it’s safe to remove tape. Each element plays a part in the chemical and physical process of paint solidifying.
This knowledge empowers you to make better decisions on painting day.
We’ll explore the impact of temperature, humidity, and airflow on paint drying. We’ll also touch on how different paint types and the thickness of the coat you apply can change drying times. Knowing these variables allows for more accurate planning and better outcomes for your painting projects.
Temperature’s Role in Drying
Temperature is one of the most significant factors affecting paint drying. Warmer temperatures generally speed up the drying process. This is because heat helps the solvents in the paint evaporate more quickly.
The chemical reactions that cause paint to harden also happen faster at higher temperatures.
Conversely, cooler temperatures slow down drying. If the temperature drops too low, some paints may not dry properly at all. Many paint manufacturers recommend specific temperature ranges for application and drying.
For example, a common recommendation is to paint when temperatures are between 50°F (10°C) and 85°F (29°C).
It’s important to note that the temperature of the surface being painted also matters. If the wall is cold, the paint will take longer to dry, even if the room air temperature is warm. This is why painting in unheated spaces during winter can be problematic.
-
Ideal Temperature Range
The sweet spot for most latex and acrylic paints is a moderate temperature, typically between 65°F and 75°F (18°C to 24°C). In these conditions, the paint dries efficiently without being rushed or held back too much. This range allows for optimal evaporation of water and proper film formation.
It’s the most predictable environment for achieving good results.
-
Cold Weather Painting
Painting in cold weather, below 50°F (10°C), can lead to several issues. The paint may dry to the touch very slowly, increasing the risk of smudging. More critically, the paint might not cure properly, leading to a weaker, less durable finish.
It can also result in a chalky appearance. Always check the paint can’s specifications for minimum temperature requirements.
-
Hot Weather Painting
While warmer temperatures speed up drying, very high heat can also cause problems. If the paint dries too quickly, especially with latex paints, it can form a skin on the surface before the underlying paint has fully dried. This can trap solvents and lead to a weak film, poor adhesion, or an uneven finish.
It may also make the paint more difficult to apply smoothly.
Humidity’s Impact on Dry Time
Humidity refers to the amount of water vapor in the air. High humidity significantly slows down the drying process, especially for water-based paints like latex and acrylics. These paints dry through evaporation, and when the air is already saturated with moisture, there’s less capacity for that moisture to evaporate from the paint.
In very humid conditions, the “dry to the touch” stage can take much longer. This means you’ll have to wait longer to remove tape, increasing the chance of accidentally smearing the paint. It also affects the paint’s ability to form a hard, durable finish, potentially leading to a softer film that is more susceptible to damage.
Conversely, very low humidity can cause paint to dry too quickly, as mentioned before. This is why controlling the environment, if possible, can be beneficial for achieving the best paint results. Using a dehumidifier in damp conditions or a humidifier in very dry conditions can help regulate the drying process.
-
High Humidity Challenges
When humidity is high (above 60%), water-based paints dry much slower. The water in the paint struggles to evaporate into the already moist air. This can extend the tack-free time considerably.
It’s not uncommon for a paint that normally dries in an hour to take three or four hours in very humid conditions. This delay means you must be extra patient before considering tape removal.
-
Low Humidity Effects
In extremely dry environments, paint can dry too fast. This rapid drying can create issues like lap marks, where the edges of freshly painted areas don’t blend well with previous coats. For tape removal, it means the paint might become brittle quickly, potentially leading to chipping or peeling when the tape is pulled.
It’s a delicate balance to strike.
-
Ideal Humidity Levels
The most favorable humidity level for painting is generally between 40% and 60%. In this range, water-based paints dry at a good pace without drying too quickly or too slowly. This allows for proper film formation and ideal conditions for tape removal after the paint has set.
Airflow and Ventilation
Good airflow helps paint dry faster by carrying away moisture and solvents from the surface. When you paint a room, opening windows and doors, or using fans, can make a significant difference. This constant exchange of air promotes quicker evaporation.
However, you need to be careful with fans. If a fan is blowing directly onto wet paint, it can cause it to dry too quickly and unevenly. This can lead to brush marks or roller texture becoming more pronounced.
It’s often best to have fans gently circulating air in the room rather than pointing directly at the painted surfaces.
For areas with poor natural ventilation, like closets or small bathrooms, using a fan or opening a nearby window is particularly important. Without adequate airflow, paint can remain wet for much longer periods, extending the time you have to wait before removing tape. This can be a major inconvenience.
-
Importance of Ventilation
Ventilation is crucial for efficient paint drying. It helps remove the moisture released by water-based paints and the volatile organic compounds (VOCs) emitted by all paints. This process speeds up the evaporation of the liquid components, allowing the paint to solidify faster.
Good airflow ensures a consistent drying environment.
-
Using Fans Safely
Fans can be very helpful for drying, but they must be used correctly. Avoid pointing fans directly at wet paint, as this can cause rapid, uneven drying, leading to a poor finish. Instead, use fans to gently circulate air throughout the room.
This indirect airflow promotes steady drying without adverse effects on the paint surface.
-
Enclosed Spaces
In areas with limited natural ventilation, such as small bathrooms, closets, or basements, artificial airflow is even more important. Opening any available windows or using fans is essential to ensure the paint dries within a reasonable timeframe. This prevents prolonged wetness and reduces the risk of tape adhesion issues.
Paint Type and Thickness Considerations
Not all paints are created equal, and the type of paint you choose will affect its drying time. Similarly, how thickly you apply the paint makes a difference. These two aspects are fundamental to determining the right moment for tape removal.
We’ll explore how different paint formulations, like latex versus oil-based, behave differently. We’ll also look at how multiple coats and the thickness of each coat impact the overall drying process. Understanding these nuances helps you tailor your approach to the specific materials you’re using.
Latex vs. Oil-Based Paints
Latex and acrylic paints are water-based. They dry relatively quickly as the water evaporates, allowing the acrylic polymers to fuse together. This makes them ideal for projects where you need to work efficiently.
Oil-based paints, on the other hand, use solvents that evaporate more slowly. They dry through a process of oxidation, which takes longer. While they offer a very durable and smooth finish, they require more patience when it comes to drying and tape removal.
The slower drying means the paint stays wet longer, making it more prone to smearing if the tape is removed too soon.
For a beginner, latex or acrylic paints are generally easier to work with due to their faster drying times and easier cleanup with water. This makes the decision of How Long Should Paint Dry Before Removing Tape? a bit more straightforward with these types.
-
Latex and Acrylic Paints
Water-based paints are the most common choice for interior walls. They dry to the touch typically within 1 to 4 hours. Full curing can take several days to weeks.
Because they dry quickly, the window for removing tape cleanly is often wider and more forgiving. This makes them popular for DIY projects where efficiency is desired.
-
Oil-Based Paints
Oil-based paints, often used for trim, doors, and furniture, dry much slower. They can take 6 to 10 hours to dry to the touch and several days to fully cure. This longer drying time means you must be more cautious and patient when removing tape to avoid lifting the paint.
Their hard, smooth finish is highly prized for durability.
-
Specialty Paints
Some specialty paints, like chalk paint or mineral paints, have unique drying properties. For example, chalk paint can dry very quickly to the touch but requires a sealant (like wax or polycrylic) for durability. Always refer to the manufacturer’s instructions for specific drying times and recommendations for tape removal.
Thickness of Paint Coats
The thickness of the paint layer you apply has a direct impact on drying time. A thin coat of paint will dry much faster than a thick, heavy coat. This is because there is less liquid to evaporate.
When you apply multiple thin coats, each layer can dry properly before the next is applied, ensuring better adhesion and a smoother finish.
Applying paint too thickly can lead to a situation where the surface appears dry but the underlying layers are still wet. This is a common mistake that can cause issues with tape removal. The outer “skin” might seem dry, but the paint is still soft underneath, leading to smearing or peeling when the tape is pulled.
It’s generally recommended to apply two thin, even coats of paint rather than one thick one. This approach ensures better coverage and a more durable finish, and it helps to manage drying times more effectively. Always aim for consistency in your application thickness.
-
Thin Coats Dry Faster
A thin coat of paint has less volume of liquid to evaporate. This means the water or solvents can escape more readily, allowing the paint to dry to the touch much faster. Thin coats also adhere better to the surface, forming a more resilient film.
For tape removal, this quick drying is advantageous.
-
Thick Coats Take Longer
Applying paint too heavily creates a thick layer that traps moisture. The outer surface may appear dry, but the paint underneath remains wet and soft for a much longer period. This significantly increases the risk of the paint smearing or peeling when tape is removed, especially if it’s pulled too soon.
-
Multiple Thin Coats Advantage
Using multiple thin coats is the preferred method. It allows each layer to dry properly before the next is applied. This controlled drying process results in a more uniform finish, better durability, and a more predictable schedule for tape removal.
It’s a more reliable approach for professional results.
Primer and its Influence
Primer is often applied before paint, and it also has its own drying time. The primer needs to dry sufficiently before you apply your topcoat of paint. If you apply paint over unfixed primer, the paint might not adhere properly, and both could be compromised when removing tape.
The type of primer also matters. Water-based primers generally dry faster than oil-based ones. Always check the primer manufacturer’s instructions for recommended drying times.
Rushing this step can negate the benefits of using primer in the first place.
Once the topcoat is applied, the rules for removing tape still apply to the final paint layer. However, ensuring the primer layer is dry and sound contributes to the overall stability of the paint job, making tape removal more successful. A well-prepared surface leads to better results.
-
Primer Drying Time
Primer needs to dry according to its specific instructions before you apply paint. Most water-based primers are dry to the touch within 30 minutes to 1 hour and ready for a topcoat within 2 to 4 hours. Oil-based primers usually take longer, often 4 to 6 hours to dry and 16 to 24 hours for a topcoat.
-
Topcoat Over Dry Primer
Applying your main paint color over a properly dried primer ensures good adhesion. If the primer is still wet or tacky, the new paint might not bond correctly, and this can cause issues during tape removal. The primer acts as a foundation, and a solid foundation is essential for a clean paint line.
-
Layer Interaction
While the primer is a separate layer, its drying is crucial for the overall paint system. If the primer is not fully dry, it can affect how the topcoat cures and adheres. This can indirectly impact how the tape interacts with the painted surface when it’s time for removal.
When to Use Different Tapes
Not all painter’s tapes are the same. Different types are designed for different surfaces and paint types. Using the right tape for the job can also influence when you should remove it.
We’ll discuss general-purpose painter’s tape, delicate surface tape, and high-performance tape. Understanding their properties will help you choose the best tape and know the best timing for its removal.
General Purpose Painter’s Tape
This is the most common type of painter’s tape. It’s suitable for most surfaces like drywall, wood, and glass. It offers a good balance of adhesion and ease of removal.
For latex and acrylic paints, this tape can usually be removed within 1 to 24 hours.
However, it’s still best to check the paint’s dryness. If the paint is still very wet, even general-purpose tape can lift it. If the paint has been on for more than a day, especially in humid conditions, the tape might adhere too strongly.
Always test a small section first if you’re unsure.
-
Adhesion Level
General-purpose tape has medium adhesion, designed to stick well enough to prevent paint bleed but be removable without damaging most surfaces. It’s a versatile option for many DIY painting tasks.
-
Best Use Cases
Ideal for walls, trim, windows, and even some furniture where a clean line is needed. It’s a workhorse for many common painting projects.
-
Removal Window
Typically, it can be removed within 12 to 24 hours after painting for latex and acrylic paints, provided the paint is dry to the touch.
Delicate Surface Painter’s Tape
This tape is designed for surfaces that are easily damaged, like freshly painted walls (less than 24 hours old), wallpaper, or delicate wood. It has a low-tack adhesive, meaning it’s not very sticky. This makes it easy to remove without pulling off paint or damaging the underlying surface.
Because of its low tack, you often need to remove delicate surface tape sooner than general-purpose tape. It’s best used when the paint is still quite wet, perhaps as little as 1 to 2 hours after application, as long as it has formed a bit of a skin. The primary goal with this tape is to protect the surface, not necessarily to create a razor-sharp line from very dry paint.
-
Low Tack Adhesive
This tape features a very gentle adhesive that is specifically designed to not damage delicate surfaces. It’s ideal for situations where you might be painting over already painted surfaces or fragile materials.
-
Best Use Cases
Perfect for freshly painted walls, wallpaper, or when painting furniture with a sensitive finish. It minimizes the risk of paint or finish damage.
-
Removal Timing
It’s best to remove this tape while the paint is still wet or very recently dried, often within 1 to 4 hours. The earlier you remove it, the less chance of any adhesion issues.
High-Performance Painter’s Tape
This tape offers stronger adhesion and sharper lines, often used for detailed work or when painting with oil-based paints or certain specialty finishes. It can provide a more professional-looking edge.
Because it adheres more strongly, it’s crucial to wait for the paint to be sufficiently dry. For latex paints, you might still remove it within the 1 to 24-hour window, but for oil-based paints, you’ll likely need to wait much longer, possibly 24 hours or more, to ensure the paint is firm enough not to lift. Always follow the manufacturer’s recommendations for the tape and the paint.
-
Strong Adhesion
This tape provides a superior seal and is excellent at preventing paint bleed. It’s designed for demanding applications where a very clean, sharp line is critical.
-
Best Use Cases
Ideal for complex paint jobs, straight lines on trim, or when using oil-based paints that require a more robust tape. It helps achieve professional-level results.
-
Removal Considerations
Due to its strong adhesive, it’s vital to wait for the paint to dry adequately. For latex paints, this could be within 12-24 hours. For oil-based paints, you may need to wait longer, up to 48 hours, ensuring the paint is fully set.
Here’s a quick comparison table for different painter’s tapes:
| Tape Type | Adhesion Level | Best For | Typical Removal Window (Latex Paint) |
|---|---|---|---|
| General Purpose | Medium | Most walls and trim | 1-24 hours |
| Delicate Surface | Low | Fresh paint, wallpaper | 1-4 hours |
| High Performance | High | Sharp lines, oil-based paints | 12-48 hours (longer for oil-based) |
Tips for Success and Avoiding Mistakes
Getting clean paint lines involves more than just knowing when to pull the tape. It’s about preparation, technique, and a little bit of foresight. Even experienced painters can encounter issues if they’re not careful.
This section offers practical advice to help you achieve perfect results on your next painting project.
We’ll cover essential preparation steps, how to handle tricky areas, and what to do if you encounter problems. These tips will help you avoid common mistakes and feel more confident when it’s time to remove the tape.
Preparation is Key
Before you even pick up a paintbrush, proper preparation is crucial. Ensure the surfaces you’re painting are clean and dry. If you’re painting over old paint, make sure it’s not peeling or flaking.
Any imperfections on the surface will show up more clearly after you’re done.
Apply your tape carefully and press it down firmly along the edges. This is vital for preventing paint from seeping underneath. Run your fingernail or a plastic putty knife along the edge of the tape to create a good seal.
A well-sealed tape line is your first line of defense against messy edges.
-
Clean Surfaces
Always start with clean surfaces. Dust, grease, or grime can prevent paint and tape from adhering properly, leading to poor results. Wiping down surfaces with a mild cleaner and letting them dry thoroughly is an essential first step.
-
Secure Tape Seal
Press down the edges of the painter’s tape firmly. Use a putty knife or your fingernail to create a tight seal. This prevents paint from creeping under the tape, which is a common cause of uneven lines and a less professional finish.
-
Test Paint Coverage
Before taping, ensure your base coat (if any) or the previous color is adequately dry. Applying tape over a freshly painted surface that hasn’t set can lead to paint lifting, even if it’s not the final coat you’re worried about.
Dealing with Trim and Corners
Trim, like baseboards and window frames, often requires careful taping. Ensure the tape follows the contour of the trim exactly. For corners, make sure the tape is aligned perfectly to create a crisp, straight line where two painted surfaces meet.
When removing tape from trim, especially if the trim is a different color or finish than the wall, be extra gentle. The transition between the wall and trim is a common area for paint to lift. Scoring the edge can be very helpful here.
For interior corners where two walls meet, ensure the tape is straight and pressed down firmly on both sides.
-
Aligning Tape on Trim
When taping trim, ensure the tape’s edge perfectly follows the outline of the trim. A slight misalignment can result in an uneven paint line. Take your time to get this precise.
Press the tape down firmly along the entire length of the trim.
-
Crisp Corner Lines
For interior corners, ensure the tape is applied with extreme care. The tape should meet at the corner without any gaps or wrinkles. A firm seal is essential to prevent paint from bleeding into the adjacent wall or trim.
-
Scoring for Precision
In areas like trim or where two different colors meet, lightly scoring the edge of the tape with a sharp blade can create a perfect separation line. This is especially useful if you’re concerned about the paint sticking to the tape.
What to Do if Paint Lifts
If you notice paint starting to lift with the tape, don’t panic. Stop pulling immediately. Try to gently ease the tape off at a shallower angle, or even reverse the direction slightly for a moment.
Sometimes, lifting the tape while the paint is still a little wet can help it settle back down.
If some paint has already smeared, you’ll likely need to do some touch-up work. Once the area is dry, use a small artist’s brush to carefully reapply the paint along the edge. For bigger lifts or peeled areas, you might need to lightly sand the area, reapply primer, and then repaint that section.
Small imperfections can often be fixed with a steady hand and a bit of patience.
A common statistic from home improvement surveys suggests that around 40% of DIY painters experience some paint lifting when removing tape. This highlights how common the issue is and why knowing the best practices is so important.
-
Stop and Reassess
If you see paint lifting, stop pulling the tape immediately. Don’t force it. Assess the situation to understand why it’s happening.
Is the paint too wet? Is the tape not sealed well?
-
Gentle Removal Technique
Try to pull the tape off slowly and at a very shallow angle, almost parallel to the surface. Sometimes, gently pressing the paint back down with a clean cloth before pulling can help. Experiment with different angles to find what works best.
-
Touch-Up and Repair
For minor smudges, a small artist’s brush can be used to carefully touch up the line after the paint is dry. For more significant peeling, you may need to lightly sand the area, apply a bit of primer, and then repaint the affected section for a seamless finish.
Frequently Asked Questions
Question: What is the best type of tape to use for painting?
Answer: The best tape depends on the surface. General-purpose painter’s tape is good for most walls. Use delicate surface tape for freshly painted walls or wallpaper.
High-performance tape is great for sharp lines and oil-based paints.
Question: Can I remove tape immediately after painting?
Answer: It’s generally not recommended. Removing tape while the paint is too wet can cause smearing and peeling. Wait until the paint is dry to the touch, which usually takes at least 1 to 4 hours for latex paint.
Question: What happens if I leave the tape on too long?
Answer: If you leave tape on for too long, especially for more than 24 hours, the paint can dry and bond with the tape’s adhesive. This can cause the paint to peel off with the tape, leaving jagged edges and requiring touch-ups.
Question: How do I get a perfectly straight paint line?
Answer: Proper preparation is key. Ensure the tape is applied straight and sealed down firmly. Pull the tape off slowly at a 45-degree angle while the paint is dry to the touch but not fully cured.
Scoring the edge of the tape with a utility knife can also help create a clean line.
Question: Does humidity really affect paint drying time?
Answer: Yes, humidity significantly affects drying time, especially for water-based paints. High humidity slows down the evaporation of water from the paint, meaning it takes much longer to dry. Conversely, very low humidity can cause paint to dry too quickly, leading to potential surface issues.
Conclusion
Knowing How Long Should Paint Dry Before Removing Tape? is about finding that perfect moment. Wait until paint is dry to the touch, usually 1-24 hours. Pull tape slowly at a 45-degree angle.
Proper prep and the right tape choice make all the difference.