How Much Is It To Sand And Refinish Hardwood Floors? Key
Sanding and refinishing hardwood floors typically costs between $3 and $8 per square foot when hiring a professional. For a DIY project, expect to pay around $1 to $2 per square foot for material and equipment rentals. The final price depends on your floor’s condition, the type of finish you choose, and your location.
Hello, I’m Md Meraj! Seeing your beautiful hardwood floors look dull, scratched, or worn out can be a real downer. You know they have the potential to shine, but the thought of refinishing them feels overwhelming. Maybe you’re worried about the cost, the mess, or just how to even get started. It’s a common feeling, and you’re not alone.
Don’t worry, I’m here to help. Refinishing your floors is one of the most rewarding home projects you can do. It can completely transform a room, bringing back warmth and character. In this guide, I’ll break down exactly how much it costs to sand and refinish hardwood floors, whether you hire a pro or do it yourself. We’ll look at every factor so you can make the best choice for your home and budget.
Understanding the Cost: What Really Goes into the Price?
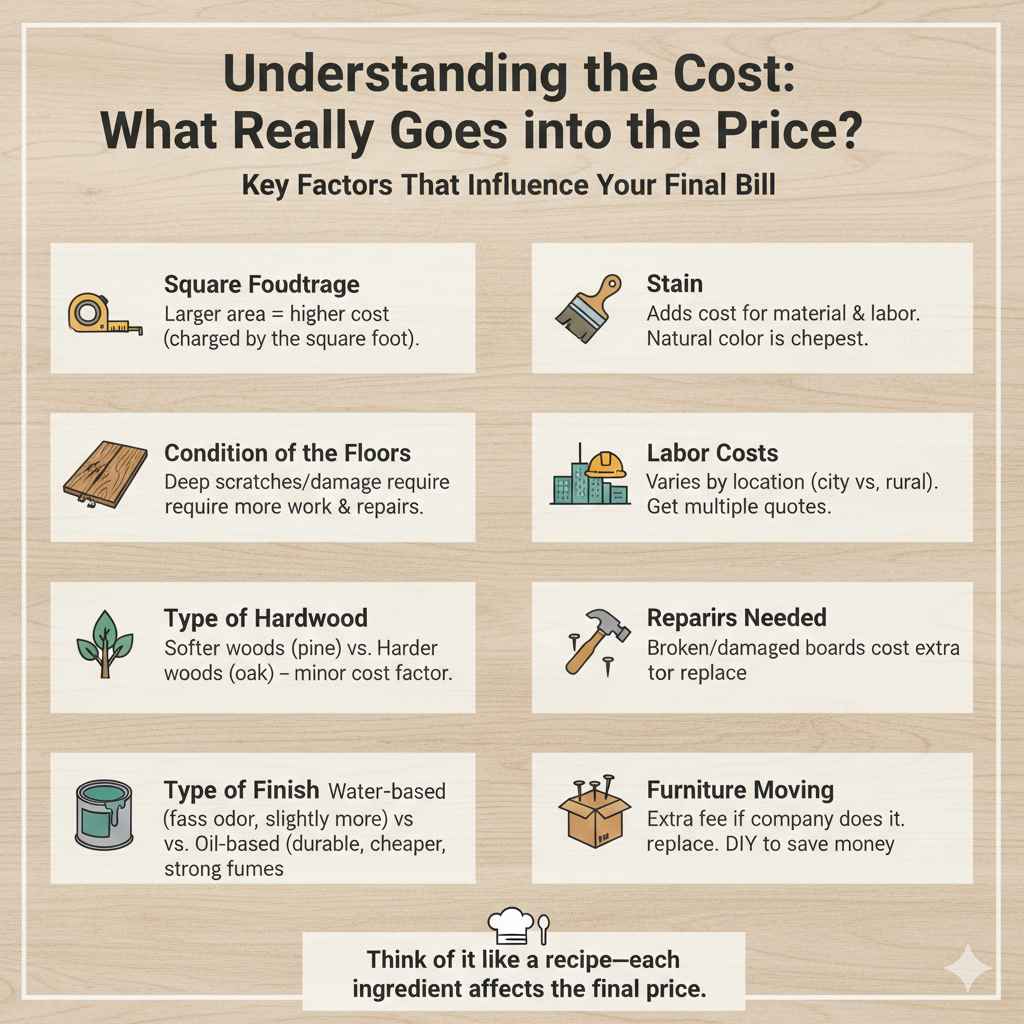
When you get a quote for refinishing your floors, the price isn’t just a random number. Several key factors come together to determine the final cost. Understanding these will help you see where your money is going and identify areas where you might be able to save. Think of it like a recipe—each ingredient affects the final taste, and each factor here affects the final price.
Key Factors That Influence Your Final Bill
Here are the main things that professionals consider when creating your estimate, and what you’ll need to budget for if you tackle the job yourself.
- Square Footage: This is the biggest factor. The larger the area, the more it will cost in both labor and materials. Professionals almost always charge by the square foot.
- Condition of the Floors: Are your floors just a little dull, or do they have deep scratches, pet stains, or water damage? Floors in poor condition require more sanding passes and potentially some repair work, which adds to the cost.
- Type of Hardwood: Softer woods like pine can be more delicate and may require a more careful approach than harder woods like oak. While this doesn’t drastically change the price, it can be a minor factor.
- Type of Finish: You have a choice between oil-based and water-based polyurethane. Water-based options tend to cost a little more upfront but dry faster and have less odor. Oil-based finishes are traditionally more durable and cheaper but take longer to cure and have strong fumes.
- Stain: Do you want to change the color of your wood? Adding a coat of stain will cost extra for the material and the additional labor step. Keeping the natural color is the most budget-friendly option.
- Labor Costs: This varies a lot depending on where you live. Labor rates in a major city will be higher than in a rural area. It’s always a good idea to get quotes from at least three different local contractors.
- Repairs Needed: If you have any broken or damaged boards that need to be replaced, this will be an additional charge. The cost will depend on the extent of the damage and the type of wood needed for the repair.
- Furniture Moving: The room needs to be completely empty. Most companies will charge an extra fee to move furniture out and back in. You can save money by doing this yourself.
Professional vs. DIY: A Detailed Cost Breakdown
Now for the big question: should you hire a professional or roll up your sleeves and do it yourself? Both paths have their pros and cons, and the right choice really depends on your budget, your timeline, and your comfort level with home improvement projects. Let’s break down the numbers for each.
The Cost of Hiring a Professional
Hiring a professional is the most hassle-free option. They have the experience, the high-end equipment, and the know-how to get the job done efficiently and with beautiful results. You can expect to pay anywhere from $3 to $8 per square foot. For a standard job without major repairs, the average cost often lands in the $4 to $6 range.
Let’s look at what that might cost for common room sizes.
| Room Size / Area | Average Cost Range (Professional) |
|---|---|
| Small Bedroom (150 sq. ft.) | $450 – $1,200 |
| Living Room (300 sq. ft.) | $900 – $2,400 |
| Large Open Area (500 sq. ft.) | $1,500 – $4,000 |
| Whole First Floor (1000 sq. ft.) | $3,000 – $8,000 |
What’s Usually Included in a Pro’s Quote?
A standard professional quote typically covers:
- Sanding the floor down to the bare wood (usually three passes with different sandpaper grits).
- Applying a wood stain of your choice (if desired).
- Applying multiple coats of a protective finish (polyurethane).
- Minor cleanup of the work area.
Potential Extra Costs to Watch For
Always ask your contractor what is and isn’t included. Common add-ons include:
- Moving Furniture: Often an extra $50 – $100 per room.
- Removing Old Flooring: If there’s carpet or vinyl to be removed, this will add to the labor cost.
- Stairs: Refinishing stairs is a detailed, labor-intensive job. Expect to pay $40 – $100 per stair tread.
- Significant Repairs: Replacing boards or patching large damaged areas will be quoted separately.
The Cost of Doing It Yourself (DIY)
If you’re looking to save money and don’t mind putting in some hard work, a DIY approach can be very rewarding. The cost for a DIY floor refinishing project typically falls between $1 and $2 per square foot. The main expenses are equipment rental and materials.
The biggest piece of equipment you’ll need is a drum sander for the main floor area and an edger for the corners and along the walls. Renting these usually costs between $60 and $100 per day.
| DIY Item | Estimated Cost | Notes |
|---|---|---|
| Drum Sander & Edger Rental | $60 – $100 per day | Most projects require 1-2 days of rental. |
| Sandpaper (Various Grits) | $50 – $100 | Depends on the size of the room and condition of the floor. |
| Wood Stain (Optional) | $30 – $60 per gallon | A gallon covers about 500 sq. ft. |
| Polyurethane Finish | $50 – $80 per gallon | You’ll need at least two coats. A gallon covers 400-500 sq. ft. per coat. |
| Applicators & Supplies | $40 – $70 | Includes brushes, rollers, paint trays, tack cloths, and painter’s tape. |
| Safety Gear | $30 – $50 | Crucial! Includes a good respirator mask, safety glasses, and hearing protection. |
| Total Estimated DIY Cost (for 300 sq. ft.) | $300 – $600 | This compares to $900 – $2,400 for a professional. |
Remember, safety is your top priority. The sanding process creates a huge amount of fine wood dust, which can be harmful to breathe in. The Occupational Safety and Health Administration (OSHA) provides detailed information on the hazards of wood dust, so be sure to wear a high-quality respirator mask at all times.
Step-by-Step Guide: How to Sand and Refinish Your Floors
Feeling brave and ready to tackle this yourself? Great! I’ll walk you through the process step by step. Take your time, be patient, and you’ll get amazing results. This is a big job, but it’s absolutely achievable.
Step 1: Gather Your Tools and Materials
Before you start, make sure you have everything you need. A trip to the hardware store mid-project is no fun. Here’s a good checklist:
- Drum Sander and Edger (rented)
- Sandpaper for both sanders (coarse, medium, and fine grits—e.g., 36, 60, and 100)
- Shop vacuum
- Hammer and nail set
- Pry bar (for removing shoe molding)
- Plastic sheeting and painter’s tape
- Wood stain (optional)
- Polyurethane finish (water-based or oil-based)
- Applicators (lambswool for oil-based, synthetic pad for water-based)
- Paint brushes for cutting in edges
- Clean rags and tack cloths
- Safety Gear: Respirator mask, safety glasses, hearing protection, gloves
Step 2: Prepare the Room
Proper preparation is the key to a professional-looking finish. Don’t rush this part!
- Empty Everything: Remove all furniture, rugs, and curtains from the room.
- Seal the Area: Wood dust gets everywhere. Use plastic sheeting and painter’s tape to seal doorways, vents, and any built-in cabinets you want to protect.
- Remove Molding: Gently pry off any shoe molding or quarter-round trim along the baseboards. Label the pieces so you can easily put them back later.
- Check for Nails: Carefully walk the entire floor and look for any nails sticking up. Use a hammer and nail set to sink them about 1/8 inch below the surface. A rogue nail can shred your sandpaper and gouge your floor.
Step 3: The Big Job – Sanding the Floor
This is where the magic happens. The goal is to remove the old finish and a very thin layer of wood to expose a fresh, clean surface.
- First Pass (Coarse Grit): Start with the coarsest grit sandpaper (e.g., 36-grit). This pass does the heavy lifting, removing the old finish and leveling out minor imperfections. Always keep the sander moving with the grain of the wood. Never stop in one spot, as it will create a divot.
- Use the Edger: After each pass with the drum sander, use the edger with the same grit sandpaper to sand the areas the big machine couldn’t reach, like along the walls and in corners.
- Second Pass (Medium Grit): Change to a medium-grit sandpaper (e.g., 60-grit) on both machines. This pass will smooth out the scratches left by the coarse grit. Overlap your passes slightly to ensure even coverage.
- Final Pass (Fine Grit): For your last pass, use a fine-grit sandpaper (e.g., 100-grit). This will give you a beautifully smooth surface that’s ready for finishing.
Step 4: Clean Up and Prepare for Finishing
You’ll have a lot of dust. Getting rid of all of it is critical for a smooth finish.
- Vacuum Thoroughly: Use a shop vacuum to clean the floors, walls, windowsills—everywhere. Go over the floor twice.
- Wipe It Down: Use a slightly damp cloth or a tack cloth to wipe the entire floor. This picks up the finest dust particles that the vacuum may have missed. Let the floor dry completely.
Step 5: Applying Stain (Optional)
If you want to change your floor’s color, now is the time. If you love the natural color, you can skip this step.
- Test First: Always test your stain on a small, hidden area (like inside a closet) to make sure you like the color.
- Apply Evenly: Use a clean rag or an applicator pad to apply the stain in small sections, working with the grain of the wood.
- Wipe Off the Excess: Follow the manufacturer’s instructions. Usually, you’ll let the stain sit for a few minutes and then wipe off the excess with a clean rag. Letting it sit longer results in a darker color.
- Let It Dry: Allow the stain to dry completely. This can take 24 hours or more.
Step 6: Applying the Protective Finish (Polyurethane)
This is the final step that protects your floor and gives it that beautiful sheen. Ventilation is extremely important here, so open windows and use fans.
- Cut in the Edges: Use a paintbrush to apply the polyurethane along the edges of the room first.
- Apply the First Coat: Use your applicator to apply a thin, even coat to the rest of the floor, working in long, smooth strokes with the grain. Make sure you don’t paint yourself into a corner!
- Let It Dry and Scuff Sand: Let the first coat dry completely (check the can for times). Then, lightly sand the entire floor by hand with very fine-grit sandpaper (220-grit). This is called “scuff sanding” and it helps the next coat adhere better.
- Clean and Repeat: Clean up all the dust from scuff sanding with a vacuum and tack cloth. Then, apply your second coat. Most floors need two or three coats for proper protection. Do not scuff sand after the final coat.
For more detailed guidelines on finishing, the National Wood Flooring Association (NWFA) offers excellent resources for both professionals and homeowners.
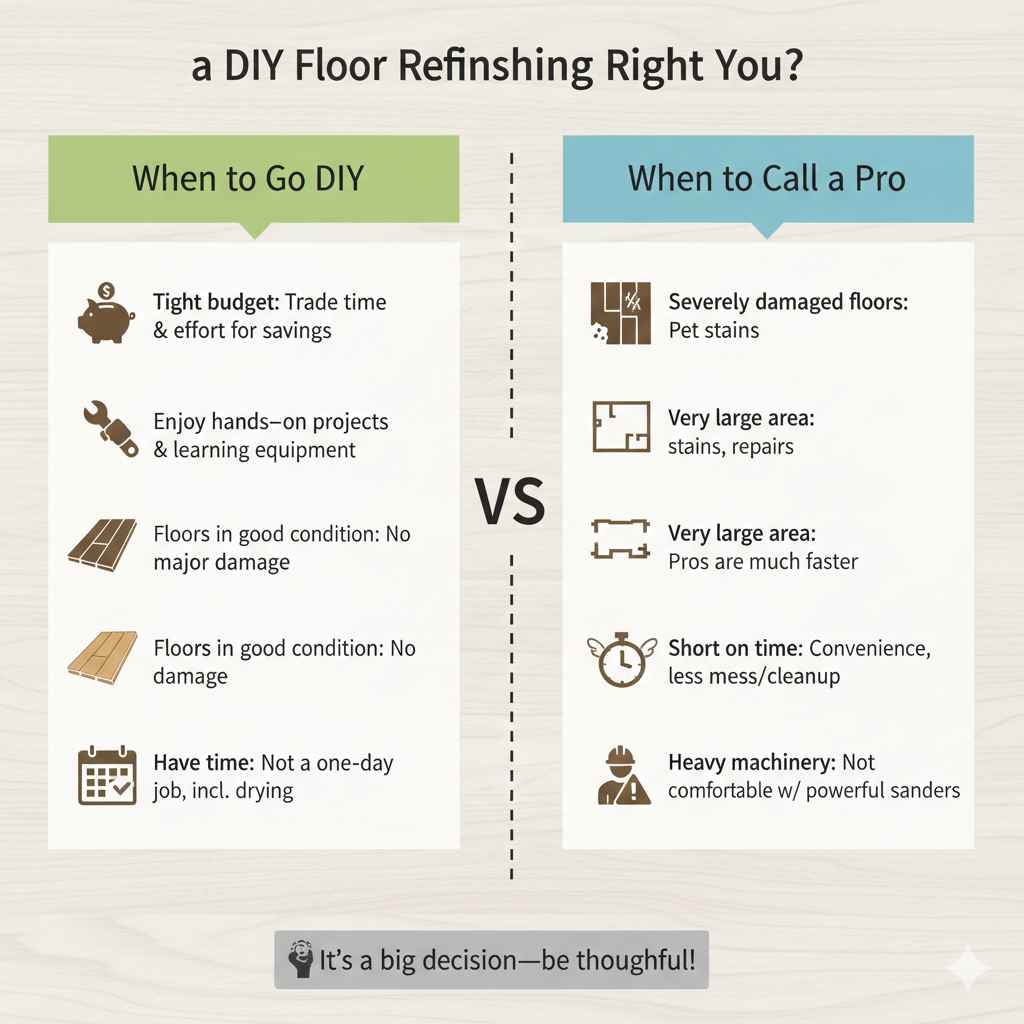
Is DIY Floor Refinishing Right for You?
Still on the fence? It’s a big decision, and it’s smart to be thoughtful about it. Here’s a quick guide to help you decide whether to take the DIY route or hire a trusted professional.
When to Go DIY
- You have a tight budget and are willing to trade your time and effort for significant cost savings.
- You enjoy hands-on projects and are confident in your ability to learn and operate rental equipment.
- Your floors are in relatively good condition, without major damage like deep gouges or water stains.
- You have the time to dedicate to the project. It’s not a one-day job; expect it to take a full weekend or longer, including drying time.
When to Call a Pro
- Your floors are severely damaged, have pet stains, or need extensive repairs. Professionals have the tools and experience to handle these tough issues.
- You have a very large area to refinish. A pro can get it done much faster.
- You are short on time or have a busy schedule. The convenience of having someone else handle the work, mess, and cleanup is often worth the cost.
- You are not comfortable operating heavy, powerful machinery like a drum sander. In the wrong hands, it can easily damage a floor.
Frequently Asked Questions (FAQ)
How long does it take to sand and refinish hardwood floors?
For a professional crew, a standard-sized project (around 500 sq. ft.) usually takes 2 to 4 days. For a DIY project, it’s wise to budget at least 4 to 5 days to account for the learning curve, work, and proper drying times between coats.
Can I stay in my house during the refinishing process?
It’s strongly recommended that you stay elsewhere. The process is noisy, dusty, and the fumes from stains and finishes can be very strong, especially with oil-based products. You’ll also need to stay completely off the floors for at least 24-48 hours after the final coat is applied.
Is it cheaper to refinish or replace hardwood floors?
Refinishing is almost always significantly cheaper than replacing hardwood floors. New hardwood floor installation costs anywhere from $8 to $25 per square foot. Refinishing, at $3 to $8 per square foot, is a much more budget-friendly way to get floors that look brand new.
What’s the difference between oil-based and water-based polyurethane?
Oil-based polyurethane is more durable, cheaper, and gives the wood a warm, amber tone. However, it has a very strong smell and takes much longer to dry. Water-based polyurethane has low odor, dries quickly, and goes on clear, so it won’t change the wood’s natural color. It’s slightly less durable and costs more than its oil-based counterpart.
How do I know if my floors can be refinished?
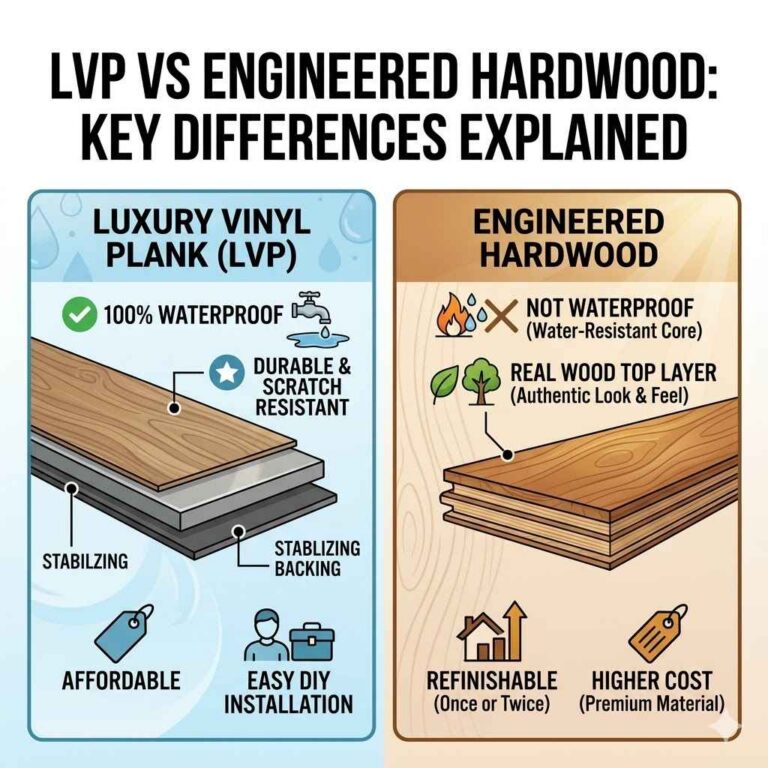
Most solid hardwood floors can be sanded and refinished multiple times. The key is the thickness of the wood layer above the tongue and groove. If you have engineered hardwood, it depends on the thickness of the top veneer. If it’s very thin, it may not be possible to sand it. A professional can assess this for you.
What is the most durable finish for hardwood floors?
For residential use, oil-based polyurethane is traditionally considered one of the most durable and scratch-resistant options. However, modern water-based formulas have improved significantly and offer excellent durability with the added benefits of faster drying times and lower VOCs (volatile organic compounds).
Conclusion: Giving Your Floors a New Lease on Life
Refinishing your hardwood floors is more than just a home improvement project; it’s an investment in the beauty and value of your home. Whether you decide to hire a professional for a flawless, worry-free finish or embark on a rewarding DIY journey, the result is the same: stunning floors that bring warmth and elegance to your space.
By understanding the costs, weighing the pros and cons of each approach, and following the right steps, you can make a decision that fits your budget and lifestyle. Don’t let worn-out floors get you down. With a little planning, you can restore them to their original glory and enjoy their timeless beauty for many years to come. Happy building!