How To Adjust A uPVC Door Hinge Properly
Fixing a sticking or misaligned uPVC door can seem tricky, especially if you’re new to home repairs. Many people find adjusting uPVC door hinges a bit confusing because the adjustment screws aren’t always obvious, and it’s easy to overtighten them. But don’t worry, it’s usually a simple fix!
This guide will walk you through how to adjust a uPVC door hinge properly, step by step. You’ll be able to get your door swinging smoothly again in no time.
Understanding uPVC Door Hinges
uPVC door hinges are the unsung heroes of your entryway, allowing your door to open and close smoothly. Unlike traditional metal hinges, uPVC hinges are often made from durable, weather-resistant plastic materials, hence the name uPVC (unplasticized polyvinyl chloride). These hinges are designed to withstand the elements and require minimal maintenance.
However, over time, they can sag or become misaligned due to the weight of the door, frequent use, or even shifts in the building’s structure. This is where the ability to adjust them becomes essential for maintaining door functionality and appearance.
The beauty of uPVC hinges lies in their adjustability. Most modern uPVC doors are fitted with what are commonly known as ‘three-dimensional’ hinges. This means they can typically be adjusted in three directions: up and down (height), left and right (side-to-side), and in and out (compression or depth).
This comprehensive adjustment capability allows for fine-tuning the door’s position within the frame, ensuring a snug fit, preventing drafts, and eliminating the annoying scrape of the door against the floor or frame. Learning to make these adjustments can save you the cost of a professional call-out.
Types of uPVC Door Hinges
There are a few common types of uPVC door hinges you might encounter. The most prevalent are the surface-mounted butt hinges and the concealed (or invisible) hinges. Butt hinges are visible on the exterior of the door when it’s closed, often with decorative caps covering the adjustment screws.
Concealed hinges are hidden within the door frame and door leaf, offering a sleeker, more minimalist look. Both types, however, generally offer similar adjustment mechanisms, usually involving accessible screws that control the hinge’s movement.
Surface-mounted hinges are easier to access for adjustments as they are not hidden. They typically have screw caps that pop off to reveal the adjustment points. Concealed hinges, while offering a cleaner aesthetic, might require a bit more effort to locate the adjustment screws, sometimes hidden behind plastic covers or requiring the door to be slightly ajar.
Regardless of the type, the underlying principle of adjusting tension and position remains the same.
The materials used in uPVC hinges are chosen for their durability and resistance to rust and corrosion, making them a practical choice for external doors. However, like any mechanical component, they can wear down or get out of alignment. Understanding the specific type of hinge on your door is the first step in knowing where to look for adjustment screws.
The Role of Adjustment Screws
Adjustment screws are the key to fine-tuning your uPVC door hinges. These screws allow you to make precise movements of the door within its frame. Each hinge typically has multiple screws, and each screw controls a specific type of adjustment.
For example, one screw might adjust the vertical height, another the horizontal position, and a third the compression. It’s important to identify which screw does what for each hinge before you start turning.
Identifying these screws usually involves looking for small, often hexagonal, screw heads. Sometimes they are covered by plastic caps that need to be gently pried off with a flat-head screwdriver or a specialized tool. The direction you turn these screws will dictate the direction the door moves.
A quarter turn is usually enough to make a noticeable difference, so it’s best to make small adjustments and test the door’s movement frequently. Overtightening can strip the threads or damage the hinge mechanism.
When you turn an adjustment screw, it either pushes or pulls a component within the hinge mechanism. This action subtly shifts the door’s alignment. For instance, tightening a screw might pull the door closer to the handle side, while loosening it might push it away.
Understanding this basic mechanical principle helps demystify the process and empowers you to make the necessary corrections with confidence.
Common Problems and Solutions
One of the most common issues faced by homeowners with uPVC doors is a door that sticks or rubs against the frame. This often happens when the door has sagged slightly due to its weight or the settling of the house. Another frequent problem is a draft coming from around the door, indicating that the compression seal isn’t tight enough.
Both of these problems can usually be resolved by adjusting the hinges.
Another sign that your hinges need adjustment is if the locking mechanism doesn’t align properly with the keeps on the frame. If you have to lift or force the handle to lock or unlock the door, this is a clear indicator that the door is out of alignment. Left unaddressed, this can put undue stress on the locking mechanism, potentially leading to more serious and costly repairs.
The good news is that most of these issues are preventable and fixable. With a few simple tools and a bit of patience, you can have your uPVC door operating perfectly again. The following sections will guide you through the specific steps needed to tackle these common problems effectively.
Door Sagging or Rubbing
When your uPVC door starts to sag, it usually means the bottom corner is dropping. This causes the door to rub against the floor or the bottom of the door frame. To fix this, you typically need to adjust the hinges to lift the door.
This is often achieved by adjusting the vertical screws on the bottom hinge or both hinges, depending on the hinge design and the severity of the sag.
The process involves identifying the vertical adjustment screw on the hinge. On many hinges, this screw is located at the bottom of the hinge, and turning it clockwise will lift the door, while turning it counter-clockwise will lower it. It’s crucial to make small adjustments, perhaps a quarter turn at a time, and then test the door by opening and closing it.
You’re looking for the point where the rubbing stops and the door swings freely without touching the frame.
It’s also a good idea to check all the hinges. Sometimes, a slight sag might be caused by one hinge needing adjustment, while others are fine. If the door has a significant sag, you might need to adjust multiple hinges.
Remember to ensure the door is properly supported if you’re making significant adjustments, especially on heavier doors, to prevent it from falling or causing further damage.
Example Scenario: Rubbing on the Frame
Sarah noticed her uPVC back door was starting to scrape along the bottom of the frame whenever she opened or closed it. It had gotten progressively worse over the past few months. She suspected the door had sagged.
She got a screwdriver and located the bottom hinge. She found a screw that looked like it controlled the height. She turned it a quarter turn clockwise.
After testing the door, she saw it had lifted slightly. She made another quarter turn, and the rubbing stopped completely. The door now opens and closes smoothly without any noise.
Drafts and Seal Issues
Drafts around your uPVC door are often caused by a lack of compression. This means the door isn’t pressing firmly enough against the weather seals when it’s closed. To fix this, you need to adjust the hinges to bring the door closer to the frame on the locking side.
This is typically done by adjusting the horizontal or depth screws on the hinges.
The adjustment screw for compression or depth is often located on the side of the hinge. Turning this screw usually moves the door closer to or further away from the hinge side of the frame. The goal is to increase the pressure against the weather seal.
Again, make very small adjustments and test the door’s seal by closing it and checking for light or feeling for air gaps.
It’s important not to overtighten these screws, as this can make the door difficult to close or put excessive strain on the locking mechanism. You want a firm seal, but the door should still operate smoothly. Some uPVC door hinges have a central screw that controls both horizontal and depth adjustment, so you might need to experiment slightly to find the right setting.
Sample Scenario: Fixing a Draft
John felt a cold draft coming from his front uPVC door, especially around the top corner where the lock was. He knew this meant the door wasn’t sealing properly. He looked at the hinges and found a screw on the side of the middle hinge.
He turned it a small amount clockwise. He closed the door and checked for drafts. He could still feel a little air.
He turned the screw another small amount. This time, when he closed the door, the draft was gone. The door felt more secure and snug in the frame.
Locking Mechanism Alignment
When the locking mechanism on your uPVC door doesn’t line up with the keeps (the metal plates on the frame that the bolts slot into), it can make locking and unlocking difficult. This is a clear sign that the door’s position within the frame needs adjustment. You might need to adjust the door horizontally to make sure the bolts engage correctly with the keeps.
This adjustment is usually controlled by the horizontal screws on the hinges. These screws allow you to move the door left or right within the frame. If the locking bolts are too high or too low, you’ll also need to use the vertical adjustment screws to correct the height.
The aim is to get the door perfectly centered so that the bolts slide smoothly into their respective keeps.
It’s often best to tackle this adjustment with the door slightly open, allowing you to see how the bolts align with the keeps. You might need to make small adjustments to multiple hinges to achieve the perfect alignment. Once the bolts are aligning correctly, you should test the locking mechanism multiple times to ensure it operates smoothly and securely.
Step-by-Step Guide: How to Adjust a uPVC Door Hinge Properly
Now that you understand the common problems and the purpose of the adjustment screws, let’s walk through the process of how to adjust a uPVC door hinge properly. This guide assumes you have a basic set of tools and a willingness to make small, incremental changes.
Gather your tools first. You will likely need a Phillips head screwdriver, a flat-head screwdriver, and possibly an Allen key set. Some uPVC hinges require specific sizes of Allen keys for their adjustment screws.
Before you begin, take a moment to observe your door. Note exactly where it is rubbing or where the drafts are coming from. This will help you understand which adjustments are needed.
Also, consider the general alignment of the door in its frame.
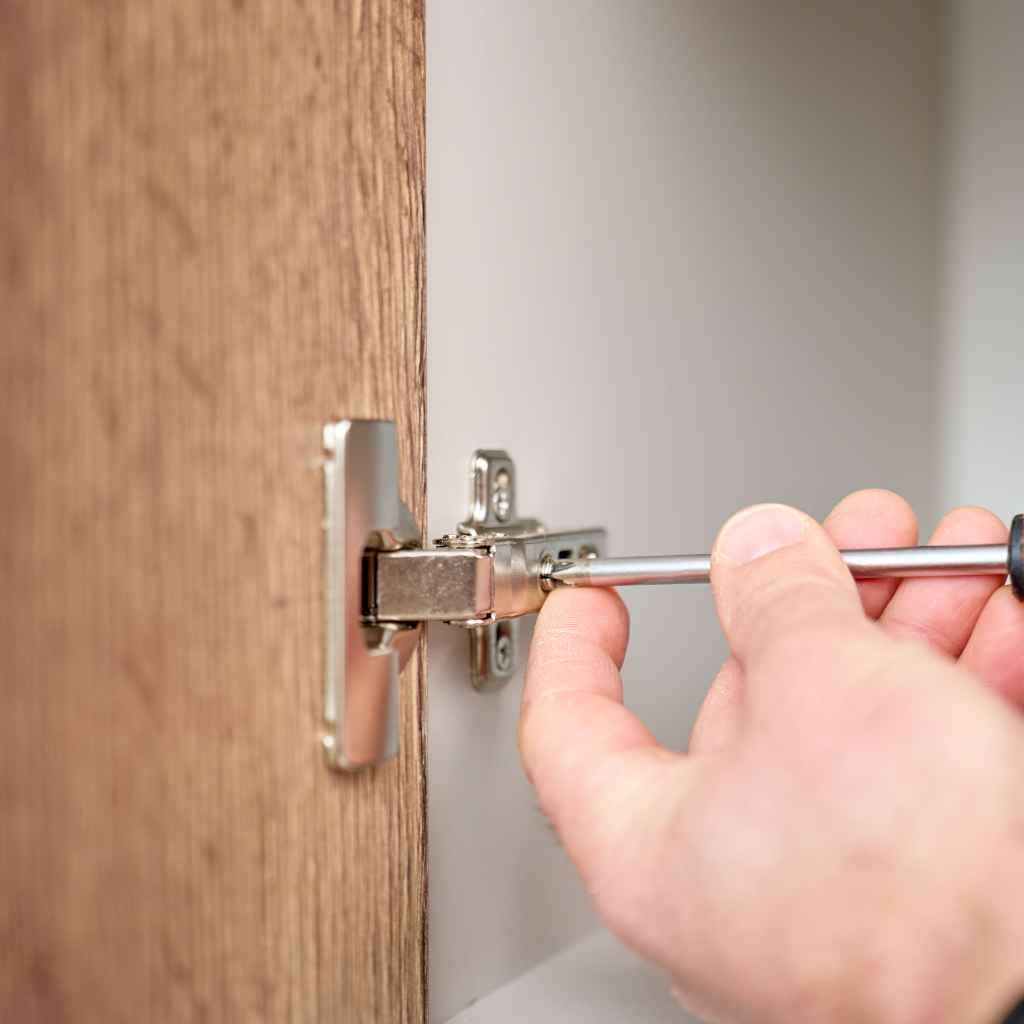
Step 1 Identify the Hinges and Adjustment Screws
Most uPVC doors have two or three hinges. You need to examine each hinge closely. Look for any plastic caps or covers.
These often conceal the adjustment screws. You may need to gently pry these caps off using a flat-head screwdriver.
Once the screws are exposed, try to identify which screw controls which direction of movement. Often, there is a screw that runs horizontally along the hinge body for side-to-side adjustment, a screw that runs vertically for up-and-down adjustment, and a screw that goes into the depth of the hinge for compression. The exact placement can vary between hinge manufacturers and models.
-
Vertical Adjustment Screw: This screw typically controls the height of the door. Turning it up or down will lift or lower that specific hinge’s side of the door.
-
Horizontal Adjustment Screw: This screw allows you to move the door left or right within the frame. It often runs parallel to the hinge’s length.
-
Depth (Compression) Adjustment Screw: This screw controls how tightly the door presses against the frame’s seals. Adjusting it can improve insulation and prevent drafts.
Take note of the screw heads. Some are Phillips, some are flat-head, and some require an Allen key. Having a variety of screwdrivers and Allen keys on hand is essential.
Step 2 Make Small Adjustments
Once you have identified the relevant screw, make a small adjustment. A quarter turn is usually sufficient to start. Turn the screw clockwise or counter-clockwise.
The direction will depend on the hinge design and the desired outcome.
For example, if the door is rubbing on the top of the frame on the handle side, you might need to lower that corner. This would typically involve turning the vertical adjustment screw on the top hinge counter-clockwise, or the bottom hinge clockwise, depending on how the hinge mechanism works. Always make one adjustment at a time.
After each adjustment, close the door gently and check its movement. Does it still rub? Is it easier to lock?
Are there fewer drafts? If the problem persists or if you’ve made it worse, simply turn the screw back the opposite way by the same amount.
Step 3 Test the Door’s Movement and Alignment
After making an adjustment, it’s critical to test the door thoroughly. Open and close it several times. Listen for any scraping or rubbing sounds.
Check if it swings freely and smoothly. Pay attention to how the locking mechanism engages with the keeps on the frame.
If the door is still not aligned correctly, make another small adjustment. It might take several small turns and tests to find the perfect position. Be patient; rushing the process can lead to over-adjustment and further problems.
You may need to adjust more than one hinge to get the door perfectly aligned. For example, if the door has sagged significantly, you might need to adjust the vertical screws on both the top and bottom hinges. If the door is not sitting flush against the frame, you might need to adjust the depth screws on all hinges.
Consider testing the door in different conditions, if possible. For instance, if you’re trying to fix drafts, you might check for airflow after making adjustments and closing the door tightly.
Step 4 Reassemble and Final Check
Once you are satisfied with the door’s alignment and operation, reattach any plastic caps or covers that you removed. Make sure they fit snugly. Give the door one final check by opening and closing it a few times, and testing the lock mechanism.
Ensure that all adjustment screws are now snug, but not overtightened. A light touch is best. Overtightening can strip the screws or damage the hinges, leading to more significant repair needs down the line.
If the door still isn’t quite right after these steps, it might be worth checking if all the hinges are the same type and brand, as this can sometimes affect alignment. In some rare cases, a hinge might be faulty or broken, requiring replacement.
Case Study: A Perfectly Aligned Door
Mr. Henderson had a uPVC patio door that was sticking badly on the bottom right corner. He decided to tackle it himself using a guide on how to adjust a uPVC door hinge properly.
He identified the vertical adjustment screw on the bottom hinge and turned it a quarter turn clockwise. The rubbing lessened but was still there. He then adjusted the horizontal screw slightly to pull the door away from the frame.
After a few more small adjustments and tests, he found the sweet spot. The door now slides open and closed effortlessly. The problem was resolved in under 30 minutes.
Troubleshooting and Maintenance
Even after successful adjustments, it’s good practice to perform periodic checks on your uPVC door hinges. Over time, screws can loosen due to vibration or temperature fluctuations, leading to a return of the original problems. Regular maintenance ensures your door continues to function smoothly.
If you find that your adjustments aren’t holding, it might indicate worn-out hinges or stripped screw threads. In such cases, the hinges might need to be replaced entirely. This is a more involved process but is still manageable for a DIY enthusiast.
Lubrication is also a key part of hinge maintenance. While uPVC hinges are designed to be low-maintenance, a small amount of silicone-based lubricant applied periodically can help them operate more smoothly and prevent wear. Avoid using oil-based lubricants, as they can attract dust and grime, which can impede the hinge’s movement.
When to Call a Professional
While most uPVC door hinge adjustments are straightforward, there are times when it’s best to call in a professional. If you’ve tried adjusting the hinges multiple times and the door is still not right, or if you suspect the hinges are damaged or worn out, a professional glazier or locksmith will have the expertise and specialized tools to diagnose and fix the problem.
Another situation where professional help is recommended is if you are dealing with very old or unusually designed uPVC doors. Some older models might have hinges with non-standard adjustment mechanisms that can be difficult for an amateur to figure out. Additionally, if the door frame itself is damaged or warped, hinge adjustments alone won’t solve the problem.
Safety is also a consideration. If the door is very heavy or if you are uncomfortable working with tools, it’s always safer to hire a professional. They can ensure the door is properly supported and adjusted without risking injury or further damage to the door or frame.
Statistics on Door Issues
According to industry reports, approximately 40% of homeowners experience issues with their uPVC doors at some point, with hinge alignment and sealing problems being among the most common. A survey by a home improvement association found that 75% of these minor door issues could be resolved with simple DIY adjustments, such as those described in this guide. This highlights the value of learning basic home maintenance skills like how to adjust a uPVC door hinge properly.
The average cost for a professional to adjust uPVC door hinges can range from £70 to £150, depending on the location and the complexity of the issue. By learning to do it yourself, you can save a significant amount of money, typically only needing to invest in a few basic tools, which might cost around £20-£30 if you don’t already own them.
Maintaining uPVC Door Hinges
Regular maintenance is the best way to prevent common uPVC door problems. A quick inspection every six months can save you a lot of hassle later. Check for any visible wear and tear on the hinges, and ensure they are clean and free from debris.
Wipe down the hinges with a damp cloth. If they appear a bit stiff, a light spray of silicone lubricant can help. Always ensure you use a lubricant that is suitable for uPVC and metal components.
Avoid WD-40 on hinges as it can dry out and attract dust over time.
When cleaning, pay attention to the adjustment screws. Make sure they are not corroded or damaged. If you see any signs of rust or significant wear, it might be time to consider replacing the hinge before it causes more serious alignment issues.
Frequently Asked Questions
Question: How often should I adjust my uPVC door hinges
Answer: You typically do not need to adjust your uPVC door hinges regularly. Adjustments are only needed when you notice issues like the door rubbing, sticking, or letting in drafts. Regular maintenance like cleaning and a light lubrication is more important than frequent adjustments.
Question: Can I adjust all uPVC door hinges myself
Answer: Yes, for the most part, you can adjust uPVC door hinges yourself. The adjustment screws are designed for user access, and with the right tools and this guide, it’s a manageable DIY task for most common issues.
Question: What if I turn a screw too far
Answer: If you turn a screw too far, you can often simply turn it back the opposite way to correct the adjustment. If a screw feels loose or you hear grinding, stop immediately as you may have stripped the thread or damaged the hinge.
Question: My door is very heavy, can I still adjust the hinges
Answer: Yes, even heavy uPVC doors can have their hinges adjusted. However, be extra careful. You might need someone to help support the door while you make adjustments to prevent it from falling or causing injury.
Question: What tools do I need to adjust uPVC door hinges
Answer: You will typically need a Phillips head screwdriver, a flat-head screwdriver, and possibly a set of Allen keys (hex keys) in various sizes, as different hinges use different types of screws.
Wrap Up
Learning how to adjust a uPVC door hinge properly empowers you to fix common door problems. With the right tools and a step-by-step approach, you can easily realign your door for smooth operation and better security. Just remember to make small turns and test frequently.