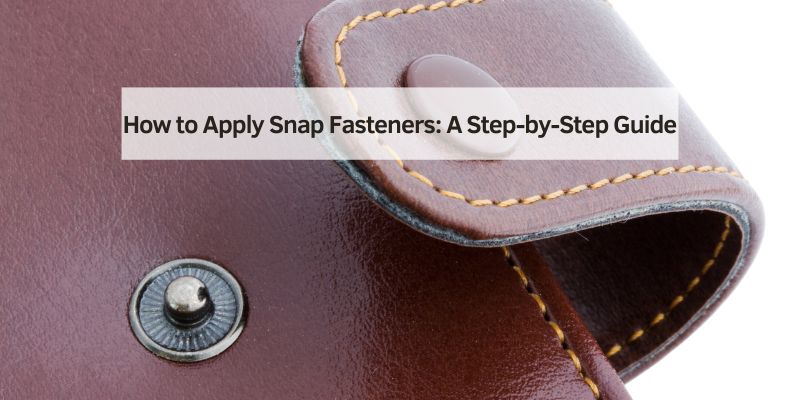
How to Apply Snap Fasteners: A Step-by-Step Guide
Are you tired of struggling with buttons that won’t stay put or zippers that just don’t zip smoothly? Snap fasteners might be the perfect solution you’ve been searching for.
These handy little devices can transform your clothing, accessories, and home projects, making them more functional and stylish. Imagine the satisfaction of easily opening and closing a jacket or bag with a simple click. In this guide, we’ll walk you through the process of applying snap fasteners, offering tips and tricks to make the task simple and enjoyable.
Stick with us, and you’ll soon master this skill, adding a touch of professionalism and convenience to your creations. Ready to get started? Let’s dive in!

Credit: blog.closetcorepatterns.com
Types Of Snap Fasteners
Metal snaps are strong and durable. They are perfect for heavy fabrics. Jackets and jeans often use these snaps. They come in many sizes and colors. Shiny silver or classic brass. These snaps are easy to use. Just press them together to close. Pull them apart to open. They make a satisfying click sound.
Plastic snaps are lightweight and colorful. They are great for baby clothes. Soft toys also use them. They do not rust, even in water. These snaps are gentle on skin. They are easy to attach. Use a special tool to fix them in place. These snaps are safe and fun to use.
Sew-on snaps are simple and classic. Many people use them for crafts. They are easy to sew with a needle. No special tools needed. These snaps are small and hidden. They are perfect for soft fabrics. You can sew them by hand. They help keep things closed neatly. Sew-on snaps are handy for repairs.
Tools And Materials Needed
The Snap Fastener Kit is essential. It contains all needed parts. Use it for neat and strong snaps. It includes various snap sizes. Make sure to choose the right size for your fabric. This helps in keeping your fabric secure.
A hammer is useful for setting snaps. It helps in pressing them tightly. Snap pliers are even better. They make the job easier and safer. These tools ensure the snaps are firm. Both tools work well.
Fabric marking tools are important. They help in marking spots for snaps. Use them to ensure accuracy. Fabric markers or chalk work well. They make sure the snaps go in the right place. This avoids mistakes.
Preparing Your Fabric
Snap fasteners work best on medium to heavy fabrics. Thin fabrics might tear easily. Consider using cotton or denim. These fabrics are strong and durable. Avoid using stretchy fabrics. They can make snaps pop off. Test the fabric strength with your hands. If it feels flimsy, choose another. Strong fabrics hold snaps well.
Use a fabric marker to mark where snaps go. Mark both sides of the fabric. This ensures snaps align properly. Measure and mark with a ruler. This keeps snap placement even. Avoid guessing placement. Uneven snaps look messy. Double-check your marks before attaching snaps. Correct placement makes clothes look neat.

Credit: so-sew-easy.com
Installing Metal Snaps
Start by making a small hole in the fabric. Use a sharp tool for this. Place the cap on top of the fabric. The prong should go through the hole. Position the socket underneath the fabric. It should align with the prong. Press them together firmly. Use a snap tool if you have one. This will keep them tight. Check to ensure they are secure.
Make another small hole in the other piece of fabric. Put the stud on top of the fabric. The prong should go through this hole too. Place the post beneath the fabric. Align it with the prong. Press them together tightly. Again, a snap tool can help. Ensure everything is in place. Test the snap to see if it works.
Installing Plastic Snaps
Snap pliers make the job easy. First, get your fabric ready. Then, find where you want the snap. Place the snap cap on the fabric. Next, use the pliers. Squeeze the snap cap and socket together. Make sure they fit tight. Check the grip of the snap. It should hold well. Repeat for the other side. Use the pliers again. Attach the snap stud and post. Press firmly with the pliers. Your snap is now ready to use.
Align the snaps before pressing them. This keeps your clothes neat. Put the fabric together. Check if the snaps line up. Adjust if needed. Misaligned snaps can cause problems. They may not close right. Always double-check the position. This helps the snaps work well. Proper alignment is key for a clean look.
Installing Sew-on Snaps
Sewing the Snap Parts is easy and fun. First, find the right spot. Use a pen to mark it. You need to sew two parts. Start with the male part. Put it on the mark. Thread the needle with strong thread. Sew through the holes. Make sure it’s tight. Check it doesn’t move.
Now, sew the female part. Place it on the matching spot. Sew it just like before. Tighten the thread well. It shouldn’t wiggle or fall off.
Ensuring Strong Attachment is very important. Choose a thread that won’t break. Double thread is stronger. Always pull your stitches tight. Loose stitches can break. Check both parts after sewing. They should snap together easily.
Test the snap a few times. Make sure it works well. Fix any loose threads. Your snaps should be strong and secure.
Troubleshooting Common Issues
Misaligned snaps can be a real trouble. To fix this, check alignment before installing. Use a ruler or tape measure. Make sure both parts line up perfectly. If misaligned, remove and reposition carefully. Take your time. Patience is key. Align properly and check twice. This prevents future issues.
Loose snap fasteners can fall off easily. Check the size of the fastener. It should fit tightly. If loose, try a smaller size. Use a tool to press it firmly. Ensure it clicks into place. If still loose, consider a different type. Metal snaps might hold better than plastic ones.

Credit: susieddesigns.wordpress.com
Care And Maintenance
Snap fasteners need regular cleaning. Dust can make them sticky. Use a soft cloth to wipe them. Warm water can help remove dirt. Avoid using harsh chemicals. They can damage the fasteners. Dry the fasteners with a clean cloth. Check for rust. If you see rust, clean it immediately. This keeps the fasteners working well.
Inspect snap fasteners often. Look for loose parts. Tighten any loose parts. Check for any wear. Worn fasteners might need replacing. If they feel hard to snap, check them. Smooth operation is important. Keep them free from dirt and debris. This ensures they last longer. Regular checks can prevent problems.
Frequently Asked Questions
How Do You Install A Snap Fastener?
To install a snap fastener, mark the fabric. Make a small hole for the prong. Position the cap and socket on one side. Place the stud and post on the other side. Use a snap tool or pliers to press and secure them together.
Is There A Trick To Sewing On Snaps?
Sew snaps securely by marking placement, using strong thread, and stitching through each hole twice. Ensure alignment for proper closure.
How To Apply Snap Fasteners With Hammer?
Place the snap fastener on the fabric. Use a setting tool to position it. Strike the tool with a hammer gently. Ensure it’s securely attached by checking the alignment. Repeat for the other side of the fastener. Always work on a hard surface for better results.
How To Apply Plastic Snaps To Fabric?
Use a snap pliers tool to apply plastic snaps. Mark the fabric, insert the snap components, and squeeze firmly. Ensure the snaps are aligned correctly. Test the snap by closing and opening it. Adjust if necessary for proper fit. Secure snaps add a functional touch to fabric projects.
Conclusion
Snap fasteners are easy and practical for various projects. They add a clean finish to clothing and crafts. Follow each step carefully. Practice makes you more confident. Use quality tools and materials for best results. Check your alignment before securing.
A little patience goes a long way. With these tips, attaching snap fasteners becomes simple. You’ll enjoy the process and the finished product. Happy crafting, and keep exploring new ideas!