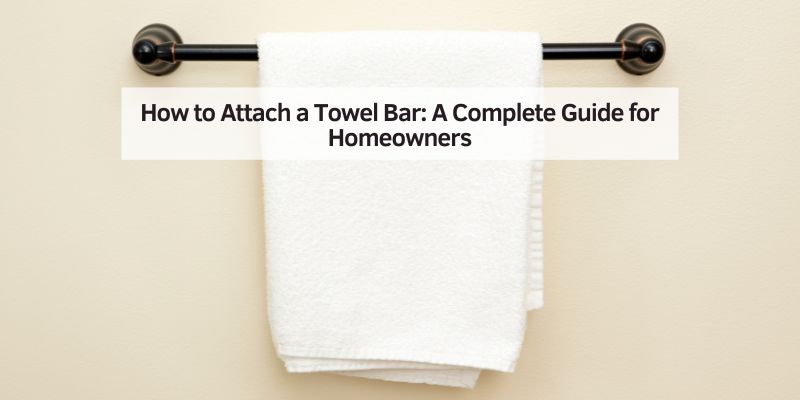
How to Attach a Towel Bar: A Complete Guide for Homeowners
Hey there! If you’re looking to spruce up your bathroom or kitchen, installing a towel bar is one of those small projects that can make a big difference. I’ve tackled this task a few times in my own home, and let me tell you, there’s something satisfying about getting that towel bar perfectly level and secure. Whether you’re a DIY newbie or a seasoned pro, I’m excited to walk you through the process of attaching a towel bar step by step.
This guide is packed with tips I’ve learned along the way to make the job easier, save you time, and ensure your towel bar stays put for years. Let’s dive in and get that towel bar up on your wall!
Why Install a Towel Bar?
Towel bars aren’t just about hanging towels—they’re about adding function and style to your space. I remember when I first moved into my home, the bathroom felt cluttered with towels draped over the shower rod or piled on the counter. Installing a towel bar gave everything a proper place, making the room look tidier and more inviting. Towel bars also help towels dry faster, which means less musty odor and fewer germs. Plus, they come in so many designs—sleek chrome, matte black, or even rustic wood—that you can match them to your decor. It’s a small upgrade with a big impact, and the best part? It’s a project most people can handle with a few tools and some patience.
Tools and Materials You’ll Need
Before we get started, let’s gather everything you’ll need. I’ve learned the hard way that having all your tools and materials ready saves a ton of frustration. Here’s what I typically grab for this job:
| Item | Purpose |
|---|---|
| Towel bar kit | Includes the bar, mounting brackets, and screws (check if anchors are included). |
| Drill | For making holes in the wall for anchors or screws. |
| Drill bits | Match the size to your wall anchors or screws (usually 1/4″ or 5/16″). |
| Wall anchors | For securing screws in drywall or plaster if you’re not hitting a stud. |
| Screwdriver (Phillips or flat) | To tighten screws into the anchors or brackets. |
| Level | Ensures your towel bar is straight and not slanted. |
| Measuring tape | For measuring the placement of the towel bar. |
| Pencil | To mark where you’ll drill. |
| Stud finder | Helps locate studs for a stronger mount (optional but recommended). |
| Painter’s tape | To mark spots or protect the wall while drilling. |
| Safety glasses | To protect your eyes from dust or debris while drilling. |
Most towel bar kits come with screws and sometimes anchors, but I always double-check. If you’re installing on drywall, you’ll likely need plastic drywall anchors. For tile, you’ll need special tile drill bits and possibly masonry anchors. I once tried installing a towel bar without a level, and let’s just say it looked like it was ready to slide right off the wall—don’t skip the level!
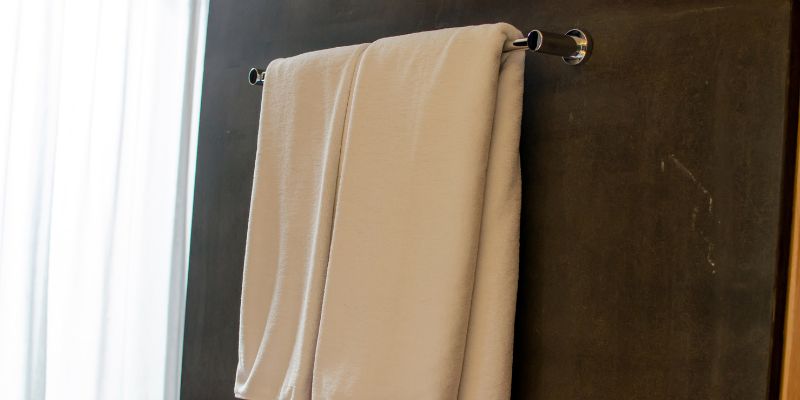
Choosing the Right Towel Bar
Picking the right towel bar is more than just grabbing the first one you see at the store. I’ve made that mistake before, and I ended up with a bar that didn’t quite fit my space. First, think about size. Measure the wall space where you want the bar—standard towel bars are 18, 24, or 30 inches long. In my small guest bathroom, an 18-inch bar was perfect, but for my master bath, I went with a 30-inch one to hold bigger towels.
Next, consider the material and finish. Stainless steel or chrome is great for a modern look and resists rust, which is key in humid bathrooms. Brass or bronze gives a warmer, classic vibe. I chose a matte black towel bar for my kitchen to match the faucet, and it tied the room together beautifully. Also, check the weight capacity if you plan to hang heavy towels or multiple towels at once. Finally, make sure the mounting style works for your wall—some bars have exposed screws, while others have hidden brackets for a cleaner look.
Deciding Where to Place Your Towel Bar
Placement is everything when it comes to towel bars. You want it to be functional and look good. In my bathroom, I placed the towel bar near the sink for easy access when drying my hands. The standard height for a bathroom towel bar is about 48 inches from the floor, but I’ve found that 42 to 48 inches works well for most adults. For kids, you might go lower, around 36 inches.
Think about reach, too. If the bar is too far from the shower or sink, it’s a hassle to grab the towel. I made sure my towel bar was within arm’s length of the shower door. Also, check for obstacles like light switches or outlets. Use a stud finder to see if you can mount into a stud for extra strength, especially if you’re hanging heavy towels. If you’re installing on tile, try to avoid grout lines—they’re weaker and harder to drill through cleanly.
Preparing the Wall
Before you start drilling, take a moment to prep the wall. This step can make or break your project. I learned this the hard way when I drilled into a tile wall without taping it first, and the drill slipped, leaving a scratch. Here’s how I prep now:
- Clean the wall: Wipe down the area with a damp cloth to remove dust or grease. A clean surface helps the towel bar stay secure.
- Mark the spot: Use a pencil and measuring tape to mark where the brackets will go. Most towel bars come with a template, which is a lifesaver. If not, measure the distance between the bracket holes on the towel bar and transfer those measurements to the wall.
- Use painter’s tape: Stick a piece of painter’s tape over your marks before drilling, especially on tile. It prevents the drill from slipping and protects the surface.
- Check for studs: Run a stud finder over the area. If you hit a stud, great—you won’t need anchors. If not, you’ll use drywall or masonry anchors.
I also double-check my measurements with a level to make sure the marks are even. There’s nothing worse than a crooked towel bar staring at you every day!
Drilling and Installing Wall Anchors
Now comes the fun part—drilling! If you’re nervous about drilling, don’t worry. I was too the first time, but it’s straightforward if you go slow. Here’s how I do it:
- Choose the right drill bit: For drywall, use a bit that matches your anchor size (usually 1/4 or 5/16 inch). For tile, use a carbide-tipped masonry bit.
- Drill the holes: Hold the drill steady and apply gentle pressure. If you’re on tile, start with a small bit and work up to the right size to avoid cracking. Drill to the depth of your anchor or screw.
- Insert anchors: Push the anchors into the holes. For drywall, they should fit snugly—tap them gently with a hammer if needed. For tile, make sure the anchor sits flush with the surface.
- Clean up: Wipe away any dust or debris from drilling. It keeps your workspace tidy and ensures a clean installation.
I always wear safety glasses during this step because dust can fly everywhere, especially with drywall. If you’re drilling into tile, go slow and steady to avoid cracks. I ruined a tile once by rushing, and it was not a cheap fix.
Attaching the Mounting Brackets
With the anchors in place, it’s time to attach the mounting brackets. Most towel bar kits have two brackets that hold the bar in place. Here’s how I tackle this:
- Line up the brackets: Hold each bracket over the anchor holes and screw them in using the provided screws. I use a screwdriver instead of a drill here to avoid over-tightening, which can strip the anchors.
- Check alignment: Before tightening all the way, place the towel bar on the brackets to make sure it’s level. Adjust if needed. I’ve had to loosen and reposition brackets a few times to get it just right.
- Secure tightly: Once everything looks good, tighten the screws fully. If your towel bar has set screws (tiny screws that lock the bar to the brackets), don’t tighten those yet—we’ll do that next.
This step feels rewarding because you start to see the towel bar take shape. Take your time to ensure the brackets are secure and aligned.
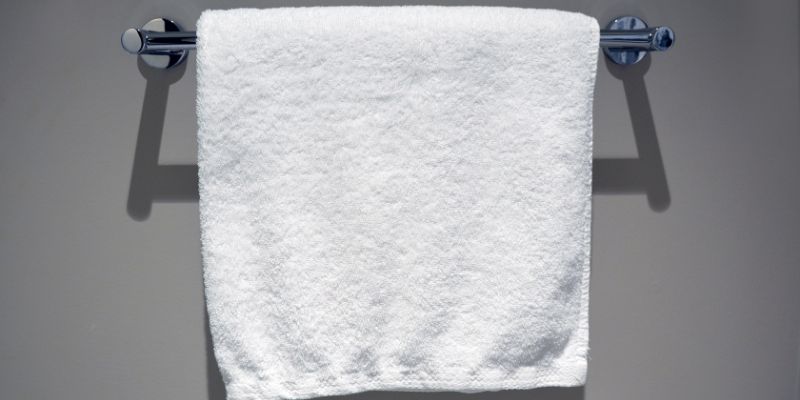
Attaching the Towel Bar
Now, let’s get that towel bar up! Most towel bars either slide onto the brackets or snap into place. Here’s what I do:
- Position the bar: Place the towel bar onto the brackets. Some designs require you to slide the bar through the bracket loops, while others have a clip or snap mechanism.
- Secure with set screws: If your towel bar has set screws, use the provided Allen wrench or screwdriver to tighten them. These screws lock the bar to the brackets so it doesn’t wobble.
- Double-check stability: Give the bar a gentle tug to make sure it’s secure. If it feels loose, check the brackets or anchors and tighten as needed.
When I installed my first towel bar, I didn’t tighten the set screws enough, and the bar wiggled every time I hung a towel. Lesson learned—make sure everything is snug!
Installing on Tile vs. Drywall
The process changes slightly depending on your wall type. I’ve done this on both drywall and tile, and here’s what I’ve learned:
- Drywall: This is the easier option. Use plastic drywall anchors if you’re not hitting a stud. Drill carefully to avoid crumbling the drywall, and make sure the anchors are flush. Drywall is forgiving, but you still want to be precise.
- Tile: Tile is trickier because it’s hard and can crack. Use a carbide-tipped drill bit and go slow. Painter’s tape is your best friend to prevent slipping. If you’re drilling into grout, be extra careful—it’s softer and can crumble. I always use masonry anchors for tile to ensure a strong hold.
No matter the wall type, take your time and check your measurements. A little patience here saves a lot of headaches later.
Troubleshooting Common Issues
Even with careful planning, things can go wrong. Here are some issues I’ve run into and how I fixed them:
- Crooked bar: If the bar looks uneven, loosen the brackets and use a level to adjust. Sometimes the wall itself isn’t perfectly flat, so you may need to shim the brackets with small spacers.
- Loose anchors: If an anchor spins in the hole, it’s too big or the hole is too wide. Replace it with a larger anchor or use drywall repair putty to fill the hole and start over.
- Cracked tile: If you accidentally crack a tile, you may need to replace it. I’ve had to do this once, and it’s not fun, but a tile cutter and some adhesive can fix it.
- Bar won’t stay in place: Double-check the set screws or clips. If they’re loose, tighten them. If the bar still moves, the brackets may not be aligned properly.
These fixes have saved me a few times, and they’re usually quick to sort out if you catch them early.
Maintaining Your Towel Bar
Once your towel bar is up, a little care keeps it looking and working great. I wipe mine down weekly with a damp cloth to remove water spots or soap residue, especially in the bathroom. Avoid harsh cleaners—they can damage the finish. If the bar starts to loosen over time, check the screws and tighten them. For metal towel bars, watch for rust, especially in humid spaces. A quick polish with a metal cleaner can keep it shiny. I also make it a habit to check the anchors every few months to ensure they’re still secure.
Adding Style with Your Towel Bar
A towel bar isn’t just functional—it’s a chance to add some personality to your space. I love coordinating my towel bar with other fixtures, like the faucet or cabinet handles. You can also hang decorative towels or even small baskets on the bar for extra storage. In my guest bathroom, I hung a small plant holder from the towel bar to add a touch of greenery. Get creative! Just make sure whatever you hang isn’t too heavy for the bar’s weight capacity.
Conclusion
Installing a towel bar might seem like a small task, but it’s one of those projects that can transform your bathroom or kitchen. I still smile every time I see my perfectly level towel bar holding neatly folded towels—it’s the little things that make a home feel complete. By following these steps, from choosing the right bar to securing it on the wall, you can tackle this project with confidence.
It’s not just about function; it’s about creating a space that feels organized and inviting. So grab your tools, take your time, and enjoy the process. You’ve got this! If you run into any questions, check out the FAQs below or drop a comment on the blog—I’d love to hear how your project goes!
Frequently Asked Questions
How high should a towel bar be mounted?
I recommend mounting a towel bar about 42 to 48 inches from the floor for adults. For kids, 36 inches is better. It depends on who’s using it and what feels comfortable. Measure from the floor to the center of the bar for consistency.
Can I install a towel bar without a drill?
It’s tough to install a towel bar without drilling, as most need screws and anchors for stability. If you’re in a rental, you could try adhesive-backed towel bars, but they’re less secure and may not hold heavy towels. I’ve always found drilling to be worth the effort for a sturdy result.
What if I don’t have a stud to mount into?
No stud? No problem! Use drywall anchors for drywall or masonry anchors for tile. They provide a strong hold when installed correctly. I always keep extra anchors on hand in case one doesn’t set right.
How do I avoid cracking tile when drilling?
Go slow and use a carbide-tipped masonry drill bit. Put painter’s tape over the spot to prevent the drill from slipping. Start with a small bit and work up to the right size. I’ve found that applying gentle, steady pressure works best to avoid cracks.
How do I clean my towel bar?
Wipe it down with a damp cloth and mild soap weekly to remove water spots or grime. Avoid abrasive cleaners, as they can scratch the finish. For metal bars, a quick polish with a metal cleaner keeps them shiny. I do this as part of my regular bathroom cleaning routine.