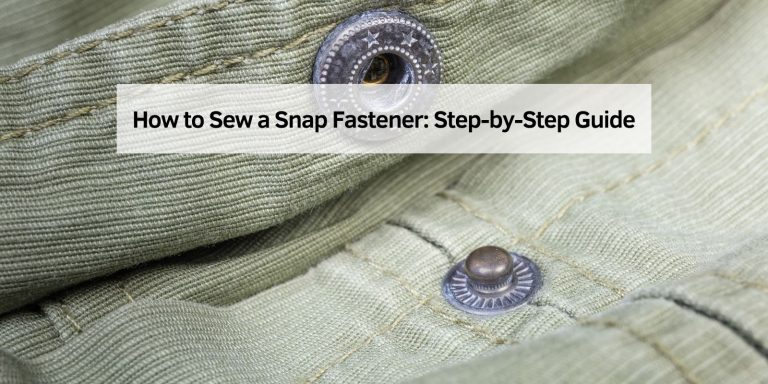
How to Attach Popper Fasteners: A Step-by-Step Guide for Beginners
Hey there! If you’ve ever struggled with attaching popper fasteners to your DIY projects, you’re not alone. I remember the first time I tried to add these handy little snaps to a cushion cover—it felt like solving a puzzle with missing pieces! But don’t worry, I’ve got you covered. After plenty of trial and error, I’ve learned the ins and outs of attaching popper fasteners like a pro. In this guide, I’ll walk you through everything you need to know to master popper fasteners for your home improvement projects. Whether you’re sprucing up curtains, sewing a bag, or tackling upholstery, this article will make the process simple and fun. Let’s dive in and get those fasteners in place!
What Are Popper Fasteners?
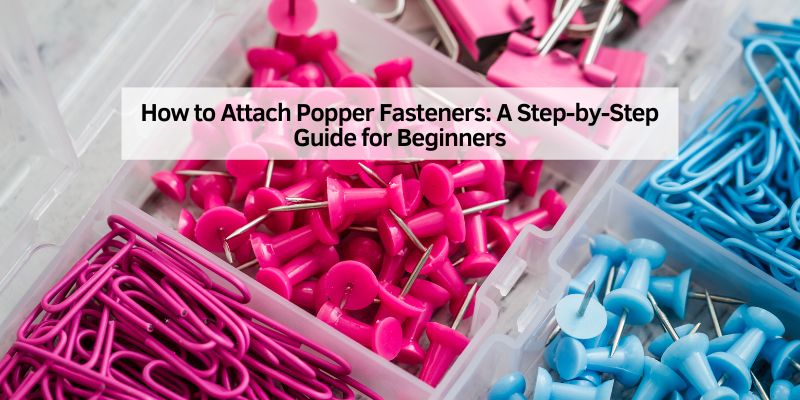
Popper fasteners, also called snap fasteners or press studs, are small metal or plastic closures that snap together to secure fabric or other materials. I first came across them when I was making a duvet cover, and I was amazed at how they could hold everything together without the fuss of buttons or zippers. They come in two main parts: the male piece (the stud) and the female piece (the socket), which click together to form a secure bond. There’s also a cap and a post that help anchor each piece to the material.
These fasteners are super versatile. You’ll find them on clothing, bags, curtains, boat covers, and even baby bibs. They’re durable, easy to use, and give your projects a polished look. Plus, they come in different sizes, colors, and materials, so you can pick the perfect ones for your project. Before we get into the nitty-gritty of attaching them, let’s talk about why they’re such a great choice for home improvement.
Why Choose Popper Fasteners for Your Projects?
I love popper fasteners because they’re both practical and stylish. When I was working on a set of outdoor cushions, I chose poppers over Velcro because they looked sleeker and held up better against the weather. Here’s why they’re a fantastic option:
- Durability: Unlike buttons that can pop off or zippers that can jam, popper fasteners are built to last. They can handle repeated use without wearing out.
- Ease of Use: They snap together with a satisfying click, making them perfect for projects that need quick fastening, like a tote bag or a pet bed cover.
- Versatility: You can use them on fabric, leather, vinyl, or even thin wood. I’ve used them on everything from pillowcases to RV awnings.
- Professional Finish: They give your projects a clean, tailored look that screams quality.
Now that you know why popper fasteners are awesome, let’s gather the tools you’ll need to attach them properly.
Tools and Materials You’ll Need
Before you start, it’s a good idea to have everything ready. I learned this the hard way when I was halfway through a project and realized I didn’t have a hammer! Here’s what you’ll need:
| Item | Purpose |
|---|---|
| Popper fastener kit | Includes the stud, socket, cap, and post for each snap. |
| Snap-setting tool | A metal or plastic tool designed to set the fasteners securely. |
| Hammer or mallet | Used to apply pressure to set the fasteners. A rubber mallet works great. |
| Awl or hole punch | To make precise holes in the material for the fastener posts. |
| Scissors | For trimming fabric or cutting out patterns. |
| Marker or chalk | To mark where the fasteners will go. |
| Cutting mat or hard surface | Protects your work surface when punching holes or hammering. |
| Fabric or material | Whatever you’re attaching the fasteners to—cotton, leather, canvas, etc. |
You can find popper fastener kits at craft stores, online retailers, or even hardware stores. I got mine from a local sewing shop, and they had a variety of sizes and colors to choose from. Make sure the kit matches the material you’re working with—thicker materials like leather need heavier-duty snaps.
Preparing Your Material
One of the biggest lessons I learned is that preparation is everything. Rushing into attaching poppers without planning can lead to misaligned snaps or damaged fabric. Here’s how to prep like a pro:
First, decide where you want the fasteners to go. For example, when I was making a curtain panel, I measured equal distances along the edge to ensure the poppers were evenly spaced. Use a ruler and a fabric marker or chalk to mark the spots. If you’re working with two pieces of material that need to snap together, make sure the marks on both pieces line up perfectly.
Next, check the thickness of your material. If it’s too thick, like heavy canvas, you might need to thin it out by trimming away extra layers or using a lighter interfacing. I once tried attaching a popper to a triple-layered denim patch, and it wouldn’t set properly until I reduced the bulk.
Finally, use an awl or hole punch to create small holes where you marked. This makes it easier for the fastener post to go through without fraying the fabric. Be gentle—too big a hole, and the snap won’t hold securely. I usually test on a scrap piece first to get the size right.
Step-by-Step Guide to Attaching Popper Fasteners
Now, let’s get to the fun part—actually attaching the popper fasteners! I’ll break it down into simple steps so you can follow along easily. This is the method I used when I added snaps to a boat cover, and it worked like a charm.
Step 1: Position the Cap and Post
Take the cap (the decorative top part) and the post (the piece that goes through the material). Place the cap on the right side of the fabric (the side that will show) and the post on the wrong side (the hidden side). Push the post through the hole you made earlier. The fabric should be sandwiched between the cap and post. Make sure it’s snug but not so tight that it puckers the material.
Step 2: Set Up the Snap-Setting Tool
Most popper fastener kits come with a setting tool, which is usually a metal or plastic piece with a divot that matches the cap’s shape. Place the cap into the divot of the setting tool, with the fabric and post on top. The tool keeps everything aligned and protects the cap from getting scratched when you hammer.
Step 3: Hammer the Post
Grab your hammer or mallet and place the setting tool on a hard, stable surface like a cutting mat. Gently tap the post with the hammer to secure it to the cap. I usually start with light taps to make sure everything is aligned, then give it a few firmer hits to lock it in place. You’ll hear a satisfying crunch when it’s set. Don’t go overboard—too much force can bend the fastener or damage the fabric.
Step 4: Attach the Stud or Socket
Now, move to the other piece of the snap—the stud or socket. If you’re attaching the stud (the male part), place it on the opposite piece of fabric or material, aligning it with the cap and post you just set. Use the same process: push the stud through the hole, place it in the setting tool, and hammer it into place. If you’re attaching the socket (the female part), follow the same steps. Make sure the stud and socket line up perfectly so they snap together smoothly.
Step 5: Test the Snap
Once both parts are attached, give them a test snap. Press the stud into the socket—it should click together easily and hold firmly. If it feels loose or doesn’t snap properly, you may need to reposition or replace the fastener. I had to redo a couple of snaps on my first try because I didn’t hammer them hard enough, so don’t be discouraged if it takes a bit of practice.
Tips for Perfect Popper Fasteners
After attaching dozens of popper fasteners over the years, I’ve picked up a few tricks that make the process smoother:
- Practice on Scraps: Before working on your actual project, practice on a piece of scrap fabric. It helps you get the hang of the hammering technique and ensures you don’t ruin your material.
- Use the Right Size: Match the fastener size to your material. Small snaps work for lightweight fabrics like cotton, while larger ones are better for heavy materials like leather or canvas.
- Keep It Clean: Wipe down your tools and fasteners before starting. Dirt or oil can make the snaps harder to set or cause them to rust over time.
- Double-Check Alignment: Misaligned snaps are a pain to fix. I always double-check my marks with a ruler before punching holes.
- Invest in a Snap Press: If you plan to use popper fasteners often, consider a snap press tool. It’s pricier than a basic setting tool, but it makes the process faster and more precise. I got one after my third project, and it was a game-changer.
Common Mistakes to Avoid
I’ve made my fair share of mistakes when attaching popper fasteners, so let me save you some trouble. Here are the pitfalls to watch out for:
- Using Too Much Force: Hammering too hard can crush the fastener or tear the fabric. Start with light taps and build up as needed.
- Skipping the Hole Punch: If you try to force the post through without a hole, you’ll likely fray or stretch the material, weakening the snap.
- Poor Alignment: If the stud and socket don’t line up, the snap won’t close properly. Take your time to measure and mark accurately.
- Choosing the Wrong Fastener: Not all poppers are created equal. I once used lightweight snaps on a heavy canvas tarp, and they popped off after a week. Check the weight and strength of your material before buying.
Creative Ways to Use Popper Fasteners in Home Improvement
One of the reasons I love popper fasteners is how versatile they are. Here are some creative ways I’ve used them in my home improvement projects:
- Removable Cushion Covers: Adding poppers to cushion covers makes them easy to remove and wash. I did this for my outdoor patio cushions, and it’s been a lifesaver.
- Curtain Tiebacks: Instead of permanent hooks, I used popper fasteners to create adjustable tiebacks for my living room curtains. They’re easy to snap on and off.
- DIY Wall Hangings: I made a fabric wall hanging with poppers to swap out designs seasonally. It’s like changing a picture frame but with fabric!
- Pet Bed Covers: Popper fasteners make it simple to remove and clean pet bed covers. My dog’s bed stays fresh with minimal effort.
- Boat or RV Covers: For outdoor gear, poppers are perfect for securing covers that need to withstand wind and weather. I used heavy-duty snaps for an RV awning, and they’ve held up for years.
Caring for Popper Fasteners
Once your poppers are in place, you’ll want to keep them in good shape. I learned this after leaving some metal snaps on an outdoor project—they rusted because I didn’t take care of them. Here’s how to maintain them:
- Clean Regularly: Wipe down metal snaps with a damp cloth to remove dirt or salt, especially if they’re exposed to the elements.
- Avoid Harsh Chemicals: Strong detergents can corrode metal snaps or fade plastic ones. Stick to mild soap and water.
- Check for Wear: Over time, snaps can loosen. If they start to feel wobbly, you may need to replace them. I keep extra fasteners on hand for quick fixes.
- Lubricate if Needed: If a snap feels stiff, a tiny drop of sewing machine oil can help. Just don’t overdo it, or it’ll stain the fabric.
Conclusion
Attaching popper fasteners might seem intimidating at first, but trust me—it’s easier than it looks! After experimenting with them on everything from curtains to boat covers, I’ve come to love how they add both function and style to my projects. With the right tools, a bit of preparation, and some practice, you’ll be snapping those fasteners in place like a pro in no time. The key is to take your time, measure carefully, and don’t be afraid to test on scraps first.
Whether you’re a seasoned DIYer or just starting out, popper fasteners are a game-changer for home improvement. So grab your tools, pick a project, and let’s get snapping! Your next masterpiece is just a few clicks away.
Frequently Asked Questions
What’s the Difference Between Metal and Plastic Popper Fasteners?
Metal popper fasteners are stronger and more durable, making them ideal for heavy materials like leather or canvas. I used metal snaps on a boat cover, and they’ve held up through storms. Plastic snaps are lighter and better for delicate fabrics like cotton or thin polyester. They’re also rust-proof, which is great for outdoor projects. Choose based on your material and whether you need extra strength or flexibility.
Can I Attach Popper Fasteners Without a Snap-Setting Tool?
You can, but it’s tricky. I tried using a regular hammer once, and the snap got dented because I didn’t have the right tool to guide it. A snap-setting tool ensures the pieces stay aligned and don’t get damaged. If you’re in a pinch, you can try using a flathead screwdriver to press the pieces together, but it’s not as reliable. Investing in a proper tool is worth it for clean results.
How Do I Remove a Popper Fastener if I Make a Mistake?
Removing a popper fastener can be a bit of a hassle, but it’s doable. I’ve had to do this when I misaligned a snap on a cushion cover. Use pliers to gently pry the cap and post apart, being careful not to tear the fabric. If the fastener is stubborn, you might need to cut it off with small scissors or a craft knife. Then, patch the hole with a small piece of fabric and start over.
Are Popper Fasteners Machine-Washable?
Yes, most popper fasteners are machine-washable, especially metal ones. I’ve washed cushion covers with metal snaps dozens of times, and they’re still good as new. Plastic snaps are also safe for washing but can sometimes fade or crack if exposed to high heat. Always check the care instructions for your specific fasteners, and use a gentle cycle with mild detergent to be safe.
Can I Use Popper Fasteners on Leather?
Absolutely! I’ve used popper fasteners on leather bags, and they work beautifully. Just make sure to use heavy-duty snaps designed for thicker materials. Punch a clean hole with an awl or leather punch, and consider reinforcing the area with a small piece of interfacing to prevent tearing. A snap press tool is especially helpful for leather because it applies even pressure without damaging the material.