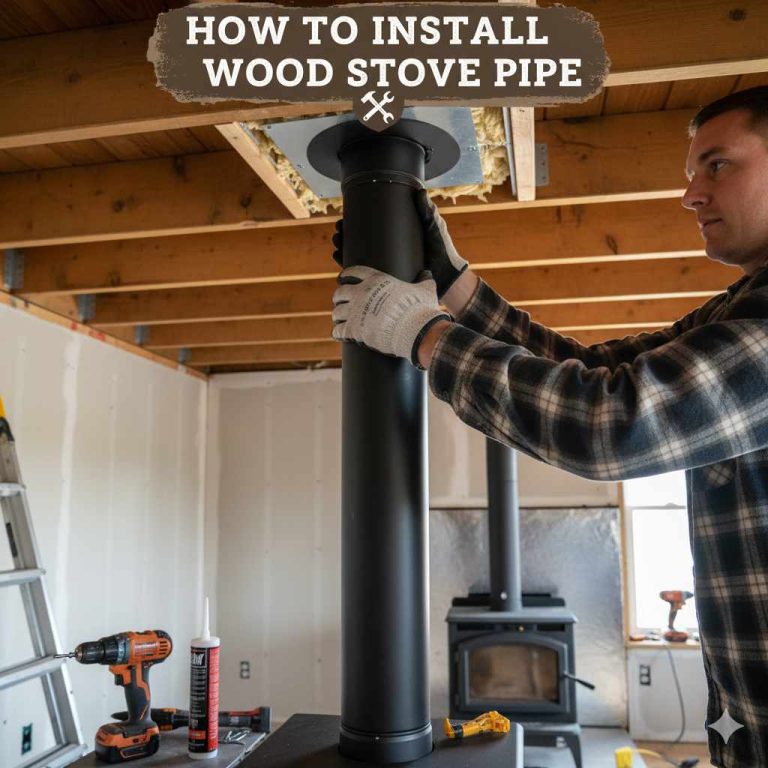
How to Attach Wood Mantel Brick Fireplace
Deciding on the best way to attach a wood mantel to a brick fireplace is the first big step. Different methods suit different fireplace designs and the type of mantel you choose. Some ways are easier for beginners, while others offer a more heavy-duty hold.
Understanding these options helps you pick what works best for your skill level and what you want your finished mantel to look like. We’ll explore the common ways people do this so you can feel confident.
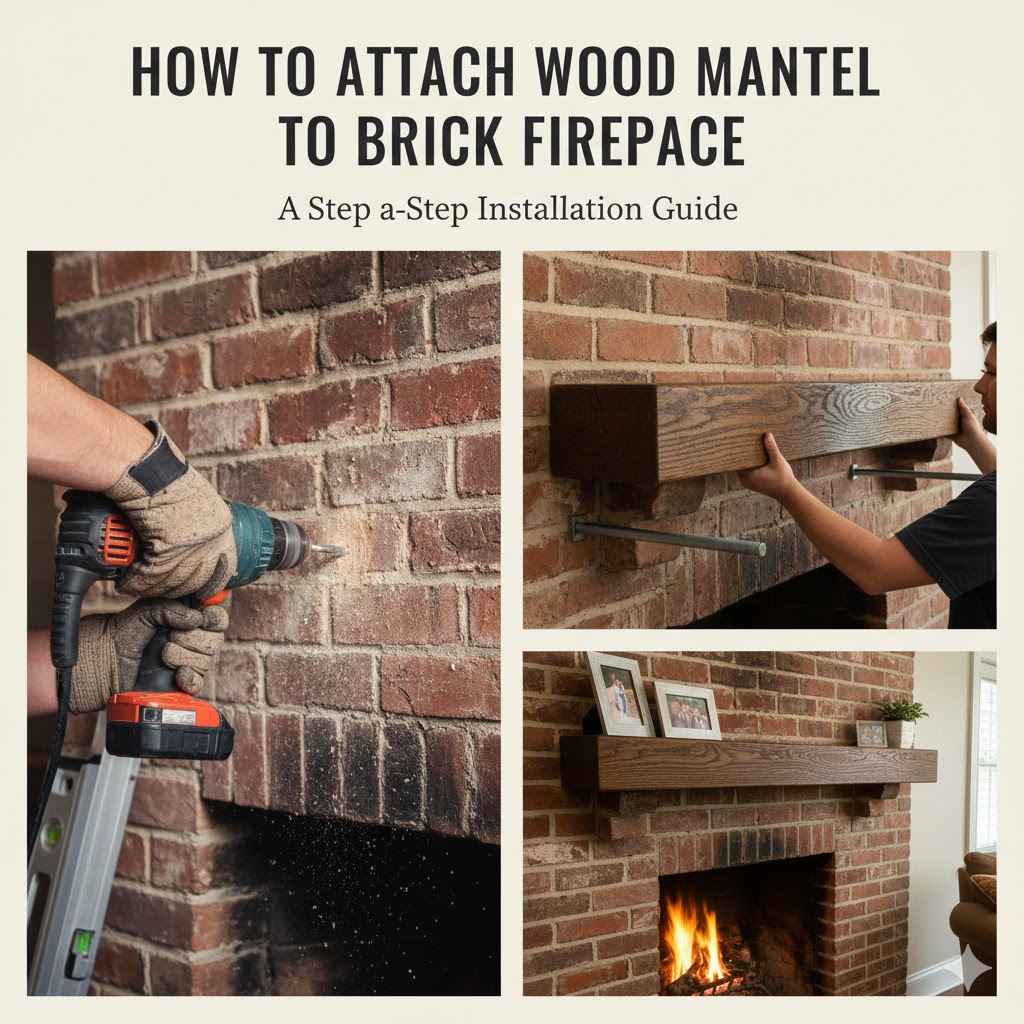
Mounting with Mantel Brackets
Mantel brackets offer a sturdy and often stylish way to hang your wood mantel. They come in many designs, from hidden supports to decorative pieces that add to your fireplace’s look. The key here is finding brackets strong enough for the weight of your mantel and any items you plan to display on it.
You’ll also need to make sure the brackets can be securely fastened to the brick. This usually involves drilling into the brick, which is a crucial part of the process.
-
Types of Brackets
Brackets are made from various materials like iron, steel, and even wood. Some are designed to be completely hidden behind the mantel, creating a floating look. Others are meant to be seen and become a decorative feature themselves. Decorative brackets can be ornate, rustic, or minimalist, depending on the style you want for your fireplace. Choosing the right type depends on your aesthetic goals and the structural needs of your mantelpiece. -
Weight Capacity
Always check the weight limit of the brackets. This information is usually provided by the manufacturer. It’s better to choose brackets that can hold more than you think you’ll need. A mantel can be heavier than it looks, and placing decorative items on it adds more weight. Exceeding the weight limit can lead to the mantel sagging or even falling, which is dangerous. -
Material Considerations
The material of the bracket affects its strength and appearance. Wrought iron and steel brackets are generally very strong and durable, suitable for heavier mantels. Wooden brackets can also work but might need to be reinforced or chosen carefully for the best support. Consider how the bracket material will complement your mantel and fireplace brick for a cohesive look.
Using L-Brackets or French Cleats
L-brackets and French cleats are popular for their simplicity and strength. L-brackets are shaped like the letter ‘L’ and can be screwed into both the brick and the back of the mantel. French cleats involve two interlocking pieces that attach to the wall and the mantel, distributing weight evenly.
Both are good options if you want a secure fit. They are often used when a cleaner, less visible support system is desired.
-
L-Bracket Installation
When using L-brackets, you’ll first attach one side of the bracket to the brick using appropriate anchors. Then, the other side of the bracket is attached to the back or bottom of your wood mantel. It’s important to use sturdy screws that can handle the load. Spacing the L-brackets correctly is key to ensuring even support across the entire length of the mantel. -
French Cleat System
A French cleat works by having one piece mounted to the wall and the other to the mantel, with each piece cut at a bevel. When you hang the mantel, the two beveled edges interlock. This creates a very strong and stable connection. It’s also great because it often allows the mantel to sit quite flush against the wall, giving it a streamlined appearance. -
Advantages for DIYers
Both L-brackets and French cleats are relatively easy for beginners to install. They require basic tools and clear steps. The visual guides for these methods are usually straightforward, making them less intimidating. The strong hold they provide also gives peace of mind, knowing your mantel is securely attached.
Floating Mantel Installation
Floating mantels give a modern and minimalist look. They appear to float on the wall without visible support. Achieving this look requires a strong internal mounting system, often a steel rod or bracket that is securely anchored into the brick.
The wood mantel then slides over this internal support. This method is more advanced and requires precise measurements and installation to ensure safety and stability.
-
Concealed Support Structure
The secret to a floating mantel is a hidden support. This is typically a heavy-duty metal bracket or a sturdy rod that is firmly attached to the wall behind the mantel. The brick wall must be strong enough to hold this structure securely. The bracket is designed so that the mantel can slide over it, concealing it completely from view. -
Precision in Measurement
Accurate measurements are absolutely vital for floating mantels. The internal support must be perfectly positioned and leveled. The opening in the back of the mantel must also be precisely cut to fit snugly over the support. Even a small error can result in a wobbly mantel or one that doesn’t sit flush against the brick. -
Weight Distribution and Safety
Because the support is hidden, the entire weight of the mantel and anything placed on it rests on the internal bracket and its connection to the brick. This means the bracket must be rated for significant weight, and the anchoring into the brick must be exceptionally secure. Professional advice or services might be recommended for this type of installation to ensure it’s done safely.
Preparing Your Brick Fireplace and Wood Mantel
Before you start attaching anything, proper preparation is key to a successful and safe installation. This involves getting your brick surface ready and making sure your wood mantel is in good condition and has any necessary modifications. Skipping these steps can lead to problems down the road, like a mantel that isn’t level or one that doesn’t attach securely.
Taking the time now saves you headaches later.
Assessing Your Brick Fireplace
Your brick fireplace needs to be in good shape to support a mantel. Look for any loose bricks or crumbling mortar. These issues need to be repaired before you attach anything heavy.
You’ll also want to check the condition of the surrounding brickwork. A solid, well-maintained brick surface will provide a much better anchor point for your chosen mounting hardware.
-
Inspect for Damage
Carefully examine the brick and mortar around where you plan to install the mantel. Look for cracks, chips, or areas where the mortar has fallen out. Loose bricks can compromise the entire structure. Pay close attention to the areas where you’ll be drilling; these need to be sound. -
Mortar Repair Techniques
If you find damaged mortar, you’ll need to repair it. This usually involves removing loose mortar with a chisel and brush and then repointing the area with new mortar. You can buy mortar mix at most hardware stores and follow the instructions on the bag. Ensure the new mortar is allowed to cure properly before proceeding with installation. -
Surface Cleaning
Ensure the brick surface is clean and free from dust, debris, or loose paint. A clean surface allows anchors and brackets to grip better. You can use a stiff brush to remove loose particles. For stubborn dirt, a mild soap and water solution might be used, but ensure the brick dries completely before you attach the mantel.
Preparing the Wood Mantel
Your wood mantel might need some preparation before it’s ready for installation. This could include measuring and cutting it to size, finishing it with stain or sealant, and preparing the back for mounting. Making sure the mantel is correctly sized and finished will contribute to both its appearance and how well it fits against your brick fireplace.
-
Sizing and Cutting
If your mantel is not already the right size, you will need to cut it. Use a saw suitable for wood, like a miter saw for precise cuts. Measure twice and cut once to ensure you get the exact dimensions needed. Always wear safety glasses when cutting wood. -
Finishing and Sealing
Apply any desired stain, paint, or protective sealant to the wood mantel. This protects the wood from moisture and wear, and it gives it the final look you want. Allow ample drying time for any finishes before proceeding to installation. -
Preparing the Back
Depending on your mounting method, you may need to create a channel or a flat surface on the back of the mantel. For example, if using a French cleat, you’ll need to attach one half of the cleat to the back of the mantel. If using floating bracket hardware, you might need to drill a channel for the support rod.
Gathering Necessary Tools and Materials
Having all your tools and materials ready before you start is essential. This avoids frustrating interruptions and ensures a smoother installation process. For attaching a wood mantel to a brick fi
-
Masonry Drill and Bits
You will need a hammer drill or a rotary hammer drill designed for drilling into brick and concrete. Regular drills may struggle or overheat. Use masonry drill bits that are specifically designed for this type of material. Ensure you have bits of the correct size for your anchors or fasteners. -
Anchors and Fasteners
Choosing the right anchors for brick is critical. Options include lag shields, sleeve anchors, or masonry screws. These are designed to expand or grip securely within the brick and mortar. The fasteners (screws or bolts) that go with the anchors must be strong and long enough to penetrate deeply into the solid brickwork. -
Level and Measuring Tools
A long spirit level is crucial for ensuring your mantel is perfectly horizontal. A tape measure, pencil, and stud finder (if there are any hidden studs behind the brick, which is rare but possible in some constructions) are also necessary for accurate placement. -
Safety Gear
Always wear safety glasses to protect your eyes from flying debris when drilling brick. Gloves are also recommended to protect your hands. If you’re working with power tools that create dust, a dust mask is a good idea.
The Step-by-Step Process How to Attach a Wood Mantel to a Brick Fireplace
Now that you’re prepared, let’s walk through the actual steps of attaching your wood mantel. This process focuses on using sturdy brackets, which is a common and reliable method. Following these instructions carefully will help you achieve a professional-looking result and ensure your mantel is safely secured.
Step 1 Locating Studs or Solid Brick
Even though you’re attaching to brick, knowing if there are any wooden studs behind it can be helpful for some mounting systems, especially if your fireplace structure has some wood framing integrated. More commonly, you’re looking for the most solid sections of brick and mortar to drill into. Avoid drilling into very soft or crumbly areas.
-
Using a Stud Finder (Limited Use)
A standard stud finder is designed for drywall and wood studs. It might give some indication of changes in density behind the brick, but it’s not reliable for finding structural wood in a brick fireplace. It’s more useful for identifying if there’s any wood framing that might be part of the fireplace surround, which is rare for the actual brick firebox area. -
Tapping and Listening
A more effective method for brick is to tap on the surface and listen. Solid brick and mortar will produce a more solid sound. Hollow sounds might indicate an air pocket or a less dense area, which you should try to avoid. -
Marking Drilling Points
Once you’ve identified the most solid areas, use your level and tape measure to mark exactly where you want to drill your holes for the mounting hardware. Double-check these marks to ensure they are perfectly level and spaced correctly according to your bracket manufacturer’s instructions.
Step 2 Drilling Pilot Holes into Brick
This is where your masonry drill bits and hammer drill come into play. You need to create holes in the brick that are the correct size and depth for your chosen anchors. Take your time and drill straight and true.
-
Selecting the Right Drill Bit Size
The size of your masonry drill bit should match the diameter of the anchors you are using. The anchor packaging will specify the required drill bit size. Using a bit that’s too small can make it difficult to insert the anchor, while a bit that’s too large will prevent the anchor from gripping properly. -
Drilling Depth and Angle
Drill to the depth recommended by the anchor manufacturer. You usually want the anchor to sit slightly below the surface of the brick. Drill perpendicular to the brick surface to ensure the anchor is seated correctly and the bracket will sit flush. -
Managing Dust and Debris
Drilling into brick creates a lot of dust. You can use a shop vacuum to collect dust as you drill, which makes cleanup easier and reduces the amount of dust spread around your home. Periodically clearing the dust from the drill bit can also help prevent overheating.
Step 3 Installing Anchors into Brick
Once your pilot holes are drilled, you’ll insert the anchors. These anchors are what will provide the strong connection to the brick wall. Make sure they are seated properly and securely.
-
Inserting Sleeve Anchors
For sleeve anchors, you’ll insert the anchor body into the drilled hole. Then, when you tighten the bolt, it expands the sleeve, creating a tight fit against the brick. Ensure the anchor is pushed in all the way. -
Using Lag Shields
Lag shields are also inserted into the hole. When you drive a lag screw into the shield, the shield collapses and expands, gripping the brick. These are very effective for heavy loads. -
Masonry Screw Installation
Masonry screws often thread directly into the brick, creating their own anchor point. You’ll likely need to pre-drill a pilot hole of a specific size for these screws. Once screwed in, they provide a very strong hold.
Step 4 Attaching the Mounting Brackets
With the anchors in place, you can now attach your chosen mounting brackets. This step involves screwing the brackets securely into the anchors you’ve just installed. Ensure the brackets are level and aligned correctly.
-
Securing Brackets to Anchors
Use the screws or bolts that are compatible with your anchors. Tighten them firmly, but be careful not to overtighten, especially if you are using plastic anchors, as this can strip them. The bracket should feel very secure against the brick. -
Checking for Level and Alignment
Before fully tightening, use your level to make sure the brackets are perfectly horizontal. If you have multiple brackets, ensure they are aligned with each other. Proper alignment is crucial for the mantel to sit correctly and look straight. -
Consider Weight Distribution
If using multiple brackets, space them according to the manufacturer’s recommendations or your mantel’s length. Even distribution of weight is important for the mantel’s stability and longevity.
Step 5 Mounting the Wood Mantel
The final step is to place and secure the wood mantel onto the attached brackets. This might involve sliding it into place, screwing it from the underside, or securing it in another way depending on the bracket type. Take care as you position the mantel.
-
Carefully Positioning the Mantel
With help if needed, carefully lift the wood mantel and position it onto the brackets. Ensure it sits flush against the brick and is centered over the brackets. Take your time to avoid scratching the mantel or the brick. -
Securing the Mantel to Brackets
Some brackets have holes through which you can screw the mantel to the bracket from the top or front. Others might require you to screw up into the mantel from underneath. Floating mantel systems will involve sliding the mantel over the concealed support. -
Final Checks for Stability
Once the mantel is in place and secured, give it a gentle push and pull to ensure it’s completely stable. Check again with your level to confirm it’s still perfectly horizontal.
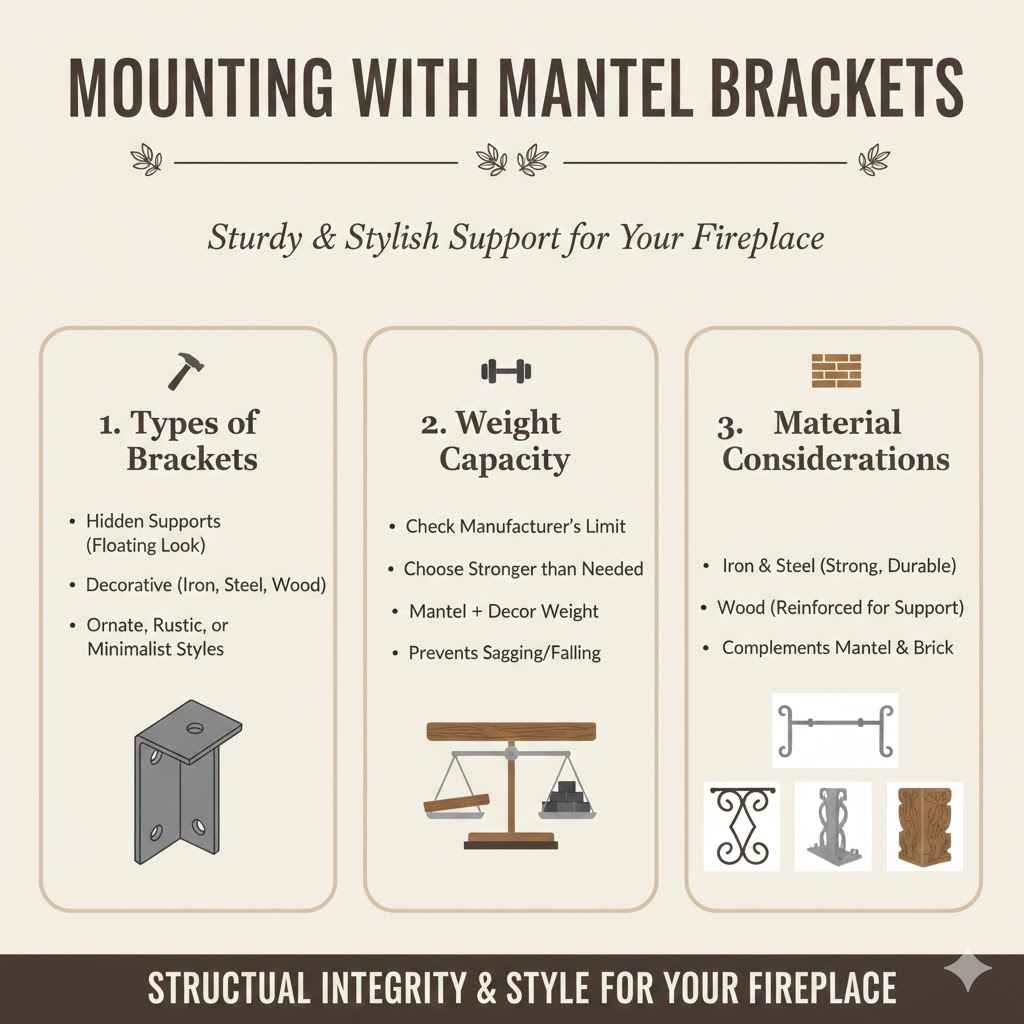
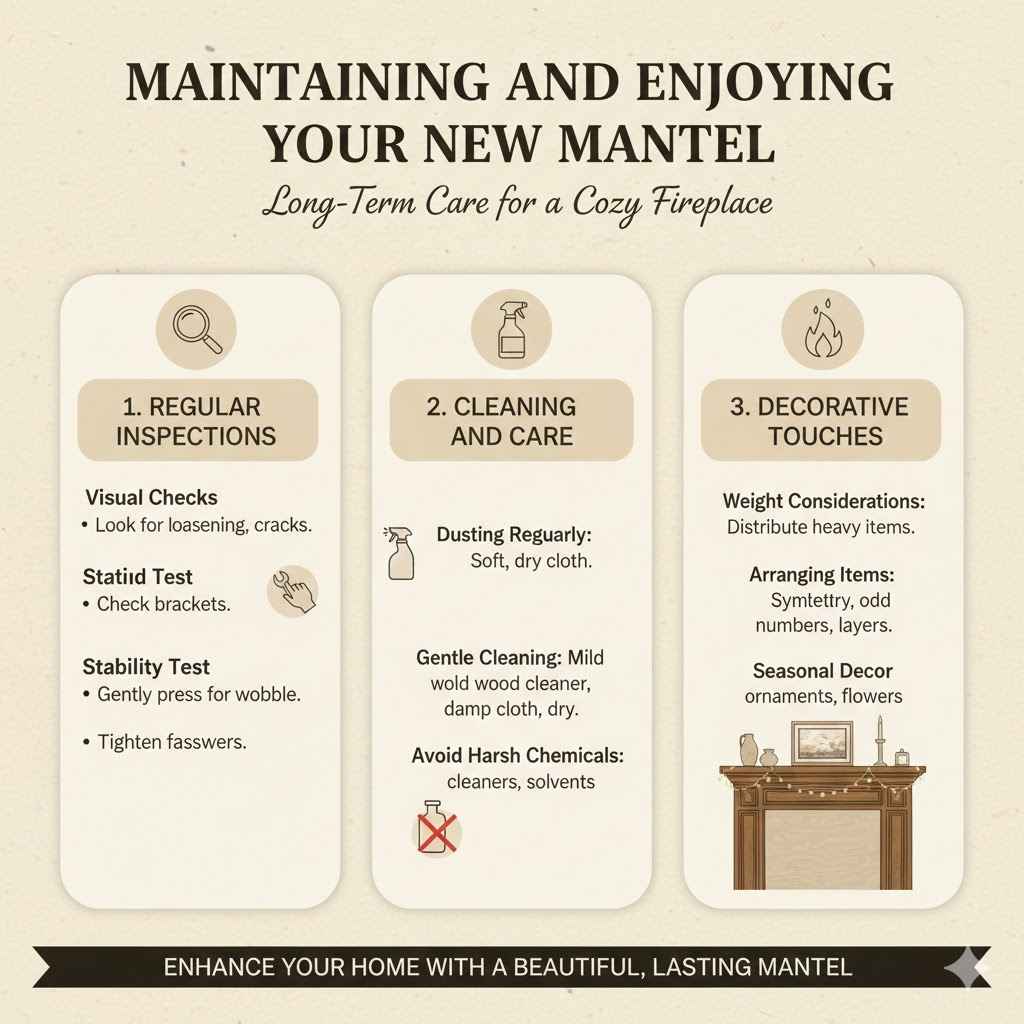
Maintaining and Enjoying Your New Mantel
Once your wood mantel is securely attached to your brick fireplace, you’ll want to keep it looking great and ensure its continued safety. Regular checks and simple maintenance will ensure your mantel remains a beautiful and functional part of your home for years to come.
Regular Inspections
Even though you’ve installed it securely, it’s wise to check on your mantel periodically. This is especially true if you live in an area with significant temperature or humidity fluctuations, as wood can expand and contract.
-
Visual Checks
Make a habit of looking at your mantel every few months. Check for any signs of loosening, cracking in the wood, or if the brackets seem to be pulling away from the brick. A quick visual inspection can catch minor issues before they become major problems. -
Stability Test
Gently press on the mantel to feel for any wobbling or movement. If you notice any instability, it’s time to re-evaluate the mounting hardware and the anchors. It’s better to address it early than wait for a potential failure. -
Tightening Fasteners
If you find any fasteners that seem loose, gently tighten them. Be cautious not to overtighten, as this can strip screws or damage anchors. The goal is to snug them up so the mantel is secure.
Cleaning and Care
Proper cleaning will keep your wood mantel looking its best without damaging the wood or its finish.
-
Dusting Regularly
Use a soft, dry cloth or a feather duster to remove dust regularly. This prevents dust from accumulating and becoming harder to remove. -
Gentle Cleaning Solutions
For tougher grime, use a mild wood cleaner or a solution of water and a small amount of dish soap. Apply the cleaner to a cloth, not directly to the wood, and wipe the surface. Then, wipe with a clean, damp cloth to remove residue and dry thoroughly with a soft towel. -
Avoiding Harsh Chemicals
Never use abrasive cleaners, ammonia, or strong solvents on your wood mantel. These can strip the finish, discolor the wood, or cause permanent damage. Always test any cleaning product on an inconspicuous area first.
Adding Decorative Touches
Once your mantel is installed and looking good, you can start decorating! This is the fun part, turning your functional fireplace into a cozy focal point for your room.
-
Weight Considerations for Decor
While you’ve ensured the mantel is securely attached, be mindful of the weight of items you place on it. Heavy vases, sculptures, or multiple picture frames can add up. Distribute heavier items evenly to avoid putting too much concentrated stress on any one part of the mantel. -
Arranging Items
Consider symmetry and balance when arranging decor. Group items in odd numbers for a more visually appealing look. You can also create layers with taller items in the back and smaller items in the front. -
Seasonal Decor
Mantels are perfect for displaying seasonal decorations like holiday garlands, festive ornaments, or spring flowers. Changing these out can give your living space a fresh, updated feel throughout the year.
Frequently Asked Questions
Question: What is the easiest way to attach a wood mantel to a brick fireplace
Answer: For beginners, using sturdy mantel brackets, often decorative ones that you can screw directly into the brick with masonry anchors, is generally the easiest and most secure method. This avoids complex joinery and provides a visible, reliable support system.
Question: Can I use construction adhesive to attach a mantel to brick
Answer: While construction adhesive can provide some bonding, it is not typically recommended as the sole method for attaching a heavy wood mantel to a brick fireplace. Mechanical fasteners like brackets and anchors provide a much more secure and reliable hold that can handle the weight and potential stress over time.
Question: How deep do I need to drill into the brick
Answer: The depth you need to drill depends on the type of anchors you are using and the manufacturer’s recommendations. Generally, you’ll want to drill deep enough for the anchor to engage with solid brick and mortar, often at least 2 to 3 inches, ensuring the anchor is fully seated and providing a strong grip.
Question: What if my brick fireplace has a very uneven surface
Answer: If your brick surface is uneven, you may need to use shims behind the mounting brackets to ensure they are level and the mantel sits straight. Some specialized masonry anchors are also designed to accommodate slightly uneven surfaces better than others. You might also consider using a thicker mortar bed to level the area if the unevenness is significant.
Question: Do I need to hire a professional
Answer: For many people, attaching a wood mantel to a brick fi
Final Thoughts
You’ve learned how to attach a wood mantel to a brick fireplace. The process involves picking the right hardware, preparing your materials, and following clear installation steps. With careful work, your new mantel will be strong and beautiful, ready for you to enjoy and decorate.
You can do this!