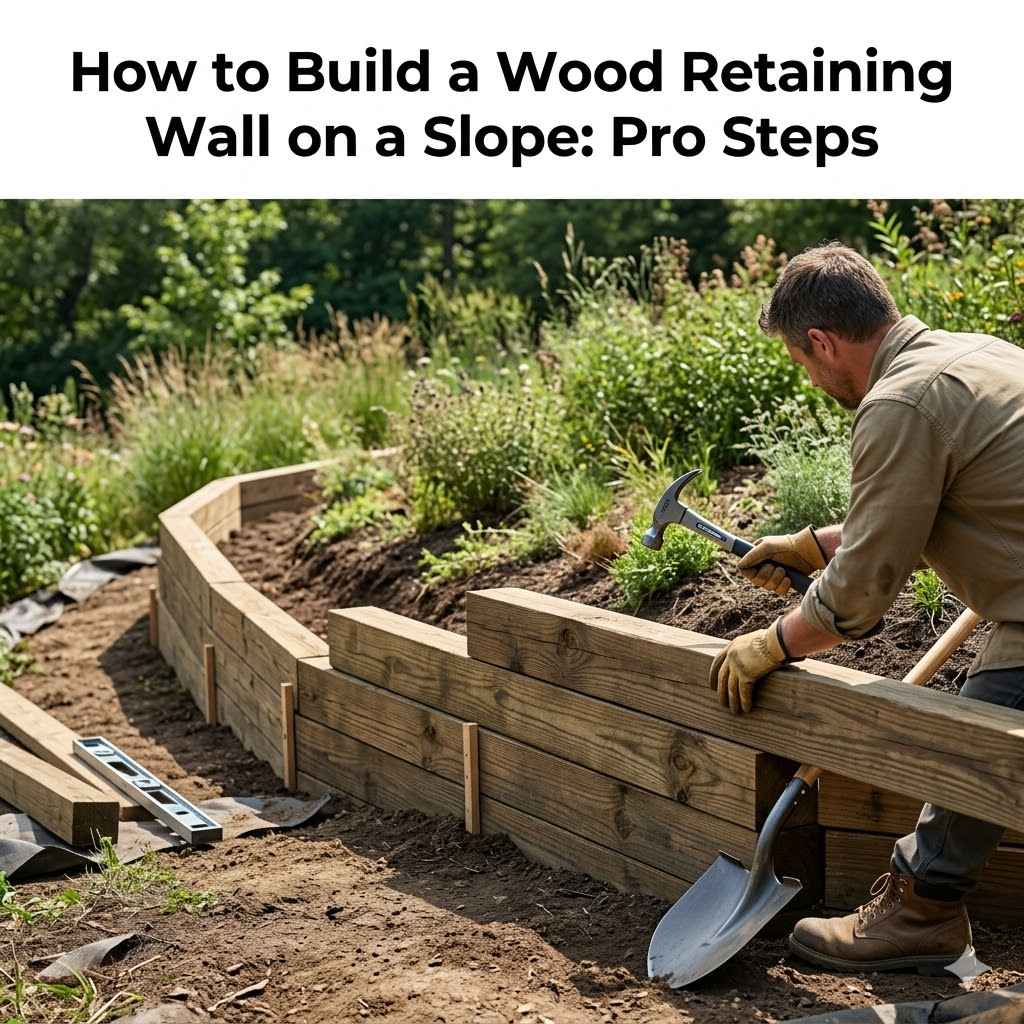
How to Build a Wood Retaining Wall on a Slope: Pro Steps
Building a wood retaining wall on a slope might seem tricky at first. Many people wonder where to begin with sloped terrain. This guide simplifies the process, giving you clear steps. We’ll walk you through everything you need to know. Get ready to learn How to Build a Wood Retaining Wall on a Slope: Pro Steps.
Planning Your Wood Retaining Wall Project
Before you even think about picking up a hammer, good planning is key. This section covers the essential groundwork for building your wood retaining wall. We’ll look at why planning is so important and what you need to consider before you start digging.
A well-planned project saves time and prevents mistakes later on. This is the foundation for a strong, long-lasting wall.
Assessing Your Site and Needs
First, you need to understand your slope. How steep is it? How long will the wall be?
What will the wall hold back? Is it just dirt, or are there heavy items you need to support? Knowing these things helps you choose the right materials and design.
For instance, a steeper slope or heavier load means you need a stronger wall. You also need to check for underground utilities before you dig. It’s always good to contact your local utility companies to mark any lines.
- Determine Wall Height and Length
- Identify Soil Type and Drainage
- Check Local Building Codes and Permits
The height of your wall will greatly affect its design and the materials you use. Taller walls need more support and stronger anchoring. Measure the length of the area you need to retain.
This helps you calculate the total amount of wood and other supplies needed. A common mistake is underestimating the amount of material required, leading to last-minute trips to the store and delays.
Different soil types behave differently under pressure. Sandy soil drains well but can shift easily. Clay soil holds water, which adds weight and pressure to your wall.
Proper drainage is crucial. Without it, water can build up behind the wall, causing it to fail. You might need to install a drainage system, like gravel and perforated pipes, to help water escape.
Some areas have rules about how high retaining walls can be and what materials you can use. It’s important to check with your local building department. You might need a permit to build your wall.
Ignoring these rules can lead to fines or having to tear down your work. Getting permits ensures your project is safe and up to code.
Choosing the Right Wood
Not all wood is created equal when it comes to outdoor projects like retaining walls. You need wood that can stand up to moisture, insects, and decay for many years. Using the wrong type of wood will mean your wall won’t last very long and might need repairs sooner than you’d like.
This is where making a smart choice upfront pays off.
- Pressure-Treated Lumber
- Naturally Rot-Resistant Woods
- Wood Treatments and Sealants
Pressure-treated lumber is treated with chemicals that protect it from rot, fungi, and insects. It’s a popular choice for outdoor structures because it’s durable and readily available. Look for lumber rated for ground contact.
This means it has a higher level of treatment for use where it will be in direct contact with the soil. Common types include Southern Yellow Pine and Douglas Fir.
Some woods, like cedar and redwood, are naturally resistant to rot and insects. They are often more expensive than pressure-treated lumber but can be a good option if you prefer a natural look or want to avoid chemical treatments. While naturally resistant, they will still degrade over time, especially in constant contact with damp soil.
For a sloped retaining wall, their lifespan might be shorter than properly treated lumber.
Even with the best wood, you can add extra protection. Wood sealants and stains can add another layer of defense against moisture and UV rays. For pressure-treated wood, some people choose to seal it again after it has dried out a bit.
This can extend its life further. Make sure any products you use are safe for outdoor use and environmentally friendly if possible.
Step-by-Step Construction Guide
Now that you’ve planned and chosen your materials, it’s time to get building. This section will guide you through each step of actually constructing your wood retaining wall. We will cover everything from digging the foundation to securing the last board.
Follow these instructions carefully for a sturdy and effective retaining wall.
Preparing the Foundation
The foundation is the most critical part of any retaining wall. A solid base ensures your wall will not shift or sink. For a sloped wall, this means digging a level trench that goes down below the frost line in your area.
This prevents heaving from freezing and thawing cycles. The width of the trench should be at least twice the width of your wall’s base material, typically gravel.
- Excavate the Trench
- Add and Compact Gravel
- Ensure Proper Drainage
Dig a trench along the line where your wall will stand. The trench needs to be deep enough to reach stable ground and below the frost line. The depth will depend on your climate.
It also needs to be wider than your wall’s base material, usually about two feet wide. This wider base helps distribute the load and prevent settling.
Fill the trench with several inches of gravel. This gravel layer helps with drainage and provides a firm, level base for your wall. Use a hand tamper or a plate compactor to compact the gravel tightly.
Compacting is essential to create a solid foundation that can support the weight of the wall and the soil it holds back. This step is vital for long-term stability.
Install a drainage system behind the wall. This usually involves a layer of gravel and a perforated drain pipe at the base of the wall, behind the first course of timbers. The pipe should slope away from the wall to allow water to escape freely.
Without good drainage, water pressure can build up and damage the wall over time. This is especially true on slopes where water tends to run downhill.
Building the Wall Structure
With the foundation ready, you can begin stacking your wood. The way you build the wall itself is important for its strength and appearance. We’ll go over how to lay the wood correctly, ensuring each piece is secure and stable, especially on an incline.
- Lay the First Course
- Stagger and Secure Subsequent Courses
- Backfilling with Gravel
Place your first layer of timbers into the prepared trench. These timbers should be level and firmly seated in the compacted gravel. For a wood retaining wall, especially on a slope, it’s common to use railroad ties or large timbers.
Ensure they are snug against each other. This first course is the backbone of your entire wall.
Each new layer of timbers should overlap the joints of the layer below it, like bricks in a wall. This staggering provides strength and stability. Use long screws or lag bolts to connect the timbers together and to any anchoring systems you are using.
Ensure each course is level as you build up. On a slope, you will need to account for the grade difference with each timber.
As you add each course of timbers, backfill behind the wall with more gravel. This gravel layer acts as a drainage zone and helps to release hydrostatic pressure from the soil. It also adds stability to the wall.
You can then fill the rest of the area behind the gravel with soil. Compact the soil in lifts as you add it.
Anchoring and Finishing Touches
Anchoring is crucial for retaining walls, especially on slopes. It prevents the wall from leaning or collapsing forward. Finishing touches make your wall look good and last longer.
- Install Deadmen or Stakes
- Apply Wood Sealant
- Landscaping Around the Wall
Deadmen are horizontal pieces of wood buried in the soil behind the wall, attached to the wall timbers with long rods or cables. Stakes can be driven into the ground behind the wall and attached to the timbers. These anchors tie the wall back into the stable soil, providing significant resistance against the pressure of the retained soil.
The number and spacing of deadmen or stakes depend on the wall’s height and the soil conditions.
Consider this example: A 3-foot high wall might require deadmen every 4-6 feet. These deadmen should be buried at least 6-8 feet back from the wall. They are then connected to the wall using galvanized steel rods or heavy-duty cables.
This connection is vital for transferring the force from the wall to the stable soil behind.
Once the wall is complete and the wood has had time to dry slightly, apply a good quality wood sealant. This will protect the wood from the elements and extend the life of your retaining wall. Reapply the sealant every few years as needed.
Choose a sealant that is appropriate for ground contact and outdoor use. This step adds an extra layer of protection against moisture.
Add plants or decorative stones around the base of your wall. This not only looks nice but can also help to stabilize the soil. Choose plants with strong root systems that can help hold the soil in place.
Ensure that any landscaping does not block the drainage system you installed behind the wall. Proper landscaping can enhance the wall’s function and appeal.
Maintenance and Longevity
Building a retaining wall is a significant undertaking. To ensure it serves its purpose for years to come, proper maintenance is essential. This section covers what you need to do to keep your wood retaining wall in good shape and prevent common problems.
Regular Inspections
Make it a habit to inspect your retaining wall at least twice a year. Look for any signs of wear and tear. Check for leaning, shifting, or loose timbers.
Also, check the drainage system to ensure it’s not blocked. Early detection of problems can save you a lot of money and effort in the long run. Catching a small issue before it becomes a big one is always the best approach.
- What to Look For
- Addressing Minor Issues
During your inspections, look for any cracks in the wood, signs of rot, or insect damage. Check that the screws or bolts are still tight. Ensure the top of the wall is still level and not slanting.
Examine the soil against the wall; it should not be bulging outwards. Also, verify that water is draining away from the wall and not pooling behind it.
If you find a loose screw, tighten it. If a timber shows minor rot, you might be able to reinforce it or replace it. If the drainage appears to be slowing, clear any debris from the drain pipe or gravel.
Small repairs made promptly can prevent larger structural issues down the line. It’s much easier to fix a loose board than a wall that has started to collapse.
Drainage System Maintenance
The drainage system is the unsung hero of a retaining wall. If it fails, the wall is in danger. Keeping it clear is paramount for the wall’s survival.
- Clearing Blockages
- Gravel Replenishment
Periodically check the drain pipe and gravel layer for blockages. Leaves, soil, and other debris can clog the system. You can use a hose to flush out the pipe or carefully remove any visible obstructions.
If the wall is surrounded by many trees, this maintenance will be even more important. Ensuring water can escape is vital to prevent pressure build-up.
Over time, the gravel behind the wall might settle or wash away slightly. If you notice the gravel level dropping, you may need to add more. This helps maintain the drainage capacity and provides continued support to the wall.
Always use clean gravel for this purpose to ensure optimal drainage. This can be a simple task that adds years to your wall’s life.
Reapplying Sealant and Treatments
The protective coatings on your wood need refreshing. This keeps the wood from drying out or absorbing too much moisture.
- Frequency of Reapplication
- Choosing the Right Products
The frequency of reapplying sealant depends on the product used and your climate. Generally, every 2-3 years is a good guideline. Harsh weather conditions might require more frequent applications.
Check the manufacturer’s recommendations for the sealant you used. A good quality sealant will typically last longer than cheaper alternatives.
Always use sealants and treatments designed for outdoor wood and ground contact. Ensure the product is compatible with the type of wood you used. Some products offer UV protection, which helps prevent the wood from fading and drying out.
Applying these treatments correctly ensures maximum protection and longevity for your retaining wall. This is a straightforward but very effective step.
Common Problems and Solutions
Even with careful building, retaining walls can sometimes develop issues. Knowing these common problems and their solutions can help you fix them before they become major concerns. This section addresses those challenges so you can keep your wall strong.
Wall Leaning or Bowing
This is one of the most common problems with retaining walls. It usually happens when the soil behind the wall becomes saturated and exerts too much pressure. Improper drainage is the primary culprit.
- Causes
- Solutions
The main causes of leaning or bowing are poor drainage, inadequate backfilling with gravel, and insufficient anchoring. When water saturates the soil, it becomes heavy and exerts significant outward force. If the wall isn’t properly anchored or the backfill isn’t draining well, this pressure will eventually push the wall out of shape.
Over time, even a well-built wall can lean if drainage fails.
If the leaning is minor, you might be able to correct it by excavating some soil from the front of the wall and reinforcing the anchors. If the leaning is significant, you may need to partially or fully deconstruct the wall, fix the drainage and anchoring issues, and rebuild it. This is why thorough planning and construction are so important.
It’s often better to over-engineer anchoring and drainage than to face this problem.
Rot and Insect Damage
Wood is organic and susceptible to decay and pests. Protecting your wood is key to the wall’s lifespan.
- Prevention
- Treatment and Repair
Using pressure-treated lumber rated for ground contact is the first line of defense. Applying quality sealants and stains also adds protection. Ensuring good drainage prevents the wood from staying constantly wet, which accelerates rot.
Planting species with non-invasive root systems near the wall can also help reduce soil moisture.
If you spot rot or insect damage, assess its severity. Small areas of rot can sometimes be cut out and patched with a suitable wood filler or a small piece of new timber. For more extensive damage, replacing the affected timbers is necessary.
Prompt action is crucial; a small problem can quickly spread and compromise the entire wall’s integrity. Always use treated lumber for any repairs. A good fungicide treatment can sometimes help slow down rot on minor spots.
Erosion Behind the Wall
Soil erosion behind the wall can compromise its stability and its appearance.
- Causes
- Solutions
Erosion typically occurs when water runs off hard surfaces like driveways or patios and collects behind the wall without proper drainage. Heavy rainfall without adequate soil stabilization can also lead to erosion. If the soil behind the wall is loose or sandy and lacks vegetation, it’s more prone to washing away.
The best solution is proper drainage. Ensure your gravel backfill and drain pipe are functioning correctly. Planting ground cover or sturdy vegetation behind the wall can help hold the soil in place.
For steeper slopes, consider terracing or installing additional retaining structures to manage water flow. Educating yourself on local rainfall patterns can help anticipate erosion risks.
Frequently Asked Questions
Question: What is the best type of wood for a retaining wall on a slope?
Answer: Pressure-treated lumber rated for ground contact is usually the best choice due to its resistance to rot and insects. Cedar and redwood are natural alternatives but are generally more expensive and may not last as long in direct ground contact.
Question: How deep should I dig the foundation for a retaining wall on a slope?
Answer: You should dig deep enough to reach stable soil and below the frost line in your area. This depth varies by region, but typically it’s at least 12-18 inches deep and about two feet wide.
Question: Do I need to use gravel behind a wood retaining wall?
Answer: Yes, using a layer of gravel behind the wall is crucial for drainage. It allows water to escape and reduces pressure on the wall, preventing rot and structural damage.
Question: How often should I inspect my wood retaining wall?
Answer: It’s recommended to inspect your wall at least twice a year, once in the spring and once in the fall. Look for any signs of leaning, rot, insect damage, or drainage issues.
Question: Can I build a retaining wall on a very steep slope?
Answer: Building on very steep slopes can be challenging and may require professional engineering. For significantly steep slopes, consider professional help to ensure safety and structural integrity.
Summary
Building a wood retaining wall on a slope involves careful planning, proper material selection, and precise construction. By following these pro steps, from preparing the foundation to anchoring and maintenance, you create a strong, stable, and long-lasting wall. This guide empowers you to tackle this project with confidence for a beautiful and functional landscape.