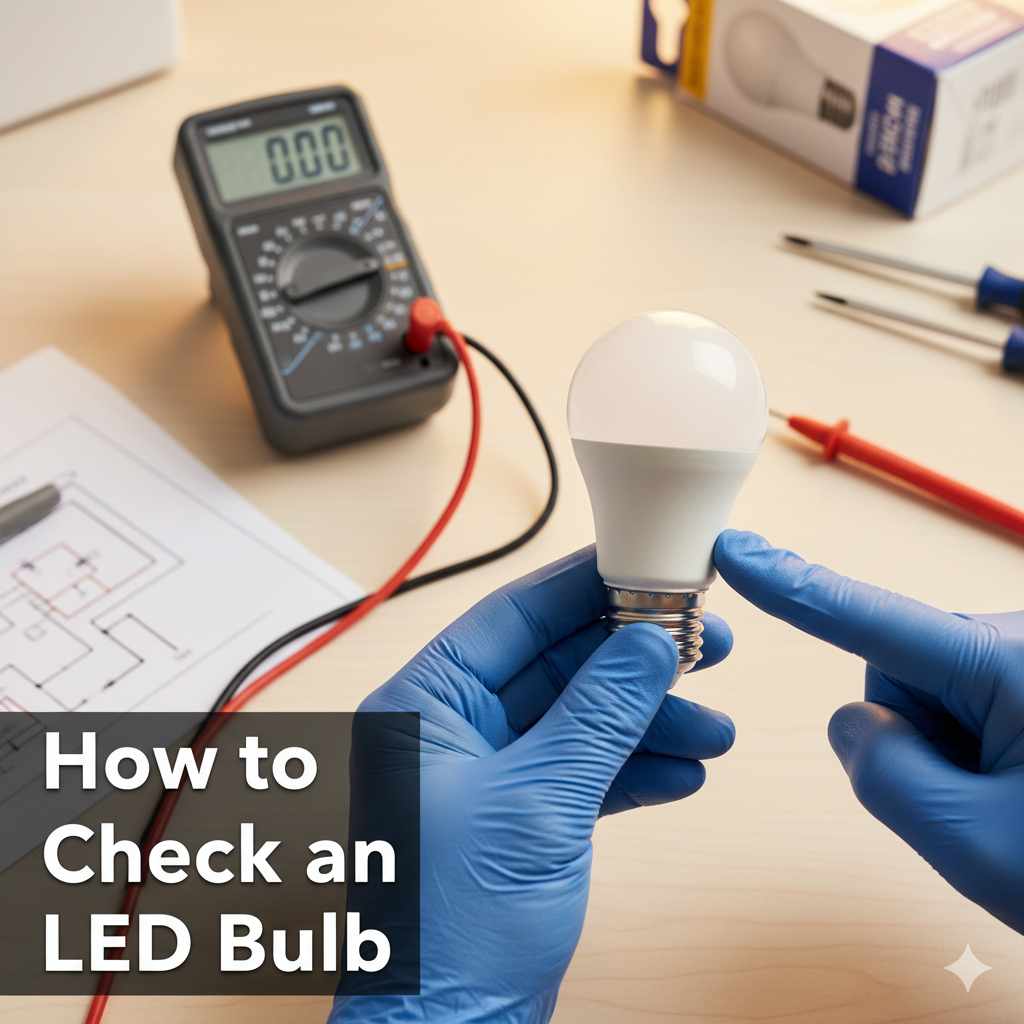
How to Check LED Bulb: Genius Effortless Method
Quick Summary:
Easily check an LED bulb without a multimeter using simple household items. This guide offers a genius, effortless method to quickly identify if your LED bulb is faulty or working correctly, saving you time and hassle.
Hey there, DIY friends! Md Meraj here. Ever unscrew a light bulb, thinking it’s the culprit behind a dark room, only to find out it wasn’t the bulb at all? It’s a common frustration, right? You want to fix that flickering light or dim corner, and the simplest answer often seems to be a bad LED bulb. But how do you know for sure before you head to the store and buy a new one? It can feel like a guessing game, and nobody likes wasting money or time. Don’t worry! I’ve got a super simple, genius method that lets you check your LED bulb without needing any fancy tools like a multimeter. We’ll walk through it step-by-step, making it easy for anyone to figure out if their LED bulb is the problem. Ready to shed some light on this mystery?
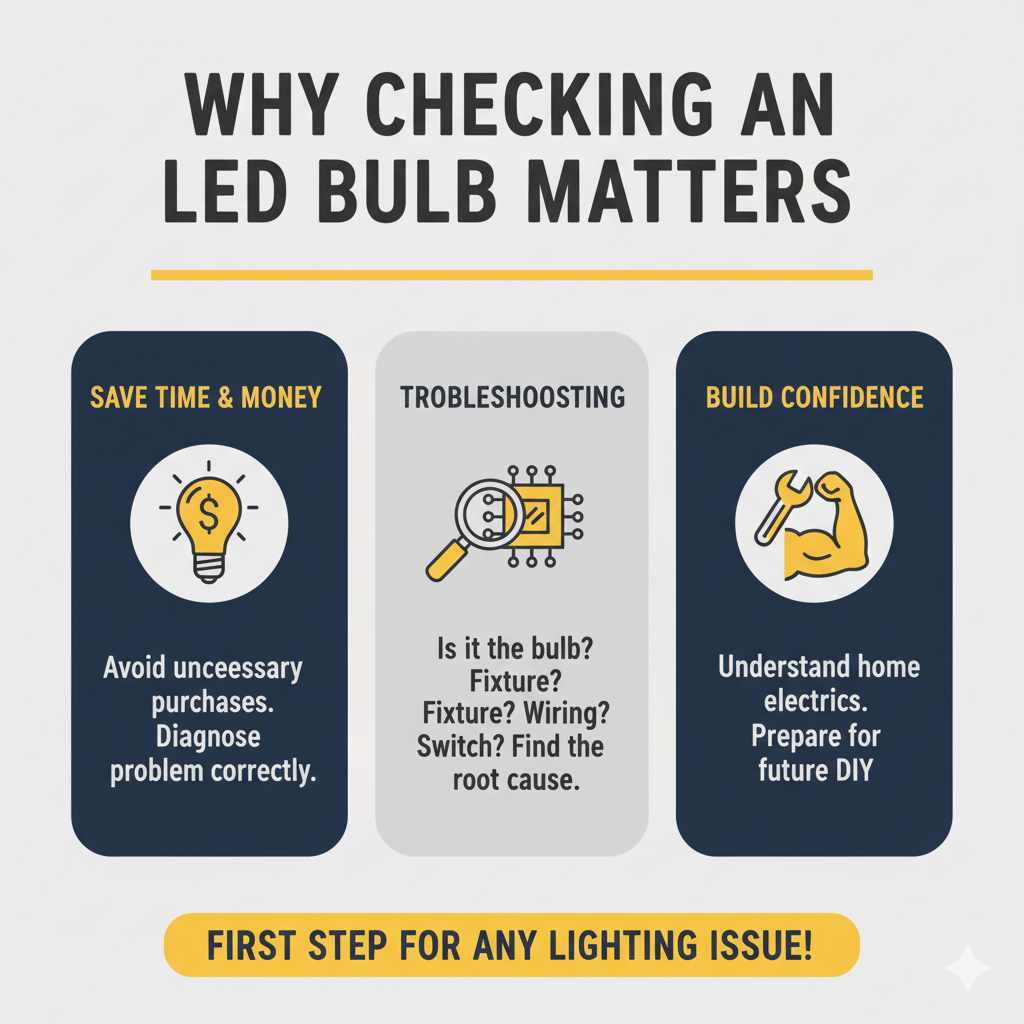
Why Checking an LED Bulb Matters
LED bulbs are fantastic – they save energy and last a long time. But like any electronic item, they can sometimes fail. When a light doesn’t work, many of us immediately suspect the bulb. While this is often true, it’s not always the case. Sometimes, the issue might be with the fixture, the wiring, or even the switch. If you’re trying to troubleshoot a lighting problem, knowing how to properly test your LED bulb is the first, most crucial step. It helps you avoid unnecessary purchases and correctly diagnose the root cause of the problem. Plus, understanding your home’s electrical components, even at a basic level, builds confidence for future DIY projects.
The “Genius Effortless Method”: Testing with a Known Working Fixture
This method is so simple, you might wonder why you didn’t think of it! The core idea is to isolate the bulb as the variable. If the bulb works in a different, confirmed working lamp or fixture, then the problem lies elsewhere in the original location. If it doesn’t work there either, then the bulb is indeed the issue.
What You’ll Need:
- The LED bulb you suspect is faulty.
- A known working lamp or light fixture. This could be a table lamp, floor lamp, or even a ceiling fixture in another room that you know works perfectly.
- A stable chair or ladder, if needed, to safely access the working fixture.
- A flashlight (optional, for safety in case the working fixture is also off).
Step-by-Step Guide to Effortless LED Bulb Testing:
- Safety First! Before you do anything, ensure the power is off to the original fixture where the bulb isn’t working. For a lamp, this means unplugging it. For a ceiling fixture, flip the corresponding breaker in your electrical panel. It’s always better to be safe when dealing with electricity. You can learn more about electrical safety basics from resources like the Consumer Product Safety Commission (CPSC).
- Remove the Suspect Bulb. Carefully unscrew the LED bulb from its original, non-working fixture. Hold it by the plastic or metal base to avoid touching the glass or internal components if it’s a newer design.
- Prepare the Working Fixture. Make sure the known working lamp or fixture is plugged in and its switch is in the “off” position. If it’s a lamp, ensure it’s on a stable surface.
- Install the Test Bulb. Gently screw the LED bulb you removed into the socket of the known working fixture. Ensure it’s snug but don’t overtighten it.
- Test the Bulb. Turn on the power to the working fixture. If it’s a lamp, flip its switch. If it’s a ceiling fixture, turn on the wall switch.
-
Observe the Results:
- If the bulb lights up brightly and stays on: Congratulations! Your LED bulb is working perfectly. This means the problem is NOT with the bulb itself. It’s likely an issue with the original fixture, its wiring, the switch, or the power source.
- If the bulb does NOT light up, flickers, or seems dim: This strongly suggests that the LED bulb is indeed faulty and needs to be replaced.
- Return the Bulb (Optional but Recommended). Once you’ve determined the bulb’s status, carefully unscrew it from the working fixture and screw it back into its original location (or set it aside if you’ve confirmed it’s bad). Turn the power back on to the original fixture to re-test the situation if you suspect the fixture.
Understanding Why This Method Works
This “known working fixture” method is a cornerstone of basic troubleshooting for any electrical device. It’s all about isolating variables. Think of it like this: when you’re trying to figure out why a car won’t start, you might swap a potentially bad spark plug with one you know is good from another cylinder. If the engine then fires up, you’ve found your faulty plug. The same principle applies here. By using a fixture that you’re certain is providing proper power and has a functional socket, you eliminate all other potential problems (wiring, switch, breaker) and leave only the bulb itself to test.
This is far more reliable than just looking at a bulb or trying to feel for heat, as some LED failures aren’t immediately obvious. Some bulbs might have internal shorts that don’t cause them to heat up but prevent them from lighting. Others might have loose connections within the bulb itself that can be jostled loose during removal or installation, giving a false positive or negative. Testing in a stable, known-good environment removes these ambiguities.
When the Bulb is NOT the Problem: Next Steps
If your LED bulb lights up perfectly in the known working fixture, but not in its original spot, it’s time to look at the original fixture. Here are a few common culprits:
Troubleshooting the Fixture:
- Check the Socket: Sometimes, the metal contacts inside the light socket can become bent or corroded. With the power OFF and the breaker flipped, you can carefully use needle-nose pliers to gently bend the small metal tabs on the sides of the socket inwards. Be extremely cautious not to bend them too far, as they can break. If they look very corroded, a gentle scrub with a pencil eraser might help, but if it’s severe, the fixture might need replacement.
- Inspect the Wiring: Loose wires are a common cause of lighting issues. If you’re comfortable and the power is definitely off, you can remove the fixture cover and check that all wire connections are secure. If you see any signs of scorching, melting, or loose wires, it’s best to call a qualified electrician. SafeElectricity.org offers great resources on home electrical safety.
- Test the Switch: Light switches can wear out. If the switch feels loose, flickers when you operate it, or seems “mushy,” it might be the problem. Replacing a light switch is a common DIY task, but again, always ensure the power is completely shut off at the breaker first.
- Check the Breaker: While less likely to affect a single light if other lights in the room work, it’s possible a breaker is partially tripped or faulty. Try flipping the breaker off completely and then back on.
When the Bulb IS the Problem: What to Do
If your LED bulb failed the test in the known working fixture, it’s time for a replacement. Here’s a quick guide:
Choosing a New LED Bulb:
- Match the Base Type: Ensure the new bulb has the same base as the old one (e.g., E26 is standard in North America for most household bulbs, E12 for candelabra, GU10 for spotlights).
- Consider Brightness (Lumens): Don’t just look at wattage. Lumens measure brightness. More lumens mean a brighter light. A 60-watt equivalent LED typically produces around 800 lumens.
- Color Temperature (Kelvin): This affects the “feel” of the light. Warm white (around 2700K) is cozy, like incandescent bulbs. Cool white or daylight (4000K-5000K) is brighter and more energizing.
- Dimming Capabilities: If the original fixture was on a dimmer switch, make sure your new LED bulb is explicitly labeled “dimmable.” Not all LEDs are. Using a non-dimmable bulb on a dimmer can cause flickering or damage the bulb.
Here’s a simple table to help you compare common LED bulb specifications:
| Feature | Description | Why It Matters |
|---|---|---|
| Base Type | E26, E12, GU10, etc. | Must match the socket for the bulb to fit. |
| Lumens (Brightness) | e.g., 450, 800, 1100, 1600 | Determines how bright the light is. 800 lumens is a common replacement for a 60W incandescent. |
| Color Temperature (Kelvin) | Warm White (~2700K), Cool White (~4000K), Daylight (~5000K) | Affects the mood and color perception in the room. |
| Dimmable | Yes/No | Crucial if used with a dimmer switch; non-dimmable LEDs can flicker or fail. |
| Lifespan (Hours) | e.g., 15,000 – 25,000+ hours | Indicates how long the bulb is expected to last. |
When purchasing new bulbs, consider brands that offer good warranties. Many reputable manufacturers provide warranties of 2-5 years, which is a testament to their quality and your peace of mind. Always keep your receipt!
Alternative (but less ideal) Methods
While the known working fixture method is the easiest and most reliable for beginners, you might hear about other ways to test bulbs. These often involve more risk or require specific tools:
1. Testing with a Known Good Socket Tester:
These are small, handheld devices that plug into a standard outlet. They usually have a socket where you can screw in a bulb. The tester then indicates if the bulb is working. They can be handy, but they are an extra purchase and still require you to have a known good power source (the tester itself).
2. Using a Multimeter (Not Beginner-Friendly):
A multimeter is a versatile tool for electrical testing. However, testing an LED bulb with a multimeter is tricky. You’d typically need to check for continuity or resistance. For LED bulbs with internal drivers (the electronics that convert AC to DC power for the LEDs), a simple continuity test might not be enough. You might need to test the voltage output, which requires understanding how the bulb is designed to be powered. For most homeowners, this is overly complicated and potentially unsafe if not done correctly. This is why we’ve avoided it in our “genius effortless method.”
3. Visual Inspection (Limited):
Sometimes, an LED bulb might show obvious signs of damage – a cracked lens, scorch marks on the base, or loose internal components visible through a clear bulb. However, many LED failures are internal and invisible to the naked eye. So, while it’s worth a quick look, it’s not a definitive test.
For simplicity and safety, sticking to the known working fixture method is your best bet as a beginner.

Frequently Asked Questions (FAQ)
Q1: Can I test an LED bulb by just touching it?
A: No, absolutely not. Never touch the internal components or the base of a bulb while it’s installed or when checking if it’s faulty. Even when removed, touching the metal contact points can be risky if there’s any residual charge. Always ensure power is off.
Q2: My LED bulb flickers. Does that mean it’s bad?
A: Flickering can indicate a bad bulb, but it can also mean the bulb isn’t compatible with your dimmer switch (if you have one), or there’s an issue with the fixture’s wiring or socket. Use the known working fixture test to see if the flickering persists there. If it works fine, the issue is likely with the original fixture or dimmer.
Q3: How long should an LED bulb last?
A: LED bulbs are designed to last much longer than incandescent or CFL bulbs. While lifespan varies by brand and quality, many good LEDs are rated for 15,000 to 25,000 hours or more. This translates to many years of typical household use. For example, 25,000 hours is over 22 years if used 3 hours a day!
Q4: What if the LED bulb doesn’t fit the working fixture?
A: If the bulb base type doesn’t match the socket, you won’t be able to screw it in. This is a sign that you need to ensure you’re using the correct base type for your fixtures. You’ll need to find a working fixture that uses the same base type as your suspect bulb, or get a compatible tester.
Q5: Can I test a dimmable LED bulb on a regular switch?
A: Yes, you can. Dimmable LED bulbs are designed to work on standard on/off switches. They simply won’t be able to dim. However, you should not use a non-dimmable LED bulb on a dimmer switch, as this can cause problems.
Q6: What does “lumens” mean on an LED bulb?
A: Lumens (lm) measure the total amount of visible light output from a bulb. It’s the true measure of brightness. Wattage, on the other hand, measures energy consumption. For LEDs, look at lumens to determine brightness, not wattage. For example, an LED bulb might consume only 9 watts but produce 800 lumens, similar to an old 60-watt incandescent bulb.
Conclusion
There you have it! Checking an LED bulb doesn’t require complex tools or confusing procedures. By using a simple, known-working light fixture, you can effortlessly and accurately determine if your LED bulb is the source of your lighting woes. This method not only saves you money on unnecessary replacements but also empowers you to troubleshoot other potential issues in your home lighting system. Remember, safety is always paramount – always ensure power is off before you start any electrical work. With this handy technique, you’re well-equipped to tackle dim lights and bring brightness back into your home with confidence. Happy DIYing!