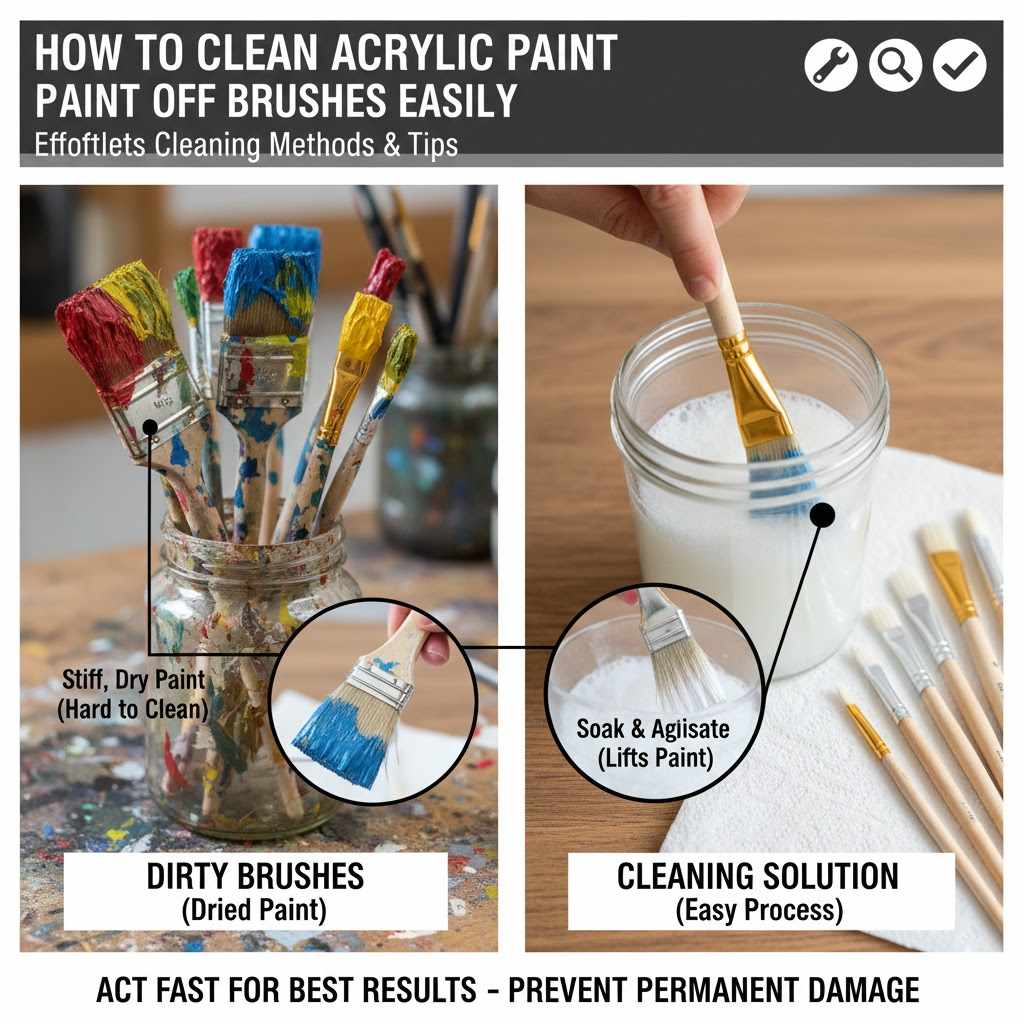
How to Clean Acrylic Paint Off Brushes Easily
Cleaning paint brushes after using acrylic paint can seem tricky, especially for people new to painting. Acrylic paint dries fast and can harden in your brushes, making them stiff and unusable. But don’t worry!
It’s much simpler than you might think. We’ll walk you through exactly how to get those brushes clean again, step by step, so you can keep painting without a fuss.
Why Cleaning Acrylic Paint Off Brushes Is Important
Keeping your paint brushes clean is super important for any artist. When acrylic paint dries on your brushes, it hardens like plastic. This can ruin the shape and softness of the bristles, making them stiff and less effective for painting.
A brush that’s not cleaned properly will become unusable over time. This means you’ll have to buy new brushes more often, which costs money. It also affects your painting quality because stiff brushes don’t lay down paint smoothly.
Learning to clean them well ensures your tools last longer and perform better, making your painting experience more enjoyable and productive.
The Science Behind Acrylic Paint Drying
Acrylic paints are made of pigment suspended in an acrylic polymer emulsion. When you use them, the water in the paint starts to evaporate. As the water leaves, the tiny plastic particles in the emulsion link together and form a strong, flexible plastic film.
This film traps the pigment, making the color permanent and water-resistant once dry. This is why acrylics are so versatile for different art projects, but it’s also why they can be a challenge to clean if left too long. The plastic-like nature of dried acrylic paint is what makes it adhere so firmly to brush bristles.
Understanding this process helps explain why prompt cleaning is key. The longer the paint stays in the brush, the more water evaporates, and the stronger that plastic bond becomes. It’s like letting cement dry in a bucket; once it’s hard, it’s very difficult to remove.
The goal of cleaning is to break this bond before it fully forms, either by washing away the wet paint or by using cleaning agents to soften the semi-dry or dry paint.
When Acrylic Paint Starts to Dry
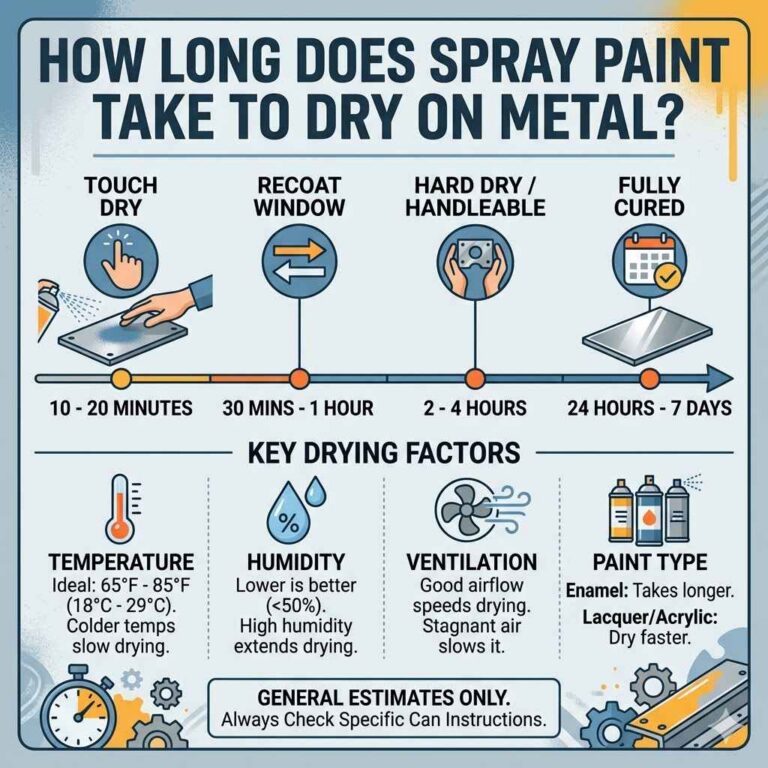
Acrylic paint dries quickly, often within minutes, especially in warm or dry environments. This rapid drying time is a major reason why cleaning brushes immediately after use is essential. If you’re painting a large piece or switching colors often, you might not have time to wash each brush thoroughly between every single stroke.
However, even a short period of neglect can lead to paint hardening in the bristles.
Signs that acrylic paint is starting to dry in your brush include a tacky feel to the bristles or a slight stiffness. The paint might look duller and thicker. If you notice these changes, it’s time to stop painting and clean your brush right away.
Waiting even a few more minutes can make the cleaning process significantly harder. This is where quick, efficient cleaning techniques come into play.
The Challenge for Beginners
Beginners often find How to Clean Acrylic Paint Off Paint Brushes Easily to be a bit of a challenge because they might not be fully aware of acrylic paint’s quick-drying nature or they might be focused on their artwork. It’s common to get engrossed in the creative process and forget about cleaning the tools until the paint has already dried hard. They might also be unsure of what cleaning agents are safe and effective for their brushes.
Using the wrong method or product could damage the bristles, leading to frustration and wasted money.
This is why simple, straightforward instructions are so helpful. Without clear guidance, beginners might resort to harsh scrubbing or chemical solvents that damage the brush hairs or even their skin. The aim is to provide a method that is gentle on the brushes, effective at removing paint, and easy enough for anyone to follow.
We want to empower new artists with the knowledge to care for their tools properly from the start.
Essential Supplies for Cleaning Acrylic Paint Brushes
To effectively clean acrylic paint off your brushes, having the right supplies on hand makes a big difference. You don’t need a lot of fancy items. Most of what you need can be found around your home or at an art supply store.
Having these items ready means you can clean your brushes promptly, preventing paint from drying and ruining them. This preparedness is key to maintaining the health and longevity of your painting tools, ensuring they perform their best every time you pick them up.
Water and Buckets
Water is your primary tool for cleaning acrylic paint, especially while the paint is still wet. You’ll need at least two buckets or containers. One bucket will be for the initial rinse to remove the bulk of the paint.
The second bucket should contain clean water for a final rinse to ensure all paint residue is gone. Using two buckets helps you keep the rinsing water cleaner for longer, making the final rinse more effective.
The temperature of the water can also play a role. While cold water is generally recommended for rinsing, lukewarm water can sometimes help loosen slightly dried paint without damaging the bristles. However, always avoid very hot water, as it can soften the glue that holds the bristles to the ferrule (the metal part of the brush), potentially causing them to loosen and fall out over time.
Why Two Buckets Are Better
Using two buckets for rinsing is a game-changer for brush cleaning. The first bucket acts as a “dirty water” rinse. You’ll swish your brush around in this water to get rid of the majority of the wet or semi-wet paint.
This prevents you from immediately transferring a thick layer of paint into your clean rinse water. After the first rinse, you move to the second bucket with fresh water. This “clean water” rinse then removes any remaining paint particles that the first rinse couldn’t get.
This method is far more effective than just rinsing under a single stream of tap water, especially if the paint is starting to set. It ensures that the final rinse water stays relatively clean, indicating that your brush is truly free of paint residue. This process is fundamental to achieving a thorough clean and protecting your brushes for future use.
Brush Soap or Mild Dish Soap
While water is great for wet paint, a good brush soap or even a mild dish soap is essential for breaking down the acrylic binder and lifting stubborn paint residue. These soaps are designed to cut through grease and oils, and they work similarly to dissolve the dried acrylic emulsion clinging to the bristles. Look for artist-specific brush soaps, which are often formulated to be gentle on natural and synthetic bristles while being tough on paint.
If you don’t have a dedicated brush soap, a small amount of mild dish soap like Dawn can work. However, be cautious not to use harsh detergents, as they can strip the natural oils from natural hair bristles, making them brittle. Always use soap sparingly; a little goes a long way.
The goal is to create a lather that helps lift the paint, not to saturate the brush in a sea of suds.
Choosing the Right Soap
Artist brush soaps are generally the best option because they are specifically formulated for the task. They often contain conditioning agents that help keep bristles soft and flexible, extending the life of your brushes. Some are made with natural ingredients and are biodegradable, making them an eco-friendly choice for artists.
These soaps typically come in bar or liquid form, and both are effective.
When selecting a dish soap, opt for a clear, mild formula without added moisturizers, dyes, or fragrances. These extra additives can sometimes leave a residue on the bristles. Again, use dish soap sparingly.
The gentle cleaning power of dish soap can be very effective for acrylics, but it’s crucial to rinse thoroughly afterward to remove all soap traces. Many professional artists rely on mild dish soap as a cost-effective and readily available cleaning solution.
Paper Towels or Lint-Free Cloths
Once your brushes are clean, you’ll need something to gently dry them and reshape the bristles. Paper towels or lint-free cloths are perfect for this. They absorb excess water and allow you to blot the bristles without leaving behind fuzzy fibers that can get stuck in the brush.
Using a clean paper towel or cloth is important to avoid re-contaminating your freshly cleaned brush.
Blotting the brush helps to remove excess water while also allowing you to gently reshape the bristles into their original form. This step is crucial for maintaining the brush’s shape and preventing splayed bristles. A clean, well-reshaped brush will perform much better on your next painting session.
Reshaping and Drying Techniques
After rinsing your brush thoroughly, gently blot out as much excess water as possible with your paper towel or cloth. Then, carefully reshape the bristles with your fingers, coaxing them back into their intended shape. For fine-tipped brushes, try to bring the bristles to a fine point.
For flat brushes, smooth them out into a flat edge.
Once reshaped, lay your brushes flat on a clean surface or hang them bristles-down to dry completely. Hanging brushes bristles-down is ideal because it allows any remaining water to drain away from the ferrule and the glue holding the bristles. This prevents water from weakening the adhesive over time.
Avoid standing brushes upright on their bristles, as this can cause them to splay and lose their shape.
Step-by-Step Guide How to Clean Acrylic Paint Off Paint Brushes Easily
Following these steps will help you keep your acrylic paint brushes in excellent condition. The key is to act quickly after you finish painting. The sooner you clean your brushes, the easier the process will be.
This guide breaks down the cleaning into simple, manageable actions, making How to Clean Acrylic Paint Off Paint Brushes Easily a routine part of your painting practice rather than a dreaded chore.
Step 1 Remove Excess Paint
Before you even think about water, use a paper towel or a rag to wipe away as much of the excess paint from your brush as possible. Gently press the bristles against the paper towel and twist the brush. You’ll be surprised how much paint can come off this way.
This step is vital because it reduces the amount of paint that goes into your rinse water, making the subsequent cleaning steps much more efficient and cleaner.
If you have a palette knife, you can also use it to scrape off thick clumps of paint from the brush. Be careful not to force the knife through the bristles, as this could damage them. The goal here is to remove the bulk of the paint before introducing any liquid.
This pre-cleaning step saves water and soap, and it significantly speeds up the entire cleaning process. Don’t worry about getting every last speck; that’s what the next steps are for.
Why This Initial Wipe Matters
This initial wiping stage is crucial for several reasons. First, it prevents a massive amount of paint from entering your water buckets. Imagine pouring half a tube of paint into your rinse water; it would quickly become unusable and require multiple changes.
By removing the excess paint mechanically, you conserve water and soap. Second, it makes the subsequent washing and rinsing much more effective. The soap and water can then work on the thinner layers of paint that remain, rather than trying to break down thick paint deposits.
Think of it like cleaning a dirty dish. You wouldn’t just immediately plunge a plate caked in food into clean dishwater. You’d scrape off the food scraps first.
This pre-cleaning step applies the same logic to your paint brushes. It’s a simple habit that dramatically improves the ease and effectiveness of your brush cleaning routine. This is a foundational technique for anyone wanting to learn How to Clean Acrylic Paint Off Paint Brushes Easily.
Step 2 Rinse in Water
Now, take your brush to your first bucket of water (the dirty water rinse). Swish the brush around, working the bristles against the bottom and sides of the bucket. You should see a cloud of paint begin to release into the water.
Continue rinsing and swishing until the water runs mostly clear or significantly less cloudy. Don’t be afraid to agitate the bristles gently with your fingers to help loosen embedded paint.
Once the first rinse is complete, move the brush to your second bucket of clean water. Repeat the swishing process. This clean water rinse removes any remaining paint particles that the first rinse couldn’t get.
If the water in the second bucket starts to become noticeably cloudy, it’s a sign that your brush might still have paint in it, and you may need to repeat the process with fresh water in both buckets, or move on to the soap step.
Agitating the Bristles
When rinsing, gently agitating the bristles is key. You can do this by swirling the brush in the water, or by pressing it gently against the bottom of the bucket. You can even use your thumb and forefinger to gently squeeze the bristles from the ferrule towards the tip, which helps to push out any paint trapped deep within the brush.
This action mimics the pressure you would apply when actually painting.
It’s important to be gentle. Avoid aggressively scrubbing the bristles against the bucket’s surface or pulling them too hard, as this can damage the brush hairs and their shape. The goal is to loosen and wash away the paint, not to wear down the bristles.
This gentle agitation, combined with the water flow, effectively flushes out the paint pigments and acrylic binder from within the brush.
Step 3 Wash with Soap
After rinsing, take your brush and apply a small amount of brush soap or mild dish soap directly onto the bristles. You can also lather it up in your hands first and then work it into the brush. Gently work the soap into the bristles, creating a lather.
You can use your fingers to massage the soap in, working from the ferrule down to the tip. You should see the soap helping to lift any remaining paint.
Continue working the lather until the brush feels clean and the lather is mostly free of paint color. This step is essential for breaking down any dried or semi-dried acrylic residue that water alone might not remove. The soap acts as a surfactant, surrounding the paint particles and allowing them to be washed away more easily.
It’s the magic step that truly gets brushes clean.
Ensuring Lather Penetration
To ensure the soap reaches all the paint, you need to work it deep into the bristles. Start by applying the soap at the base of the bristles near the ferrule. Then, gently massage it downwards towards the tip.
You can use your thumb and index finger to move the bristles apart slightly, allowing the soap to penetrate. If you have a brush comb, you can also use it very gently to help work the soap through the bristles, but this should be done with extreme care to avoid damaging the hairs.
The lather should be consistent throughout the bristles. If you notice sections where the lather is breaking down quickly or still has paint color, add a tiny bit more soap and continue massaging. The visual cue for a clean brush is a white, foamy lather that is free of any paint pigment.
This thorough lathering ensures that all acrylic binder and pigment are loosened and ready to be rinsed away.
Step 4 Rinse Thoroughly
Once you have a good lather and the brush appears free of paint pigment, it’s time to rinse thoroughly. Use clean running water, preferably cool or lukewarm. Hold the brush at an angle under the water, allowing the water to flow from the ferrule down the bristles.
Continue rinsing until all traces of soap and loosened paint are gone. You should not feel any slipperiness from soap residue on the bristles.
Again, you can gently squeeze the bristles from the ferrule down to help push out the last bits of soap and water. This thorough rinse is critical. Any soap left behind can affect the paint’s adhesion and the brush’s performance in the future.
A clean, soap-free brush is the goal at this stage. If you can still see suds or feel a slippery residue, keep rinsing.
Checking for Residue
To be absolutely sure all soap is gone, run your fingers through the bristles one last time under running water. The bristles should feel smooth and clean, not slick or soapy. You can also look at the water running off the brush; it should be clear and free of any suds.
If you have a fine-tipped brush, you can also hold it up to the light and inspect the bristles to ensure they are clean and free of any remaining paint or soap.
This final check is what separates a good cleaning from a great one. It ensures that your brush is ready for its next use and that no residues will interfere with your artwork. It’s a small step that makes a big difference in the longevity and performance of your brushes.
This attention to detail is fundamental to mastering How to Clean Acrylic Paint Off Paint Brushes Easily.
Step 5 Reshape and Dry
Gently shake excess water from the brush. Then, blot the bristles thoroughly with a clean paper towel or lint-free cloth. Carefully reshape the bristles with your fingers, returning them to their original form.
Ensure the bristles are smooth and in their proper shape. For pointed brushes, create a fine tip; for flat brushes, flatten them neatly.
Lay the brushes flat on a clean surface or, ideally, hang them bristles-down to dry. Hanging prevents water from pooling at the ferrule, which can degrade the glue over time and cause bristles to fall out. Make sure the brushes are stored in a way that allows air to circulate around them for efficient drying.
Never store wet brushes in a closed container.
Best Drying Methods
Hanging brushes is the most recommended drying method. You can purchase brush racks that allow brushes to hang freely, or you can improvise by using a clothes hanger and some string or clips. The key is to ensure the bristles are pointing downwards.
This allows gravity to pull any residual water away from the ferrule and the glue.
If hanging isn’t an option, laying brushes flat on a paper towel or a clean, dry cloth is the next best thing. Rotate them periodically to ensure even drying. Ensure the drying area is well-ventilated and out of direct sunlight, which can sometimes degrade brush materials.
Properly dried brushes are essential for maintaining their shape and preventing damage.
Dealing with Dried Acrylic Paint on Brushes
Sometimes, despite our best efforts, acrylic paint can dry on brushes. This is a common problem, and fortunately, there are ways to tackle it. The key here is patience and the right approach.
For dried paint, you’ll need to use a more potent cleaning solution than just soap and water. It’s a bit like trying to un-bake a cake, but with the right methods, you can often salvage brushes that seem beyond repair.
Using Brush Cleaners and Conditioners
Specialized brush cleaners are formulated to break down dried acrylic paint more effectively than regular soap. These cleaners often contain solvents or enzymes that soften and lift the dried paint binder without damaging the brush hairs. Follow the instructions on the product carefully, as they can vary.
Typically, you’ll soak the brush head in the cleaner for a specified time, then work the loosened paint out with a brush comb or your fingers.
After using a brush cleaner, it’s essential to wash the brush thoroughly with soap and water to remove all chemical residue. Many brush cleaners also act as conditioners, but an extra wash with your regular brush soap or mild dish soap is still recommended to ensure the brush is perfectly clean and ready for use. Proper conditioning helps restore the bristles’ flexibility.
Types of Brush Cleaners
There are several types of brush cleaners available. Some are solvent-based, which are very effective but can be harsh and require good ventilation. Others are water-based and often contain enzymes or mild solvents that are gentler on both the brushes and the user.
Many brands offer cleaners that also condition the bristles, leaving them soft and supple after the cleaning process.
Some artists also use household items like rubbing alcohol or even nail polish remover (acetone) as a last resort for heavily dried paint. However, these should be used with extreme caution, as they can be very drying and damaging to brush bristles. If you opt for these, use them sparingly, soak only the bristles (not the ferrule), and always follow up with a thorough washing and conditioning to try and restore the bristles’ health.
It’s crucial to test any strong cleaner on a small section or an old brush first.
Soaking Methods for Stubborn Paint
For paint that has hardened significantly, soaking is often necessary. You can soak your brush in warm water mixed with a good amount of brush soap or a dedicated brush cleaner. The soaking time can range from an hour to overnight, depending on how stubborn the paint is.
During the soaking process, you might see the paint start to soften and flake off. After soaking, gently work the bristles with your fingers or a brush comb to remove the loosened paint. You might need to repeat the soaking and working process several times to get the brush clean.
Be patient, as this can take time. Avoid leaving brushes soaking for excessively long periods, as prolonged exposure to water can damage the glue in the ferrule.
What to Soak In
A common and effective soaking solution can be made with warm water and a generous amount of brush soap or mild dish soap. For more stubborn paint, a dedicated brush cleaner or even a small amount of rubbing alcohol can be added to the soaking solution, but always test these first. Never soak the entire brush, only the bristles and the part of the ferrule that might have paint on it.
Some artists also find success by soaking brushes in linseed oil (for oil paints, but can help soften acrylics too) or even a specialized acrylic paint remover. The key is to use a solution that can soften the acrylic binder without damaging the brush hairs. After soaking, it’s vital to rinse the brush extremely well and follow up with soap and water to remove all traces of the soaking agent and loosened paint.
Using a Brush Comb
A brush comb, sometimes called a palette knife comb or brush rake, is a valuable tool for working out stubborn paint. Once the paint has been softened through soaking or cleaning solutions, use the comb to gently separate and untangle the bristles. Start at the ferrule and carefully comb downwards towards the tip of the brush.
This process helps to lift out paint that is trapped deep within the bristles. Use gentle, steady strokes. You may need to rinse the comb frequently as you work.
This tool is particularly helpful for larger brushes or brushes with dense bristles where paint can become deeply embedded. When used carefully, it can help restore brushes that might otherwise be considered ruined.
How to Use a Brush Comb Safely
A brush comb has fine teeth designed to get between the bristles. When using it, always work from the ferrule (where the bristles meet the metal band) down towards the tip of the brush. This helps to pull the paint out from the root of the bristles, rather than pushing it further in.
Use a light touch; you don’t need to apply a lot of pressure.
If you encounter a knot or a section of particularly stubborn paint, don’t force the comb. Instead, try to work around it, or go back to soaking the brush. After using the comb, it’s crucial to wash the brush thoroughly with soap and water and reshape it.
The comb helps loosen the paint, but the soap and water are what ultimately remove it and leave the bristles clean and aligned.
Preventative Measures for Easy Cleaning
The best way to deal with dried acrylic paint on brushes is to prevent it from happening in the first place. Implementing good habits during and after your painting sessions can make the cleaning process incredibly simple and quick. These preventative measures are the foundation of good brush care, ensuring that your tools remain in top condition with minimal effort.
Clean Brushes Immediately After Use
This cannot be stressed enough. As soon as you finish using a brush, or when you take a break from painting, clean it. Even a quick rinse in water followed by a brief wash with soap can prevent acrylic paint from drying and hardening.
Don’t let your brushes sit with paint on them, even for a few minutes.
If you’re working on a large piece and need to switch colors frequently, consider having a bucket of water and a small amount of soap nearby. A quick dip and swish in the water between colors can keep the paint wet enough to be easily washed out later. This proactive approach saves a lot of time and effort in the long run.
The “Wash Between Colors” Habit
Developing the habit of washing your brush briefly between color changes is a highly effective way to prevent paint from drying. If you’re switching from blue to red, for example, don’t just wipe the blue off on a rag and dip into the red. Take the blue brush, rinse it in your dirty water bucket, give it a quick wash with soap if needed, and then rinse it thoroughly in clean water.
This ensures that you are not mixing colors in your paint or contaminating your palette, and it keeps the paint wet in the brush.
This small action significantly reduces the amount of paint that needs to be removed later. It means that when you finish your painting session, the actual cleaning process will be much faster and easier. It’s about small, consistent actions that prevent big problems down the line.
This habit is a cornerstone of understanding How to Clean Acrylic Paint Off Paint Brushes Easily.
Proper Storage of Brushes
How you store your brushes also plays a role in their longevity and ease of cleaning. Always store brushes so that the bristles are not bent or crushed. Ideal storage methods include brush holders that keep bristles upright, or laying brushes flat.
Brushes should be completely dry before being stored away.
Avoid storing brushes in a tightly sealed container while they are still damp, as this can lead to mold or mildew growth. Ensure they are stored in a clean, dry place. Proper storage not only keeps your brushes in good shape but also prevents dust and debris from accumulating on the bristles, which can affect your painting.
Storing Bristles Up or Down
When storing brushes, especially after washing, it’s best to have them bristles-down or laid flat. Storing them bristles-up in a jar can cause the bristles to splay out over time, especially if they are not completely dry. This can also put strain on the ferrule if water seeps into the glue.
Laying brushes flat on a clean surface or using a brush holder designed to suspend them bristles-down allows air to circulate and water to drain away, preserving the shape and integrity of the bristles.
This is particularly important for natural hair brushes, which are more sensitive to moisture and can lose their shape more easily. Consistent, proper storage is a simple but vital step in maintaining your brushes. It makes subsequent cleanings easier because the bristles are less likely to be permanently misshapen by improper storage.
Using a Brush Conditioner
After cleaning and rinsing, applying a brush conditioner can help protect your bristles. This is especially useful for natural hair brushes. Conditioner replenishes the natural oils in the bristles, keeping them soft, flexible, and preventing them from becoming brittle.
This makes them less likely to shed and more resilient to cleaning.
You can use a dedicated brush conditioner or a small amount of hair conditioner designed for dry or damaged hair. Work it gently into the bristles, let it sit for a few minutes, then rinse thoroughly. This step, though seemingly minor, significantly extends the life of your brushes and makes them easier to clean in the future by keeping the paint from sticking as much.
Benefits of Conditioning
Brush conditioning is like moisturizing for your brushes. It helps to prevent the bristles from drying out and becoming brittle, which can lead to them breaking or shedding during use or cleaning. For natural hair brushes, it replaces the natural oils that can be stripped away by soaps and cleaning agents.
This keeps the bristles supple and resilient, allowing them to hold their shape and glide smoothly across the canvas.
A conditioned brush also tends to repel paint a bit better. The smoother surface of the conditioned bristles makes it harder for acrylic paint to adhere stubbornly. This means less paint gets trapped deep within the brush, making subsequent cleaning sessions much faster and easier.
It’s a proactive step that pays off in terms of brush performance and longevity.

Frequently Asked Questions
Question: Can I use just water to clean acrylic paint off my brushes
Answer: While water is good for rinsing away wet acrylic paint, it’s usually not enough on its own for dried paint. You’ll likely need soap or a specialized cleaner to fully break down the acrylic binder and remove all residue.
Question: How long can I soak brushes with dried acrylic paint
Answer: You can soak brushes for an hour to overnight, depending on how stubborn the paint is. However, avoid prolonged soaking, as too much time in water can damage the glue in the ferrule.
Question: Will rubbing alcohol clean dried acrylic paint
Answer: Yes, rubbing alcohol can help soften dried acrylic paint. However, it can also be harsh and drying to brush bristles. Use it sparingly, only on the bristles, and always follow up with thorough washing and conditioning.
Question: What if my brush bristles are splayed after cleaning
Answer: If your bristles are splayed, try reshaping them with your fingers while the brush is still wet. Laying brushes flat or hanging them bristles-down to dry will help them maintain their shape.
Question: How often should I deep clean my acrylic paint brushes
Answer: It’s best to clean your brushes thoroughly after every painting session. Deep cleaning methods for dried paint should only be used when necessary to salvage a brush.
Final Thoughts
Keeping your acrylic paint brushes clean is straightforward with the right approach. Promptly rinsing, using soap, and drying them properly prevents paint from hardening. For dried paint, gentle soaking and specialized cleaners can often save your brushes.
Consistent care ensures your tools last longer and perform better, making your painting sessions more enjoyable.