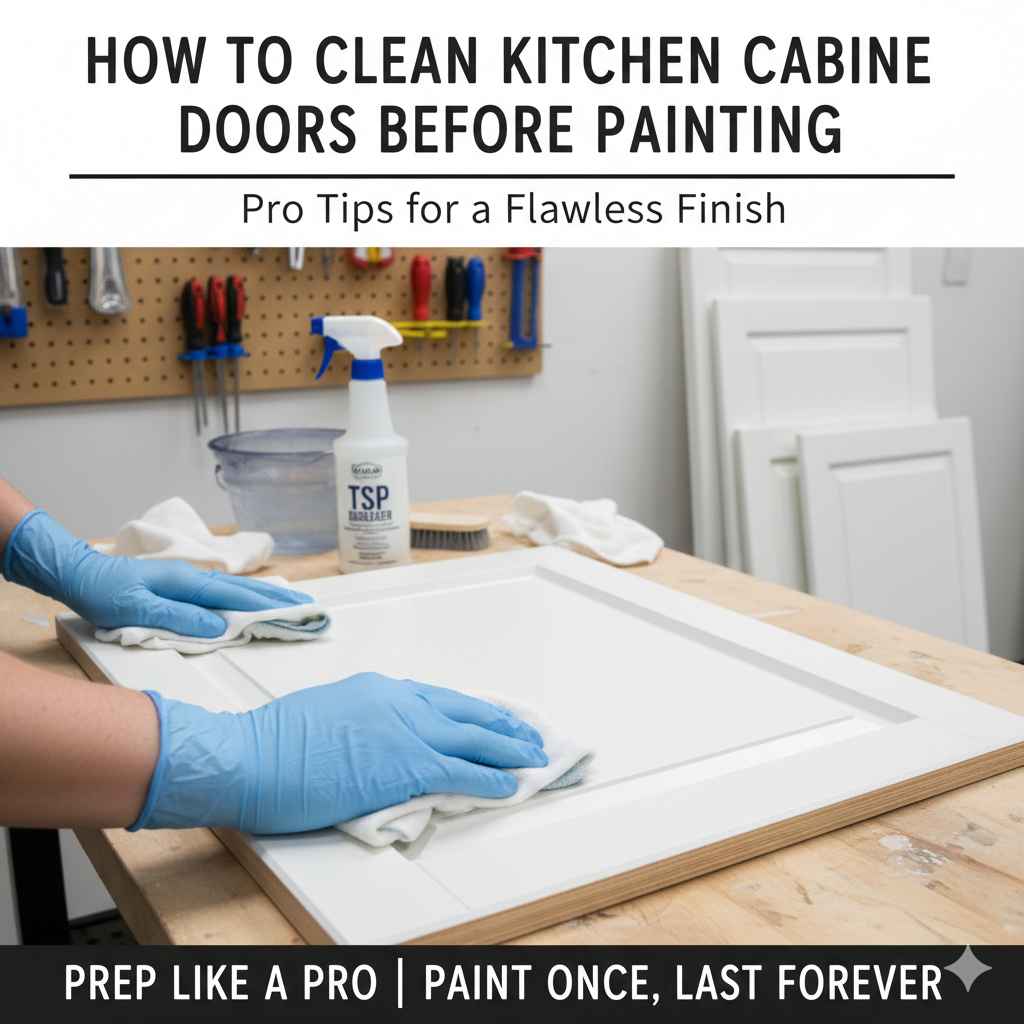
How To Clean Kitchen Cabinet Doors Before Painting: Pro Tips
To clean kitchen cabinet doors before painting, first remove all hardware. Then, scrub the doors thoroughly with a degreasing cleaner like Trisodium Phosphate (TSP) substitute mixed with warm water. Use a non-abrasive sponge to remove all grease and grime. Rinse with a clean, damp cloth and let the doors dry completely before sanding or priming.
Thinking about painting your kitchen cabinets? That’s fantastic! A fresh coat of paint is one of the best ways to completely transform your kitchen without a huge budget. But before you pick up that paintbrush, there’s one step you absolutely cannot skip: cleaning. Years of cooking leaves a sticky, invisible layer of grease and grime on your cabinets. Painting over it is a recipe for disaster. Don’t worry, I’m here to walk you through it. We’ll make this simple, safe, and effective. Let’s get those cabinets perfectly prepped for a beautiful, lasting finish.
Why a Deep Clean is Your Secret Weapon for a Perfect Paint Job
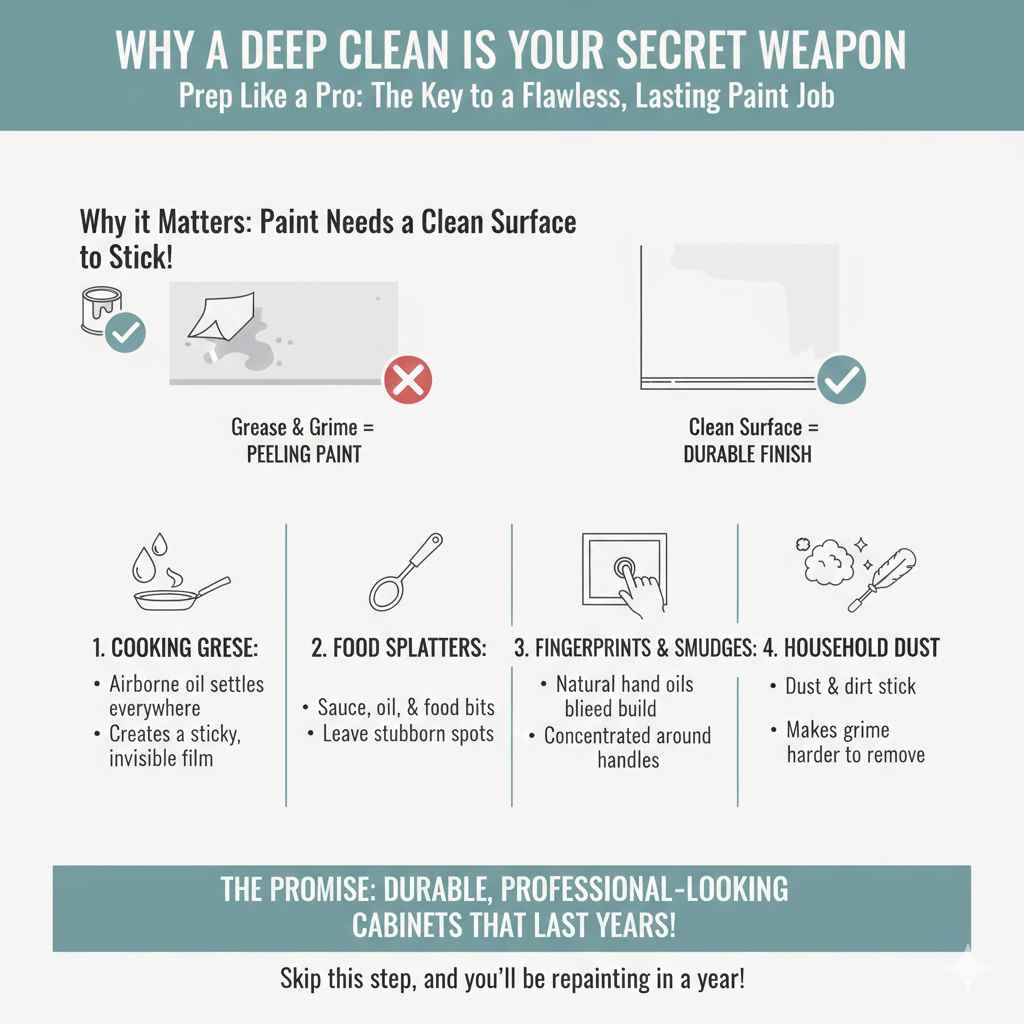
You might be tempted to just wipe down your cabinets and start painting. I get it, you’re excited to see the results! But trust me on this—spending a little extra time on a deep clean is the most important step in the entire project. Paint needs a clean, slightly rough surface to grab onto. If it can’t stick properly, it will peel, chip, or bubble within months, and all your hard work will be for nothing.
Think about what your kitchen cabinets go through every day:
- Cooking Grease: Tiny particles of oil float in the air and settle on every surface, creating a sticky film.
- Food Splatters: Sauce, oil, and other bits of food can leave stubborn spots.
- Fingerprints and Smudges: Natural oils from our hands build up over time, especially around handles and knobs.
- Household Dust: Dust and dirt stick to the greasy film, making it even harder to remove.
Painting over this layer is like trying to put a sticker on a greasy window—it just won’t hold. A proper degreasing clean removes this barrier, allowing your primer and paint to bond directly with the cabinet surface. This creates a durable finish that will look great and stand up to daily use for years to come. Taking this step seriously is the difference between a DIY project that looks professional and one that you’ll have to redo in a year.
Gather Your Supplies: Your Cleaning Toolkit
Before we roll up our sleeves, let’s get everything we need in one place. Having your tools ready will make the process smooth and frustration-free. You don’t need anything fancy, and you probably have some of these items at home already.
Essential Cleaning Supplies:
- A good degreasing cleaner: We’ll talk more about choosing the right one in a moment. Trisodium Phosphate (TSP) or a TSP substitute is a popular choice.
- Clean buckets: You’ll need at least two—one for your cleaning solution and one for clean rinse water.
- Non-abrasive scrub sponges or cloths: Look for sponges that won’t scratch the cabinet surface. Microfiber cloths are also excellent.
- Rubber gloves: Protect your hands from the cleaner and hot water.
- Safety glasses: Always a good idea to protect your eyes from splashes.
- Old towels or drop cloths: To protect your floors and countertops.
- A screwdriver or drill: For removing cabinet doors and hardware.
- Small plastic bags and a marker: For labeling screws and hinges. This is a lifesaver!
Choosing the Best Cleaner for Your Cabinets
The cleaning aisle can be overwhelming, but choosing the right cleaner is simple once you know what to look for. Your goal is to cut through grease without damaging the wood or cabinet surface. Here are the most common and effective options for this job.
Popular Degreasing Cleaners Comparison
I’ve put together a quick table to help you compare the top choices. For most kitchens with typical grease buildup, a TSP substitute is my go-to recommendation.
| Cleaner Type | Best For | Pros | Cons |
|---|---|---|---|
| TSP (Trisodium Phosphate) | Extremely greasy, old cabinets. | Very powerful degreaser. Also de-glosses the surface slightly, helping with paint adhesion. | Harsh chemical. Requires good ventilation, gloves, and eye protection. Can damage surrounding surfaces. Must be rinsed thoroughly. Check local regulations, as it’s banned in some areas. |
| TSP Substitute | Most kitchen cabinets with moderate grease. | Safer and more environmentally friendly than traditional TSP. Very effective at cutting grease. Widely available. | Still requires careful handling and rinsing. May not be as strong as real TSP for extreme cases. |
| Krud Kutter or Simple Green | Light to moderate grease. Quick clean-ups. | Easy to find and use. Less harsh than TSP. Many are biodegradable. | May require more scrubbing on heavily soiled areas. You must ensure it’s the degreasing formula. |
| DIY Vinegar & Hot Water | Very light grime, regular maintenance. | Inexpensive and readily available. Non-toxic. | Not strong enough for years of built-up kitchen grease. Vinegar scent can be strong. |
For this project, I strongly recommend a dedicated degreaser like a TSP substitute. It provides the perfect balance of cleaning power and safety. You can find excellent guidance on choosing safer cleaning products from the U.S. Environmental Protection Agency (EPA), which has a “Safer Choice” label to help you identify products that are safer for you and the environment.
Your Step-by-Step Guide to Perfectly Clean Cabinet Doors
Alright, let’s get started! Follow these steps carefully, and you’ll have your cabinets prepped and ready for a beautiful paint job. Take your time—this is a project where patience pays off.
Step 1: Set Up Your Workspace
First things first, create a good working environment. This will protect your kitchen and make the job easier.
- Clear Your Counters: Remove everything from your countertops.
- Protect Surfaces: Lay down drop cloths or old towels on the floor and cover your countertops with plastic sheeting or rosin paper.
- Ventilate the Area: Open windows and doors to ensure good airflow, especially if you’re using a strong cleaner like TSP. A small fan can help circulate the air.
- Set Up a Cleaning Station: Find a spot, maybe in the garage or a spare room, where you can comfortably lay the cabinet doors flat for cleaning. You can use sawhorses with old blankets draped over them.
Step 2: Remove Doors and Hardware
Cleaning is much more thorough when you can lay the doors flat. This also protects your cabinet boxes from getting too wet.
- Unscrew the Doors: Using your drill or screwdriver, carefully remove the screws from the hinges attached to the cabinet frames. It’s often easier to leave the hinges on the doors for now.
- Label Everything: This is my most important pro tip! As you remove each door, label it with a small piece of painter’s tape in a discreet spot (like where the hinge sits). Use a simple system like “U1” for Upper 1, “L1” for Lower 1, and so on.
- Bag the Hardware: Place the screws and hinges for each door into a labeled plastic bag. Write “U1 Hardware” on the bag. This will prevent a major headache when it’s time to put everything back together.
- Remove Knobs and Pulls: Once the doors are off, unscrew all the handles and pulls and place them in their own labeled bag.
Step 3: The Initial Dry Wipe
Before you introduce any water, do a quick dry clean to get rid of the easy stuff.
Use a clean, dry cloth or a shop vacuum with a soft brush attachment to wipe away all the loose dust, cobwebs, and crumbs from the doors and cabinet frames. This prevents you from just turning dust into mud when you start wet cleaning.
Step 4: Mix and Apply Your Cleaner
Now for the main event! Put on your rubber gloves and safety glasses.
- Mix Your Solution: Follow the instructions on your cleaner’s packaging. For TSP substitute, you’ll typically mix a small amount into a bucket of warm water. Warm water is much more effective at dissolving grease.
- Prepare Your Rinse Bucket: Fill your second bucket with clean, plain water.
- Start Scrubbing: Dip your non-abrasive sponge into the cleaning solution, wring it out so it’s damp but not dripping, and start scrubbing a cabinet door. Work in small, manageable sections. Always scrub gently with the grain of the wood if it’s visible. Pay extra attention to the areas around the knobs and handles, as well as the detailed grooves or crevices where grime loves to hide.
- Don’t Forget the Frames: Once the doors are done, use the same process to clean the cabinet frames and bases in your kitchen.
Step 5: Rinse Away the Residue
This step is just as important as cleaning. Any leftover cleaner residue can prevent the primer from sticking properly.
- Use Clean Water: Dip a clean cloth into your rinse bucket, wring it out well, and wipe down the entire surface you just cleaned.
- Rinse Your Cloth Often: Rinse the cloth frequently in the clean water bucket to avoid spreading the cleaner residue around. You may even need to change your rinse water a couple of times if the cabinets are particularly dirty.
- Feel the Surface: A properly rinsed surface should not feel slippery or soapy at all. If it does, rinse it again.
Step 6: Let Them Dry Completely
Patience is key here. Trapped moisture is an enemy of a good paint job.
Wipe the doors with a clean, dry towel to remove excess water. Then, stand the doors up or place them on drying racks in a well-ventilated area. Let them air dry completely. This can take several hours, or even overnight. Do not rush this step! The wood or MDF must be 100% dry before you even think about sanding or priming.
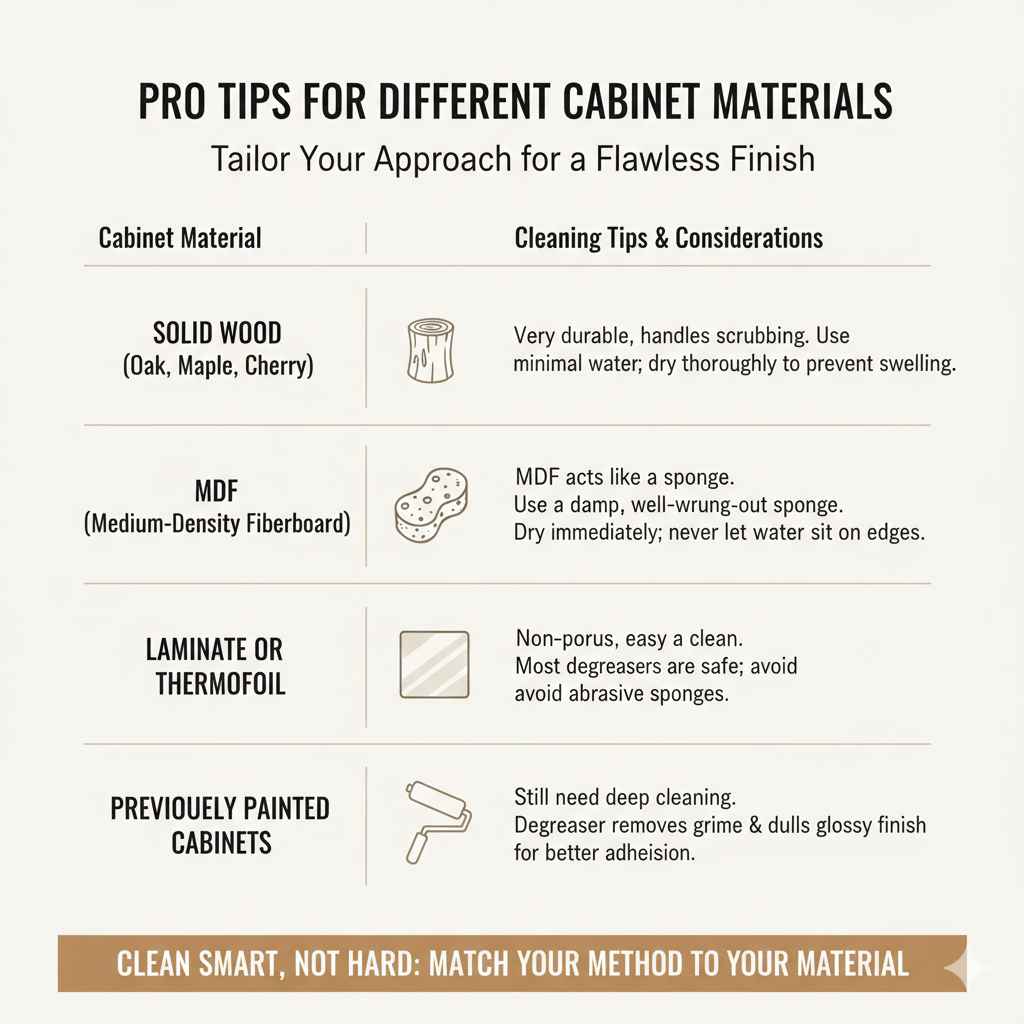
Pro Tips for Different Cabinet Materials
Not all cabinets are the same. Here’s a quick guide on how to adjust your approach based on the material you’re working with.
| Cabinet Material | Cleaning Tips & Considerations |
|---|---|
| Solid Wood (Oak, Maple, Cherry) | Very durable and can handle vigorous scrubbing. Be careful not to use too much water, which can cause the wood to swell. Always dry thoroughly. |
| MDF (Medium-Density Fiberboard) | MDF is like a sponge. It’s critical to use as little water as possible. Use a damp, well-wrung-out sponge. Never let water sit on the surface, especially on exposed edges. Dry immediately and thoroughly. |
| Laminate or Thermofoil | These plastic-coated surfaces are non-porous and easy to clean. Most degreasers are safe, but avoid abrasive sponges that can scratch the finish. You still need to clean them well to remove the greasy film. |
| Previously Painted Cabinets | Cleaning is still a must. Grease and grime build up on painted surfaces just the same. A good degreaser will also help dull any glossy finish, which is great for new paint adhesion. For more info on working with wood, the Michigan State University Extension offers some fantastic resources for homeowners. |
Frequently Asked Questions (FAQ)
What is the best cleaner to use on greasy kitchen cabinets?
For moderate to heavy grease, a TSP (Trisodium Phosphate) substitute is the best choice. It’s powerful enough to cut through years of grime but is safer and more eco-friendly than traditional TSP. For lighter cleaning, a store-bought degreaser like Krud Kutter works well.
Do I really have to remove the cabinet doors to clean them?
Yes, I highly recommend it. Removing the doors allows you to clean every nook and cranny thoroughly. It also lets you work on a flat surface, which is much easier and gives you a better result. It prevents drips and ensures you don’t miss the edges or the back of the doors.
What happens if I don’t clean my cabinets before painting?
If you paint over grease and grime, the paint will not adhere properly. You will likely experience peeling, chipping, or bubbling paint in a very short time, especially in high-use areas. The finish will not be durable, and you’ll have to strip it all off and start over.
How long should my cabinets dry after cleaning and before painting?
Let them dry for at least 4-6 hours, but waiting overnight is even better. The surface must be 100% dry to the touch, with no hidden moisture in the corners or joints. If your climate is humid, give them extra time.
Can I just use soap and water to clean my cabinets?
For everyday wipe-downs, soap and water are fine. But for prepping for paint, standard dish soap is not strong enough to cut through the tough, polymerized grease found in kitchens. Some soaps can also leave behind a residue that interferes with paint adhesion. It’s best to use a product specifically designed for degreasing.
Is it necessary to rinse the cabinets after cleaning with TSP?
Absolutely. Rinsing is a critical step. Any leftover TSP or cleaner residue will create a film on the surface that will prevent your primer and paint from sticking correctly. Rinse with a clean cloth and clean water until the surface no longer feels slick or soapy.
What is the next step after my cabinets are clean and dry?
Once your cabinets are perfectly clean and completely dry, the next step is a light sanding. This will scuff up the surface slightly, giving the primer even more to grip onto. After sanding, you’ll wipe away the dust and then you’ll be ready to prime!
Conclusion: The Foundation for a Beautiful Kitchen
And there you have it! You’ve successfully tackled the most important—and often most overlooked—step in painting your kitchen cabinets. By giving your doors and frames a thorough, deep clean, you’ve created the perfect foundation for a stunning, durable finish. You’ve removed the years of invisible grime that would have sabotaged your hard work.
Remember, the time and effort you invest in preparation now will pay off tenfold in the final result. Your paint will go on smoothly, stick firmly, and hold up beautifully to the rigors of a busy kitchen. Pat yourself on the back for doing it the right way. Now you’re ready for the fun part—sanding, priming, and finally, adding that beautiful new color that will bring your kitchen to life.