How To Remove Primer: Easy Steps For Perfect Results
In the realm of surface preparation and paint adhesion, the removal of primer is a critical task that requires precision and the right methodologies. Understanding the chemistry behind primer formulations, whether they are solvent-based or water-based, is essential to effectively tackle the challenge of how to remove primer without damaging the underlying substrate. Various techniques, including mechanical abrasion, chemical solvents, and environmentally friendly alternatives, can be employed depending on the surface material and the primer type. Delving into the specifics of these methods will unveil the best practices to ensure optimal results.
Discover the nuances of this process in the full article ahead.
How To Remove Primer: Effective Techniques And Tips
Removing primer can be a straightforward task when equipped with the right techniques and tools. This briefing covers essential methods to effectively strip primer from various surfaces, including wood, metal, and plastic. Whether using chemical solvents, sanding, or heat methods, understanding the best approach for your specific project can save time and effort. Key factors such as surface type, primer material, and safety precautions will also be discussed, ensuring a successful removal process while maintaining the integrity of the underlying material.
Understanding Primer and Its Types
Definition of primer. Different types of primer (oilbased, waterbased, shellac). Importance of selecting the right type for your project.
Primer acts as a special base coat, helping paint stick better. Think of it as the first date before the real relationship with your wall color! There are three main types: oil-based, water-based, and shellac.
Each type has its superpower, like oil-based being great for tough surfaces and water-based being friendly and easy to clean. Picking the right primer is like choosing the right shoe for a dance; it makes everything better!
| Type of Primer | Best Use |
|---|---|
| Oil-Based | Good for wood and metal |
| Water-Based | Great for interior walls |
| Shellac | Excellent for sealing stains |
Why Remove Primer?
Situations that require primer removal. Potential issues caused by leftover primer. Benefits of removing primer before painting or finishing.
Removing primer is important in several situations. For example, if the surface feels rough or uneven, leftover primer can cause paint to flake or peel. Here are a few issues that can arise from not removing primer:
- Paint may not stick well.
- Colors may look different than intended.
- Finishes may appear uneven.
Removing primer improves the overall look and durability of the paint. It helps create a smooth surface, ensuring a vibrant finish that lasts longer.
Taking this step can save time and effort in the long run.
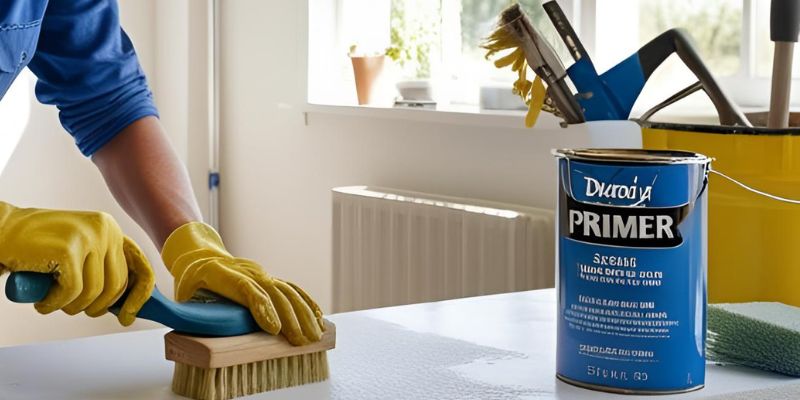
Essential Tools and Materials for Primer Removal
List of required tools (scrapers, brushes, etc.). Types of solvents and their effectiveness. Safety gear recommendations (gloves, masks, goggles).
Getting ready to remove primer? You’ll need some essential tools. A good scraper is your best friend, perfect for peeling away stubborn layers. Don’t forget brushes for the fine details!
Solvents like acetone and paint thinner are effective but handle with care. Check out the table below for your go-to items:
| Tool/Material | Purpose |
|---|---|
| Scraper | To lift off primer |
| Brush | For detailed work |
| Acetone | Strong solvent |
| Paint Thinner | Effective for removal |
| Safety Gloves | Protects your hands |
| Mask | Stops those fume monsters |
| Goggles | Keep your eyes safe |
And remember, safety gear is a must! Nothing ruins a project like an unexpected trip to the eye doctor.
Stay safe and happy stripping!
Preparation Steps Before Removal
Surface cleaning techniques. Testing primer adhesion. Choosing the right environment for removal.
Start by giving your surface a good cleaning. Wipe away dust and grime. This helps the remover work better.
Next, test if the primer sticks. Use tape to pull off a small piece. If it comes off easily, you’re lucky! Finally, choose a nice day for removal.
A calm, dry place keeps things from getting messy.
| Step | Tip |
|---|---|
| Clean Surface | Use a damp cloth to wipe away dirt. |
| Test Primer | Use tape for a quick adhesion test. |
| Right Environment | A dry, calm space makes it easier. |
Follow these steps, and you’ll be well on your way to successfully removing primer. It’s like preparing a delicious cake; you don’t want any crumbs before icing!
Methods for Removing Primer
Mechanical removal (scraping, sanding). Chemical removal (solvents, stripper application). Heat application techniques.
There are fun ways to send primer packing! First up, mechanical removal includes scraping and sanding. Grab a sturdy scraper or sandpaper and get to work—it’s like a workout for your hands!
Next, consider chemical removal. Solvents and strippers can dissolve primer faster than you can say “See ya!” Just be careful, these products can be sneaky! Lastly, heat application can help too.
Use a heat gun to warm up the primer; think of it like a warm hug that makes the primer easier to remove.
| Method | Description |
|---|---|
| Mechanical Removal | Scraping and sanding can make the primer feel like it’s in a wrestling match! |
| Chemical Removal | Solvents and strippers are the strong teammates you need to dissolve that primer! |
| Heat Application | Heat guns can soften the primer.It’s like giving it a warm bath before it leaves! |
Eco-Friendly Alternatives for Primer Removal
Environmentally friendly solvents. Baking soda and vinegar method. Pros and cons of organic removal techniques.
Removing primer can be gentle on the planet. Ecofriendly solvents, like citrus oil, are effective and safe. Another great method uses baking soda and vinegar. This mix creates a bubbling action that helps lift primer.
Here are some pros and cons of using these organic techniques:
- Pros: Safe for the environment, inexpensive, easy to find.
- Cons: May take longer, results can vary depending on the surface.
Using these methods helps keep our world clean!
Common Mistakes to Avoid When Removing Primer
Overlooking safety precautions. Ineffective tool usage. Ignoring surface sensitivity.
Removing primer can seem easy, but many make simple mistakes. First, overlooking safety precautions can lead to injuries. Always wear gloves and goggles.
Second, using the wrong tools can waste time. An ineffective scraper or solvent can harm your surface. Lastly, ignoring surface sensitivity can cause damage. Each surface reacts differently to products.
To ensure success, keep these tips in mind:
- Always prioritize safety.
- Choose the right tools for the job.
- Test your method on a small area first.
Post-Removal Care for the Surface
Cleaning the surface after primer removal. Repairing damages caused during removal. Preparing the surface for painting.
After you’ve done the tough work of removing primer, it’s time for some TLC for that surface. First, give it a good cleaning to wipe away any dust or leftover debris. Think of it as giving your wall a refreshing shower!
Next, check for any boo-boos. Did you accidentally scratch or chip the surface? No worries! Fill in those damages with some spackle, and sand it smooth.
It’s like giving your wall a mini facelift.
Finally, prep the surface for painting. Make sure it’s dry and smooth so the paint can stick like a pro. Your wall deserves to look fabulous!
| Step | Action |
|---|---|
| 1 | Clean the surface |
| 2 | Repair damages |
| 3 | Prepare for painting |
Frequently Asked Questions (FAQs)
Can you paint over leftover primer?. How long should I wait before painting after primer removal?. What to do if primer is not coming off?.
Ever wondered if you can paint over leftover primer? Well, the answer is no. You should always remove the primer first. Think of it like trying to ice a cake without baking it—messy!
After removing that stubborn primer, wait about 24 hours before painting. This gives your surface time to dry and prevents your paint from getting all sticky—yikes!
If the primer refuses to budge, try using a stronger remover.
Sometimes, it’s like a game of hide-and-seek, but you’re determined to find it! Here’s a quick guide:
| Question | Answer |
|---|---|
| Can you paint over leftover primer? | No, remove it first! |
| How long to wait after removal? | About 24 hours. |
| What if primer won’t come off? | Use a stronger remover. |
Conclusion
In summary, effectively removing primer requires the right approach and tools. Whether using solvents, sanding, or heat methods, always prioritize safety and follow the manufacturer’s instructions. By understanding the surface you’re working on and taking the appropriate steps, you can achieve a clean, smooth base for your next project. With patience and care, removing primer can be a straightforward task.
FAQs
What Are The Most Effective Methods For Removing Primer From Surfaces Or Materials?
The most effective methods for removing primer from surfaces include using solvents like paint thinner or acetone, which can dissolve the primer effectively. Sanding or scraping can be useful for harder surfaces, allowing for the physical removal of the primer layer. Chemical paint strippers also provide a powerful option for tougher primers, but it’s important to follow safety precautions. Finally, for delicate materials, gentle methods such as warm soapy water or a mild abrasive can help remove primer without damaging the underlying surface.
How Do I Safely Remove Primer From Skin And Avoid Irritation?
To safely remove primer from your skin and avoid irritation, use a gentle makeup remover or micellar water on a cotton pad. Start by softly wiping the area to dissolve the primer without rubbing too hard. Follow up with a mild cleanser to wash away any residue, then rinse with lukewarm water. Finally, apply a soothing moisturizer to keep your skin hydrated and protected.
Are There Any Household Products That Can Be Used To Remove Primer Effectively?
Yes, several household products can effectively remove primer. For water-based primers, you can use warm soapy water or a mixture of vinegar and baking soda. For oil-based primers, rubbing alcohol or acetone may be effective. Always test a small area first to ensure the surface is not damaged.
What Precautions Should I Take When Removing Primer From Wood Or Metal Surfaces?
When removing primer from wood or metal surfaces, always work in a well-ventilated area to avoid inhaling fumes. Use protective gear such as gloves, goggles, and a mask to safeguard against chemicals. Choose appropriate removal methods, such as sanding, scraping, or using chemical strippers, and test a small area first. Lastly, ensure that you properly dispose of any waste materials according to local regulations.
How Long Does It Typically Take For Primer Removal Solutions To Work, And What Factors Can Affect This Time?
Primer removal solutions typically take anywhere from a few minutes to several hours to work, depending on the specific product and the type of primer being removed. Factors that can affect the removal time include the thickness of the primer, the surfaces involved, temperature, and humidity levels. Additionally, the method of application and the age of the primer can play a significant role in how quickly the solution takes effect. It’s essential to follow the manufacturer’s instructions for optimal results.