How to Clean the P-Trap Under Your Sink: A Step-by-Step Guide
Hey there! If you’ve ever noticed a funky smell coming from your kitchen or bathroom sink, or maybe the water’s draining slower than molasses, chances are your P-trap is begging for some attention. I’ve been there—staring under the sink, wondering what that U-shaped pipe is all about and how to tackle it without making a mess. Don’t worry, I’ve got you covered. Cleaning the P-trap under your sink is easier than you might think, and I’m going to walk you through every step of the process. By the time we’re done, you’ll feel like a plumbing pro, and your sink will thank you. Let’s dive in and get that P-trap sparkling clean!
The P-trap is that curved pipe under your sink that holds a bit of water to block sewer gases from creeping up. It’s a hardworking little hero, but it can get clogged with gunk like hair, grease, or food scraps. Over the years, I’ve learned how to clean it properly, and I’m excited to share my tips with you. This guide is packed with practical advice, some handy tricks, and everything you need to know to keep your sink draining smoothly. Whether you’re a homeowner or a renter, this is a skill worth having.
What Is a P-Trap and Why Does It Matter?
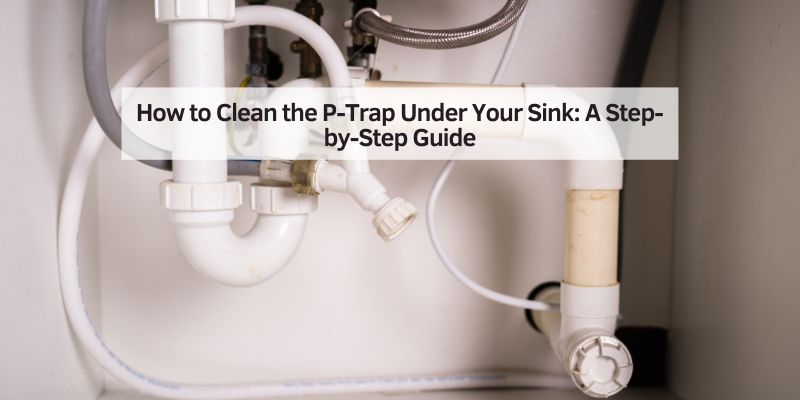
Let’s start with the basics. The P-trap is the U-shaped section of pipe you see under your sink. It’s called a P-trap because it looks like the letter “P” tilted on its side. Its job is to trap a small amount of water in the curve, which acts like a barrier to keep nasty sewer smells from wafting into your home. It also catches debris that might clog your plumbing further down the line. Pretty clever, right?
But here’s the catch: that same trap can become a magnet for gunk. In my kitchen, I’ve found everything from grease buildup to bits of food stuck in there. In the bathroom, it’s usually hair and soap scum. If you ignore it, the P-trap can get so clogged that water barely drains, or worse, you get that gross sewer smell. Cleaning it regularly keeps things flowing and your home smelling fresh. Plus, it’s a simple fix that can save you from calling a plumber.
Tools and Supplies You’ll Need
Before we get our hands dirty, let’s gather what you need. I like to have everything ready so I’m not scrambling mid-project. Here’s what I use to clean a P-trap:
| Item | Purpose |
|---|---|
| Bucket or bowl | Catches water and debris when you remove the P-trap. |
| Old toothbrush | Scrubs away grime inside the P-trap. |
| Gloves | Keeps your hands clean and protects from gross stuff. |
| Pipe brush or bottle brush | Cleans the inside of the pipe thoroughly. |
| Adjustable wrench or pliers | Loosens the nuts on the P-trap (if they’re tight). |
| Towels or rags | Wipes up spills and dries the area. |
| White vinegar | Breaks down grease and deodorizes. |
| Baking soda | Works with vinegar to clean and freshen the trap. |
| Hot water | Flushes out loose debris and helps with cleaning. |
| Flashlight (optional) | Helps you see under the sink in dim lighting. |
You probably have most of these at home already. If not, a quick trip to the hardware store or even your local dollar store will do the trick. I always keep a pair of old dish gloves handy—they make the job way less icky.
Preparing Your Workspace
Trust me, a little prep goes a long way. The first time I cleaned a P-trap, I didn’t prep properly, and let’s just say my kitchen floor got a surprise bath. Here’s how I set up now to keep things tidy:
First, clear out the area under your sink. Move any cleaning supplies, dish soap, or random junk you’ve stashed there. It’s easier to work when you’ve got space. Next, place a bucket or bowl right under the P-trap to catch any water that spills out. I also lay down an old towel around the bucket for extra protection. If your sink is full of water, bail it out with a cup or bowl before you start—otherwise, you’re in for a splashy mess.
Turn off the water supply to the sink if you’re worried about leaks, but honestly, you usually don’t need to for this job. Just make sure no one’s running the faucet while you’re working. I also like to keep a flashlight nearby because the lighting under sinks can be pretty dim. Oh, and put on those gloves—you’ll thank me later.

Step-by-Step Guide to Cleaning the P-Trap
Now, let’s get to the fun part: actually cleaning the P-trap. I’ll break it down into simple steps so you can follow along easily. I’ve done this enough times to know what works and what doesn’t, so stick with me.
Step 1: Loosen the P-Trap
The P-trap is held in place by slip nuts—those big plastic or metal rings at each end of the U-shaped pipe. Most of the time, you can loosen these by hand. Just turn them counterclockwise. If they’re stubborn, grab an adjustable wrench or pliers, but be gentle so you don’t crack the pipe. I’ve learned the hard way that plastic P-traps can be fragile.
Once the nuts are loose, carefully pull the P-trap free. Water will spill out, so make sure your bucket is right underneath. The first time I did this, a little water splashed out, but don’t worry—it’s normal. Just keep that bucket close.
Step 2: Empty the P-Trap
Take the P-trap to your bucket or a sink you’re not cleaning and dump out the water and debris. You might be shocked at what comes out—think slimy gunk, hair, or even small bits of food. I once found a chunk of onion in my kitchen P-trap, and I still don’t know how it got there! Shake out as much as you can, but don’t rinse it yet—we’ll clean it properly next.
Step 3: Scrub the P-Trap
Now it’s time to give that P-trap a good scrub. I like to start by rinsing it with hot water to loosen the grime. Then, sprinkle some baking soda inside the pipe and pour in a cup of white vinegar. The fizzing action helps break down grease and deodorizes the pipe. Let it sit for about 10 minutes.
Next, grab your pipe brush or old toothbrush and scrub the inside of the P-trap. Focus on the curved part where gunk loves to hide. I usually spend a few minutes here to make sure it’s spotless. Rinse it with more hot water when you’re done. If it still smells, repeat the baking soda and vinegar trick.
Step 4: Check the Connected Pipes
While the P-trap is off, take a peek at the pipes it connects to. Sometimes, debris gets stuck in the pipe leading to the wall or the one coming down from the sink. I use my pipe brush to give these a quick scrub, too. If you see buildup, a little vinegar and hot water can help loosen it.
Step 5: Reassemble the P-Trap
Once everything’s clean, it’s time to put the P-trap back. Slide it into place, making sure the slip nuts line up with the threads on the connecting pipes. Hand-tighten the nuts as much as you can—don’t overtighten, especially with plastic pipes, or you might crack them. I made that mistake once, and it wasn’t fun.
Run some water through the sink to check for leaks. If you see drips, tighten the nuts a bit more or check that the washers inside are seated properly. Most P-traps have rubber washers that create a tight seal, so make sure they’re not twisted.
Step 6: Test and Clean Up
Turn the water back on (if you turned it off) and let the sink run for a minute. Watch for leaks and make sure the water drains smoothly. If everything looks good, you’re done! Clean up your tools, toss any gross rags, and give yourself a pat on the back. Your sink should drain like a dream now.
Tips for Preventing Future Clogs
I’ve learned that a little prevention can save you from cleaning the P-trap too often. Here are some tricks I use to keep mine clear:
- Use a drain strainer: These cheap little screens catch hair and food before they go down the drain. I have one in both my kitchen and bathroom sinks, and it’s a game-changer.
- Avoid pouring grease down the sink: Grease is a P-trap’s worst enemy. I pour leftover cooking grease into a can and toss it in the trash instead.
- Flush with hot water: Once a week, I pour a pot of hot (not boiling) water down the drain to keep things moving.
- Regular maintenance: I clean my P-trap every six months or so, even if it’s not clogged, to stay ahead of buildup.
Common Mistakes to Avoid
Over the years, I’ve made my fair share of slip-ups when cleaning P-traps. Here are some mistakes to steer clear of:
- Not using a bucket: Trust me, you don’t want water and gunk all over your floor.
- Overtightening the nuts: This can crack plastic P-traps or strip the threads on metal ones.
- Skipping the scrub: Rinsing alone won’t get rid of all the grime. Take the time to scrub thoroughly.
- Forgetting the washers: Those little rubber rings are crucial for a leak-free seal. Make sure they’re in place when you reassemble.
When to Call a Plumber
Most of the time, cleaning the P-trap is a DIY job, but sometimes things get tricky. If you notice persistent leaks after reassembling, or if the clog is deep in the pipes beyond the P-trap, it might be time to call in a pro. I had to do this once when a clog was way down in the main drain line—definitely not a job for a beginner. Also, if your P-trap is rusted or damaged, a plumber can replace it quickly.
Why Regular P-Trap Cleaning Is Worth It
Taking the time to clean your P-trap isn’t just about fixing a slow drain. It’s about keeping your home smelling fresh, avoiding costly plumbing repairs, and feeling like you’ve conquered a little piece of home maintenance. Every time I finish this job, I feel a bit like a superhero. Plus, it’s satisfying to see the water flow smoothly again and know I did it myself.
Conclusion
Cleaning the P-trap under your sink might not sound glamorous, but it’s one of those small home maintenance tasks that makes a big difference. With a few simple tools and a little elbow grease, you can banish clogs, eliminate odors, and keep your plumbing in top shape. I’ve walked you through every step, from gathering supplies to scrubbing that pipe clean, so you can tackle this job with confidence. Whether you’re dealing with a sluggish drain or just want to stay ahead of the game, cleaning your P-trap is a skill every homeowner should have. So grab that bucket, put on your gloves, and give it a go—your sink will thank you, and you’ll feel like a DIY champ. Happy cleaning!
Frequently Asked Questions
Why does my sink smell bad even after cleaning?
Sometimes, the smell lingers if there’s still gunk in the connected pipes or if the trap wasn’t cleaned thoroughly. Try running hot water with vinegar and baking soda through the drain. If that doesn’t work, the issue might be deeper in the plumbing, and a plumber can help.
How often should I clean my P-trap?
I clean mine every six months as a preventive measure. If you notice slow draining or odors sooner, clean it as needed. Kitchens with heavy use might need more frequent cleaning.
Can I clean the P-trap without removing it?
You can try flushing it with hot water, vinegar, and baking soda, but removing it is the best way to get it really clean. If you don’t remove it, you might miss stubborn clogs.
What if my P-trap is leaking after I put it back?
Check that the slip nuts are tight and the rubber washers are properly seated. If it still leaks, the washer might be worn out or the pipe could be damaged. A quick trip to the hardware store for a new washer or P-trap usually fixes it.
Is it safe to use chemical drain cleaners instead?
I avoid chemical cleaners because they can damage pipes and aren’t great for the environment. Cleaning the P-trap manually is safer and more effective. If you must use a chemical, follow the instructions carefully and use it sparingly.